
It has been said that plaid is a bold choice. I believe it’s a great choice for any season and any garment. There are so many types of plaids to choose from, and then all the colorways and fiber types and weaves… it could all get a bit overwhelming. Unfortunately, plaids require even more decisions and planning after you’ve already gone through so many just picking the plaid you like most.
So let’s go over some things to keep in mind when it comes to sewing with a plaid.
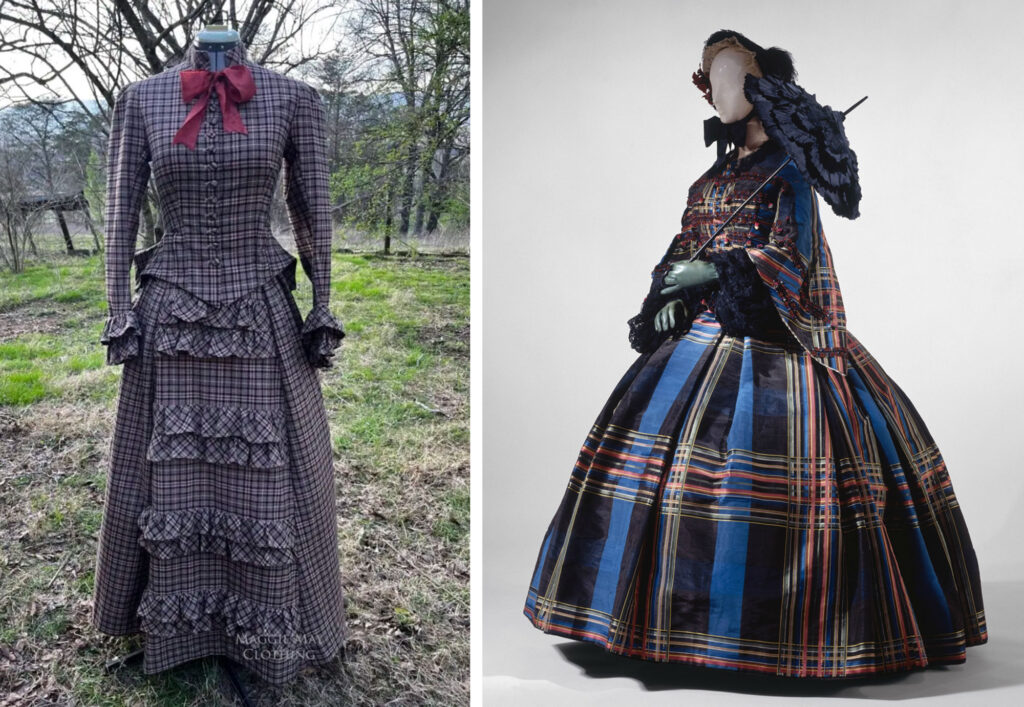
Planning – Which Plaid?
When choosing a plaid, your joy or necessity should always be the first consideration. It takes too long to sew a garment to sew one with fabric you do not like.
After you find the plaid that sings to your heart, consider the scale of the plaid. The scale of the stripes and spaces should harmonize with the scale of the garment you want to make from it and the scale (size) of the wearer so that it does not overwhelm. You want to wear the garment, not have it wearing you. (And then, and I’ll mention this again, if you love the fabric, make it and wear it! Fashion rules should be tested, if not broken)
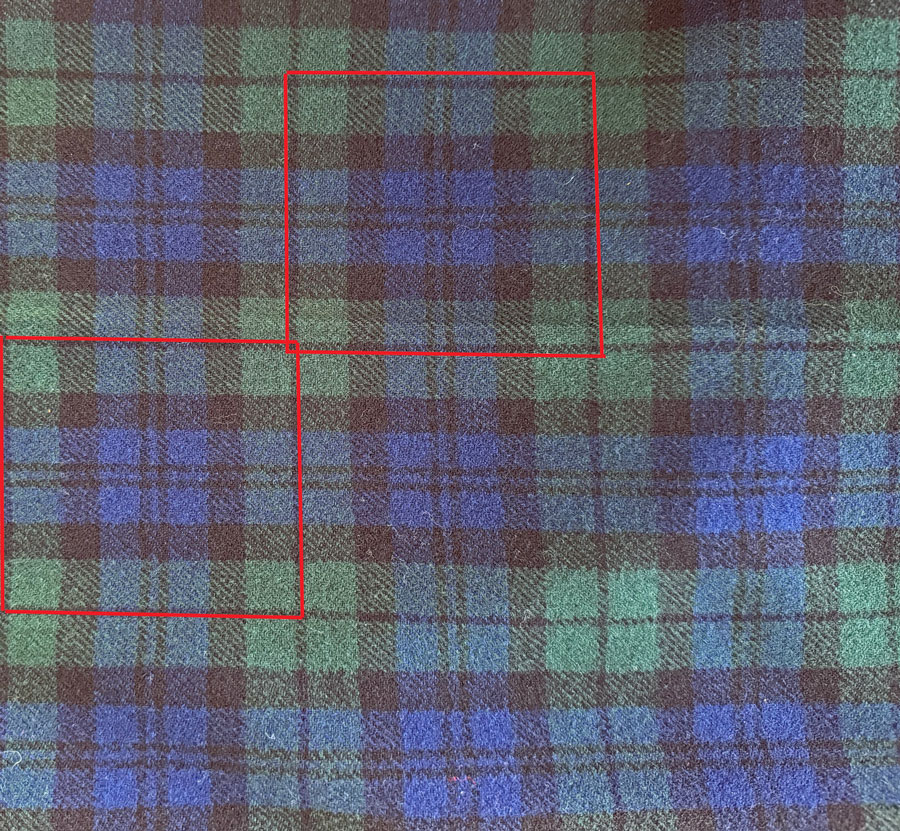
The scale and the size of the repeat (how big the area is before the design repeats itself) determine how much extra yardage to buy. Large-scale plaids will take more fabric to line up pattern pieces since the repeat is larger. If the plaid is even (also called symmetrical or balanced), the length of one repeat should be added to each yard needed. Example: The pattern requires 3 yards. The repeat of my plaid is 10”. I need to buy 3 yards plus one repeat (10”) for every yard, or 3 yards and 30” – might as well throw in 6 more inches and order 4 yards.
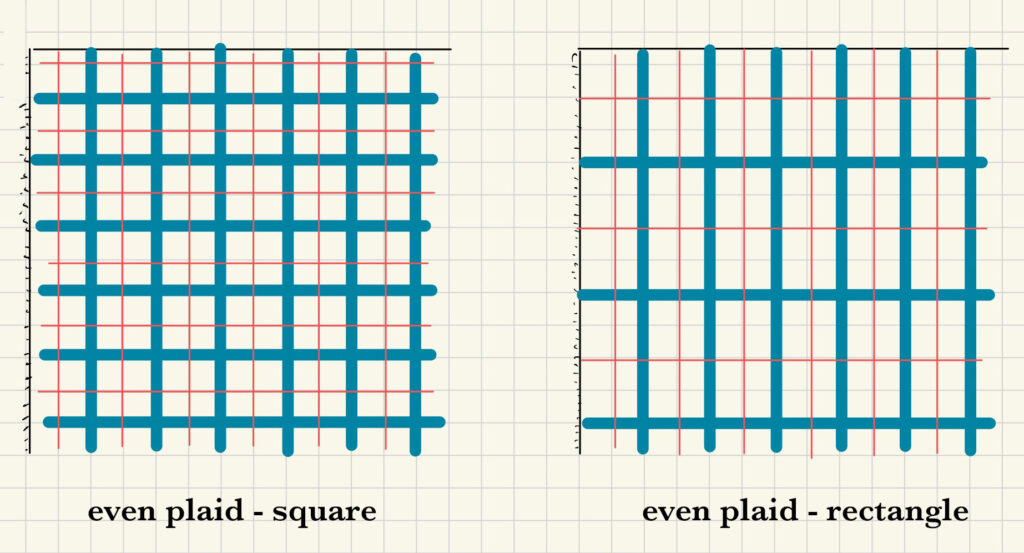
Even plaids can have a square or rectangular repeat.
An uneven plaid (also called an asymmetrical or unbalanced) requires even more yardage. It requires a “with nap” layout (also called a one-way or directional layout). How much extra yardage to buy of an uneven plaid depends on the pattern pieces and their size. Whereas on a solid fabric, a piece that becomes wide, like a jacket with a built-in facing or an A-line skirt, can be nested to fit both pieces across a single width of fabric, one piece facing left and the other facing right. This cannot be done on a “with nap” layout. All the tops have to be facing the same direction.
Determine if the plaid is even or uneven, as this changes what can be accomplished with it and how much extra yardage you’ll need to buy.
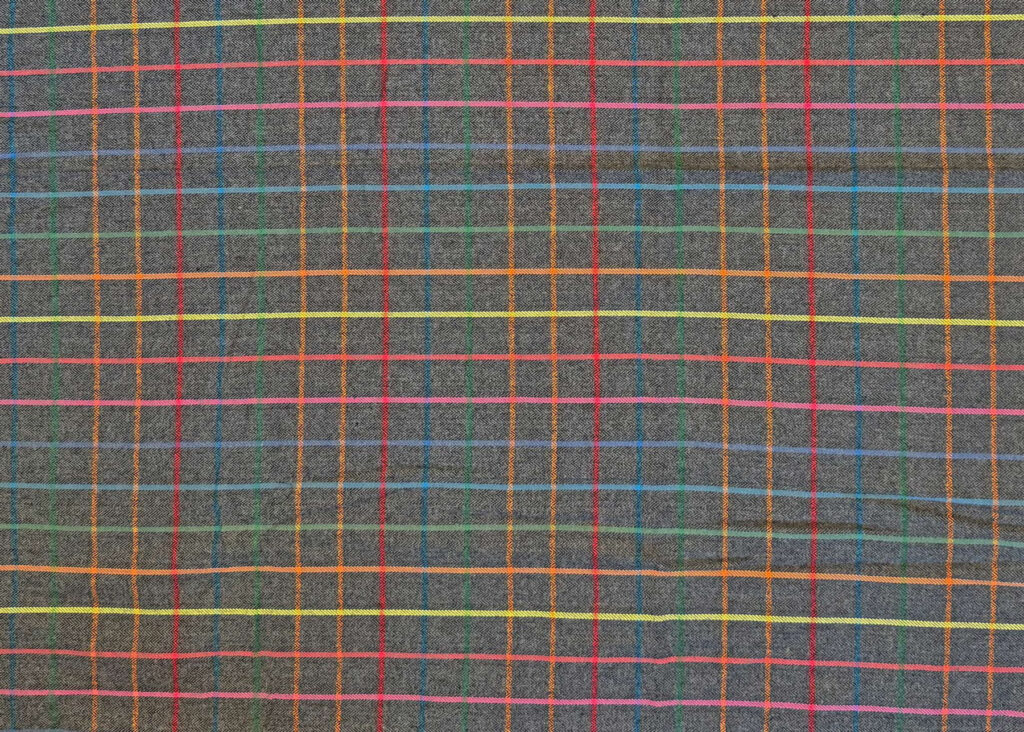
Uneven plaids can be uneven only in the lengthwise grain, or the crosswise grain, or uneven in both directions.
In an uneven lengthwise plaid, the stripes crossing the fabric horizontally, from selvedge to selvedge, are evenly spaced from each other and the color repeat is balanced/symmetrical. However, the stripes that run up and down the cloth, from cut edge to cut edge, are unevenly spaced and/or the color repeat is unbalanced or asymmetrical.
In an uneven crosswise plaid, the stripes running vertically, from cut edge to cut edge, are evenly spaced and repeating in color in a balanced repeat. The stripes going across the fabric, from selvedge to selvedge, are not evenly spaced and/or the colors are not repeated in a balanced order.
A plaid that is uneven in both directions has uneven stripe spacing in both directions and/or the colors do not repeat in a balanced/symmetric pattern. An uneven plaid like this cannot be matched in both directions.
Planning – Which Style?
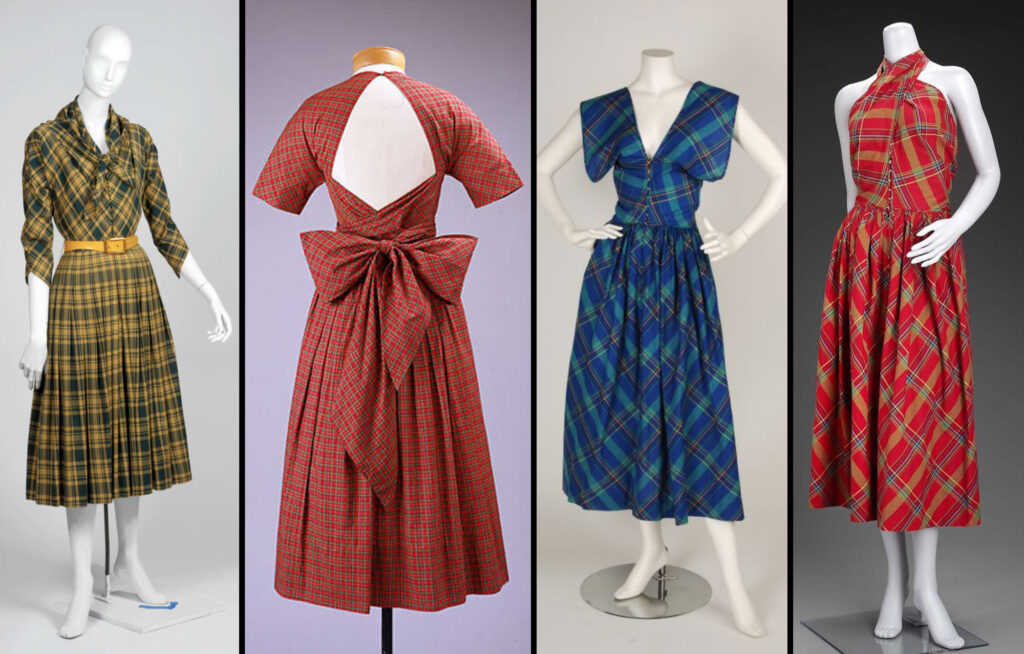
Plaids add an additional design dimension in any garment. It is best to avoid a complicated garment style when using plaid. Let the plaid be the focus (and as with all design rules, you have to know the rules before you can break them).
Even though design details are what make a style special, when sewing with a plaid, especially a bright or busy plaid, many of the details become lost.
Look over the garment’s style. Where are the seamlines? Can they be matched easily? Can you eliminate them? Or can you turn the garment piece to eliminate matching?
Designs with curved seam lines are almost impossible to match satisfactorily. Princess seams are curved and require easing one seam into the other. This sabotages matching of plaids or stripes. (Usually the horizontal stripes in a plaid will match across a princess seam – depending on how curved the seam is, and where the stripe crosses the seam, like below the apex instead of directly across it)
Sewing with an uneven plaid is not for the novice (and here I assume that everyone who takes the time to sew their garment is going to take the time to match their plaid at the seams; otherwise, you could go buy the shirt, jacket, skirt, etc). So choose a pattern with few construction lines to reduce the places where matching your plaid is going to be a thing.
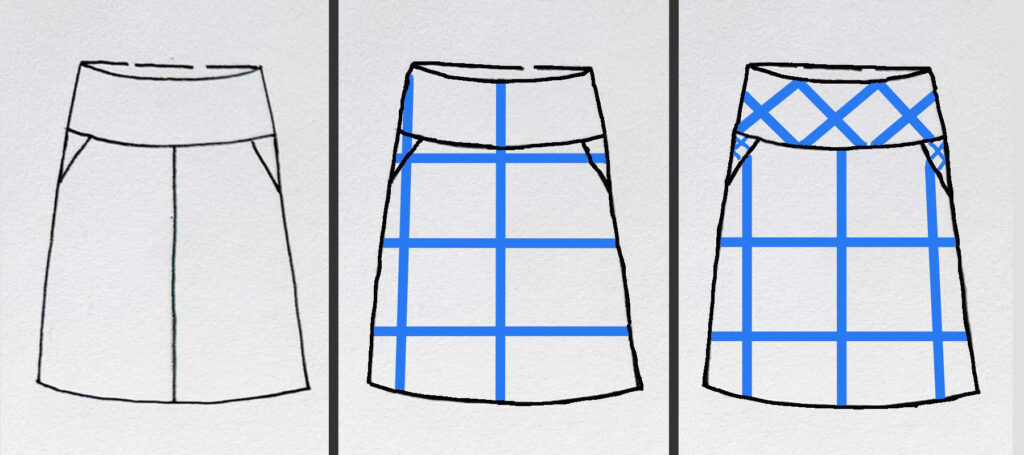
You can also eliminate construction lines. For example, a skirt that has a yoke and a center front seam. I would eliminate the center front seam, making the front skirt one piece. The yoke could then be cut on the bias. This is a design decision, based on eliminating the need to match the plaid of the yoke to the skirt front.
Look at the garment’s intended grainline. Large pieces that are cut on the bias may be impossible to match on the side seams. In fact, uneven or asymmetrical plaids are very difficult to match in bias-cut designs. If you have an even plaid, it’s possible to divide the pattern piece down the center (add seam allowance) and match the plaid as a chevron.
Also, many plaids are woolens; check now how the fabric feels against your skin and decide if you need to add a lining to your garment. If so, plan how you will construct and attach the lining.
Fit First!
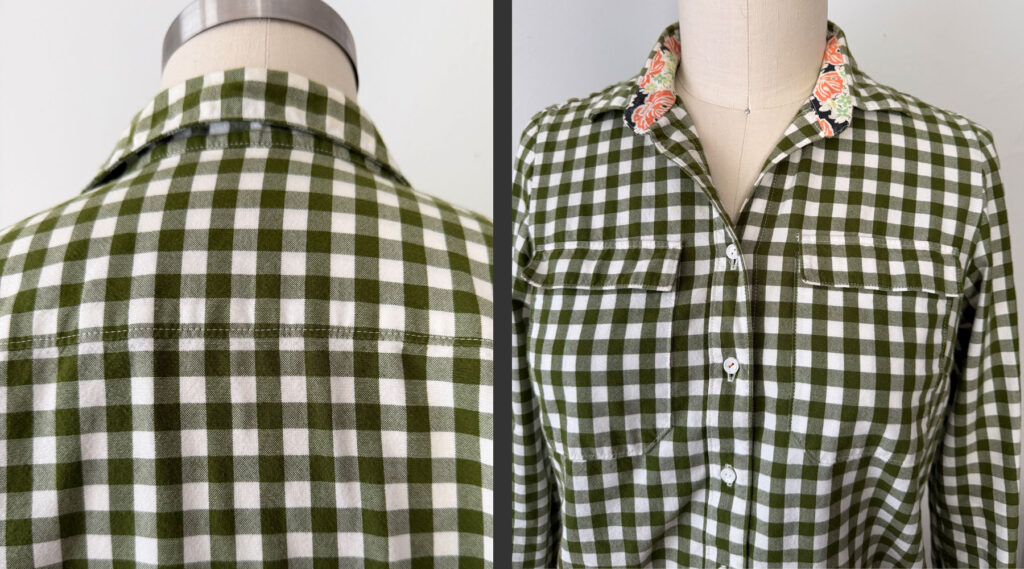
Make a test garment and work out the fit before cutting into your plaid. You don’t want to discover that you need to take in or let out a seam after all that careful matching you did.
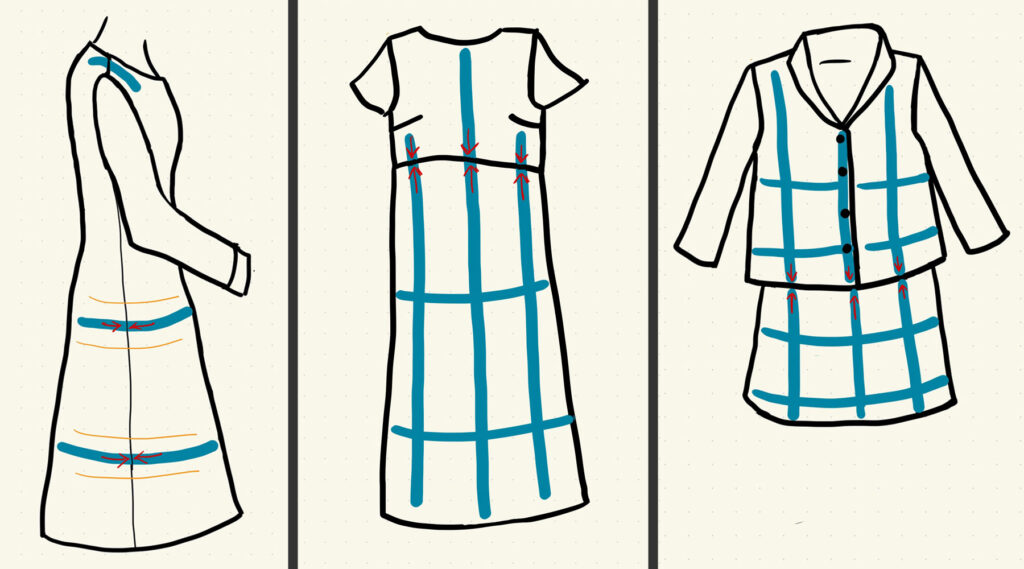
Layout – More Planning
Since plaids require lengthwise centering and crosswise matching, and attention to the placement of the lines in your plaid on the garment (especially the dominant stripe or dominant color), you will likely need to deviate from the layout guide provided in the pattern.
The stripes in a plaid should travel continuously from front to back and from neck to hem. If it is a two-piece outfit, the stripes in the plaid should still run continuously from neck to hem.
Start with a trial layout on the fabric. No pins or weights, just a run-through to check that all the pattern pieces will fit and match.
Lay out the front pattern piece, as this is the piece that is most important to lay on the plaid. Think of the front piece(s) of the garment as the foundation stone. After the front is down, see where the back piece(s) will go so they will line up with the front. Then follow with all the main garment pieces from larger to smaller.
If a plaid has a prominent stripe, position it at the center front. Consider dominant crosswise bands and spaces. Typically, it’s wise to avoid dominant cross bands across the bust, across the waist, and at the hem of a curved shape. If the hem is straight, it’s preferable to place the dominant stripe at the hem. When a dominant stripe or space in the plaid is placed on a curved hem, it is visually chopped by the curve. This distortion draws one’s attention because the eyes are always scanning for the thing that sticks out from the pattern. (This is why a tiger is camouflaged, so you don’t see him in the tall grass. Put that tiger in a plaid with a distorted hem, and you will spot him a mile away)
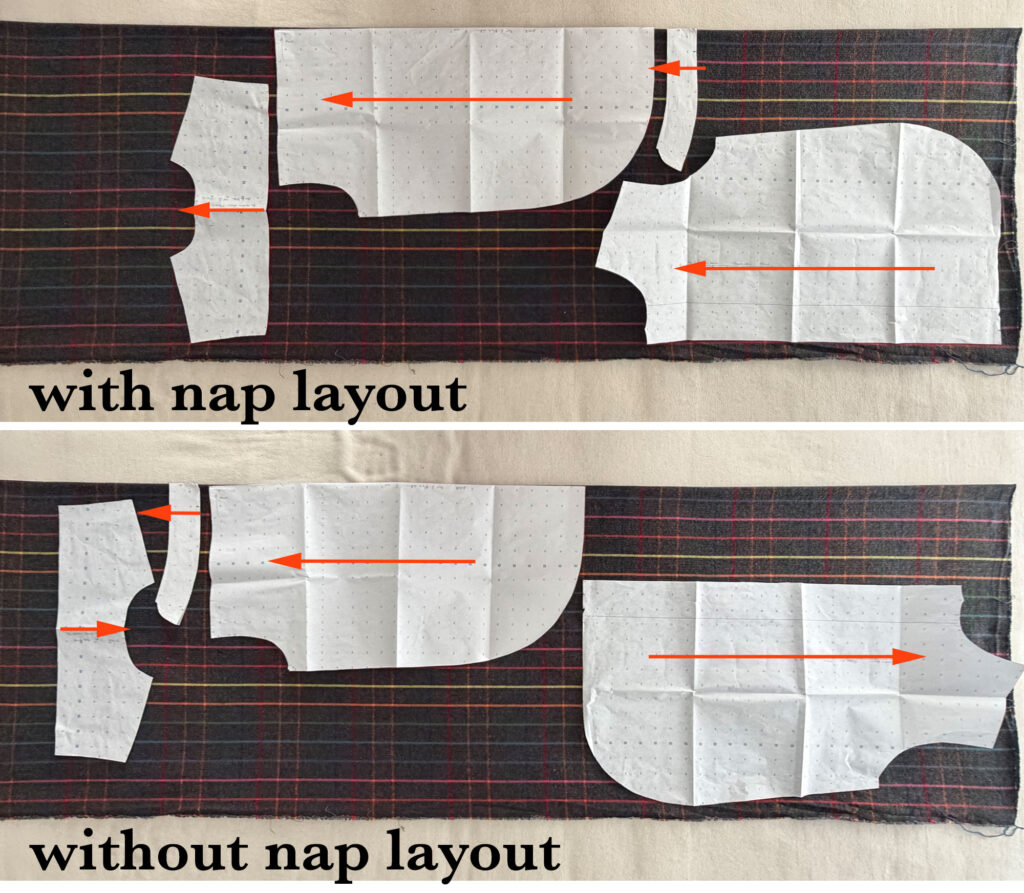
Uneven plaids require a nap layout. This means keeping all the top edges of your pattern pieces to the right or left – either direction, just keep them all pointing toward the same direction.
To save fabric, or if you run out because of matching the larger pieces, cut unseen facings out of a different fabric altogether. For example: an armhole and neckline, a waistband facing, and a yoke facing. Often you will see the collar band facing and the cuff facings on shirts in a coordinating but different fabric. This is a design detail that can be used to your not-enough-fabric advantage.
It can be helpful to trace off the other half of any pattern piece that is intended to be “cut on fold”. Especially if your fabric is difficult to work with: a slippery rayon, a knit, or a linen. Make the missing half and tape them together down the fold line. This makes a complete or whole pattern. A whole pattern is then cut out of a single layer of fabric, and not on a fold. A whole pattern is ideal when cutting out on a fabric where matching seams are important (plaids, yes, but also stripes and large prints). The whole pattern is easier to lay out for exact matching and will make cutting more accurate.
If you have a printed, not woven, plaid, check that the plaid is printed on grain. If it’s a little off, prioritize matching the plaid over cutting the pieces on grain. However, if the plaid is printed too far off-grain, the plaid won’t match if you cut it on grain, or even a little off (up to 10% off), and the garment won’t drape well if you cut it way off-grain. Consider walking away from that fabric or using it for something other than a garment.
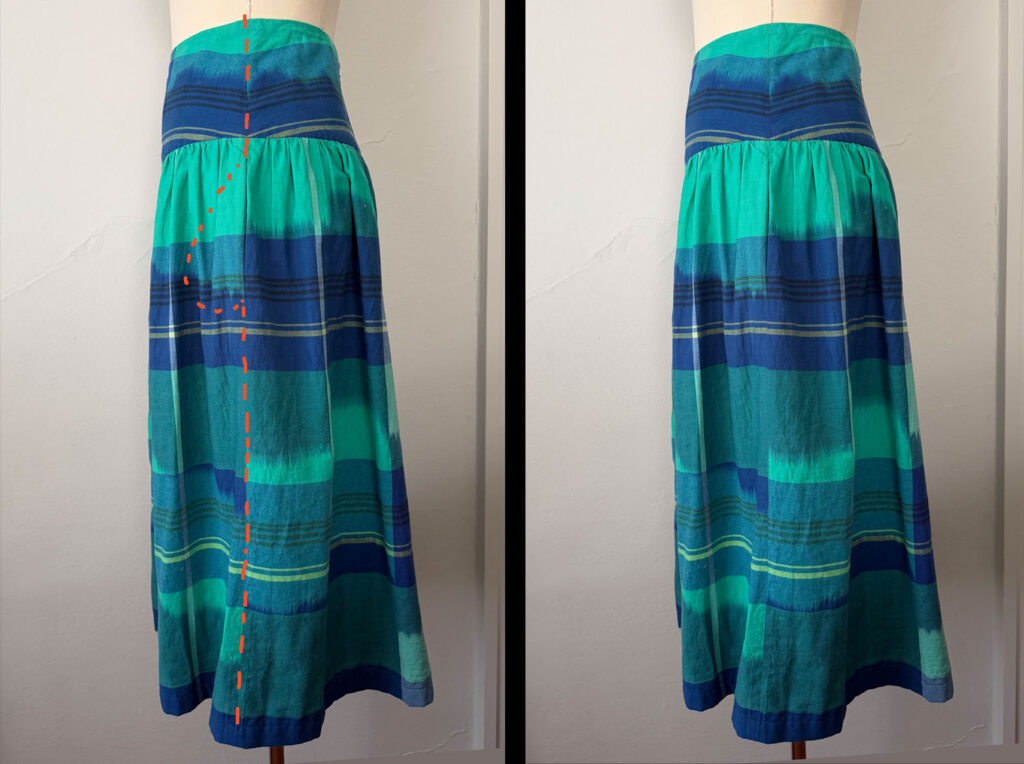
Matching Tips:
- Match the back to the front at the sides and the shoulder seams.
- On styles with a side bust dart, match the side from hem up to the first dart leg. The area above the dart will not match up, but it is partially concealed under the arm anyway.
- Sleeves can match the front from the front notch in the armhole to the side seam. Matching above the first notch is highly unlikely, as the sleeve cap is curved and is usually eased into the armhole.
- Match plaids at the pattern’s seam line, not the cutting line.
- You will not be able to match every seam line – match the important ones
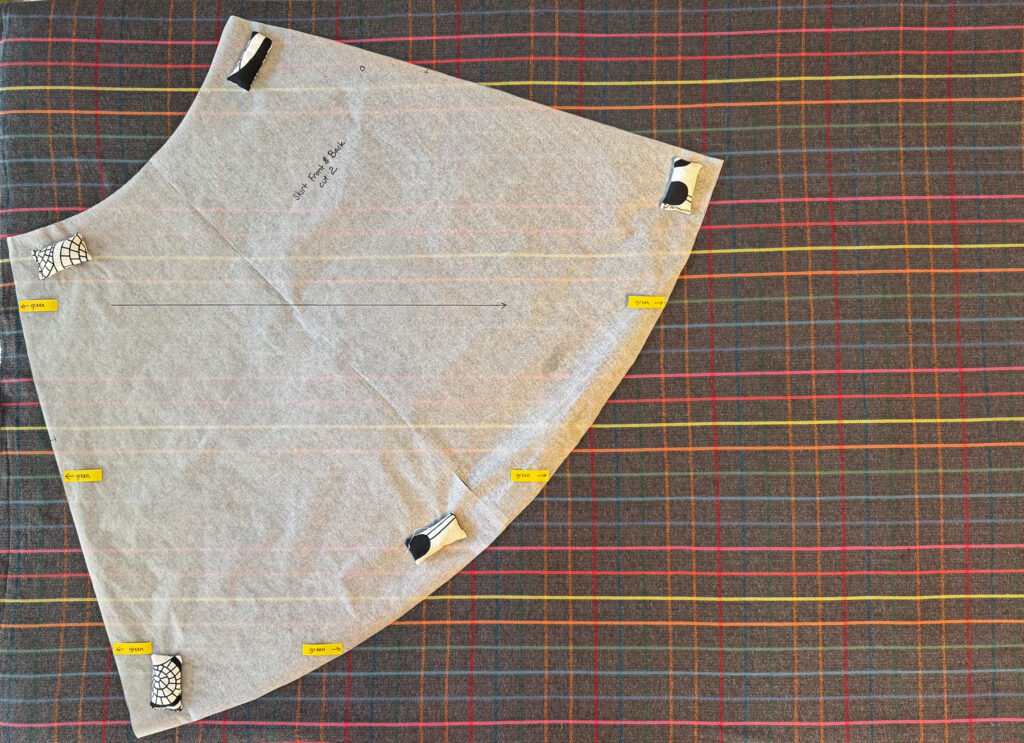
Cutting – Where the Planning Pays Off (but still more planning)
Because you can’t see through the folded fabric to be sure all the stripes in the plaid are lying on top of one another, it makes sense to cut the pattern pieces from a single layer of cloth. And hear me now, believe me later, cutting plaids from a single layer saves time.
If you fold plaid fabric to make two layers for cutting as most instructions have you do, you’ll have to line up all the corresponding stripes of the two layers. Then you must pin the layers together along the stripes so they all stay lined up. This is how cutting from a single layer will save you time.
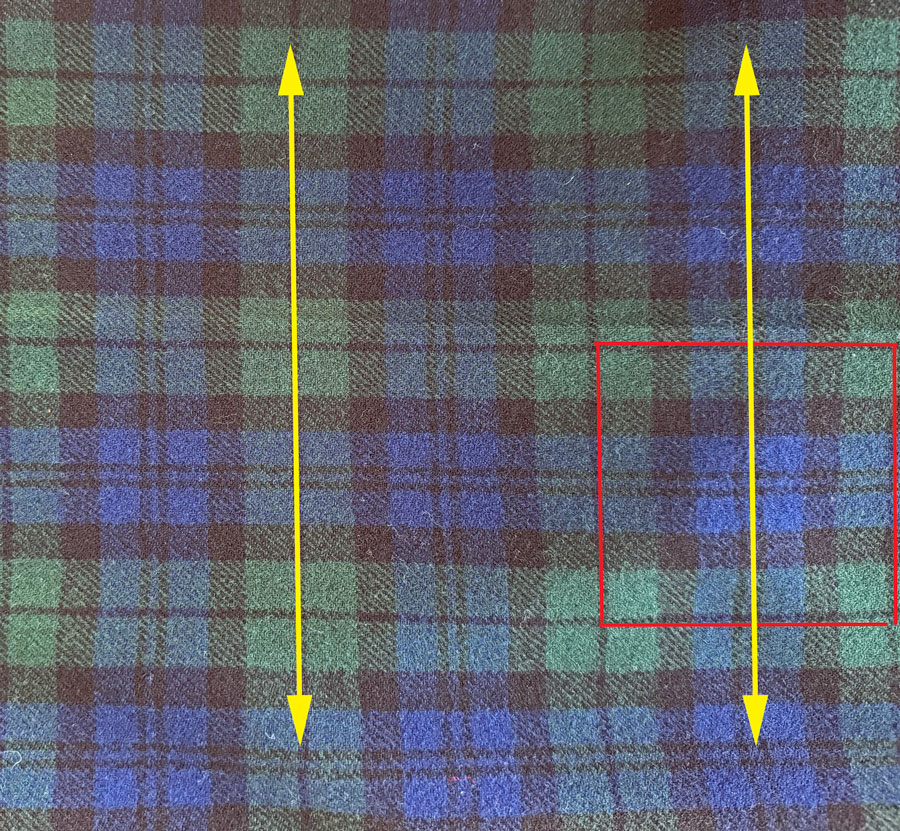
If you do fold the fabric for cutting ( if you have an even large-scale plaid in a stable fabric) fold it on the center of the repeat so everything lines up on both layers.
When you cut from a single layer you can use the first piece you cut as a guide for the second piece. Say you have a jacket front. You need to cut two of them, a right and a left. You cut the first front with the pattern tissue facing up. Then take that front piece and flip it over; the tissue is now between the fabric and the piece you just cut. When you lay the cut out section down on the fabric, you can clearly see all the stripes in the plaid and can line it up on the fabric with ease. The first piece becomes an exact guide for where the second piece should lay on the plaid.
Always remember, for plaid or solid fabric, you need a left and a right for major garment sections. Cutting from one layer means that after cutting out one of the pattern pieces, you have to flip the pattern piece upside down to cut the second (any printed words on the pattern are facing down). This ensures you cut a left and a right, and not two of the same side.
If you can lay the corresponding pattern pieces side by side, you will see that they match at the hem, the notches, etc. If your pattern does not have notches, draw in your own notches.
After laying your pattern piece on the plaid, mark the location of a few of the stripes. Then walk the pattern to any corresponding piece and transfer these marks. Remember to walk the seamlines, not the cut lines.
Extra Information:
- This post (with video): The Best Way to Cut Stripes so they Match at the Seam
- This post explains walking your pattern: How to Check if Your Pattern is True
Cut pockets, welts, and pocket flaps out after cutting the garment section to which they are sewn onto. Place the pattern for the pocket or flap over the cut garment section at their placement marks, and draw a few stripes of the plaid onto the pattern tissue (mark inside the seam allowances) and line up on the fabric following your guide.
And remember, you can cut pockets, welts, and pocket flaps on the bias if you desire.
Sewing – Finally
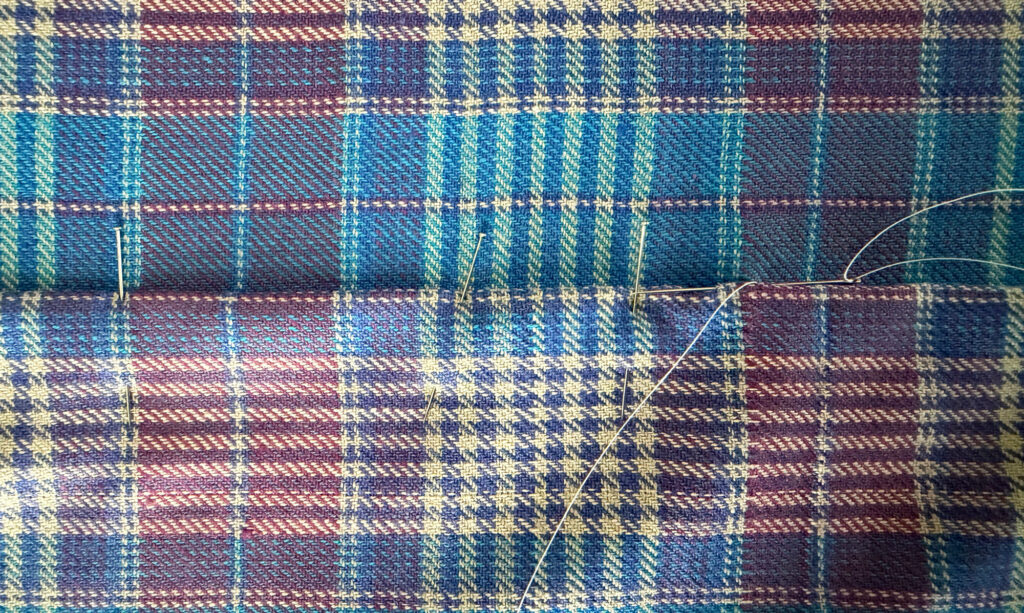
Use a walking foot when sewing the seams of a plaid garment. It will keep your lines all matched up. If you don’t have a walking foot, consider slip or tailor basting your important seams and/or use more pins than you normally do.
Slip basting is commonly recommended for matching important seams. The stitch can be worked from the outer side of the garment pieces. One piece has the seam allowance folded back. It is laid on top of the corresponding piece, and they are slip-basted together. The stitch allows you to finely match all the stripes as you baste it. Fold back the top piece after basting and machine-stitch the seam.
You can also baste difficult-to-match seams with double stick tape in the seam allowance.
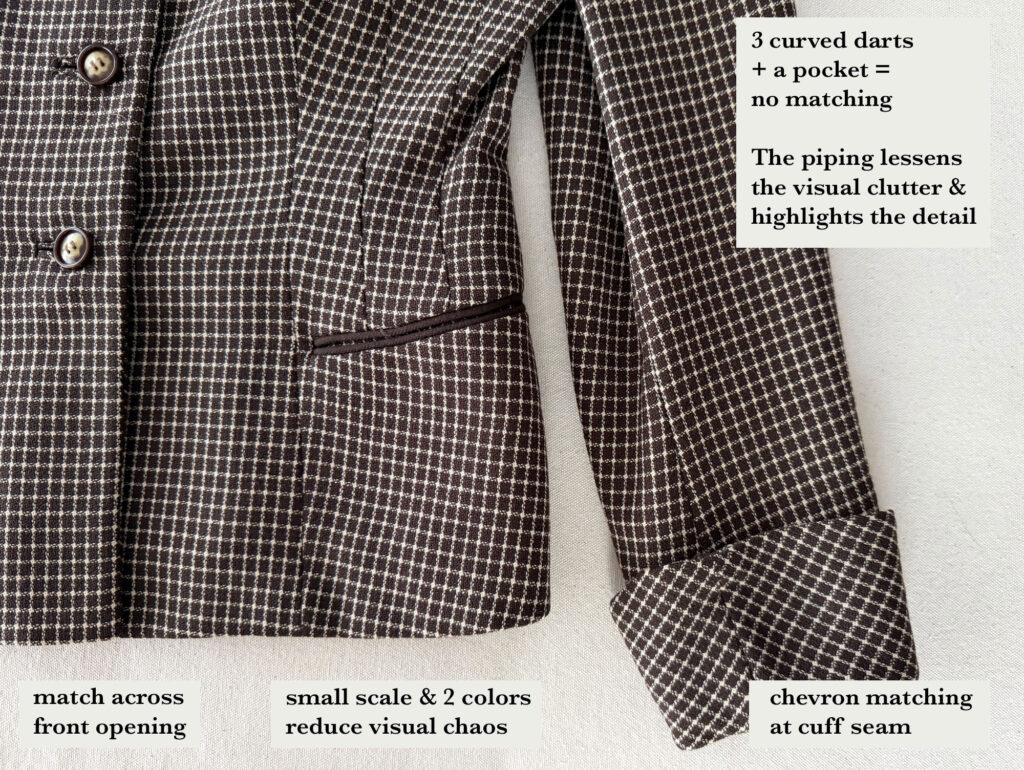
A workaround: Insert piping into a seam line if the seam doesn’t match exactly. The piping will break it up, and the mismatch will not be as noticeable.
Cutting the pocket welt(s) on the bias is a great workaround, but always cut the interfacing for the welts on the straight grain for stability.
Wearing – Enjoy!
For a brief overview of plaids and the names and characteristics of common plaids, visit my post, Know Your Plaids: From Tartan & Houndstooth to Buffalo & Windowpane