
Folding your fabric to cut out your pattern, as most patterns instruct you to do, means you obviously cannot see the fabric on the bottom layer. So when you cut out a pattern from folded striped or checked or plaid fabric how do you know if the stripes on both layers are lining up with each other? I mean, you want to be sure they are because if not, you could end up with your stripes sloping down across your garment.
How do you know for sure everything is straight? How do you know that the bottom layer is even on grain especially true when cutting fabrics that shift with the slightest touch, like rayon, handkerchief linens, and many knits?
And then there’s the related problem that comes when cutting folded fabric; lining up stripes, matching up large prints, and getting an exact placement of a pattern piece on printed fabric so the bird, or the flower, or whatever it is is where you want it to be and not where you don’t.
When your fabric is solid or has a small-scale print, and isn’t so shifty, go ahead and cut on folded fabric. It will save you time. But when you have horizontal stripes, plaids, large prints, or slippery fabrics, you can avoid frustration when cutting it out and be happier with the finished garment if you use this method.
Luckily, the solution is very easy
In the video, I show how to cut your fabric so your stripes will be straight (the trick is changing the pattern piece) and also how to lay out your pattern pieces so the stripes will match at the seams. This works for large prints too and I’ll explain how.
If you would rather read about the process, or want more details and pictures, read on 😉
Pattern pieces that need to be cut on the fold are always one-half of the garment piece. Cutting on the fold lets you cut out the whole garment piece with just half of a pattern. This saves paper and some time but when you cut on the fold you can’t be sure how the bottom layer of fabric is lining up.
Solution: You need a whole pattern, not half of a pattern, and you need to cut it out of unfolded fabric.
Better yet, take it a step further and make your whole pattern out of tracing paper or tissue paper, because being able to see the fabric through the pattern piece allows you to place it exactly where you want it on the fabric. This see-through ability allows you to line up stripes, match up large prints, and avoid placing large circular elements of a print on the bust apex or other unintentional but critical misalignments.
Making a Whole Pattern is Easy
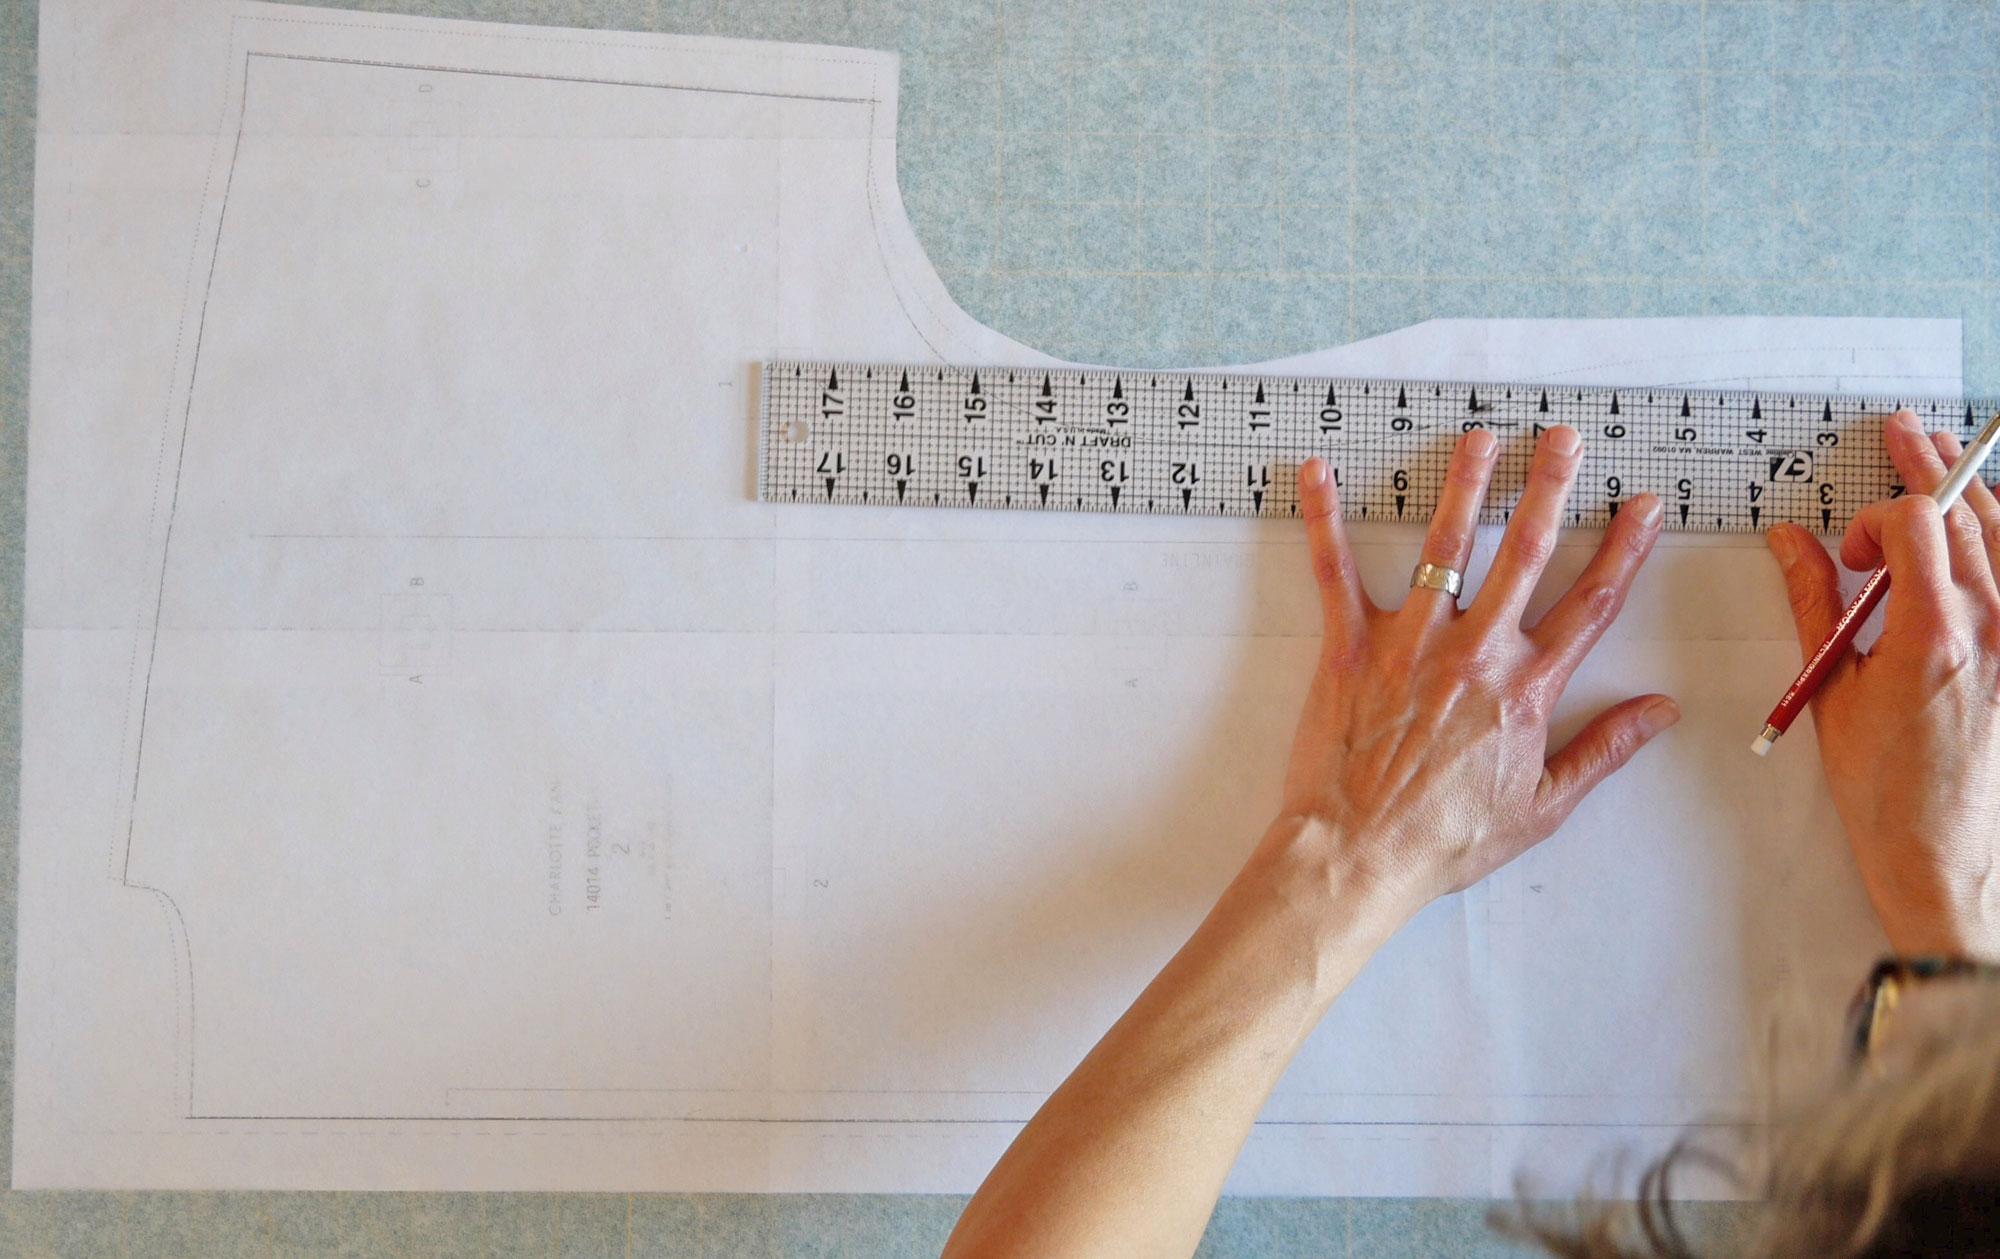
Step 1: If your pattern piece is opaque, trace it onto tracing paper, tissue paper, or medical exam table paper (it’s cheaper but it isn’t as see-through. It’s what I’m using in this post). For more info about paper for patternmaking, see this post.
Don’t forget to trace off pattern notches and other important markings like pocket placement.
If your pattern piece is already on transparent paper, skip this step.
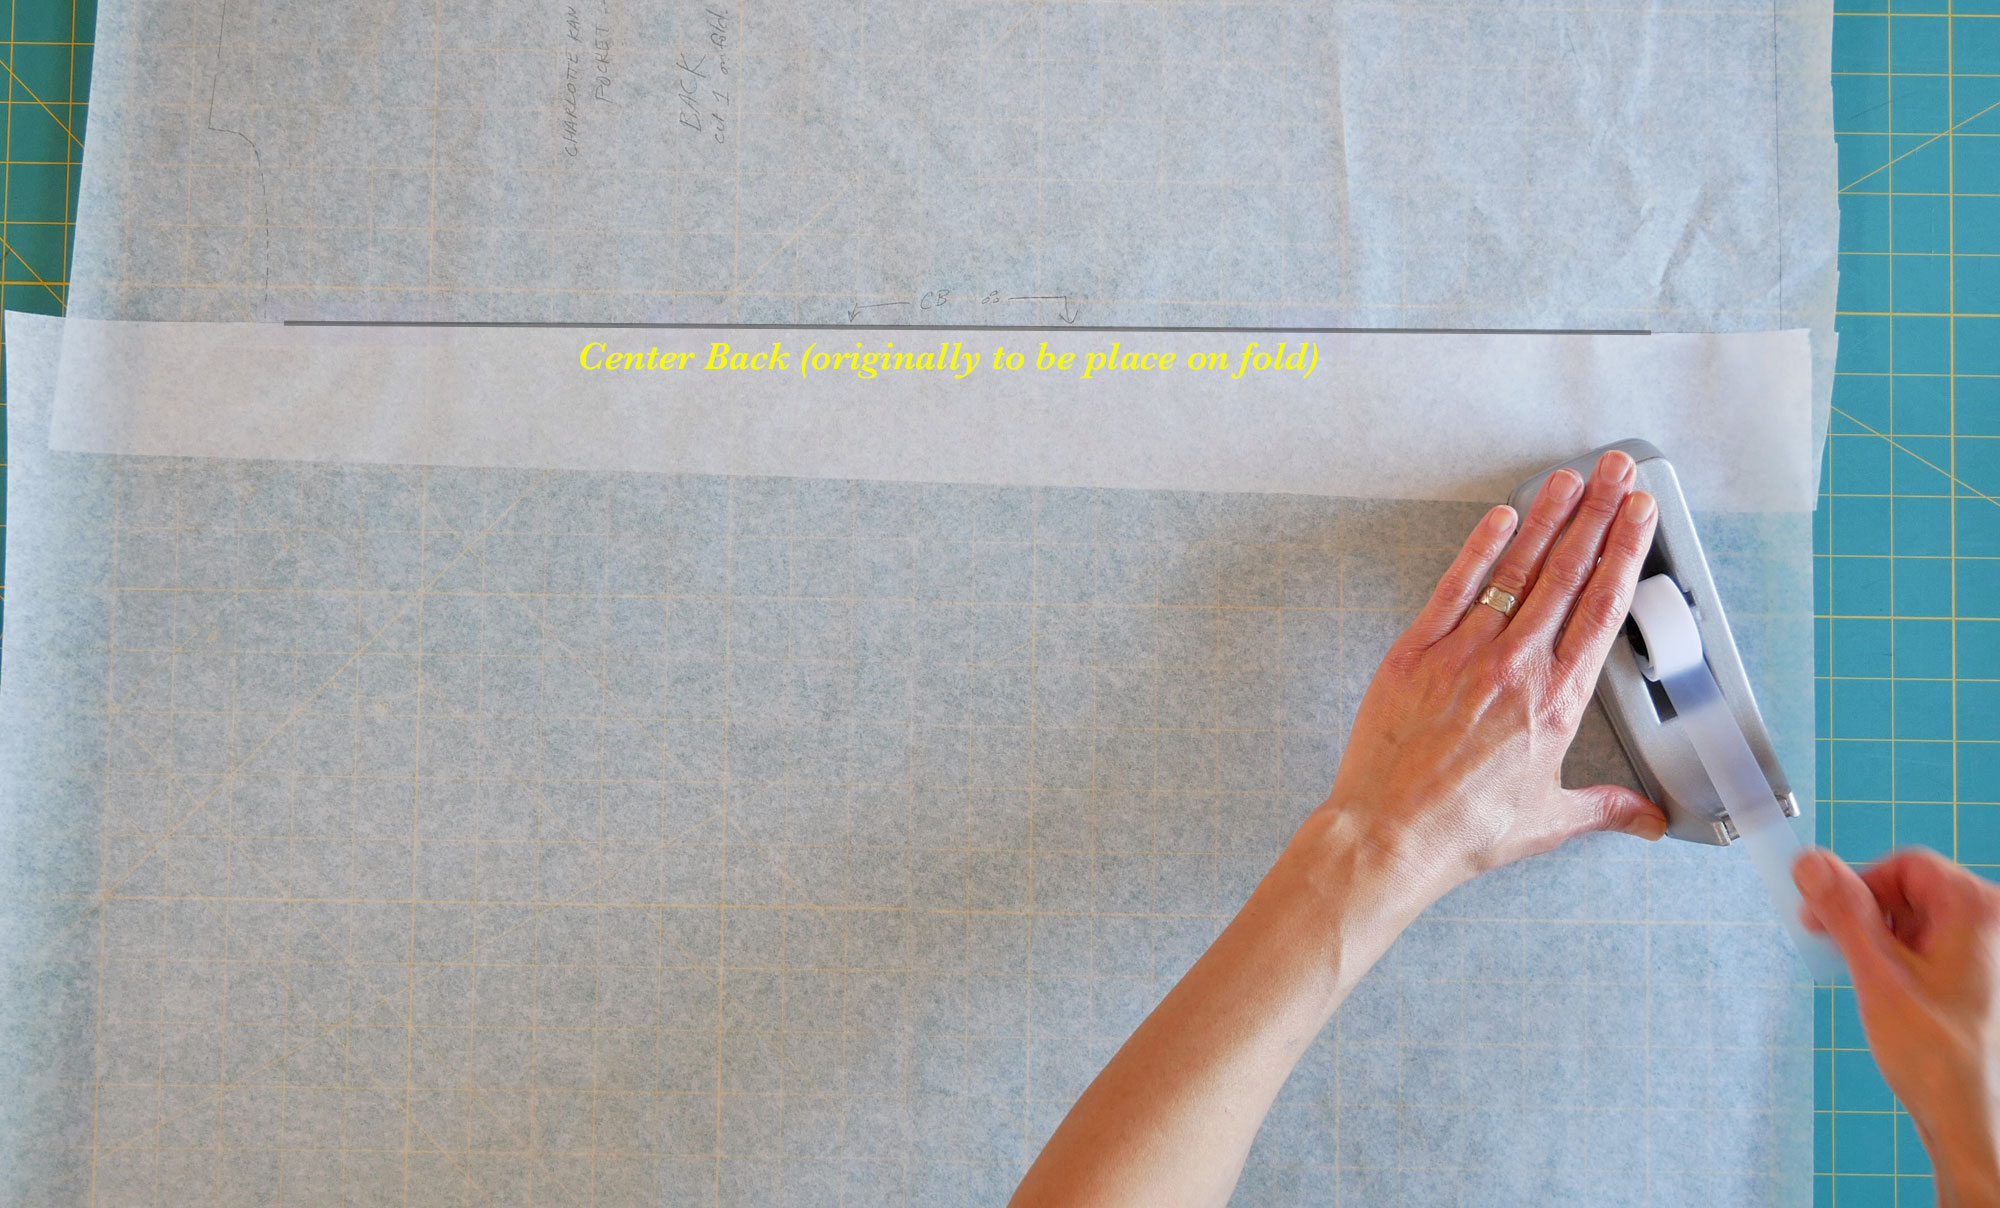
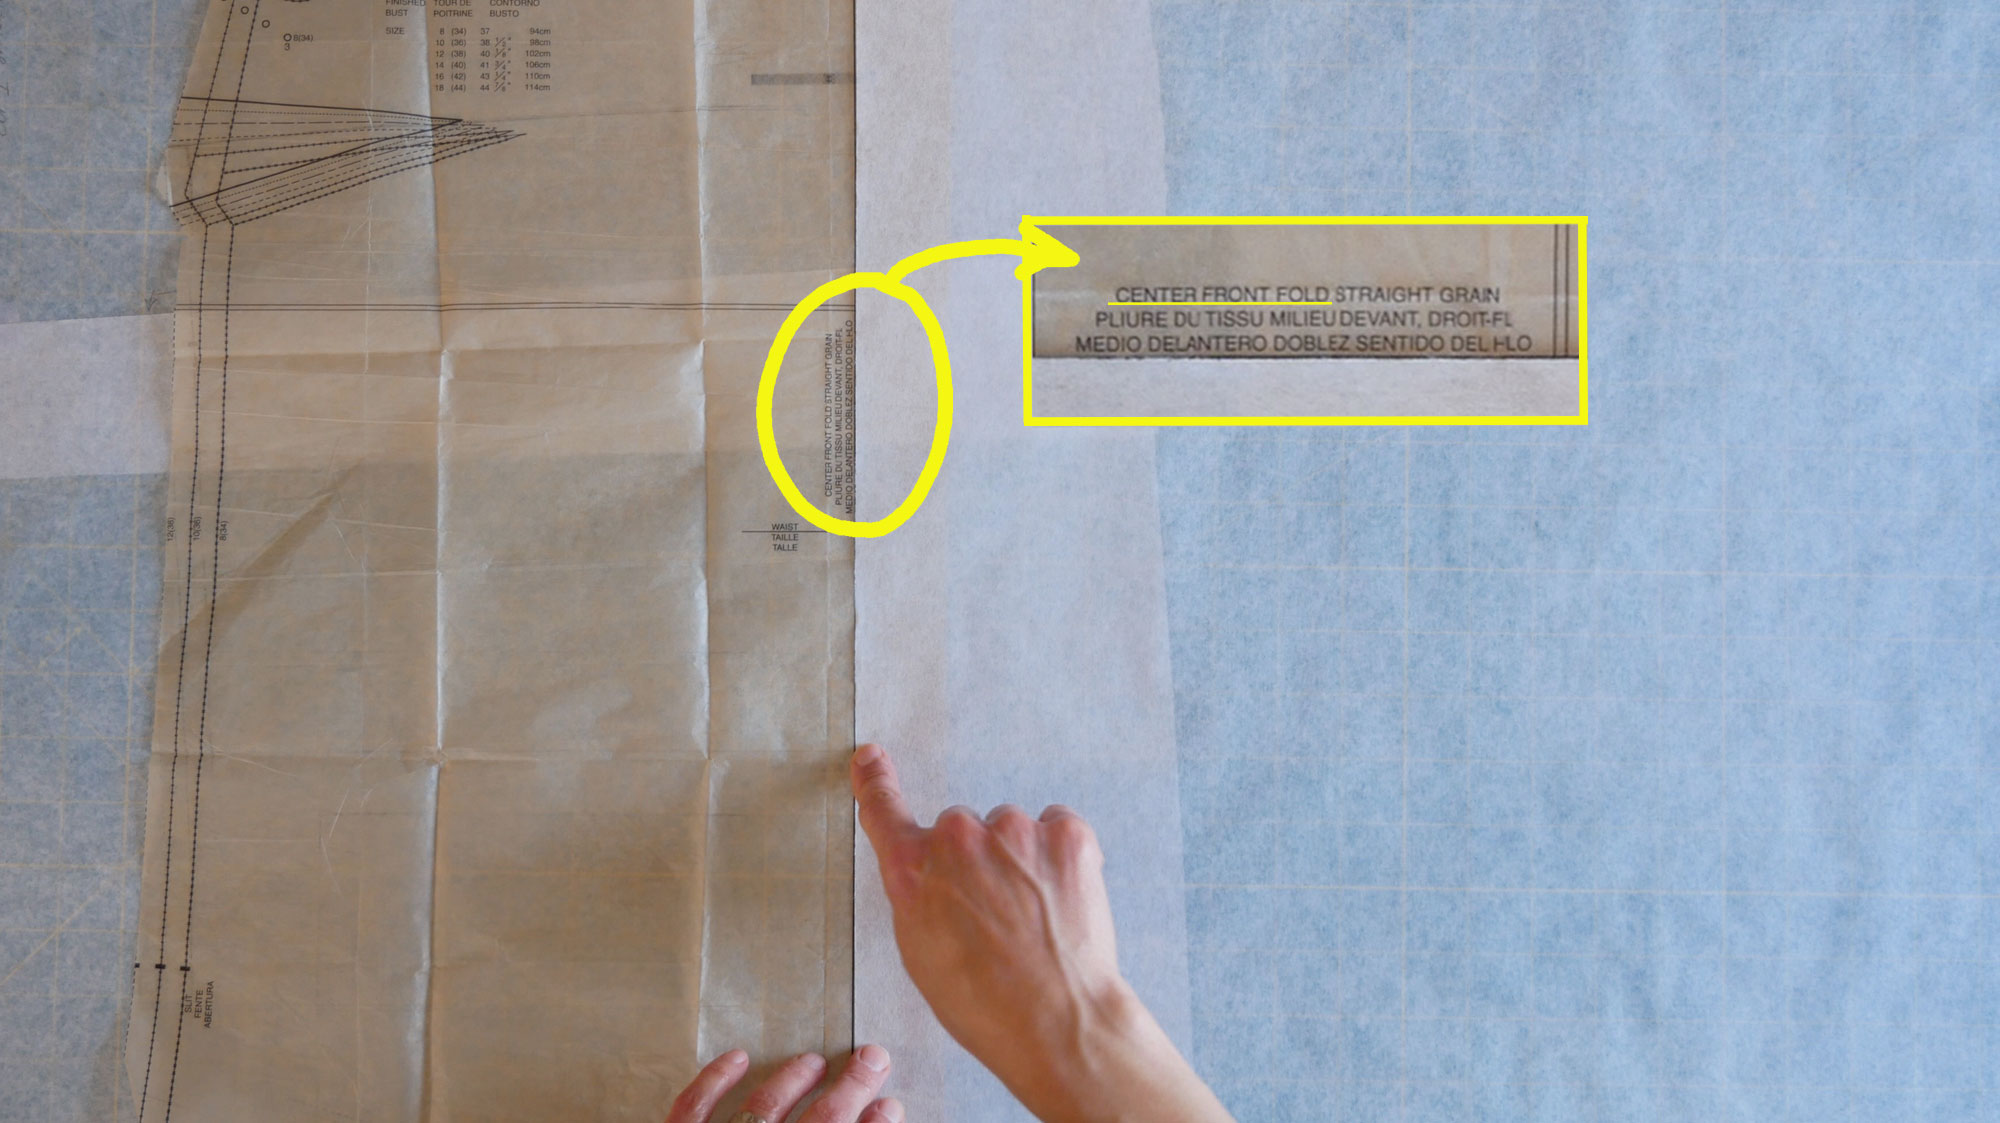
Step 2: Tape another piece of transparent paper (large enough to make another tracing of your pattern piece) lined up to the “place on fold” edge of your traced pattern, or original tissue pattern.
Your pattern piece may be small enough, and the tracing paper that you traced it onto, wide enough, that you do not need to tape more paper to it. To check; fold the taped-together papers on the “place on fold” line and check that you have enough paper to make a complete tracing of the original half pattern.
If your pattern is already transparent, simply tape a piece of tracing paper to the center fold line. The added paper should be as large as the pattern piece you’re taping it to.
Step 3: Fold along the “place on fold” line of your pattern (usually Center Back or Center Front). You will fold the tape if it’s on the line. Check that you have enough paper to cover your entire traced pattern. Tape on more if needed.
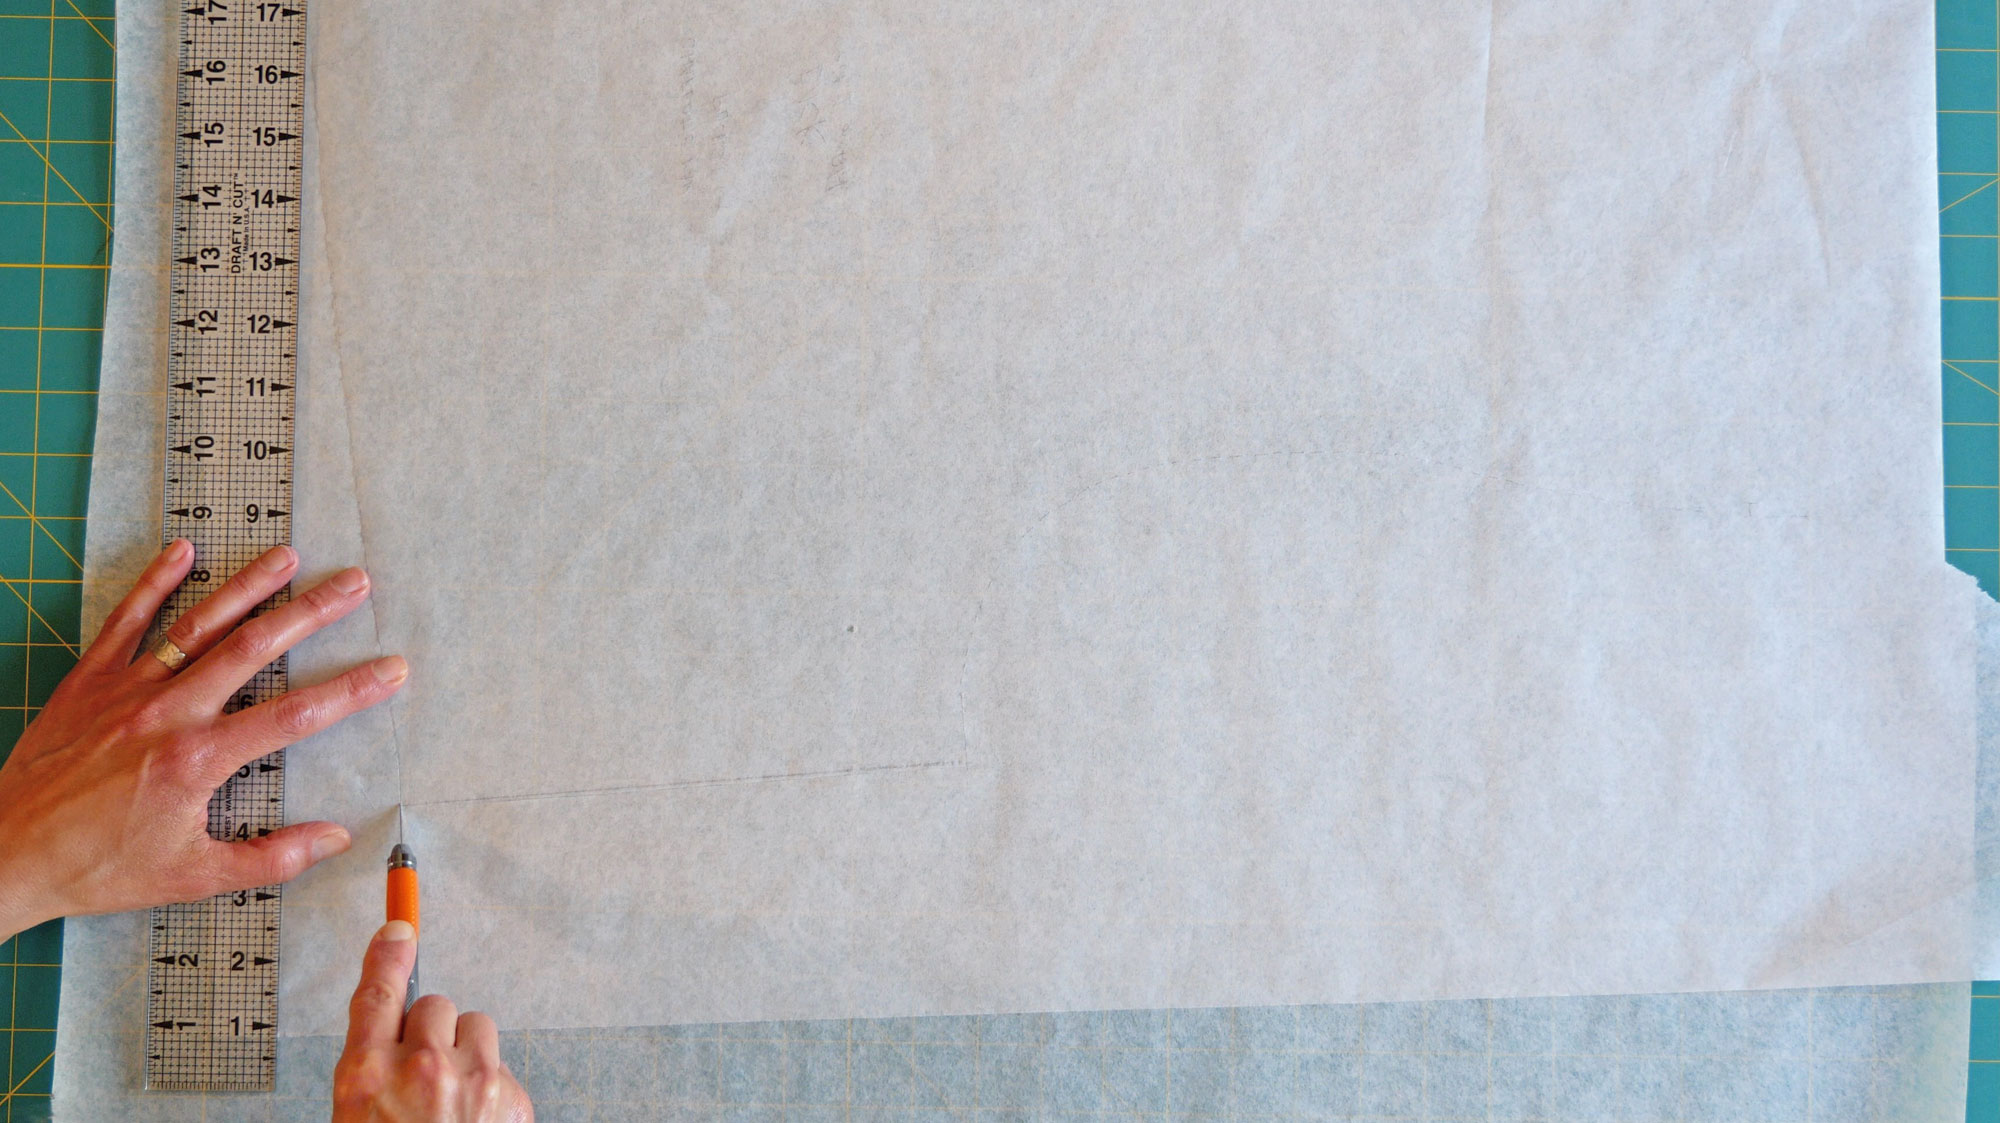
Step 4: With the pattern and extra paper folded on the “place/cut on fold” you can either trace your pattern again onto the paper you taped on, or cut out the pattern with the extra paper underneath. You will be cutting both layers of paper as if one. You can staple the layers together to keep them lined up while cutting with scissors if you need to (carefully remove the staples when done so as not to rip the paper) or cut the pattern out flat with an X-Acto knife.
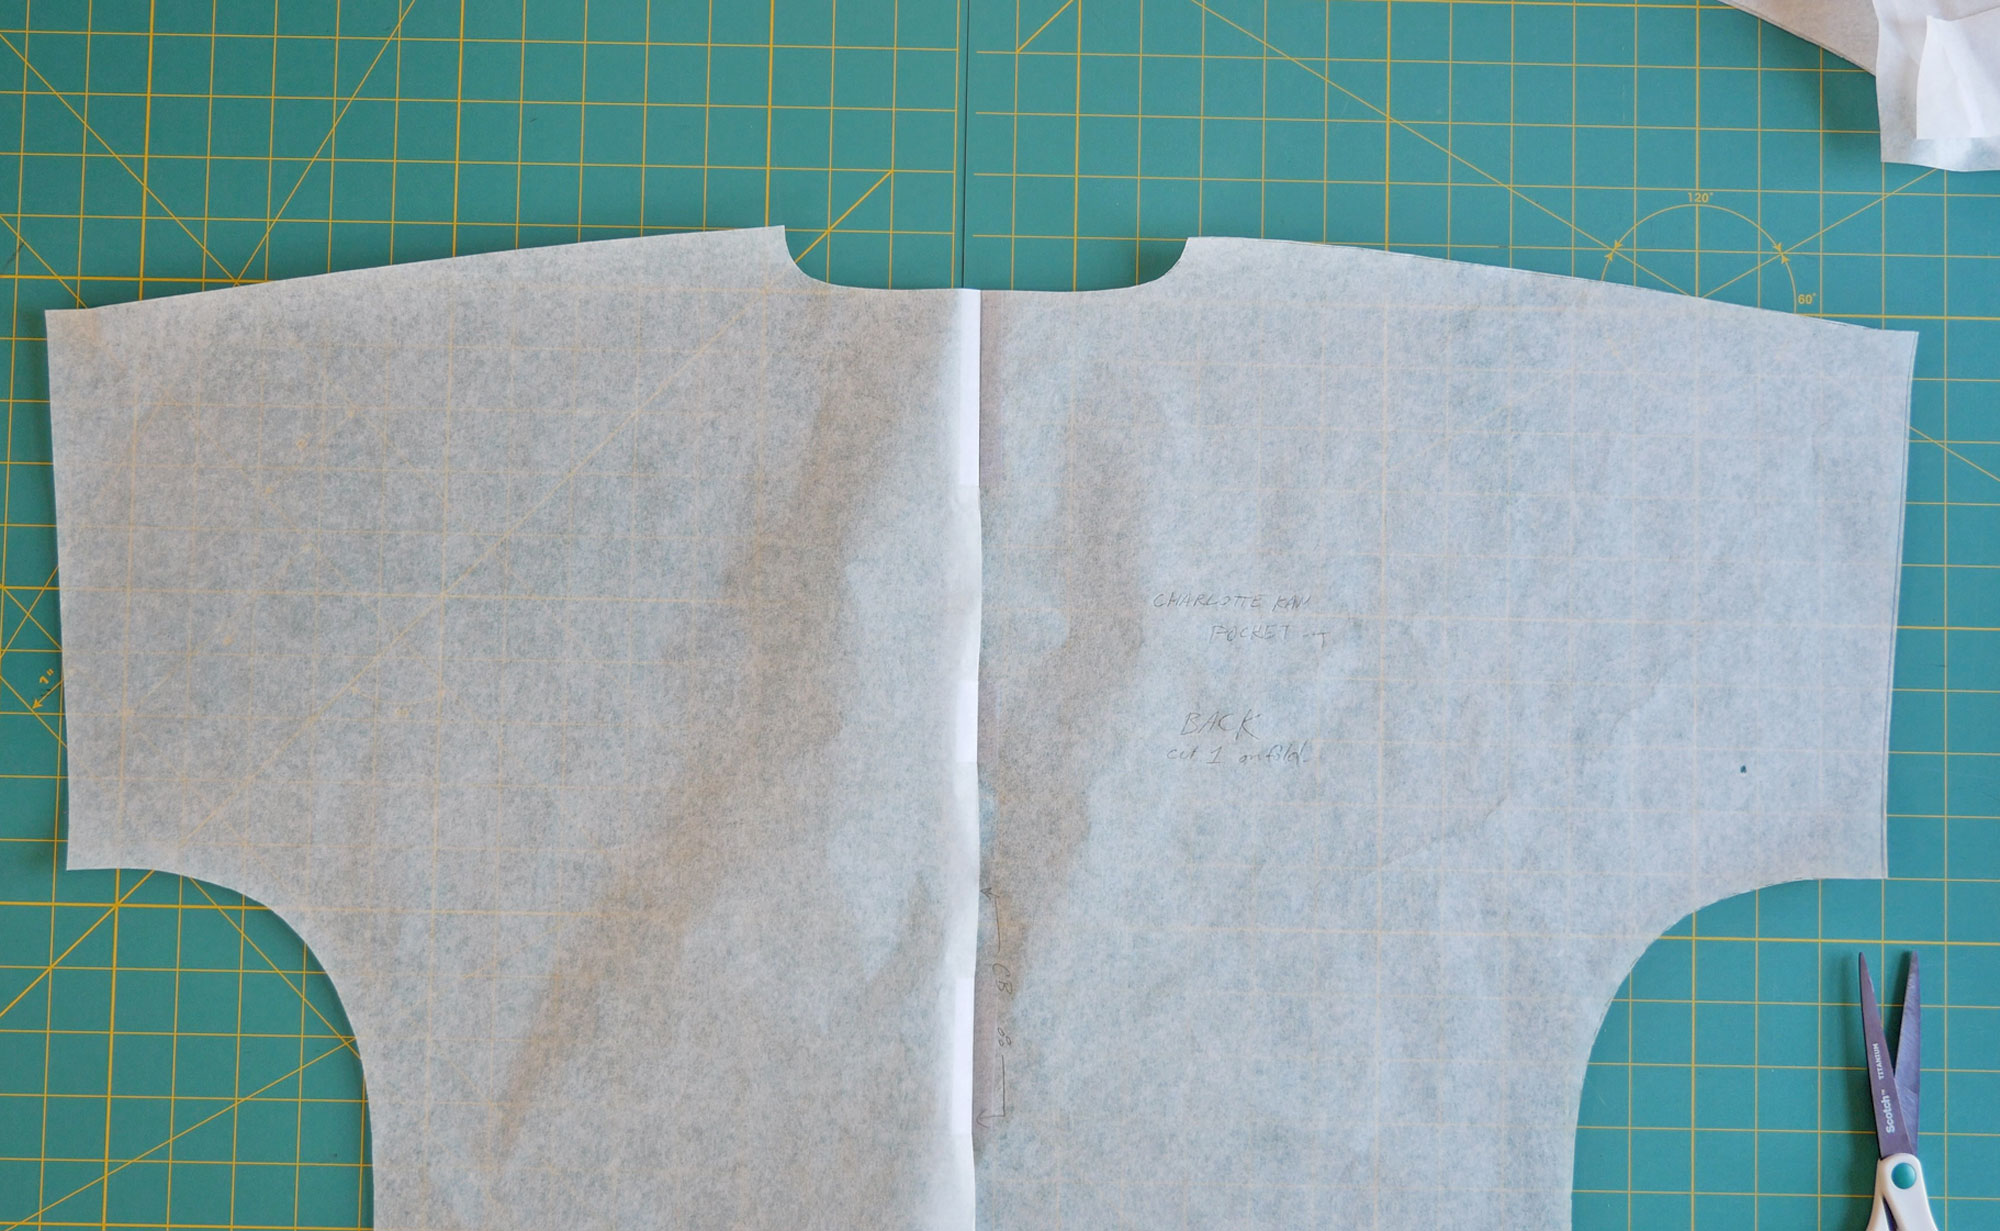
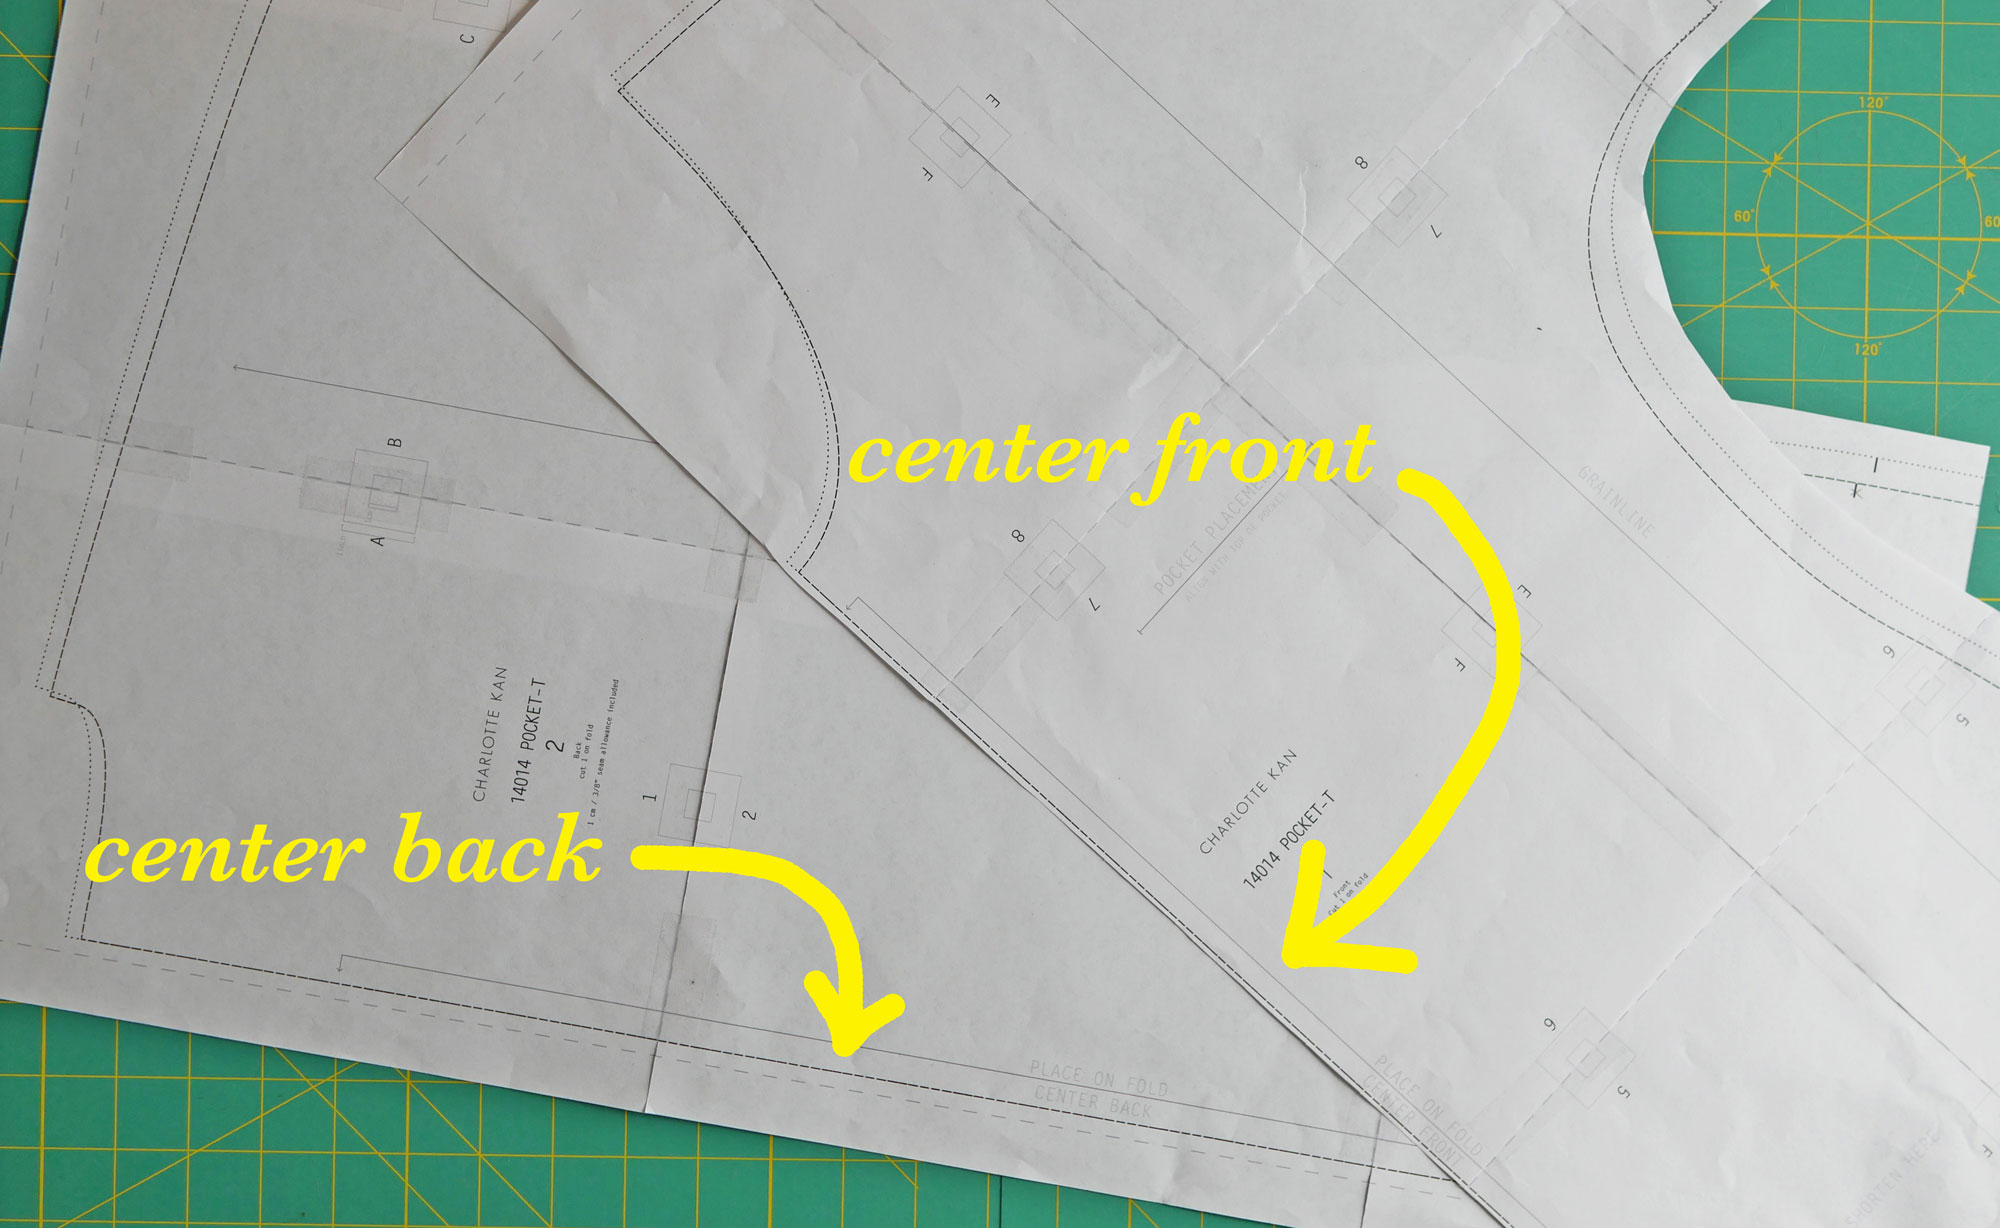
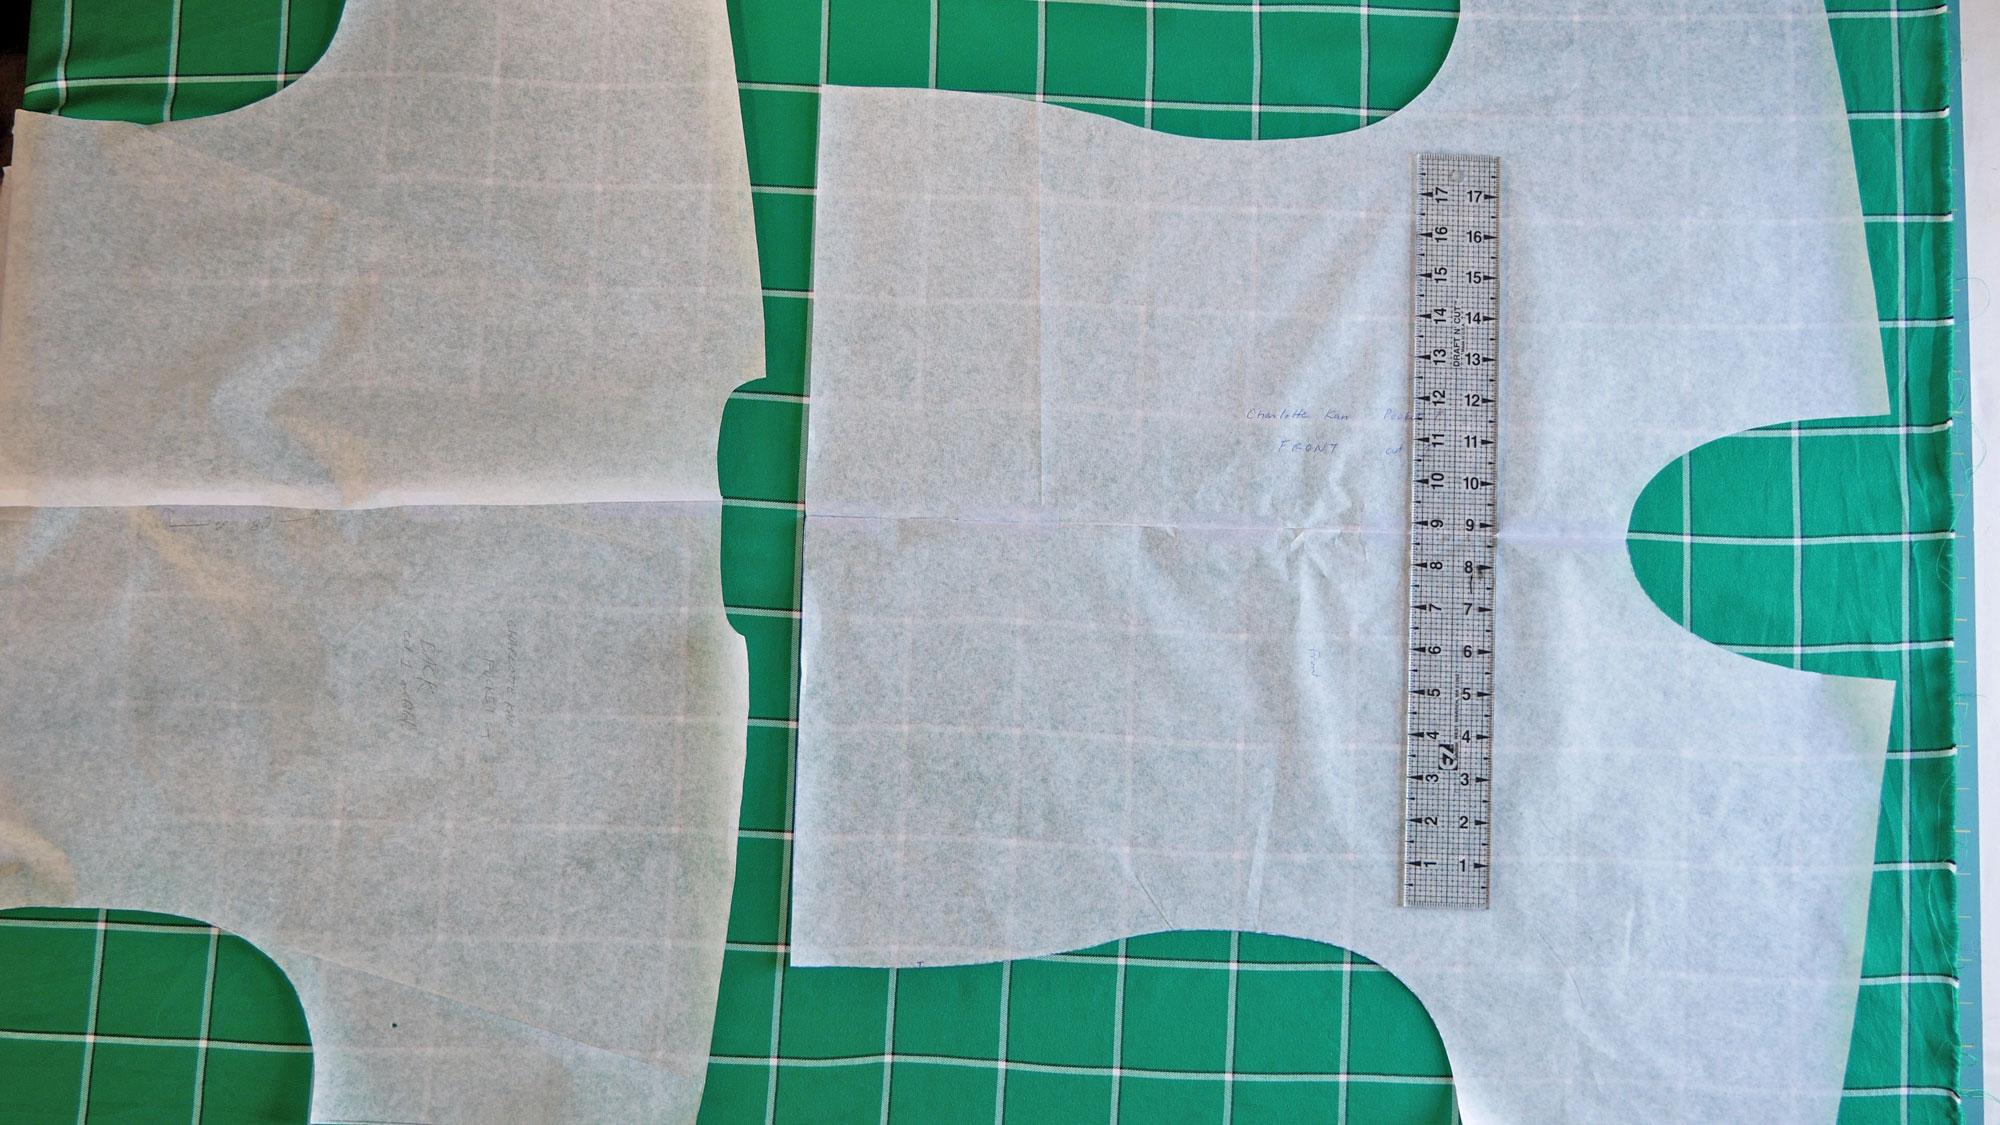
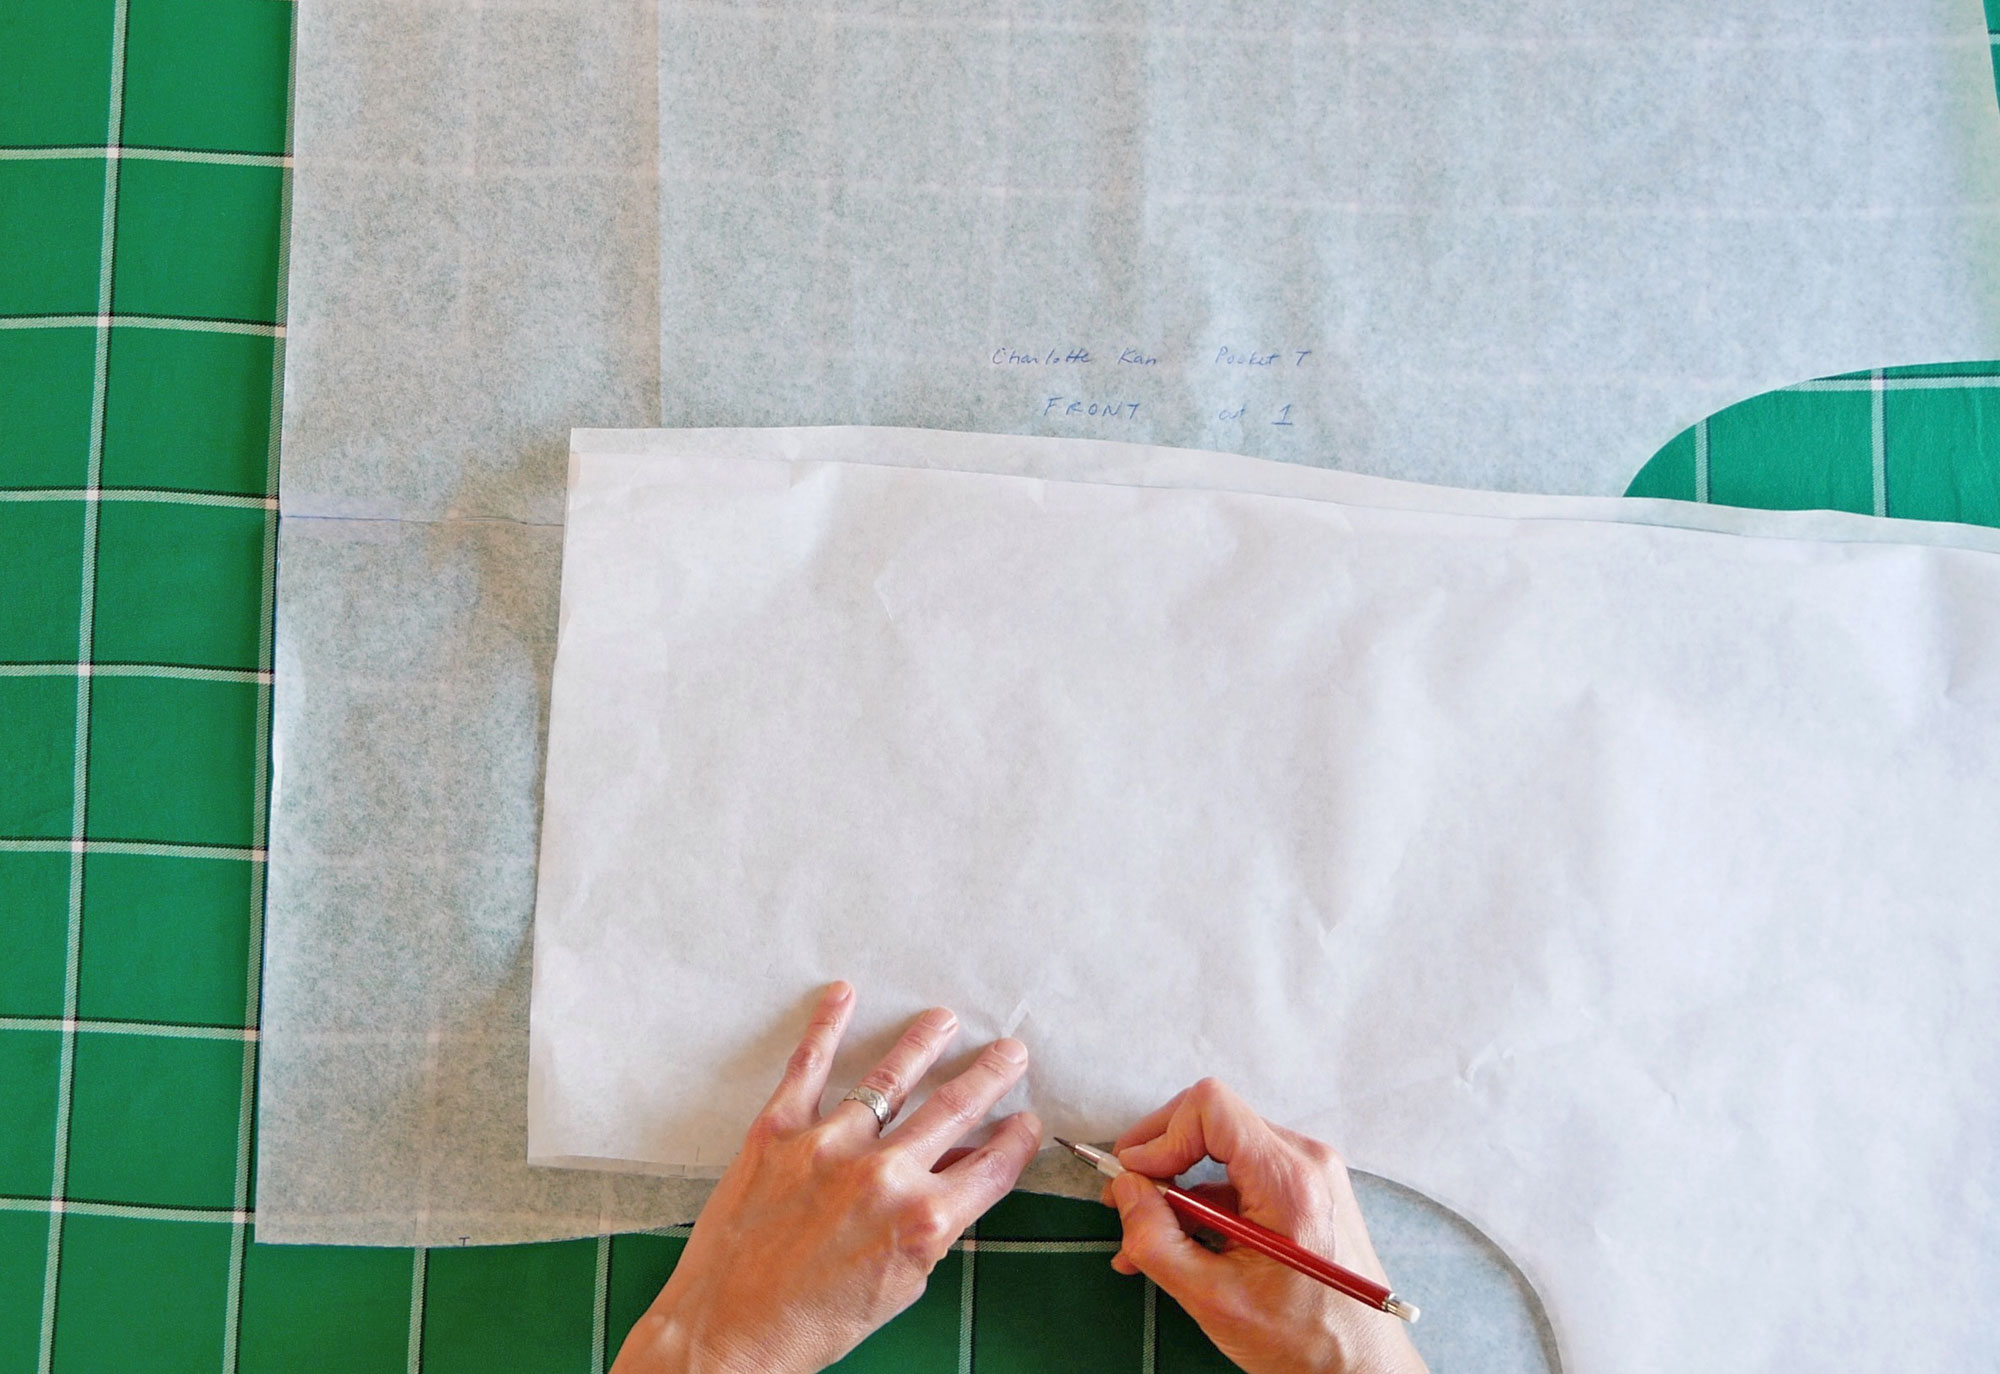
Unfold the now whole pattern. Draw in the grainline, pocket placements, and any notches. Label your new whole pattern piece with the pattern maker’s name (i.e., Vogue, Butterick, Charlotte Kan – the pattern used in this demonstration), the number or name of the style, what piece this is (i.e., front, back, yoke, etc), size, and how many you now need to cut (i.e., cut 1, or cut 1 fabric and 1 lining)
The pattern pieces in patterns instructing you to cut two of, are already whole patterns, not half patterns. Example, a pocket bag, a sleeve, a pant front, or a pant back. You do not need to add anything to these pattern pieces but you may want to trace them onto tracing paper or other semi-transparent paper so you can line up stripes, or to assure you are getting an exact placement on a printed fabric.
How to use a whole pattern
Lay the fabric on your cutting surface in a single layer (Do be sure to press out any wrinkles and creases in the fabric before cutting out)
Lay all the main pattern pieces on the fabric roughly where you want them cut out of the print, avoiding or featuring certain elements in the print, or on certain lines of a striped or plaid fabric. Because you are not cramming your pattern pieces into as little fabric as possible, you definitely want to double-check that you have enough fabric for all pieces needed before you start cutting. But this is not a meticulous lining up of pieces. This is just a quick double-check before you do all the meticulous lining-up work.
If your print is small and you’re not trying to match anything, fabrics with one-way designs can require extra fabric to get all the pieces going in the same direction, so it’s always wise to check before you start cutting.
Cutting out of a single layer is really great for slippery fabrics, too, whether they or printed, striped or solid. It lets you keep track of the grain line and avoids the horribly misshapen piece you will get if you cut two layers out at once. That bottom piece is never right if you cut two shifting, slippery layers at one time.
A Very Important Reminder
When you cut any pattern piece that you need two of (two side fronts, two sleeves, two cuffs) out of a single layer, make sure you cut one with the pattern facing up and the other with the pattern facing down so you end up with a right and left piece, not two identical pieces ( 2 right sleeves, or 2 left pants back) I think everyone makes this mistake at least once (or, in my case, more than once) so if you do, just check that box and see what you can do to salvage your project (and it’s ok to cry).
How to Line Up Stripes and Other Design Elements on the Fabric
I like to start with the main front pattern piece because I want to be sure stripes and certain design elements of any print are where I want them and not where I don’t. The front bodice, on a top, is the front and center part of a garment. If your garment has another area that is the focal point, start with that pattern piece. Get that main piece of your pattern lined up on the fabric first.
Check placement of stripes and/or design elements through the pattern tissue. Double-check the bust area as it really is front and center, but also the crotch level and the bum on pants, skirts and dresses. This is most true when cutting pieces from large prints.
Adjust the location of the pattern piece on the fabric so it’s pleasing to you.
Place pattern weights or pin the pattern piece down to keep it exactly where you want it.
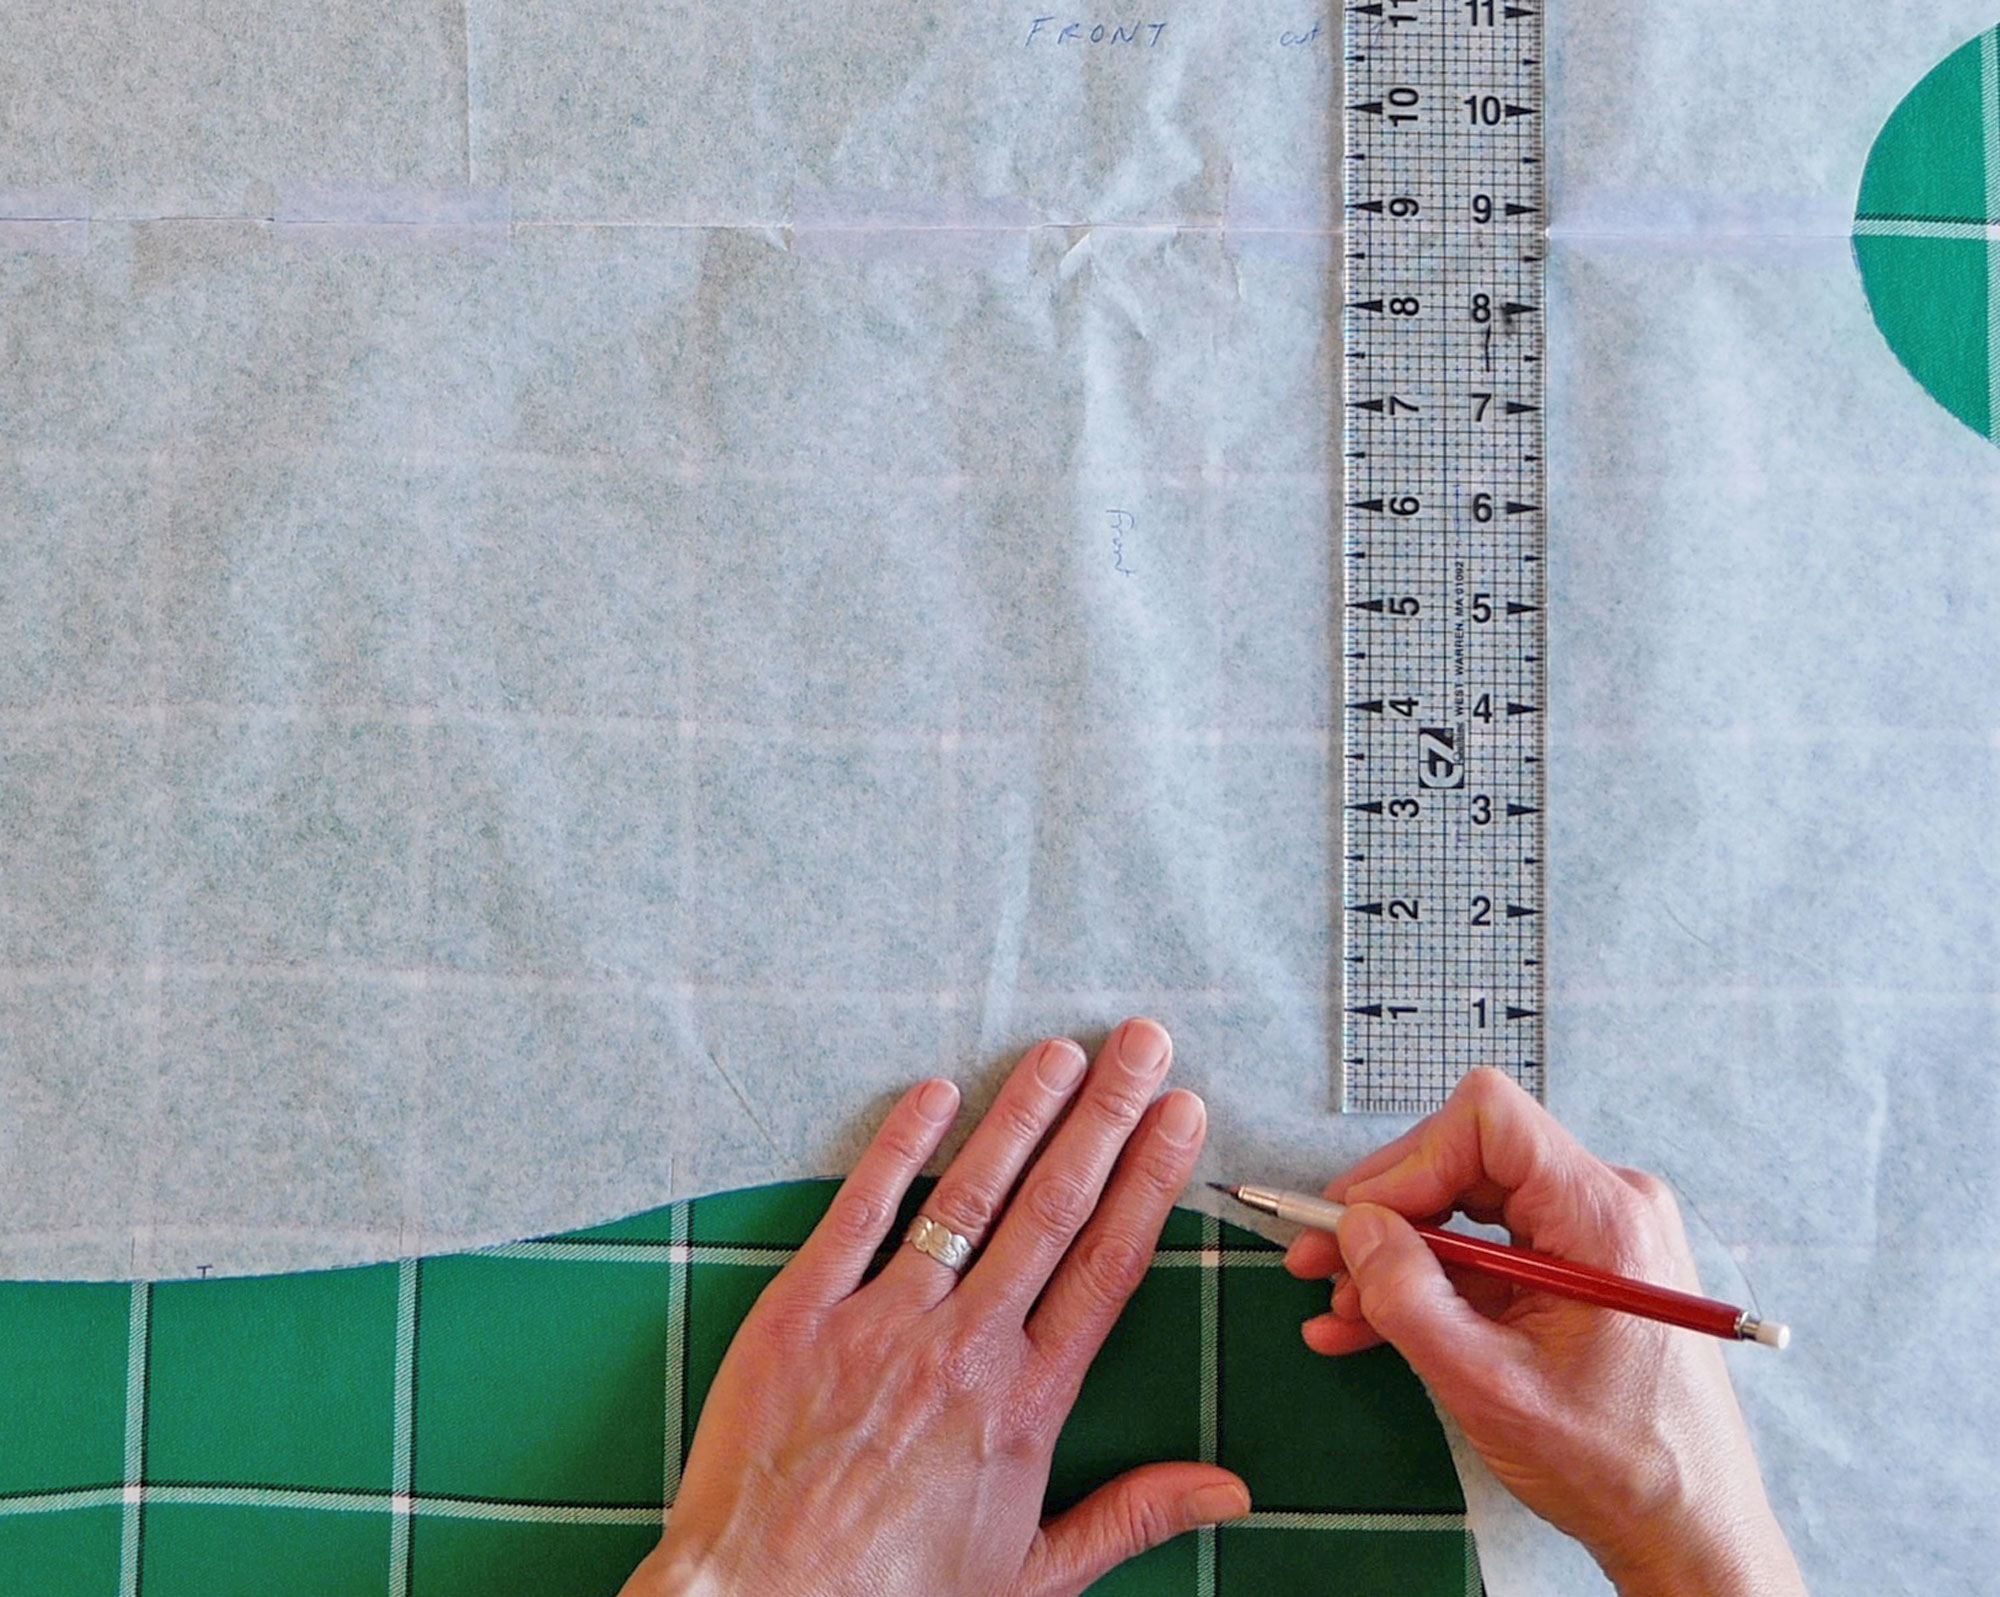
With a pencil, mark where the stripes are on the pattern piece at the seams.
On seams that curve, you can’t always line up all the stripes (especially vertical stripes) along the seam. Line up what you can and leave it at that.
If you’re dealing with a printed fabric that you want to match at the seams, look for something in the print you can reference. Pick a particular element that is at the seam, for example, a red flower in a large floral print. Trace where that element is on the pattern on any seam and anywhere you need/want to match the print up, like a patch pocket, and across the button placket of a button-up shirt.
These marks and tracings you make on the pattern piece become reference marks for laying out this and the other pattern pieces.
Fold the pattern in half if it is a whole pattern, along the center front and copy any reference marks to the other side seam. Then, when you open up the pattern, you have marks on both the right and left side seams showing where to place it on the fabric.
While folding the whole pattern piece down the center and tracing the reference marks works great for symmetrical designs, stripes, and plaids, it is better with very asymmetrical fabric designs to trace/draw any reference marks on the side seams with the whole pattern piece still flat on top of the fabric.
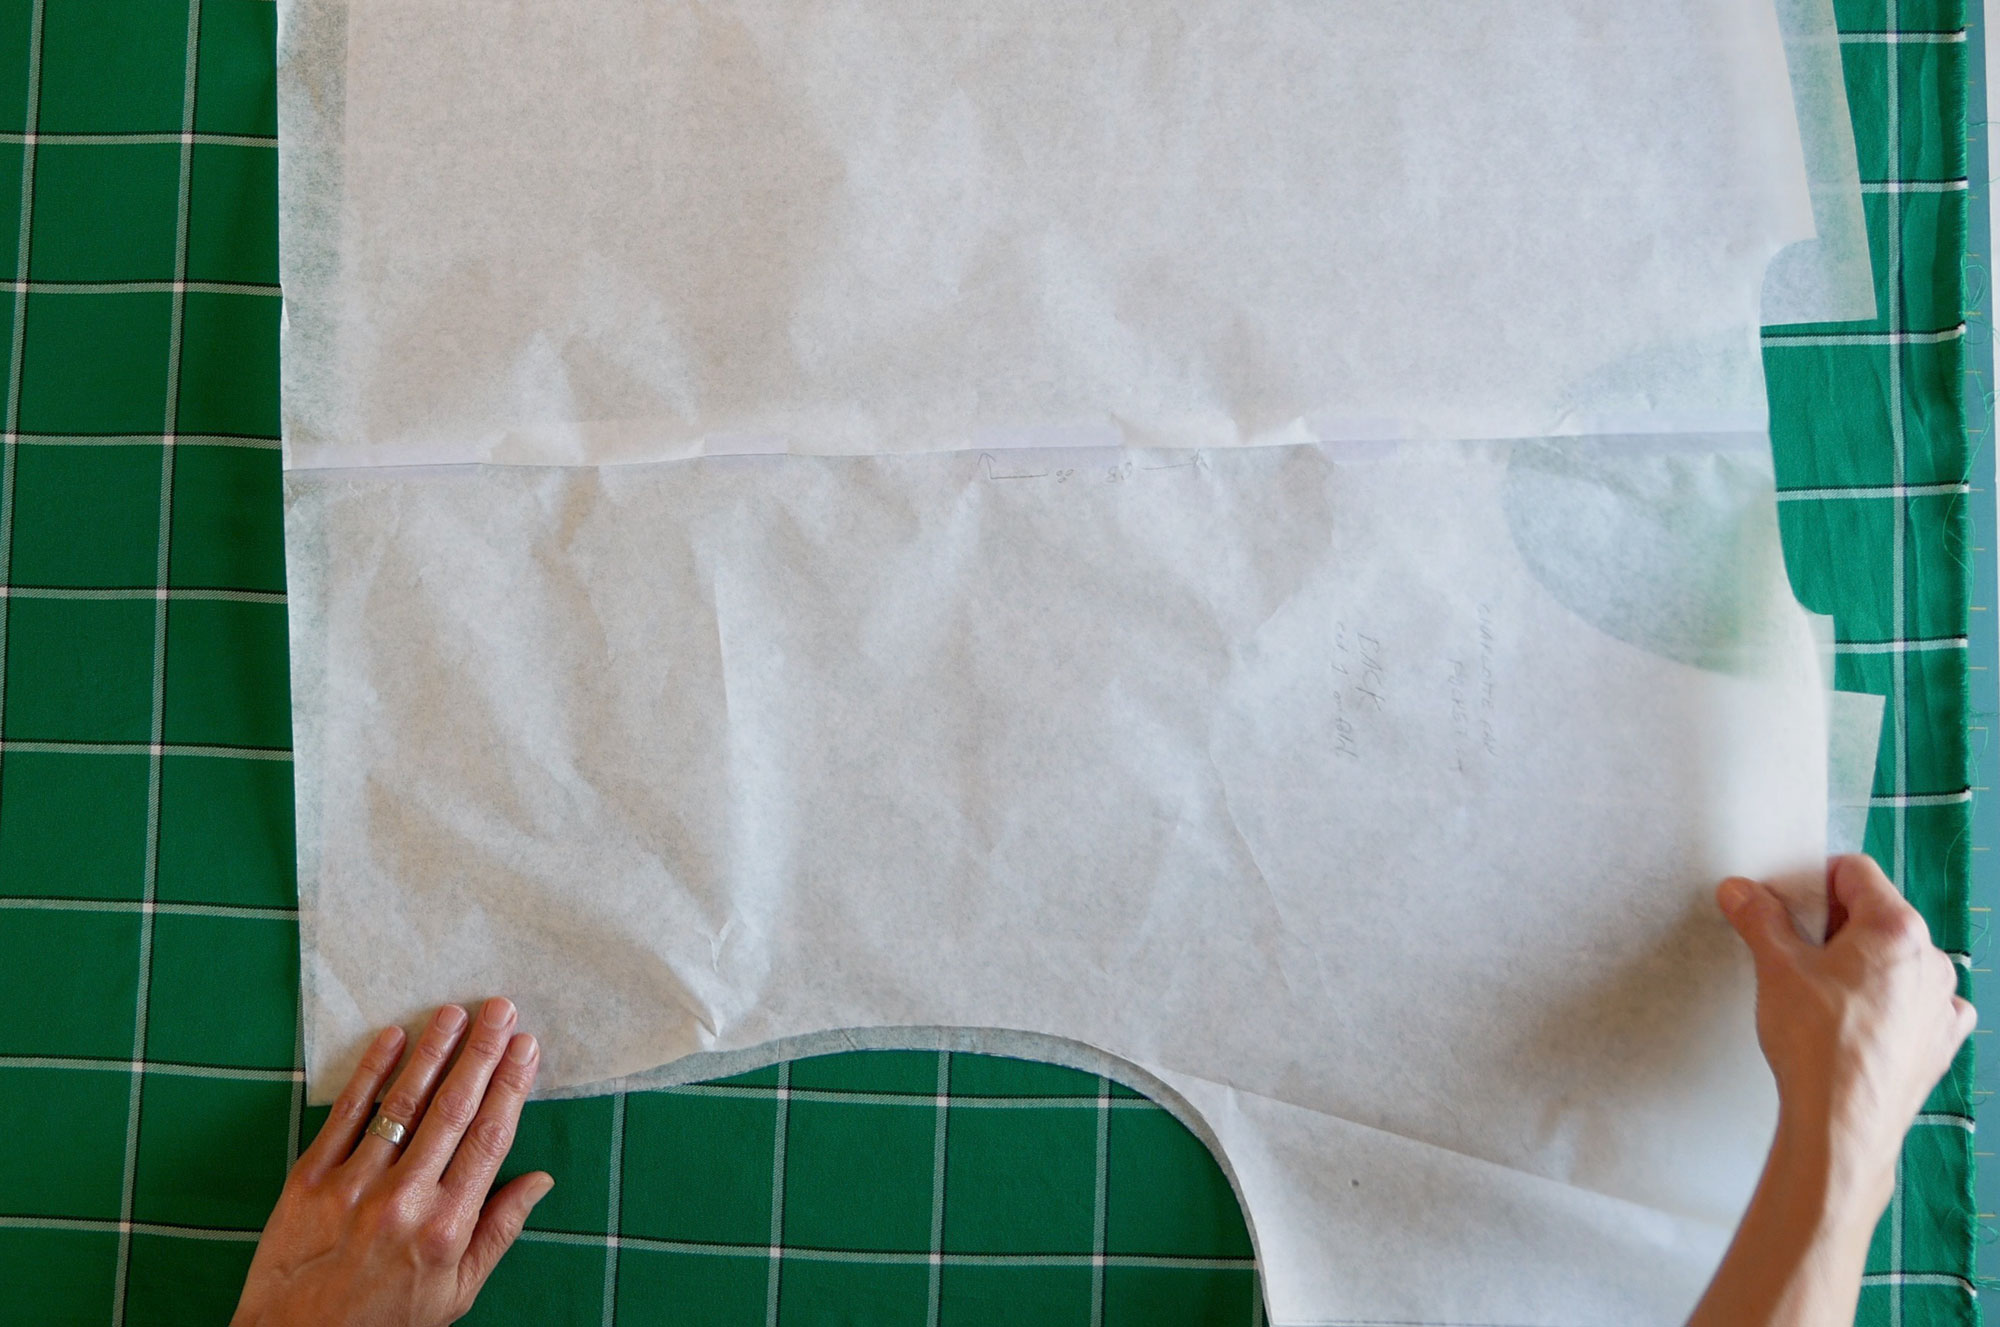
Lay the back pattern piece on top of the front pattern piece. One side at a time, line up any pattern notches first. Then transfer the markings you made along the seam from the front pattern to the back pattern. Since these marks show where the stripes are on the front, transferring them to the back means the stripes will be in the same place as they are on the front. And this means they will line up at the seam. (YAY!)
And the same works for design elements in a print. However, you also need to draw in the seamline. This will show you where the print lines up on the seam – not the cut edge (details, details). Copy your reference marks to the back pattern piece so both pieces can be laid exactly where you need them to be so the design will match on the seam.
Pockets and yokes could be matched up to the stripes as well, set perpendicular to the stripes on the garment, or even cut out on the bias to be diagonal. Your choice.
To match pockets or yokes, lay the main pattern piece on the fabric where you will cut it out. Lay the pocket pattern piece on the pocket placement of the bodice and make reference marks where stripes or elements are. Then, when you lay the pocket pattern piece on the fabric to cut out you can line it up with those reference marks, and it will match.
For a yoke, it’s the same except lay the yoke pattern, upside down, on the pattern piece it will be sewn to as if sewing them together, and make reference marks on the yoke pattern at the seams. Remember, seam allowance if you’re matching a print.
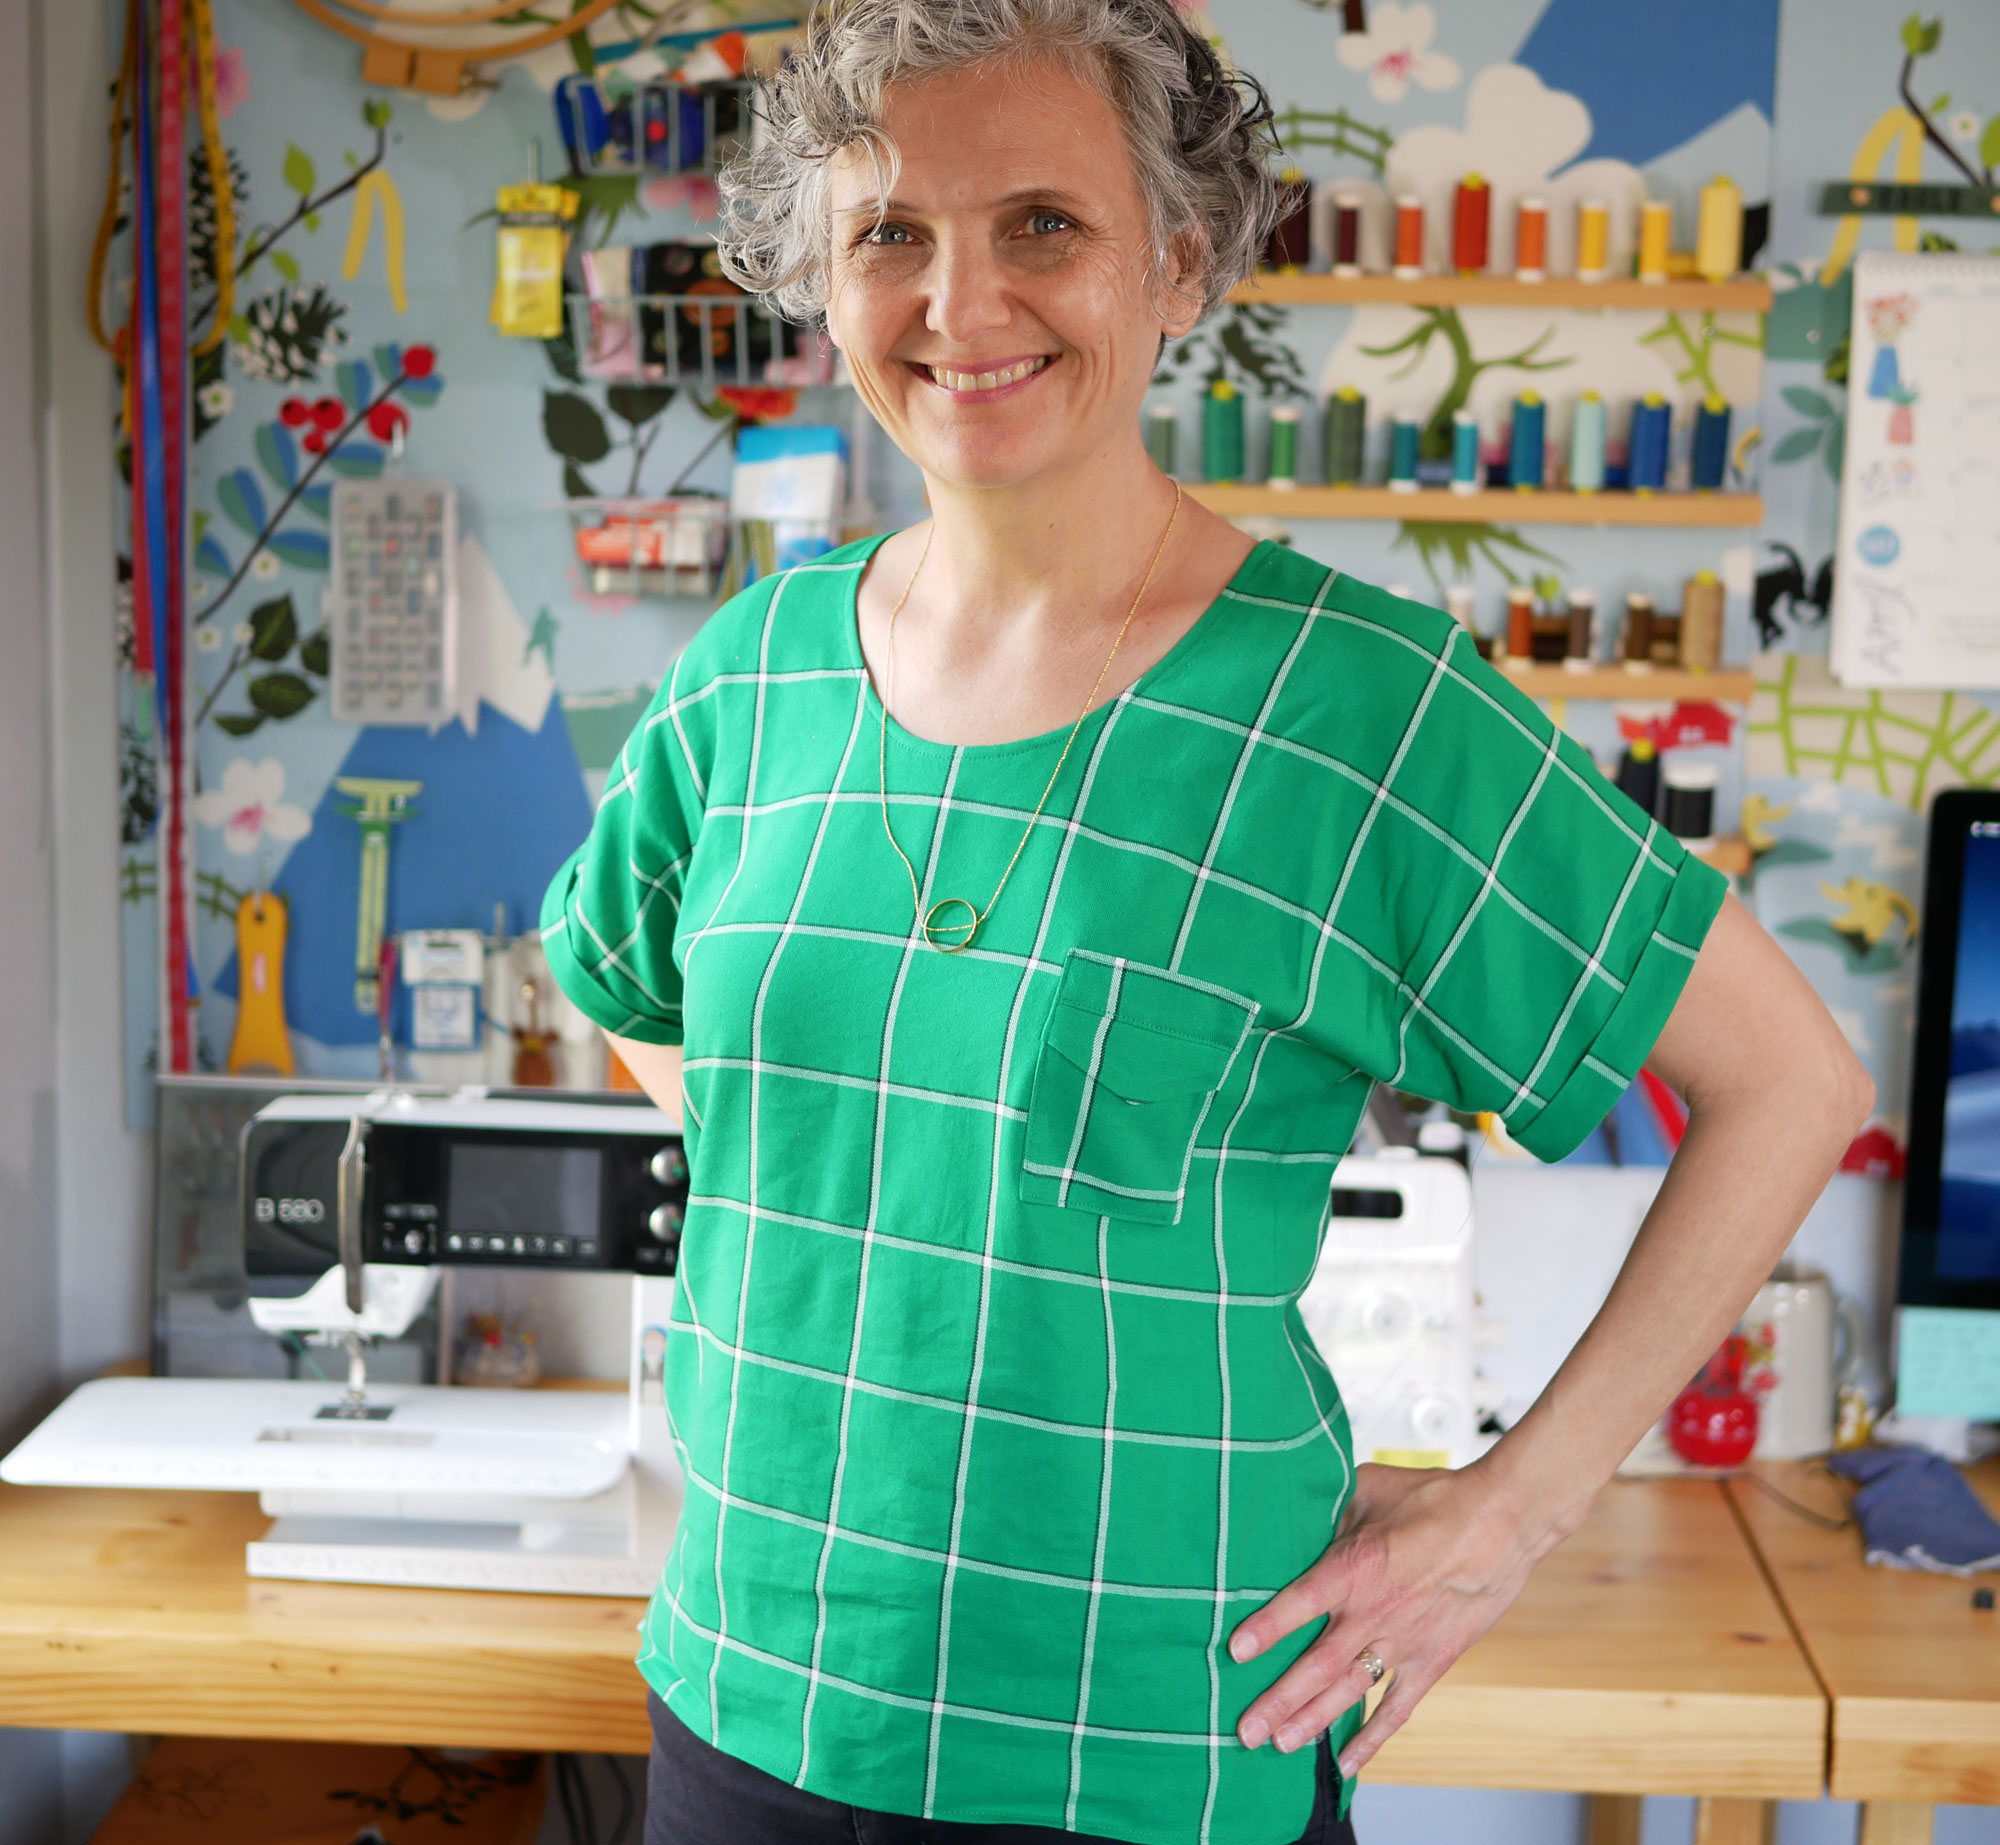
Because I couldn’t match my pocket (due to how it folded on itself at the top, and because this window pane fabric is asymmetrical – the thin black stripes are only on one side of the white stripes), I made sure it was off enough to look deliberate, like I wasn’t trying to match it and accidentally got it off a smidge.
Sewing Notes
When going to sew these seams, pin the layers together at each stripe and maybe even in between (depending on how close the stripes are) to keep the layers matched up under the needle and use a walking foot.
I recommend Tailor Basting your seam together before sewing, especially if it’s at all slippery (Rayon, some linens).
It’s typical for stripes on lower-priced garments to be misaligned. Since a hand-made garment is made with a lot of time and attention, why not invest a little more time and attention when cutting it out?
You can make this shirt too
As of May 2026 this pattern is out-of-print. It was a pdf pattern from Charlotte Kan. It is a well drafted pattern and she offers a few other styles you can check out at her store. Perhaps she will bring it back.
If you have any pattern-matching tips you want to share or have any questions, please put them in the comments below. Happy Sewing!