Hemming men’s trousers was my first side hustle. It’s a pretty common task and one you can do with professional results even if you don’t have much sewing experience. You just need to follow a couple of easy tips.
Note: you will need someone to do the initial pinning if you’re hemming your own trousers.
watch the video here or read on
Objectives for this project:
When you’re done your pants’ hem should:
- Hang evenly
- Have no lumpiness in the hem allowance
- Be inconspicuous
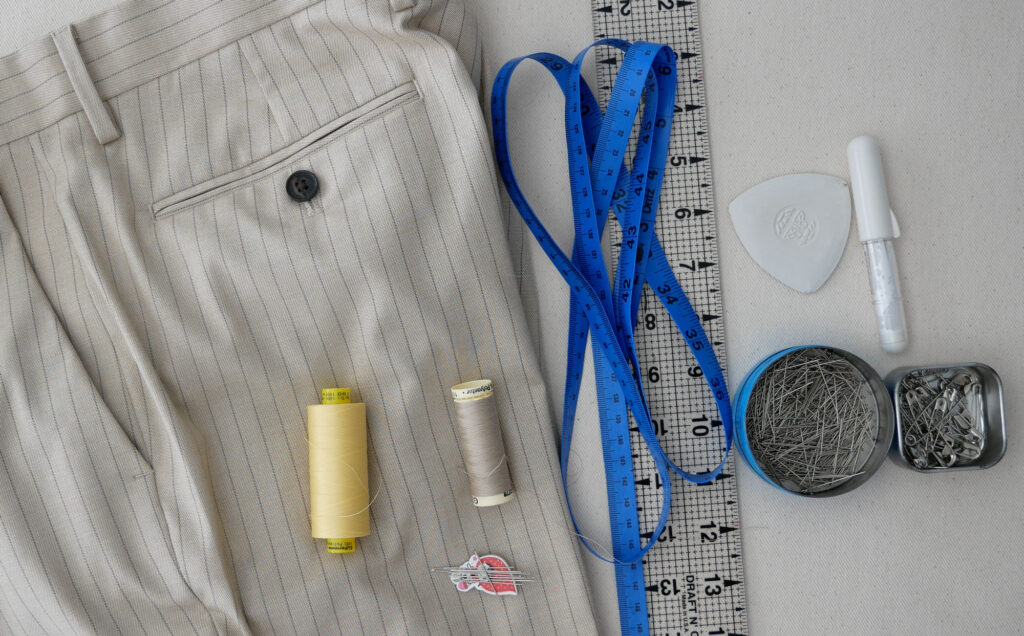
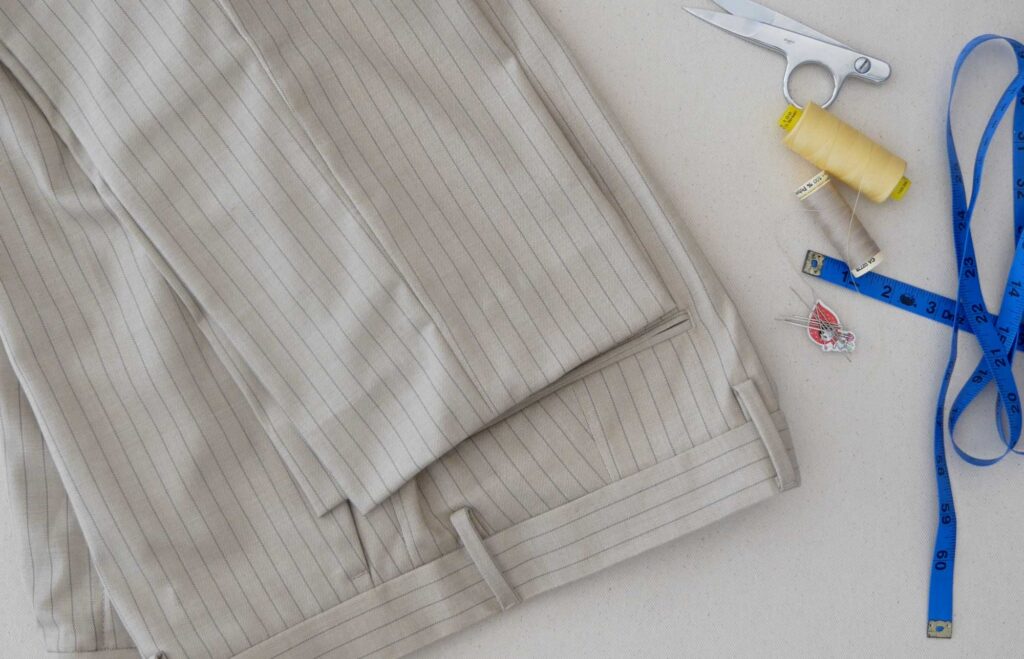
Supplies Needed
- A Ruler or tape measure
- Tailor’s Chalk or a chalk pencil
- Pins and Safety pins
- Thread to match your trousers (or one shade darker)
- White or pale yellow thread
- Hand needle
- A Sewing machine but you can do this entirely by hand
Pinning the Hem
Now, This is a project that needs two people at first. The person who needs the pants shortened and a person to do the initial pinning up.
People often gave me their pants with a single pin marking where they wanted the new length to be. This is acceptable but only if they realize I do not have all the information and the finished hem may suffer because of it. (In other words: payment upfront 😉
Have the person put on their pants with the belt and shoes they plan to wear with them and stand them in front of a mirror. Ideally, they can stand on a flat stool so you can get a better view than if you are bent over with your face on the ground.
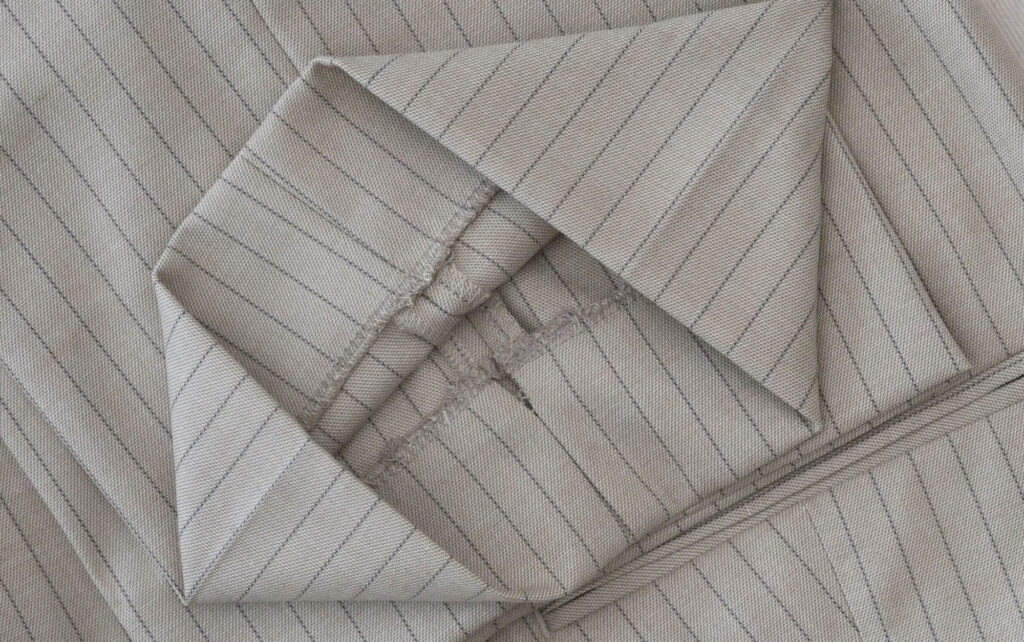
Fold up the excess length to the inside of the pants leg and pin with straight pins.
Ask the wearer if both their legs same length. If not pin up both legs
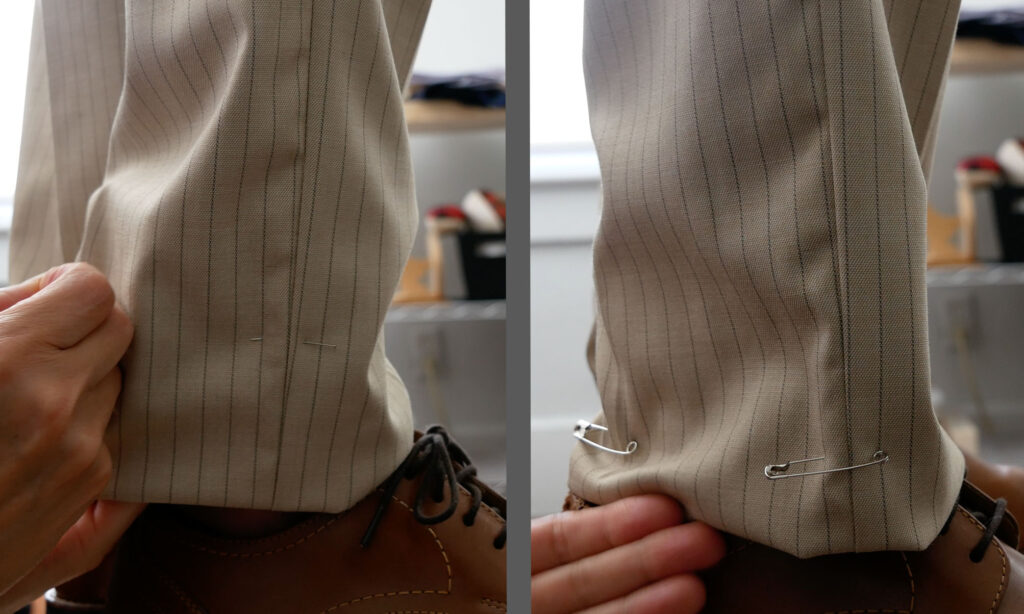
Once everyone is happy with the hem, place safety pins to hold the hem and remove the straight pins. The safety pins keep the hem in place between the fitting and sewing. Straight pins can fall out sometimes.
Measuring
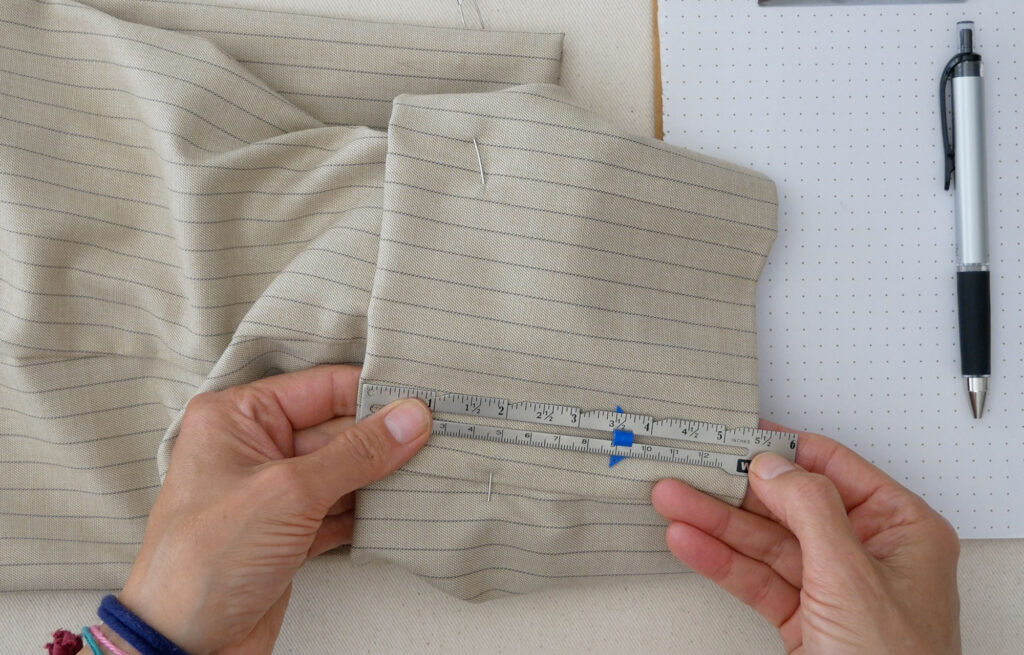
On your work surface, flip the leg so you can see the total amount you pinned to the inside.
Measure how much you pinned up before removing the pins
The amount is likely to be a little uneven therefore measure in a few spots and go with the most common or frequent amount
Write this amount down
Notes:
The hem for women’s slacks is about 1 ¼” to 1 ½” or 3-4 cm
Men’s trousers have a hem allowance of 2” or 5 cm. This gives the pants leg some weight which provides a better drape.
If the pants are already hemmed use the current hem, or the bottom of the pants leg, as your baseline.
If the pants are not hemmed use the end of the pant leg as your baseline.
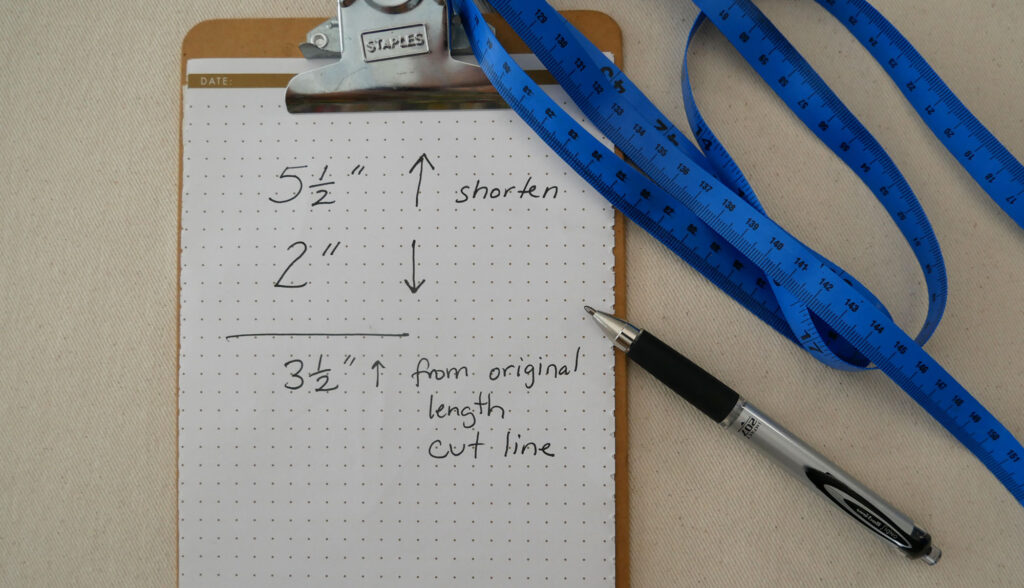
From the baseline, you will subtract the excess length.
The pants in this post need to be shortened or raised 5 1/2”. I write down 5 ½”. This amount is taken off the length (-) the hem allowance is added back (+) to give the new cutting line.
5 ½ – 2 = 3 ½
After writing this down you can take out the safety pins
If you only pinned up one leg check that both legs of the pants are sewn the same length. If one leg is shorter or longer, make a note and adjust the amount you need to fold up accordingly. You might want to mark this leg with a safety pin to avoid confusion
Before marking the new hem check that the original/current hem is not going to be in the way.
Start at the bottom of the pants leg and measure up the amount you need to shorten and back down 2” (the hem allowance) If where you end up is above the current hem You don’t have to unpick the original hem.
If you end up on top of the current hem you will need to unpick and unfold this hem.

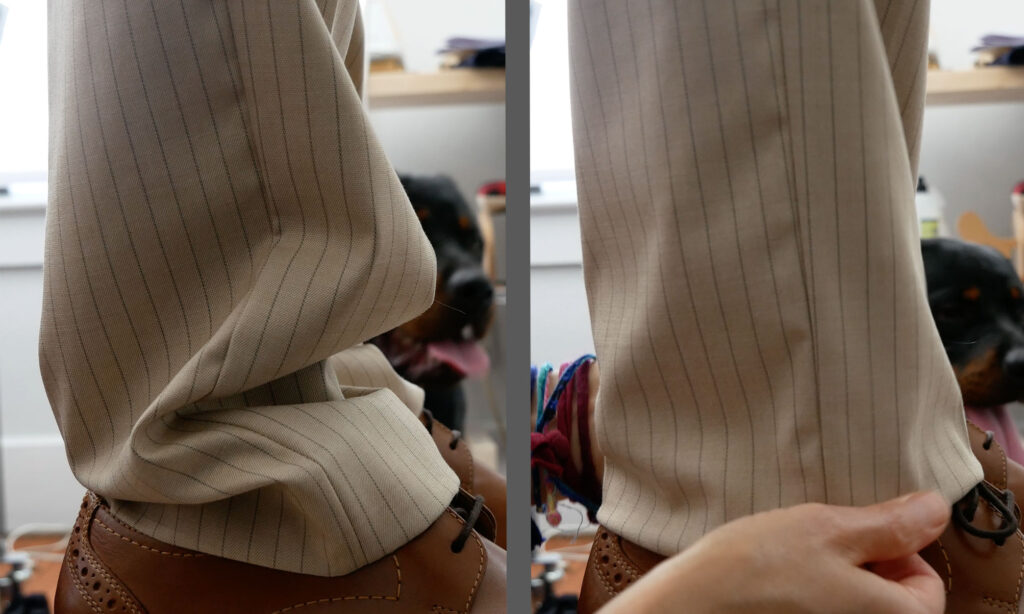
Objective 1: Pants hang Evenly
Tip: Marking the pants in 3 spots. Marking the front and back separately
To mark the pants, lay the pants flat, front side up on a work surface. You will measure up in three spots and mark both the amount you are shortening (the new length) and the new cutting line (the new length + the hem allowance)
Measure up from the original hem (or fold line of the hem if you had to unpick it) at three points across the front; at the center of the leg and about 1” in from each side seam.
Mark with chalk the 2 numbers you wrote down; First the amount you need to take off and then that amount minus the hem allowance. On my pants that’s 5 ½” and at 3 ½”
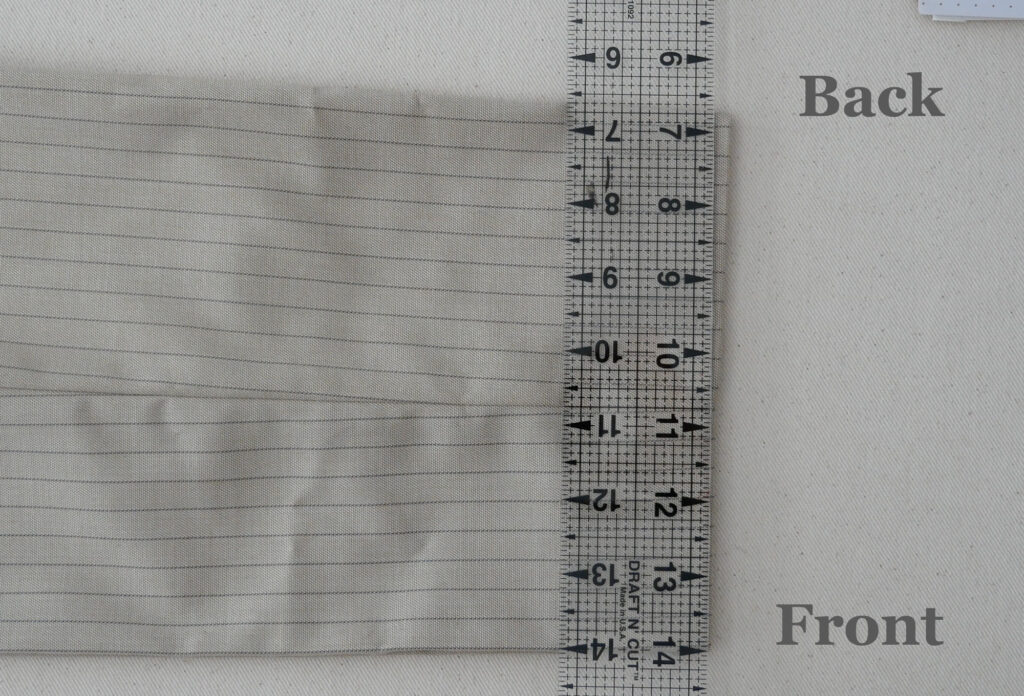
Many trousers have a slight slope to the back hem. You want to keep that and by measuring and marking the front and the back of the leg separately you keep that slope.
Measure and mark the second leg.
If you want, connect your bottom marks to make more of a continuous line
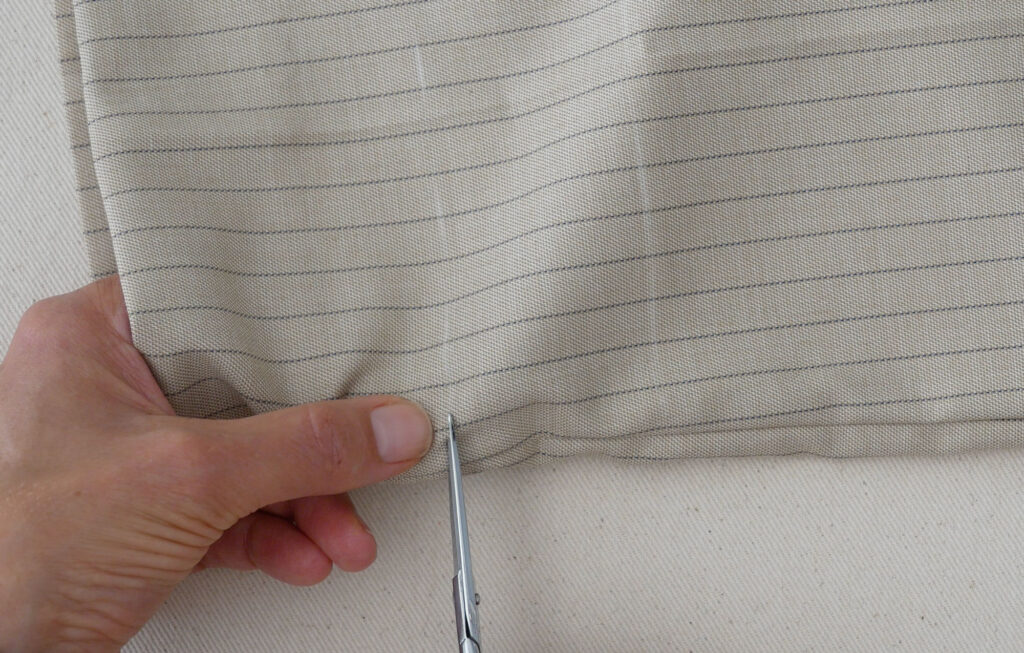
Orient the leg so you are comfortable cutting across it. The bottom line is the cut line. Make a small snip on the new cutting line to cut the leg in the round (not cutting up and then over). Placing your other hand inside the pant leg ensures you’re only cutting only one layer
If the pants you are hemming are tapered go ahead now and unpick the first ½” of the side seams so they can separate and allow the hem to lay flat against the pants.
Finish the raw edge with an overcast stitch on a sewing machine or serger or if you do not have a sewing machine fold over a narrow amount of fabric and press well.
Press overcast stitches but DO NOT press any chalk marks

Fold the pants to the inside of the leg on your top marked line. You can double-check the hem amount with a ruler as you fold it up.
Objective 2: Have no lumpiness in the hem allowance
Tip: Look and adjust as you go
Pin up the hem as you fold but check that you are not twisting the hem by holding up the lower part of the pants leg and shaking it a little so it can fall in place
Your side seams may not line up with each other, especially if your pants are tapered – that’s ok as long as on the outside everything looks flat
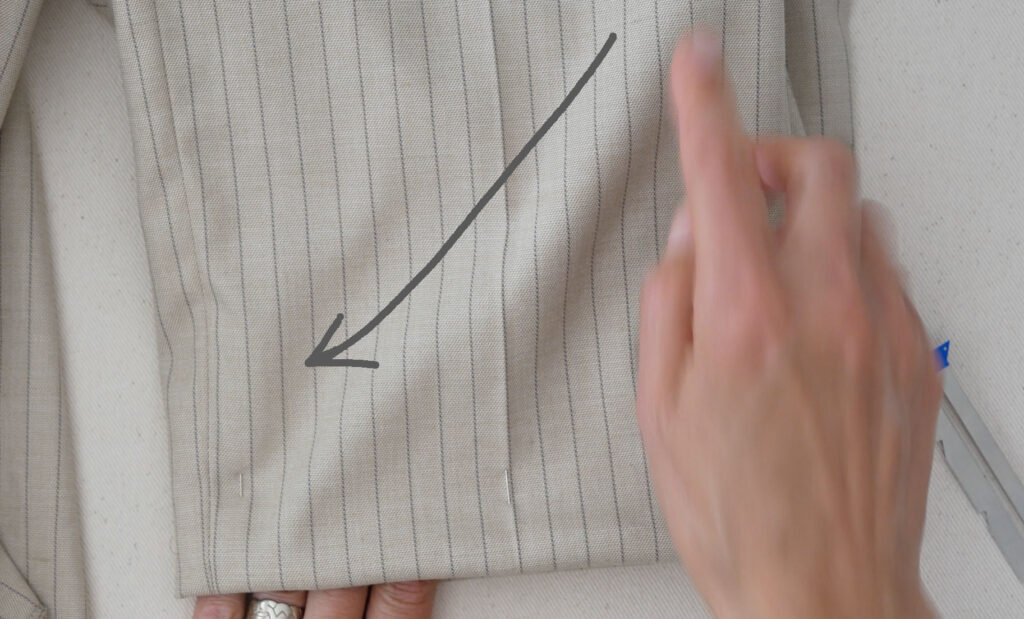
After pinning the hem if you notice any diagonal lines in the leg unpin in that area and scooch the hem in one direction or other to get rid of it.
Remember if it’s twisted now it will be twisted forever – so take a good look and repin if needed – it’s easier than resewing.
Prepping
Basting the hem in place before you hem it may seem like an unnecessary step. It isn’t. Basting keeps the hem allowance from shifting as you hem the pant leg. Shifting is what leads to twisting – and you don’t want that.
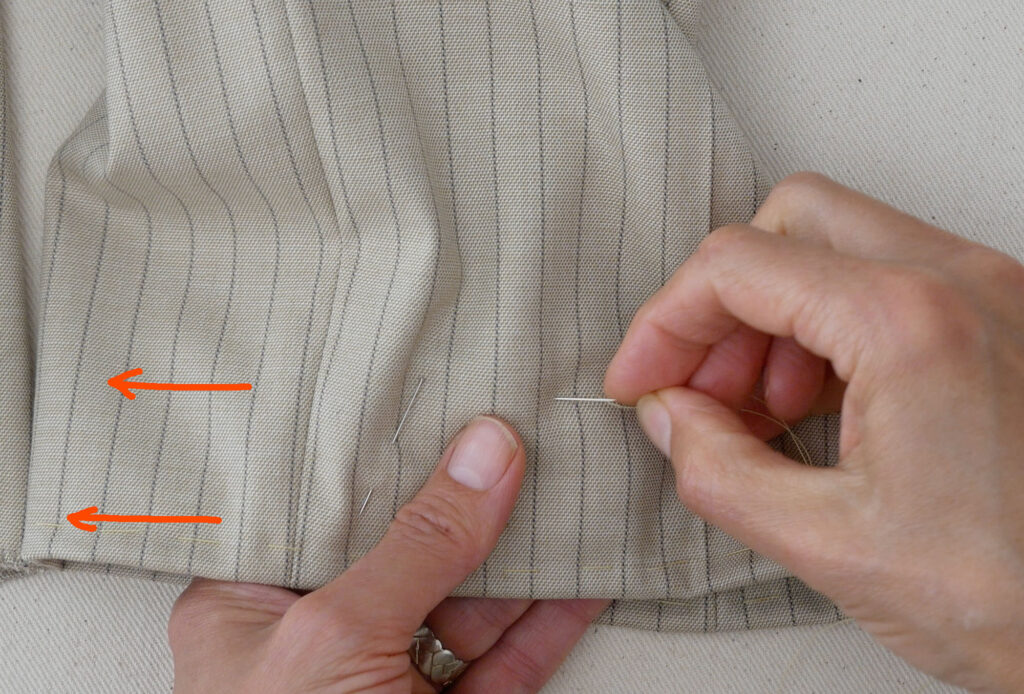
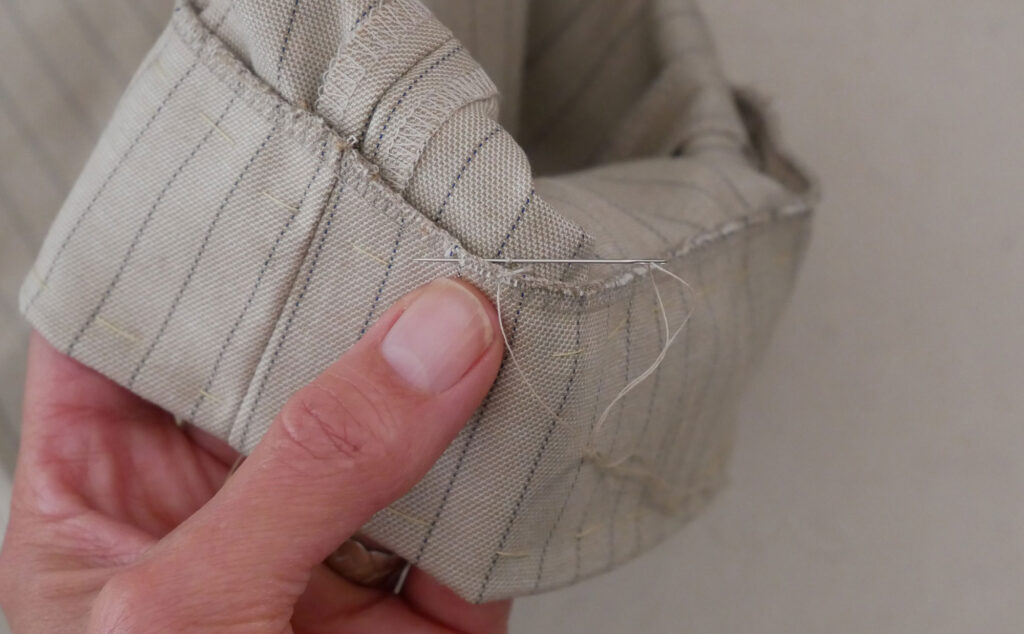
Thread a needle with white or pale yellow thread but do not tie a knot.
Tack with hand-basting stitches from the right side of the pants close to the new fold around the leg.
Add a second row of basting stitches close to the serged edge but not too close, you don’t want the stitches to be where your hemming stitches will be later.
Remove the pins as you baste
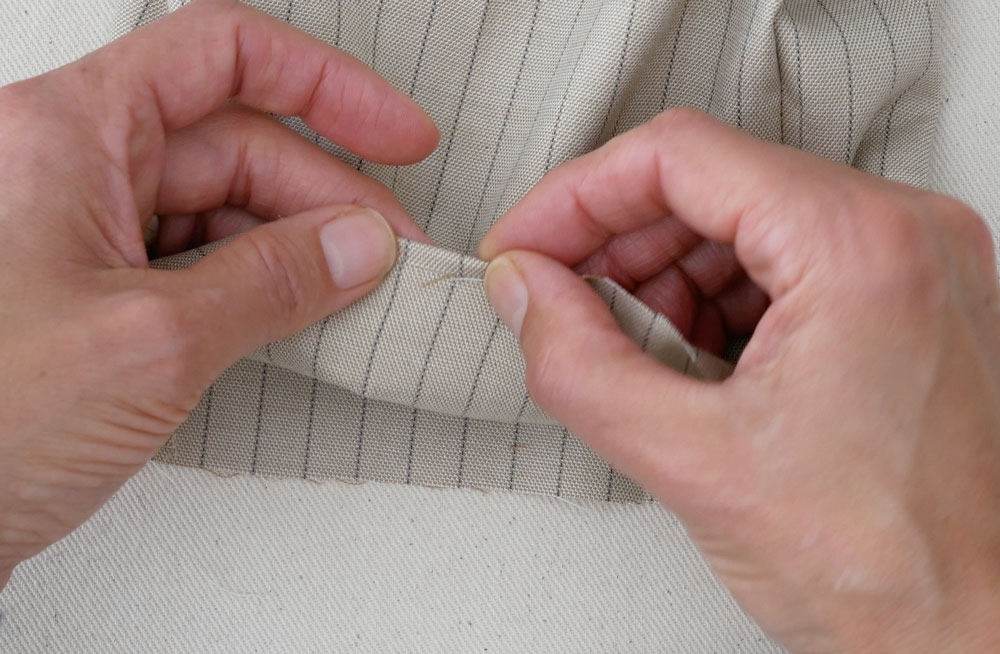
Do you notice any puckering in the leg where you basted? Puckering is a sign of tightness. I had some puckering when I basted these pants. My basting stitches were not tight, it was the pants leg. It’s a tapered leg. It’s slight, but in those 4 inches, from where the hem will be attached to the pant and where the cutting line is the circumference of the leg changed enough to make a mess of the hem.
The fix is to clip some stitches in one or both side seams of the hem allowance – just about ½”. Let that spread and relax a little. Of course, it’s better to do this before you overcast the edge but if you didn’t notice the taper, like me, it’s not too late. Just run a serger stitch over that gap.
Then stretch out the leg so the basting stitches can move and loosen – remember there’s no knot in the thread so it should move
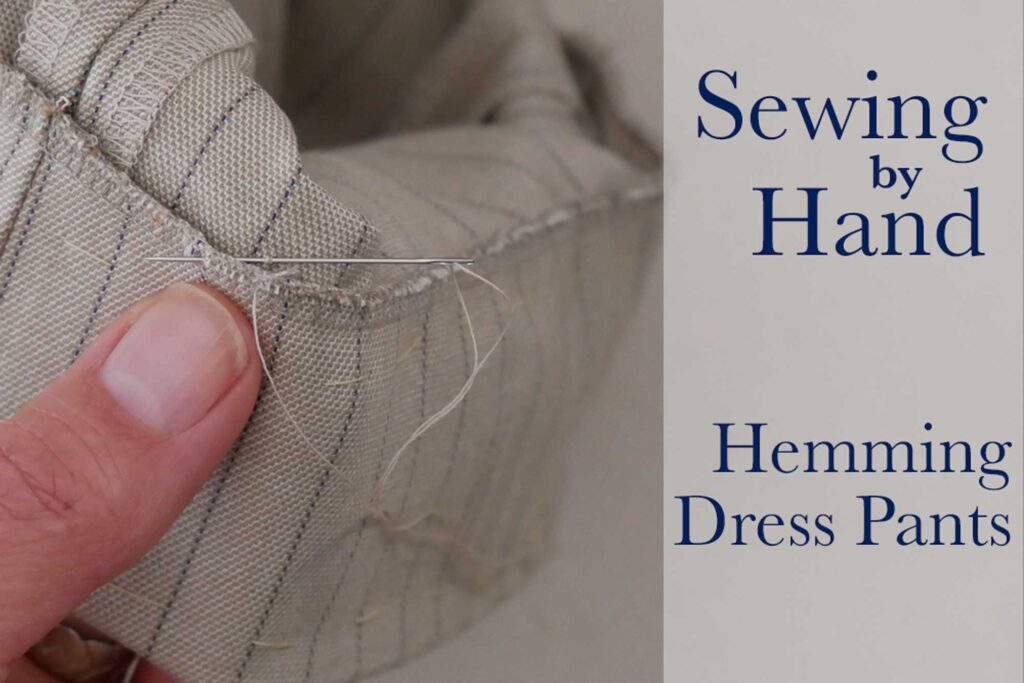
Hemming
Objective 3: Be inconspicuous
Tips: Matching thread, Pick only one thread, Even tension.
Use thread that matches or is one shade darker than the pants to hem the pants. Using a single thread and a sharp needle bring the needle from the back of the hem, so the knot is between the hem allowance and the pant.
Use a slip stitch. Come up over the hem and pick up only a thread of the outer trouser leg. You can check the outside to see how much needle you can see before pulling it through. Wherever you see the needle is where the thread will be.
Then put the needle back through the top edge of the hem again, back to front, about ¼ to ⅜” or 1 cm away from the last stitch. (I work right to left and am right-handed. If you are left-handed it may work best for you to go left to right).
Don’t pull too tightly on your sewing. The thread should be on the surface of the hem, not digging into it not floating above it. If you do pull tight, as many of us do naturally, pause every few stitches and stretch the hem a bit to loosen the thread.
Pulling the thread tight makes lumps in the pant leg.
When you come back to the start, make a little knot and before clipping the thread, insert the needle into the hem only – not catching any of the pants – and come out a ½” away and tug. This buries the knot in between the pants and the hem allowance. Clip the thread.
When you are done hemming, remove the basting stitches.
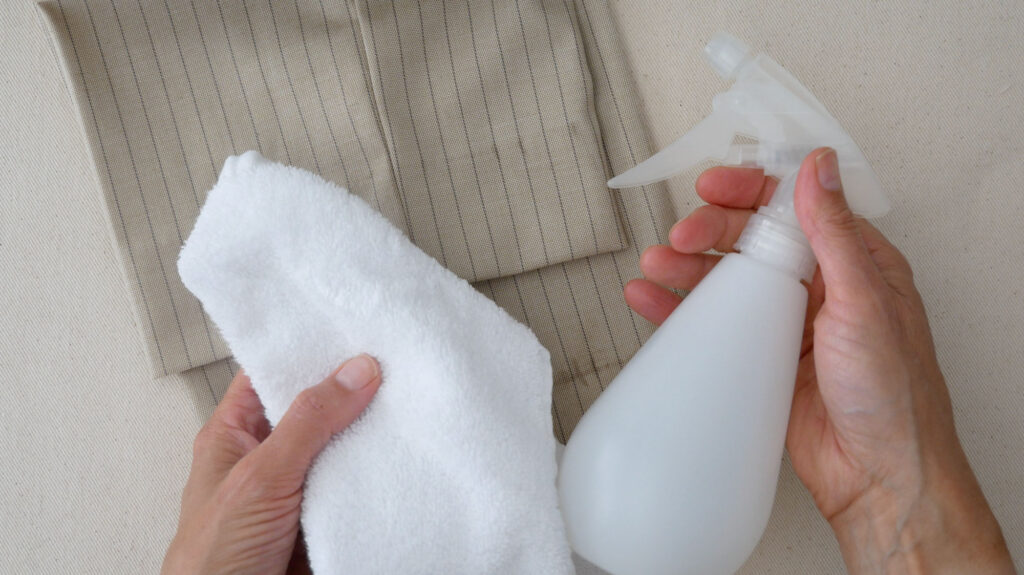
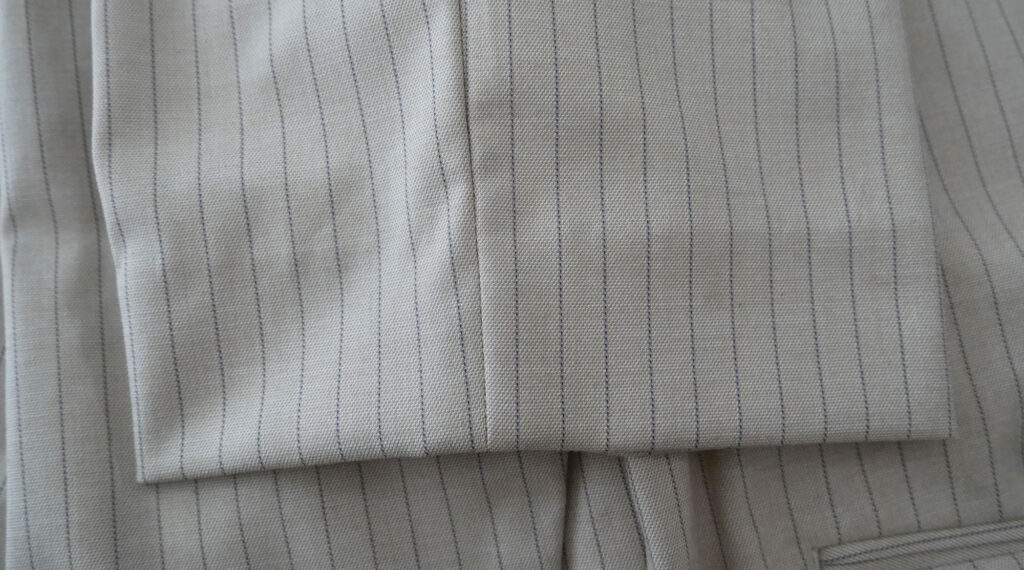
You absolutely want to be sure any remaining chalk marks are removed before pressing the hem and you need to press the hem.
I recommend using a press cloth between the iron and the pants as you press, especially dark-colored pants and wool gabardine. The iron can leave a sheen or shiny area, on the cloth and a press cloth eliminates any chance of that. A white cotton t-shirt or clean white kitchen towel can be used as a press cloth.
OK, You’re done. It’s a pretty easy task, just a little time. In fact, I think pinning it up is the longest part of this job.