
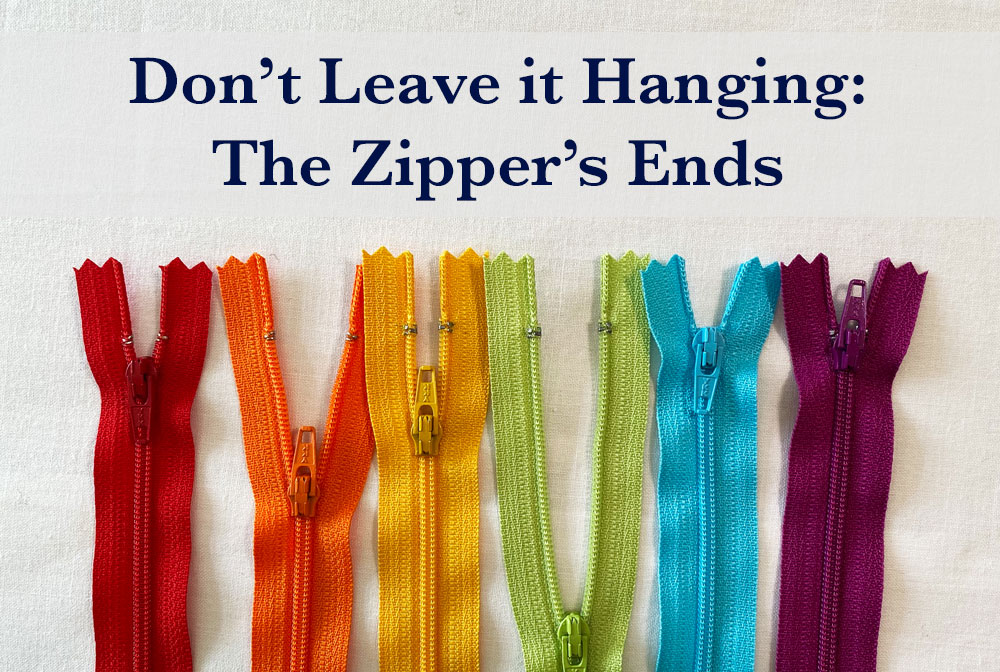
How do you finish the top of a zipper?
If you’re following a pattern there will be instructions but if you’re without a set of instructions or you just need some further clarification, let me explain some typical ways the top end of a zipper is cleanly tucked out of sight.
But first, a quick Vocab Quiz:
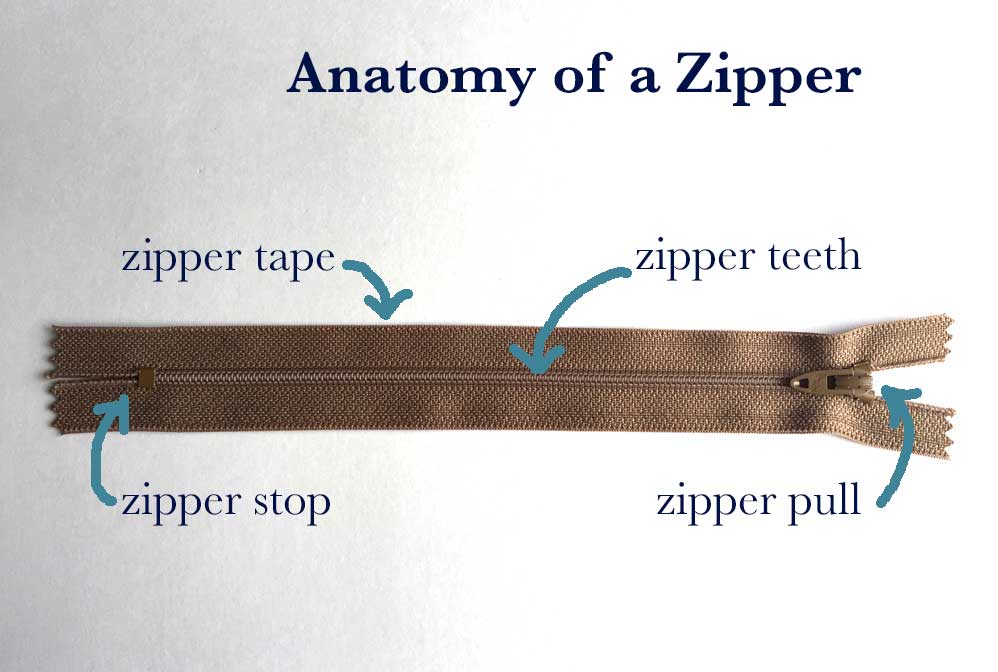
A centered zipper is the most common way a zipper is sewn into a garment This is not where the zipper is placed on the garment but rather how it is evenly placed between two sections of a garment.
In garment sewing, typically the top of a zipper will end at the top of a garment, for example, the neckline (front or back) or at a waist without a waistband (side, back, or front). These zippers are finished in the same way even when the garment is lined, or has a facing, or is finished with bias binding.
The traditional way to sew in this type of zipper is to attach the facing first and then sew in the zipper.
The quick and easy way is the opposite. The zipper is sewn to the garment first and then the facing is attached.
I’ll show you both ways. Plus what to do if there is a waistband or other piece attached above the zipper, for example, a narrow funnel collar. How to finish a zipper that ends at a hem. And finally how to finish the end if it is hanging out of the item as they do sometimes on a purse or tote.
The Traditional Way: Facing First
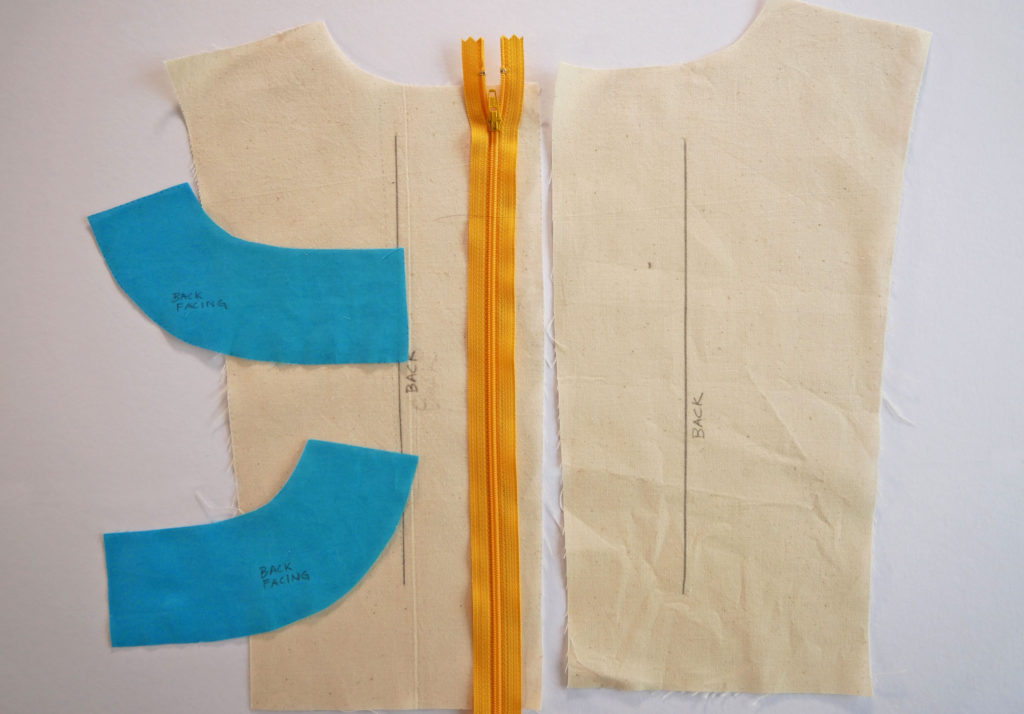
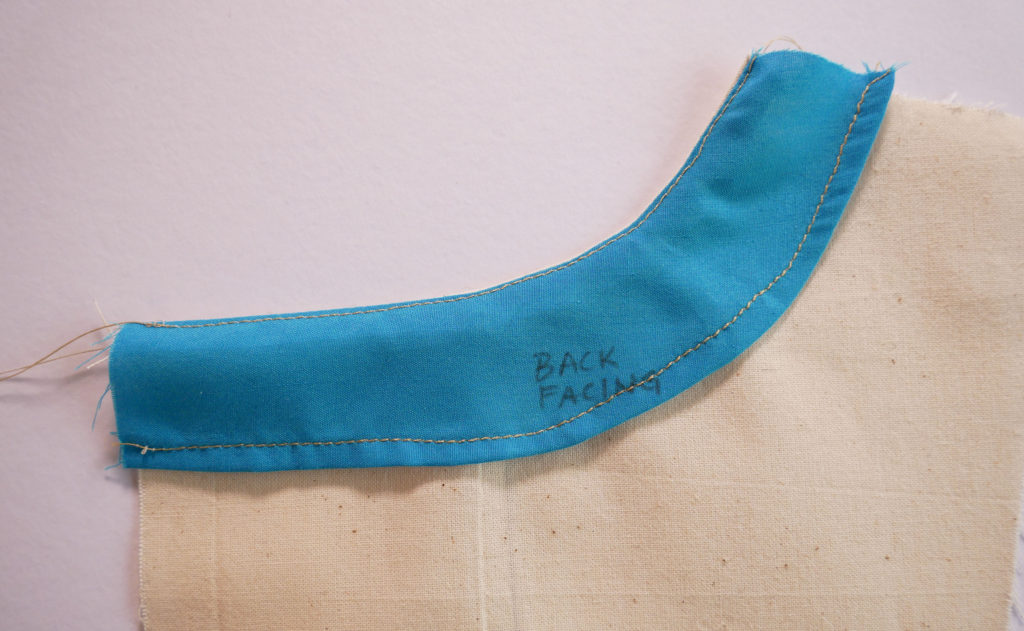
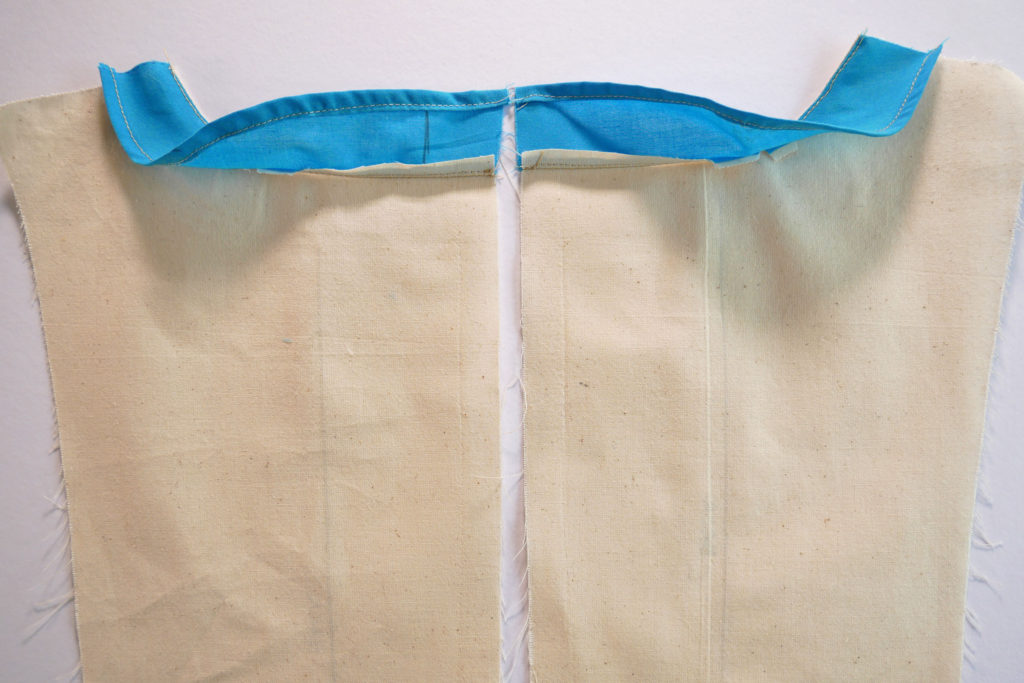
I’m going to show the process as if it’s a centered zipper at the center back of a top. The facings are blue to ease any confusion in the photos.
After finishing the long raw edges of the facings attach them to the garment. The right sides of the fabrics are touching each other.
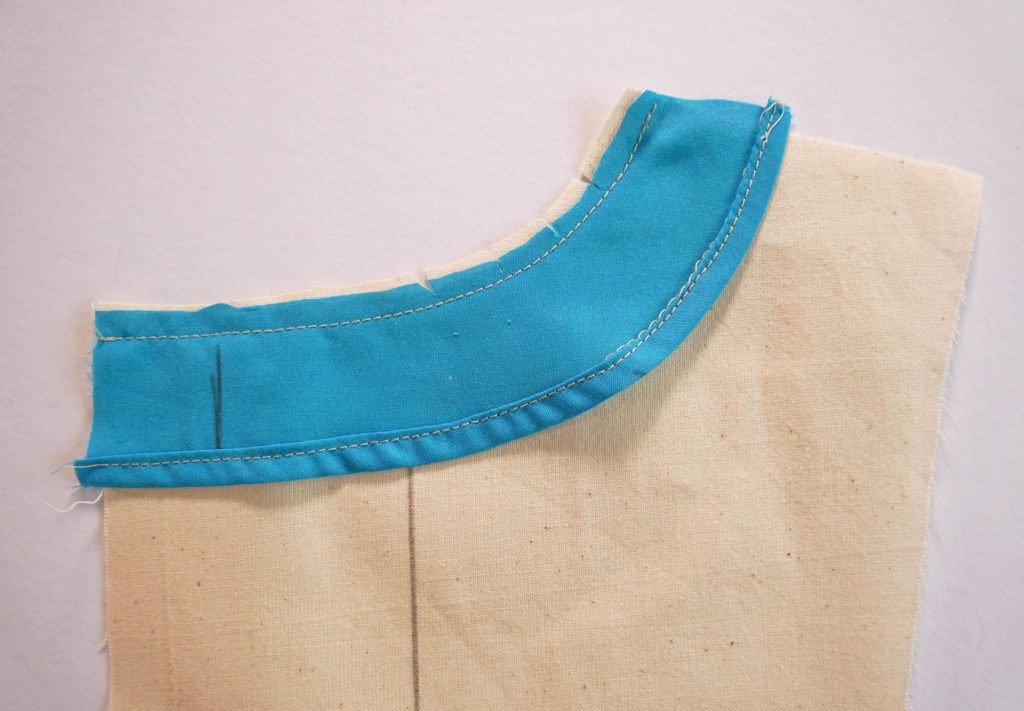
Trim and grade the seam allowance to reduce bulk and allow the neckline to lay smooth after you flip the facing to the inside.
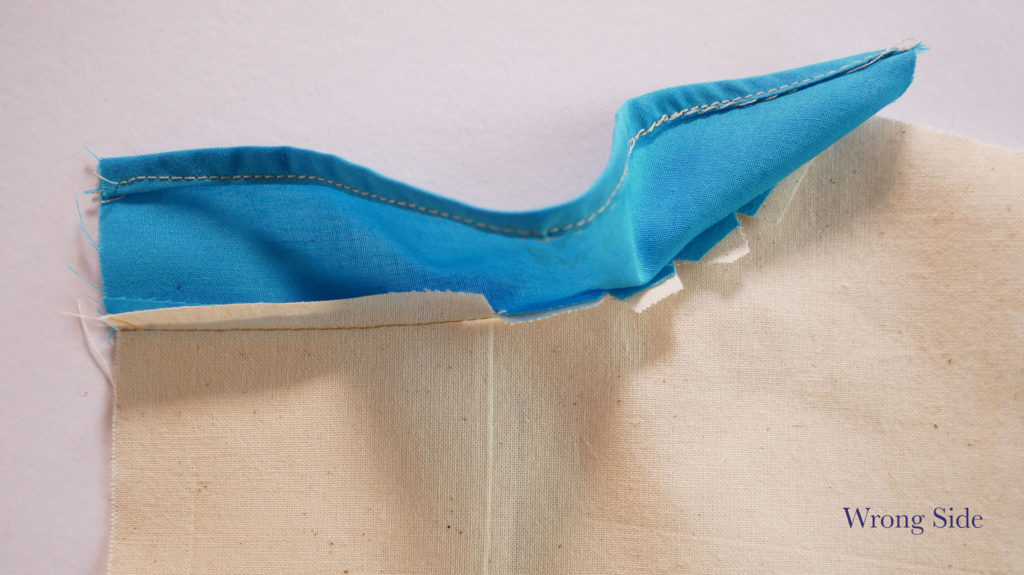
Turn the facing to the inside of the garment and press flat.
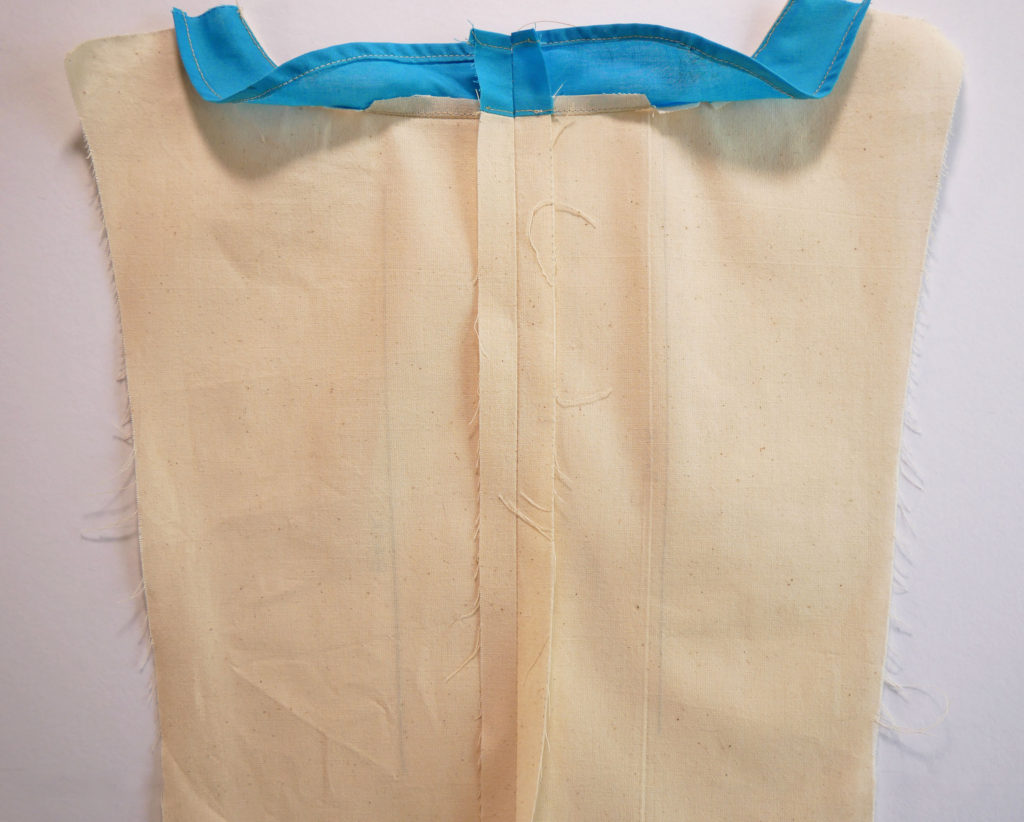
If you notice straining, puckering, or the like anywhere on the neckline open the layers back up and clip, or clip deeper (closer TO the stitches but not THROUGH the stitches), where you see the buckling or straining.
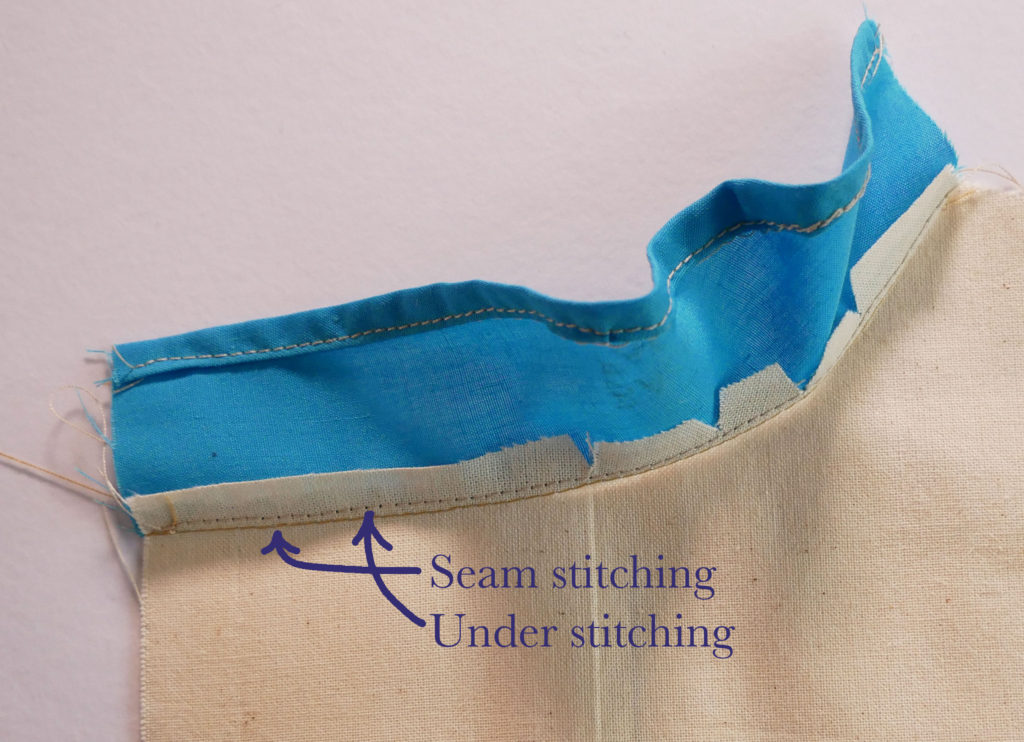
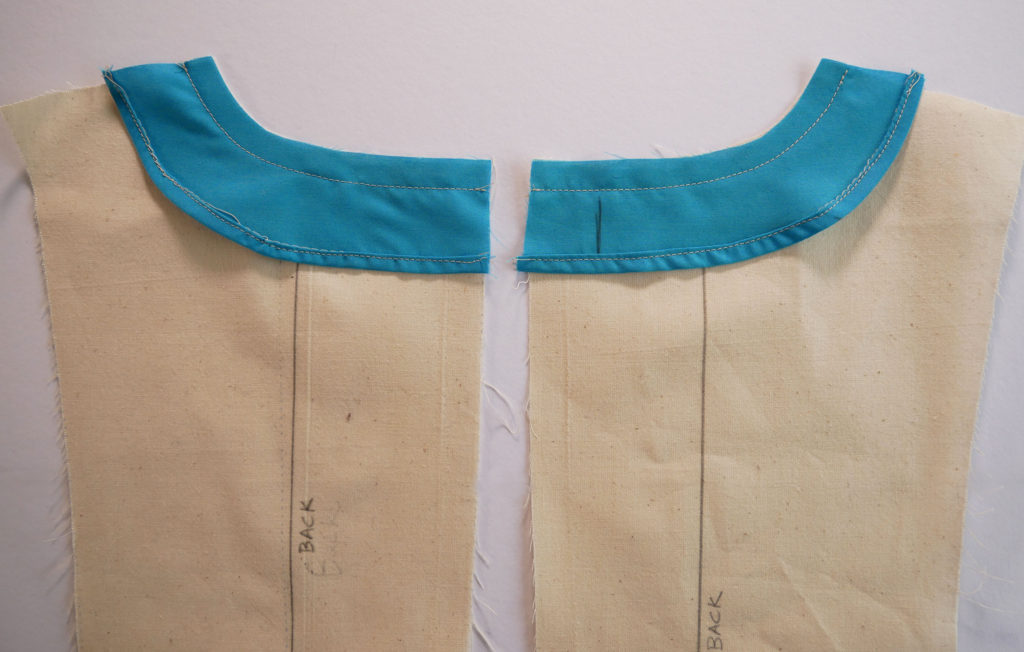
To keep a facing from rolling out of your garment and showing itself to the world understitch.
Understitching is: sewing the 2 layers of seam allowances together close to the stitching line that sewed the two layers together. You are not sewing the seam allowance down to the garment, just to themselves.
Turn facing back down and press again. You can see the line of understitching at the top of the facing.
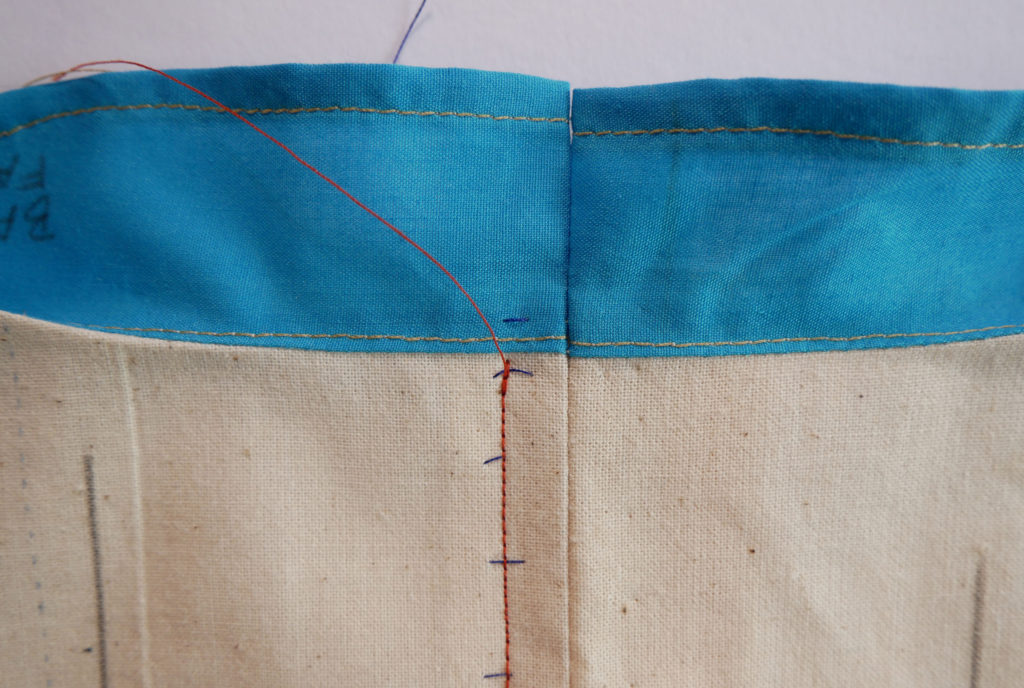
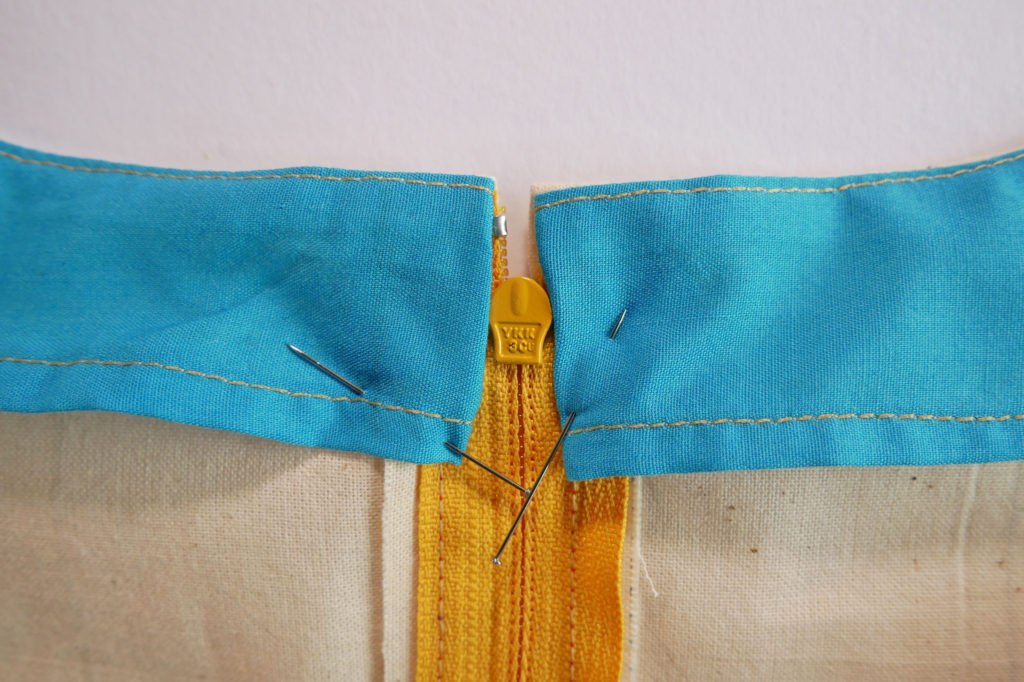
Line up the two pieces, in this example, the two back pieces, so any seams match (neck seams and sometimes waist seams) You may also have other matching considerations like stripes.
Baste together the two pieces using the seam allowance your pattern states or your garment already has if you’re replacing a zipper.
Baste all the way from the bottom of the zipper placement to the finished edge of the facing
If your altering, upcycling, or making this on the fly, a seam allowance the equal width or wider then the zipper tape is recommended.

Press the basted seam open with an iron to get a nice edge.
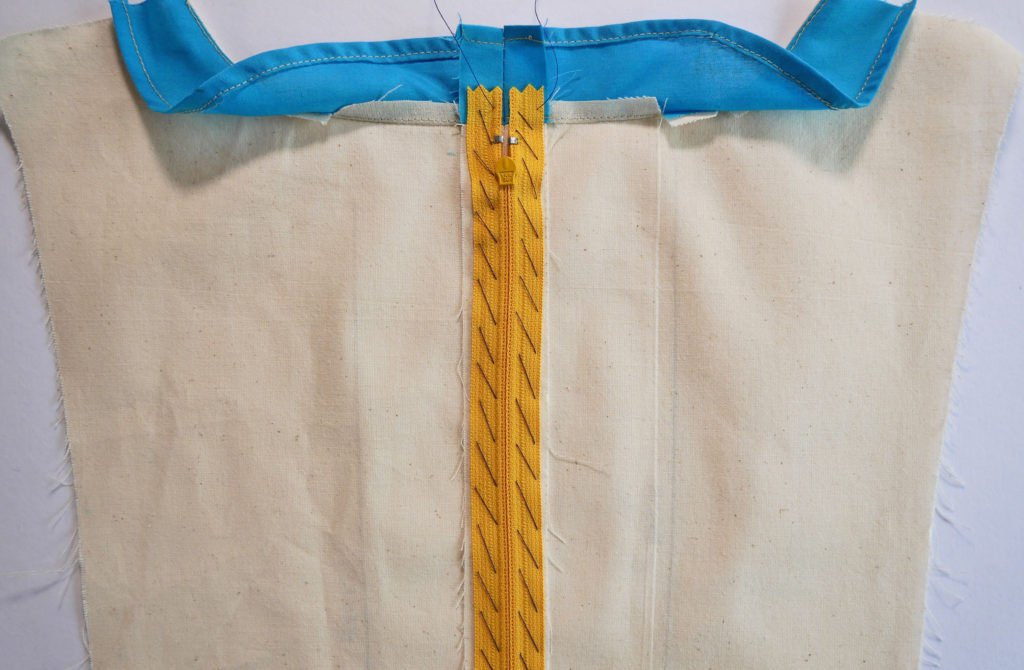
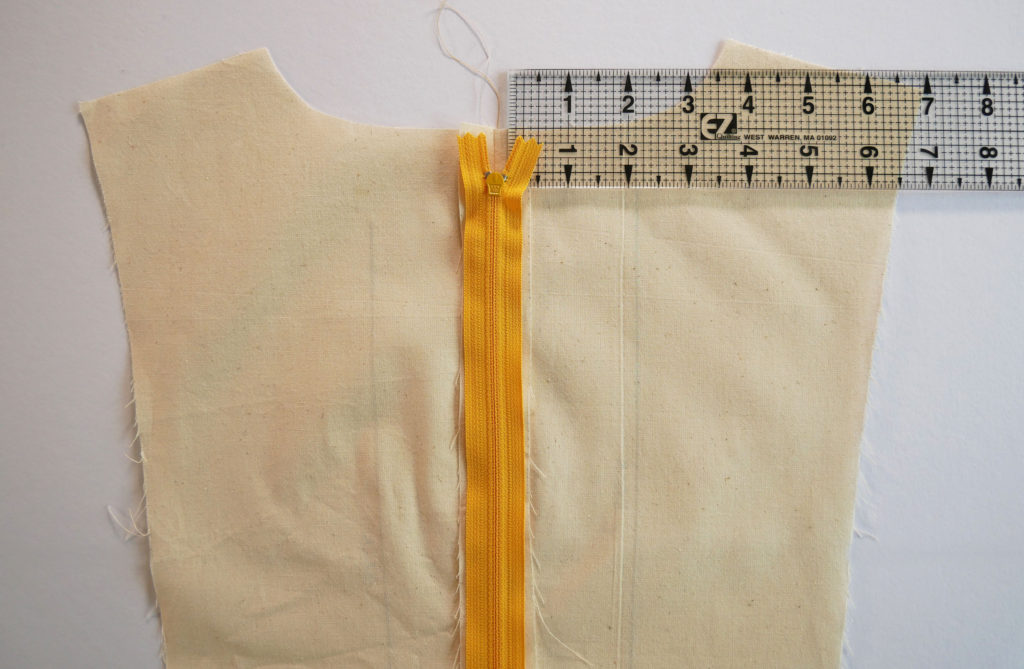
Lay the zipper, right side down, on top of the wrong side of the garment. Center the teeth on the seam.
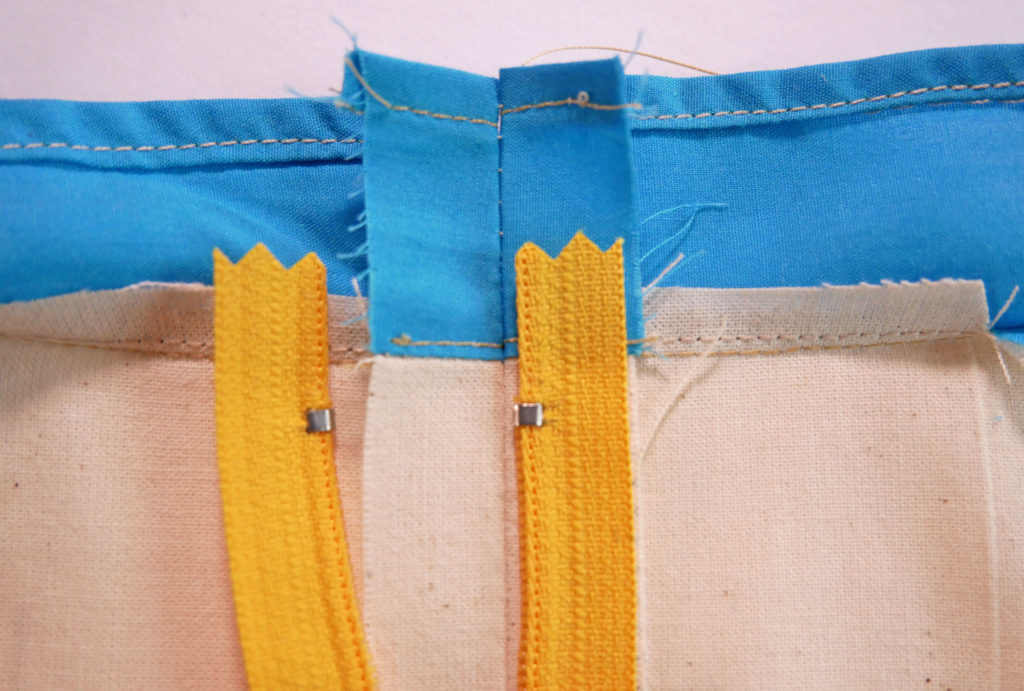
Place the zipper stop below the neck seam line about 1/4″. This allows room to add a hook and eye and to also ease the neck facing or binding back enough for the zipper pull.
Pin the zipper in place.
Baste the zipper down by hand with a running basting stitch to really keep it in place as you sew it in by machine. (Top photo)
OR pin zipper down and stitch the zipper in with a prick stitch (a very useful hand stitch to know). Believe it or not, the prick stitch may take less time than sewing the zipper in by machine if you want your stitches perfect because the prick stitch practically disappears into your garment.
A note on why to use a running basting stitch and not a tailor basting stitch:
I used a tailor basting stitch (lower photo above) because it really holds layers of cloth in place in both directions.
“Genius, Mary” I thought until it came time to sew the zipper down.
The tailor stitch is wide and therefore left no room to move the zipper pull out of the way when I sewed the zipper down by machine.
Learn from my mistakes and use a running basting stitch or maybe a very narrow tailor basting stitch if you place it on the outer edge of the zipper tape)
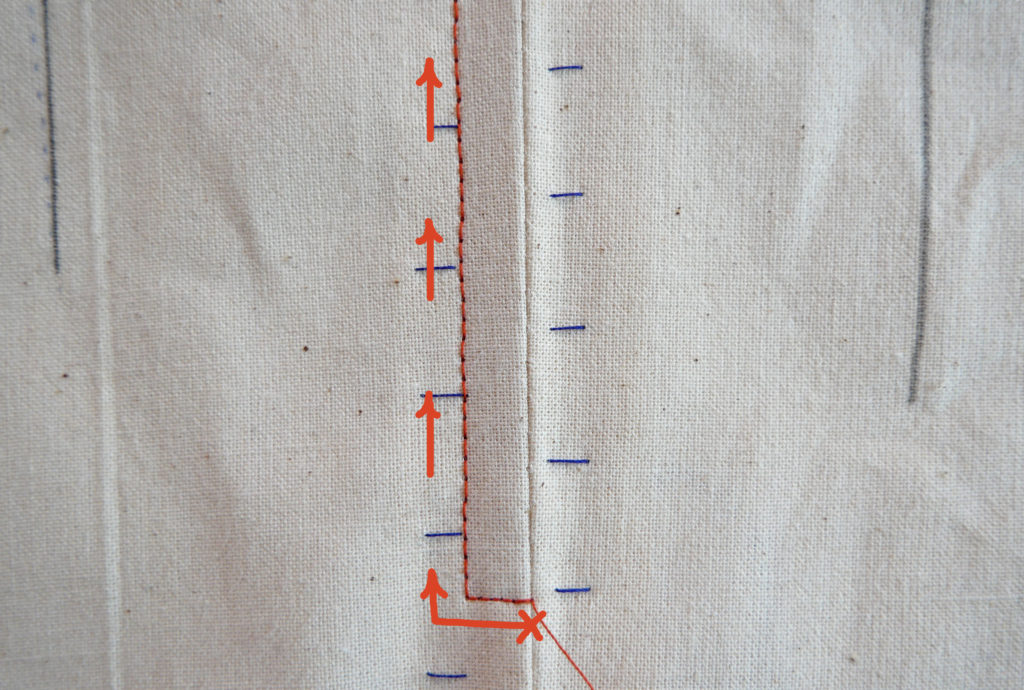
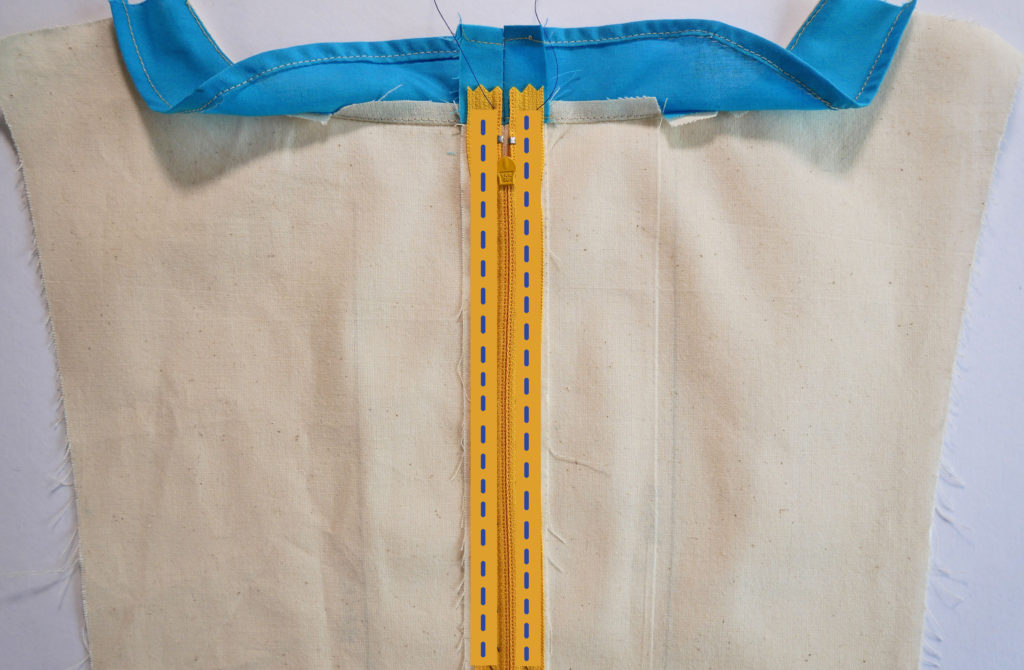
With your zipper foot on the machine start sewing the zipper down at the bottom of the zipper on the seam. You could back tack here (take a couple of stitches back at the beginning of your sewing) or leave long thread tails and pull the top thread to the wrong side and knot the tails together.
You can sew up either side of the zipper first but you do sew up just one side at a time.
Stitch a couple of stitches across the zipper, leaving the needle in the garment, raise the pressure foot and pivot the garment to check if you’ve sewn far enough to clear the teeth and to start sewing up the side. I think I had to take three stitches before I changed direction. It’s a good habit to count how many you take on the first side so you can repeat it on the second side.
When you start getting to the zipper pull don’t try to sew around it. Instead, stop your sewing, again with the needle still down in the fabric, raise the pressure foot and slide the zipper pull down out of your way completely. (you have to sort of push it down through the top of the fabric)
Stop stitching at the top of the garment. Don’t sew beyond the seam. Again, secure your stitching with either a couple of reverse stitches or knotting your thread tails on the underside.
Repeat to sew up the other side. If it looks acceptable to you take out both the hand basting stitches holding the zipper and the machine basting stitches holding the two garment pieces together.
If there’s a section of stitches that got too wobbly for you you can just pick out that section and redo. Sew a little bit on the good stitches at the start and at the end to prevent them from coming undone. I recommend knotting the new threads at the beginning and end of your new stitching instead of back tacking. Back tacking will leave bunches of stitches in the middle of your pretty line of stitches.
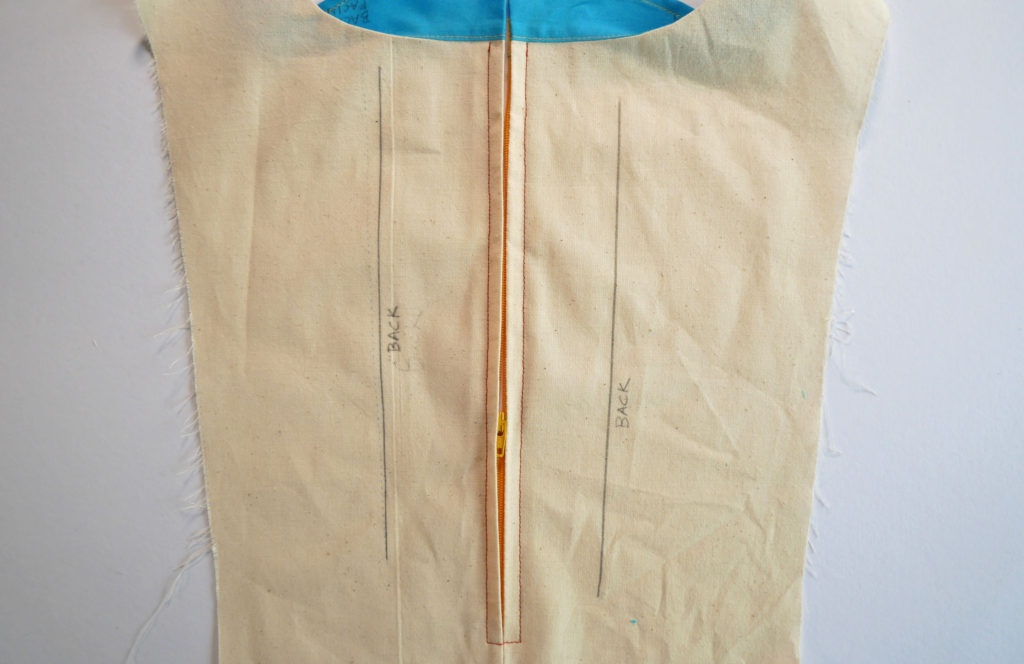
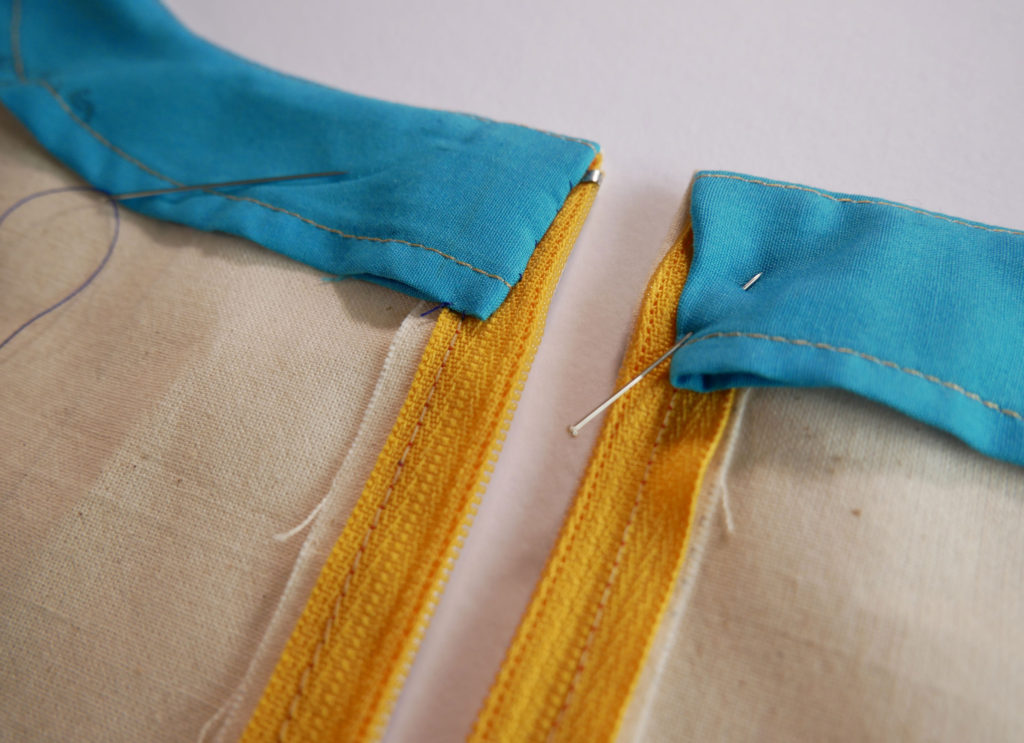
With the zipper in, it’s time to finish the facing.
Fold the facing back into the garment. The short ends of the facing will fold under from being basted together and pressed when you prepared the seam for putting in the zipper. However, you may need to roll them under a bit more to clear the zipper pull.
Check that the top edges are even. You may have to manipulate one side of the upper edge a little to make it even. (The right side of the picture above shows a little outer fabric coming to the backside to get the top edges even. This little bit is allowed – at least in my book it is 😉 )When you get the facings in place, pin them down.
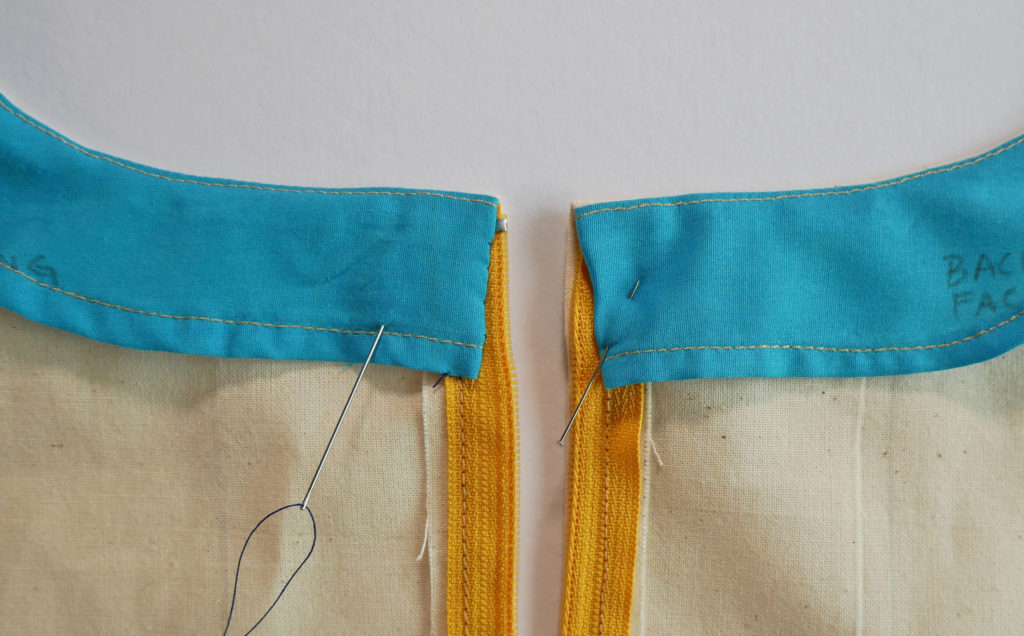
With a few hand stitches secure the facing down to the zipper tape.
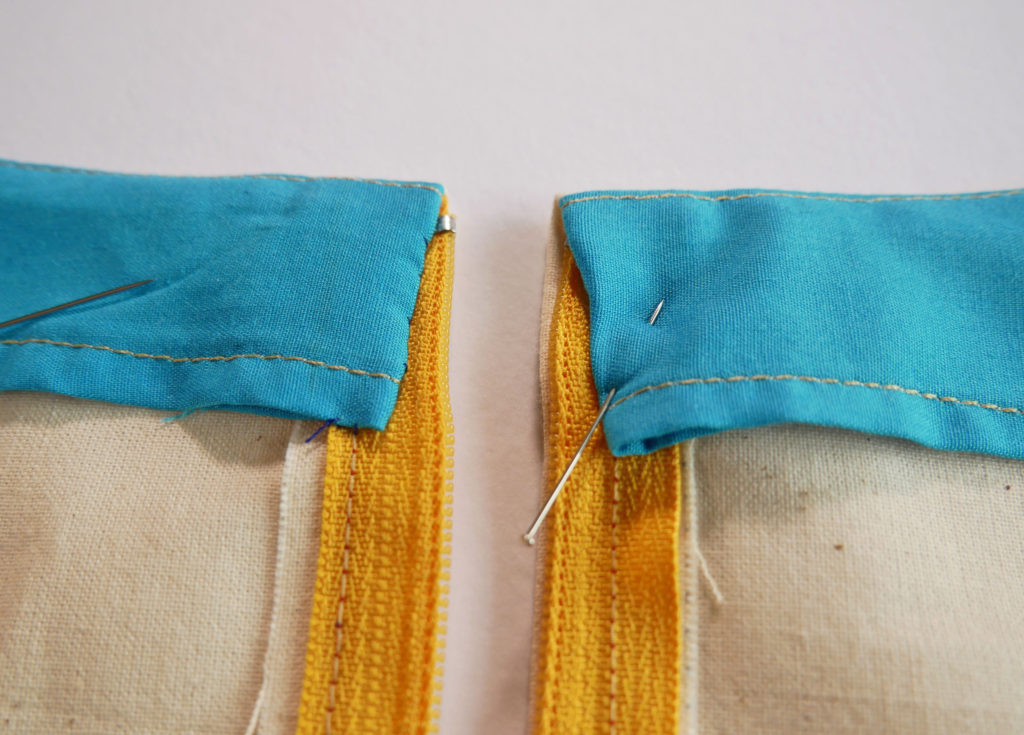
You’ll do the same to both sides.
The Quick Way: Zipper First
Also good when your top edge is finished with binding and not a facing.
The quick way, according to the Vogue Sewing Book is to sew the zipper to the garment pieces first. Be sure to place the top zipper stops (the metal part that stops the zipper from going off the teeth) far enough down from the edge to clear the stitching line. So if you have a 5/8″ seam allowance place the zipper stops 3/4″ down from the top of the garment.
If you have a narrow seam allowance or a wider seam allowance that difference is going to change. Set the zipper down so the stops are placed equal distance to the seam allowance + 1/8″. (The Quick Way assumes you are not sewing on a hook and eye – so if you want that add another 1/8″)
The steps real quick: (see the Traditional Way above for details)
- match up and baste the two garment pieces together, press
- lay the zipper down centering the teeth on the seam
- baste (maybe not in the quick way) the zipper down
- sew the zipper down
- attach the facings (or binding) to the upper edge
- secure the facings down
Zippers That End at a Waistband or Standing Neckband
A zipper that ends in a waistband or any sort of band across the top of it (a cuff, a collar) is finished much like the Quick Way shown just above.
The zipper is sewn to the garment before the waistband (or other finishing band) is attached. The waistband is then sewn to the front of the garment And when it’s flipped upwards the zipper top is encased in the waistband along with the seam allowance.
Zippers That End at the Bottom
Sometimes the top of the zipper is at a hem which is kind of upside down and is finished off in the simplest of ways.
You simply fold the top ends of the zipper tape into the hem allowance. When the hem is sewn the ends of the zipper tape are secured as well.
Zippers That End in Space
Zipper ends that remain hidden, like the bottom edges of most garment zippers or zippers in pillow covers are usually left unfinished since they stay hidden and will not unravel providing you didn’t cut the zipper tape.
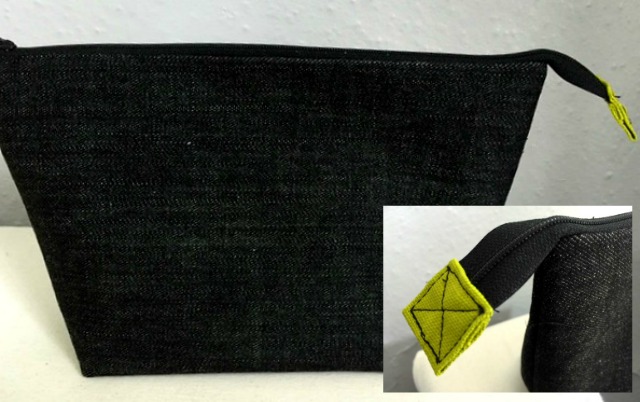
You’ll see a lot of zippers, mostly on bags, that just end in space. They’re little tails left out in the open. These zippers are usually finished off with a tab of fabric. And this tab can be used for either or both ends.
- Cut a piece of fabric 2″ wide and 3″ tall.
- Fold in 1/2 ” on the long sides and press.
- Fold in 1/2″ on the short ends and press.
- Fold the rectangle in half lengthwise. and press.
- Slip the end of the zipper into the tab. Pin in place.
- Sew around the edges of the tab sewing it together and capturing the ends of the zipper tape.

Bottom: After sewing many tabs, I discovered this is a great time to use
Wash Away Wonder Tape (by Dritz)
Well, That is how to take care of those naked ends. Please let me know in the comments if you have any questions. Thanks for reading.
You may be interested in this post about How to Shorten a Zipper.