
I made a set of cloth linen napkins in 2012.
We used them every day and washed them every week. The linen became softer, the color mellowed evenly and so I never thought I would have to make cloth napkins again.
Until Atlas joined our family.
Atlas is our new Rottweiler pup. He’s a wonderful dog; intelligent, and snuggly but also mischievous.
Being large, he can and will slyly remove a napkin from your lap and proceed to eat it.
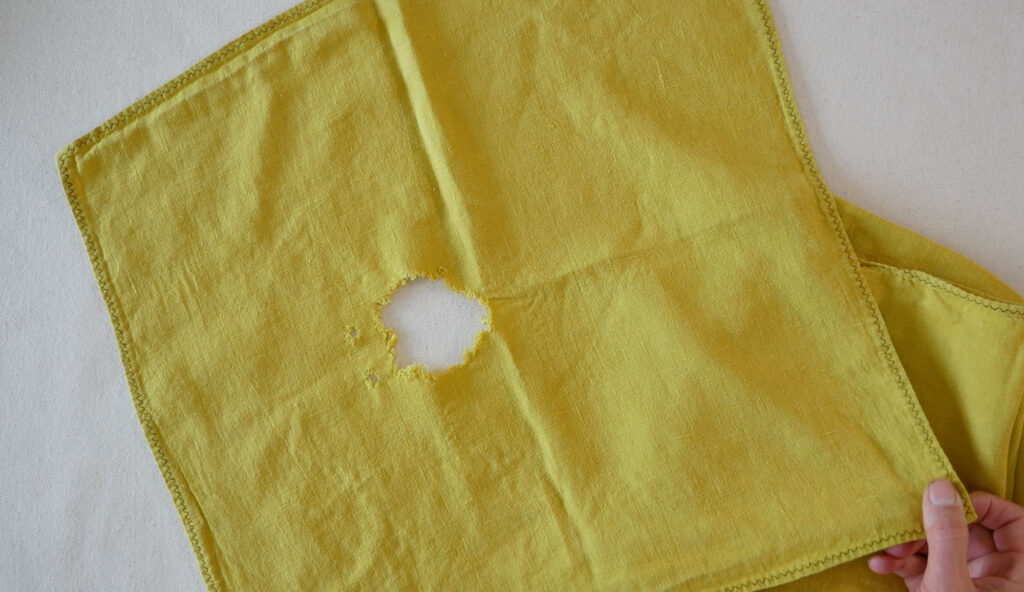
Time to make some new napkins.
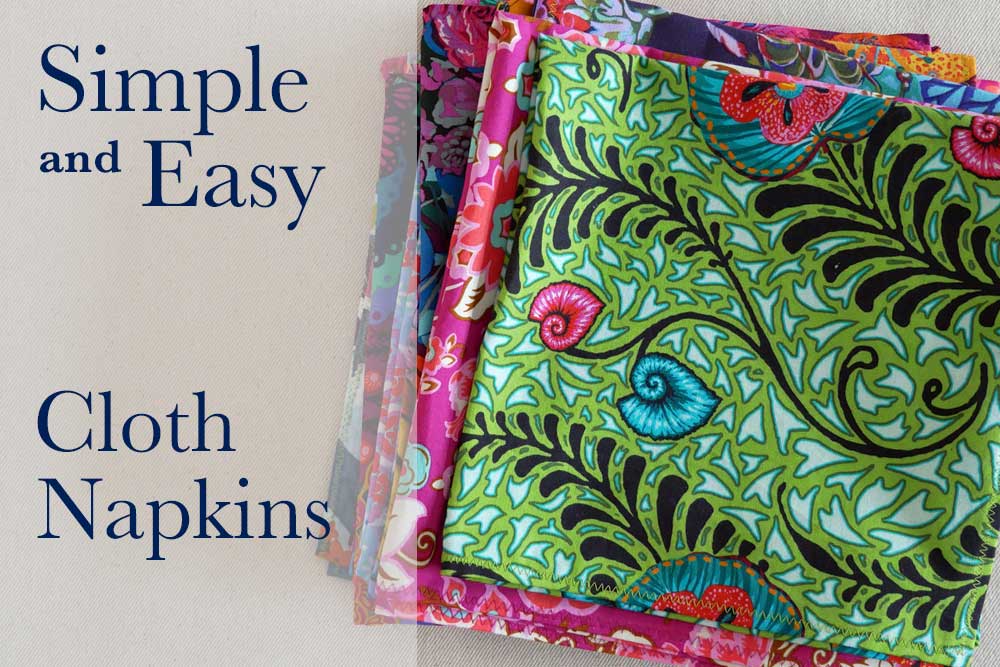
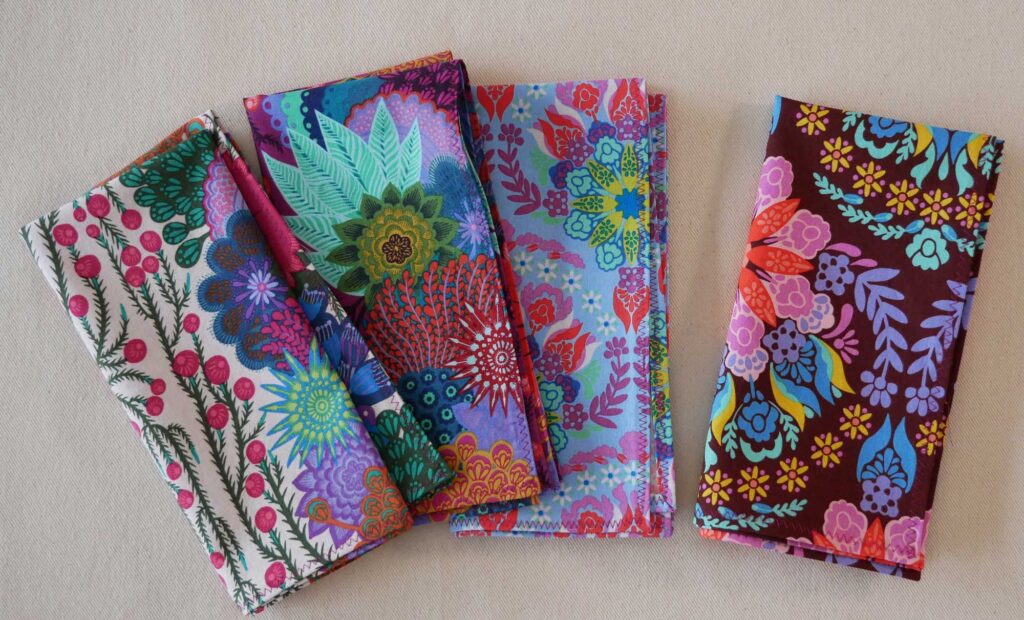
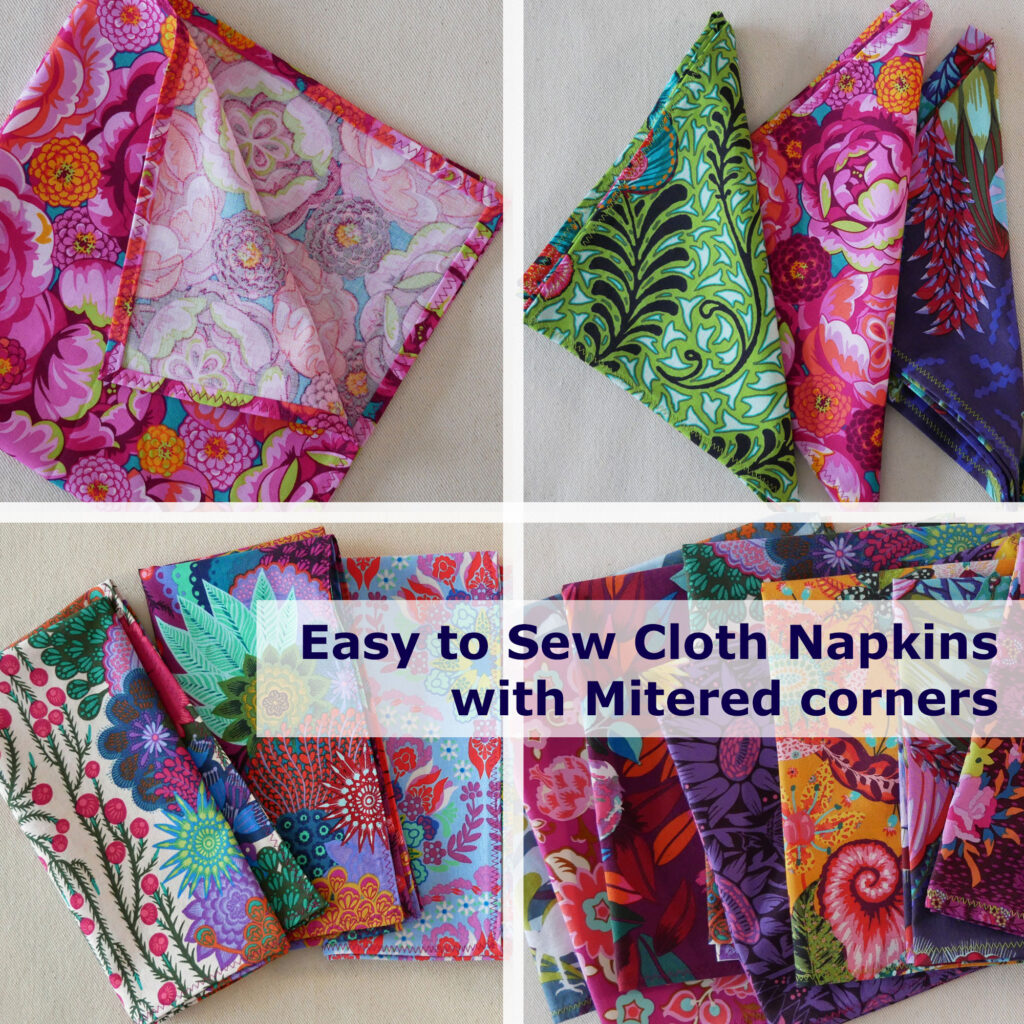
Although I loved the linen, this time I decided to use printed quilting cotton. They may not last as long and they might fade unevenly, but cotton is easier to work with (not as slippery as linen when cutting and pressing) and I like the idea of a colorful mismatched but coordinating set.
As much as I wanted this project to be quick and done I mitered all the corners. It’s an extra step but not a hard step and it makes the napkins look a little less “home-made” – It’s those tiny details, that add up.
You can watch how I mitered the corners and made the napkins in this video Or read on and follow the pictured steps
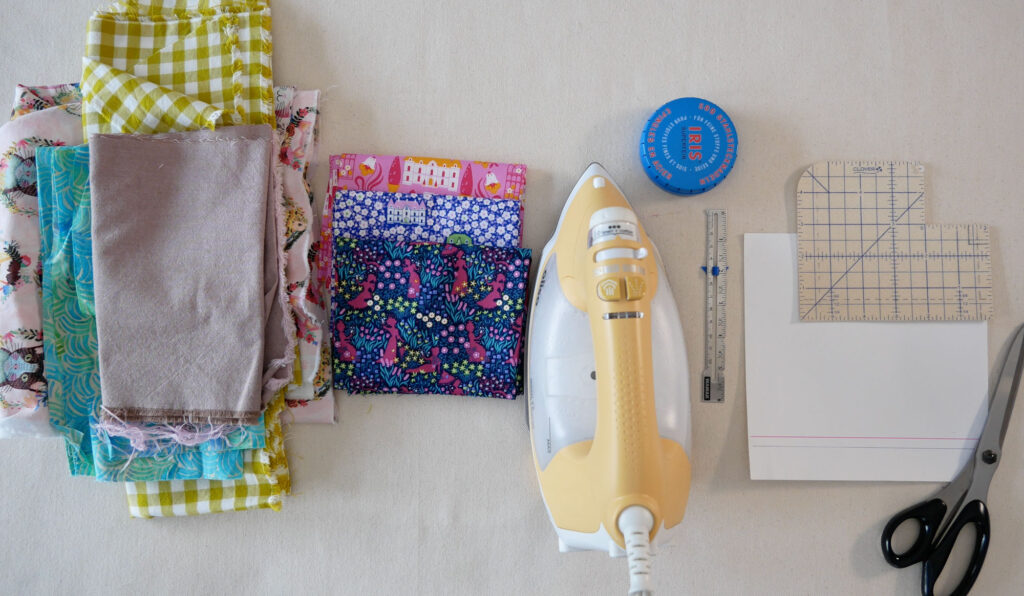
Supplies
This section may contain affiliate links to items and tools that I bought, use and recommend. You can buy them from anywhere but if you buy through the link (and Amazon) I receive a tiny percent back from that mega-retailer to help support this channel. Just letting you know 😉
Fabric washed, dried and ironed flat before you cut (Since napkins will be washed you want to prewash the fabric before you cut or sew)
- How much fabric you need depends on the size you want to make and how many you want.
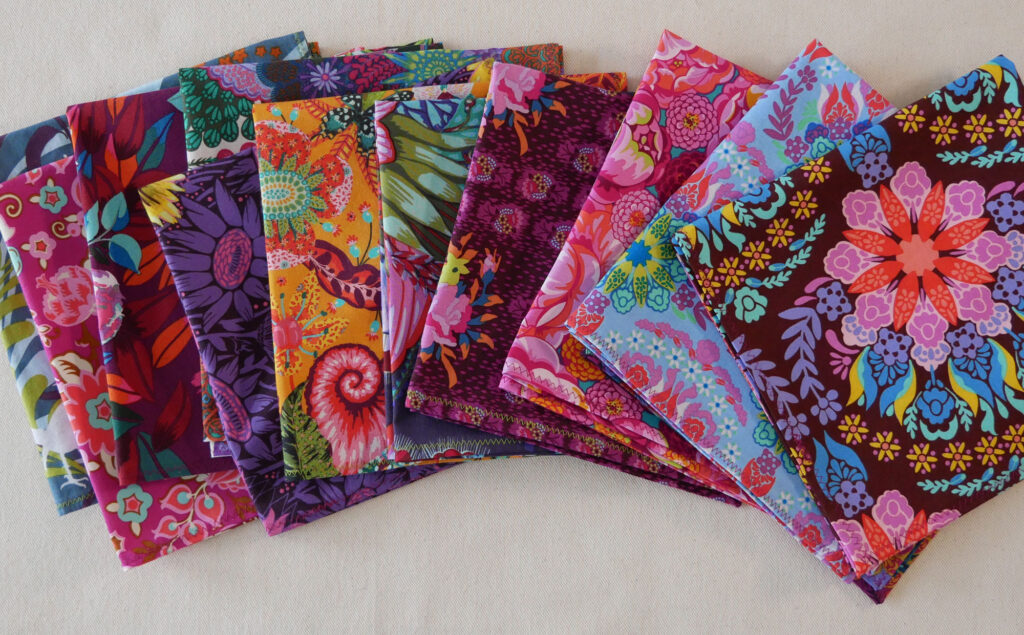
- You could purchase yardage, use your stash, or buy fat quarters at the quilt shop. I used a combination of fat quarters and fabrics from my stash.
- I suggest cotton or linen for absorbency and durability. Something that can be washed and dried weekly, is soft enough to rub on your face, and you can live with for years to come.
- Prints are typically printed on white cloth, therefore napkins made from prints will have and obvious front and back side. Fabrics made with dyed yarns like solid linens, solid cottons, and most ginghams look the same on the front and the back.
An Iron – For this project you might use an iron more than a sewing machine.
A ruler or pressing guide. You can make a pressing guide with cardstock or thin cardboard. Draw a guideline on it with permanent ink (I use a fine-tip Sharpie)
And the usual; pins, scissors, thread, and sewing machine
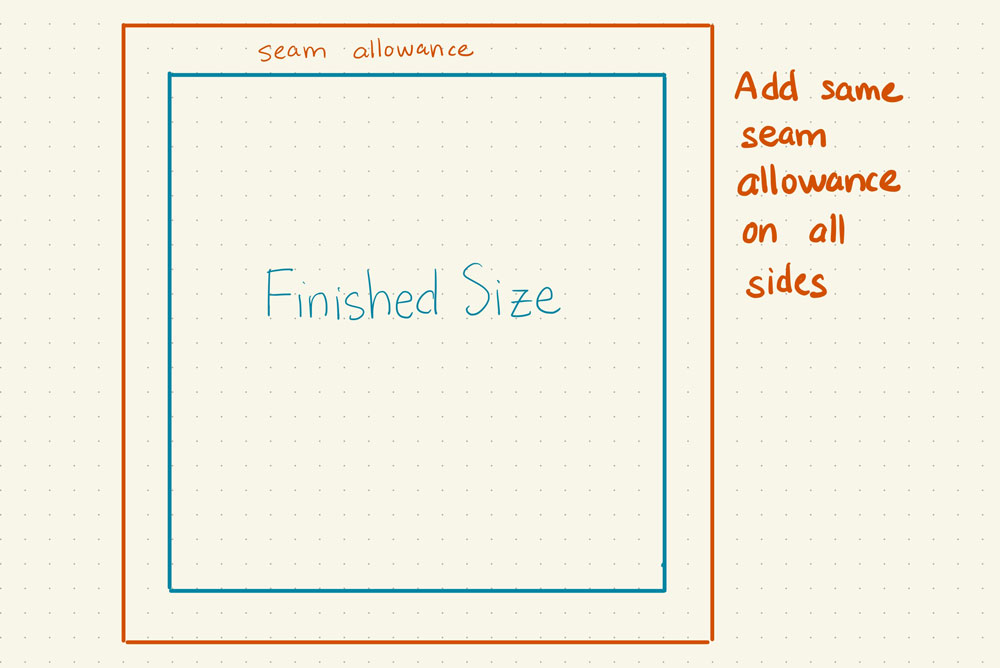
Determine Your Size and Cut Your Fabric
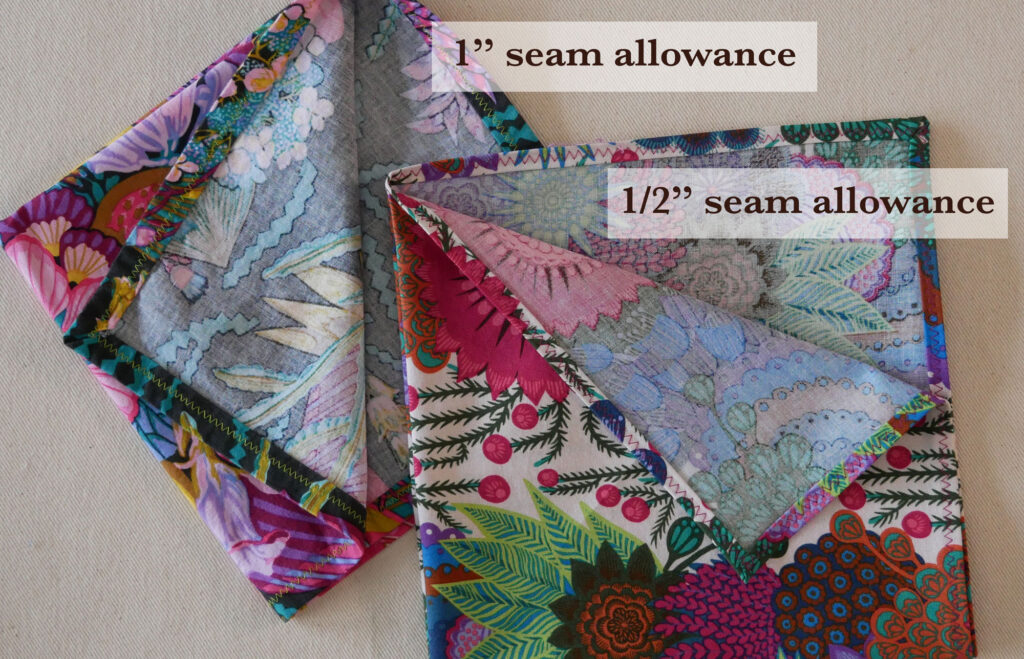
Add 1” to the width and to the height of your desired finished size for a ½” seam allowance on the edges.
(17” x 17” is a nice dinner size, 9” x 9” is great for a lunch box, 7” x 7” is nice for parties)
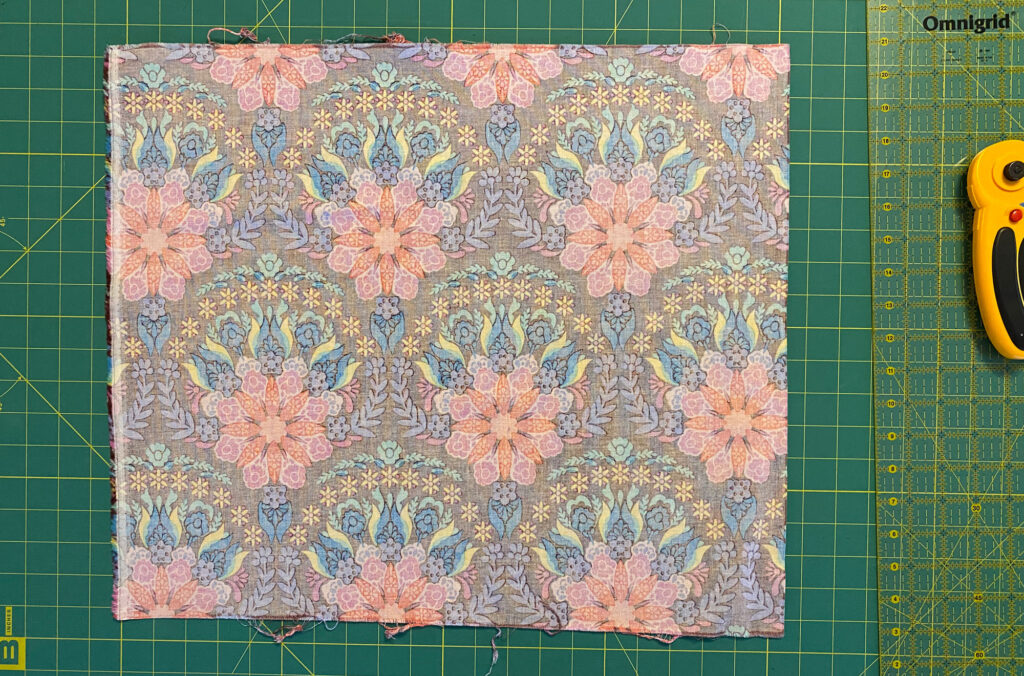
If using fat quarters, trim the cut side opposite the selvedge so it is straight.
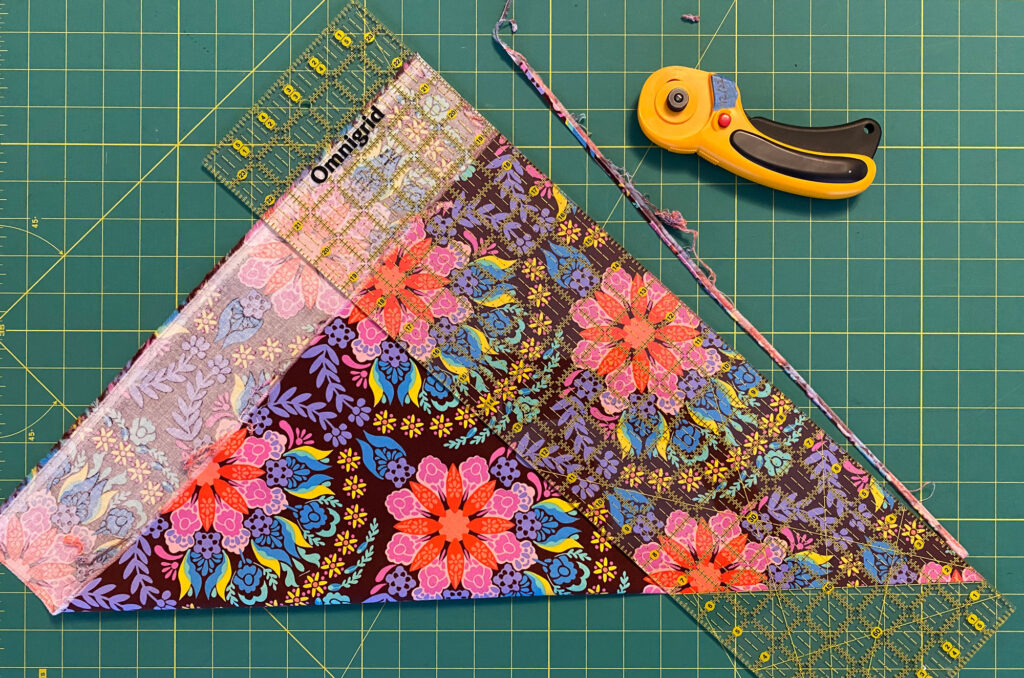
Lift the lower corner of the trimmed side up and over to meet the top edge of the fabric so the fabric makes a 45-degree folded edge. Trim the edges to be straight.
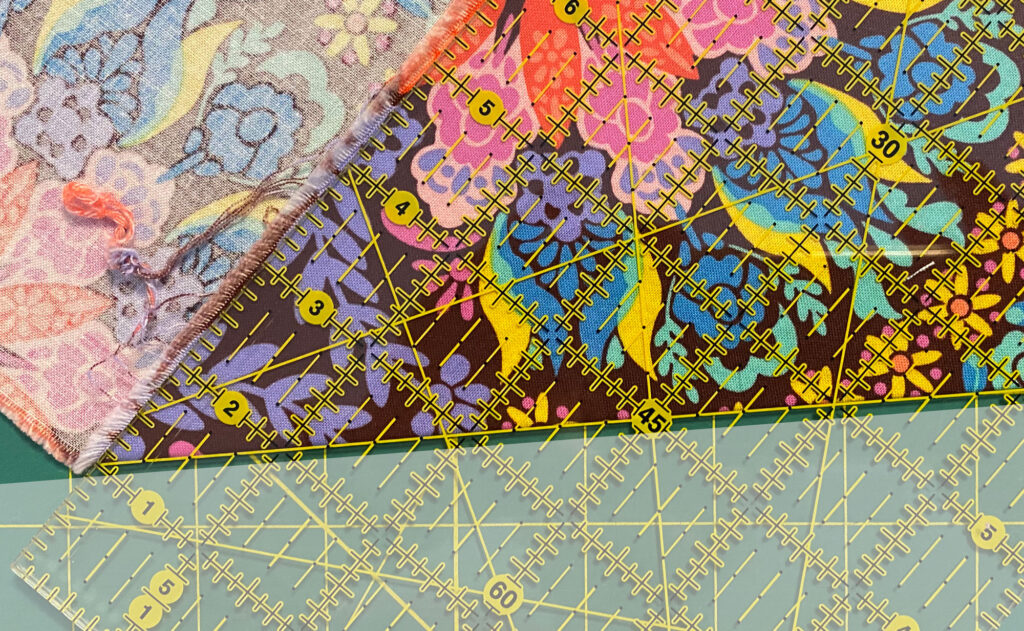
If you have a quilting ruler lay the 45-degree line on the fold.
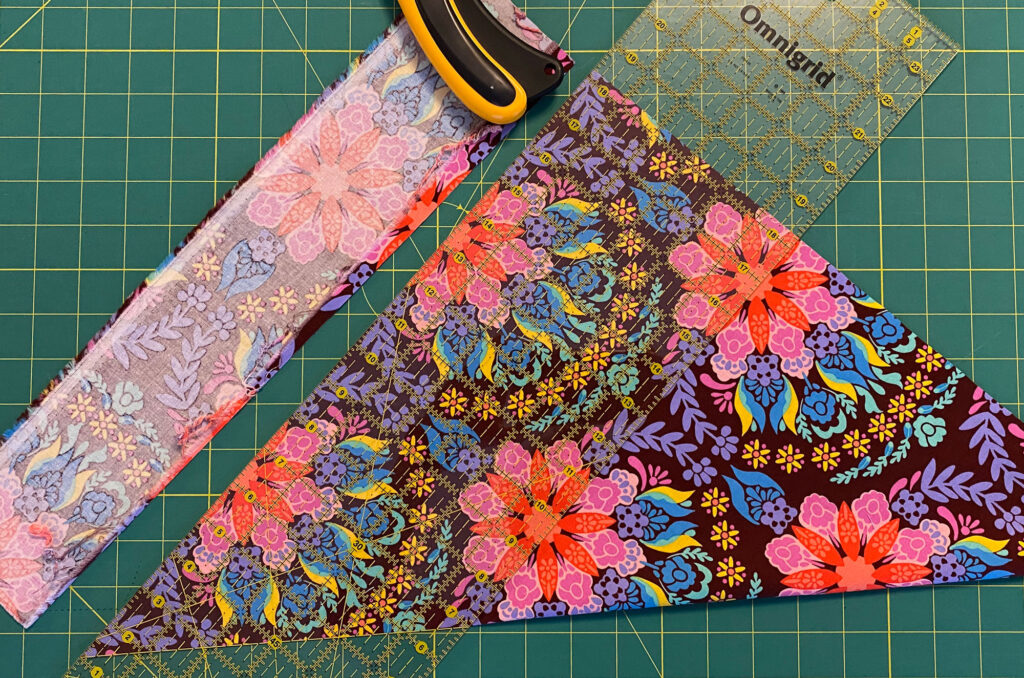
Trim off the extra width and straighten the last edge with one cut.
The napkins may not be all the same size if you cut the napkins this way. Some FQs will need more or less trimmed off to get the edges straight. But the final napkins will be close enough in size.
This is a project you can measure precisely if you want. (I went as far as pulling threads when I cut the linen napkins to be certain everything was on grain) But you can also be a little loose, or a lot loose.
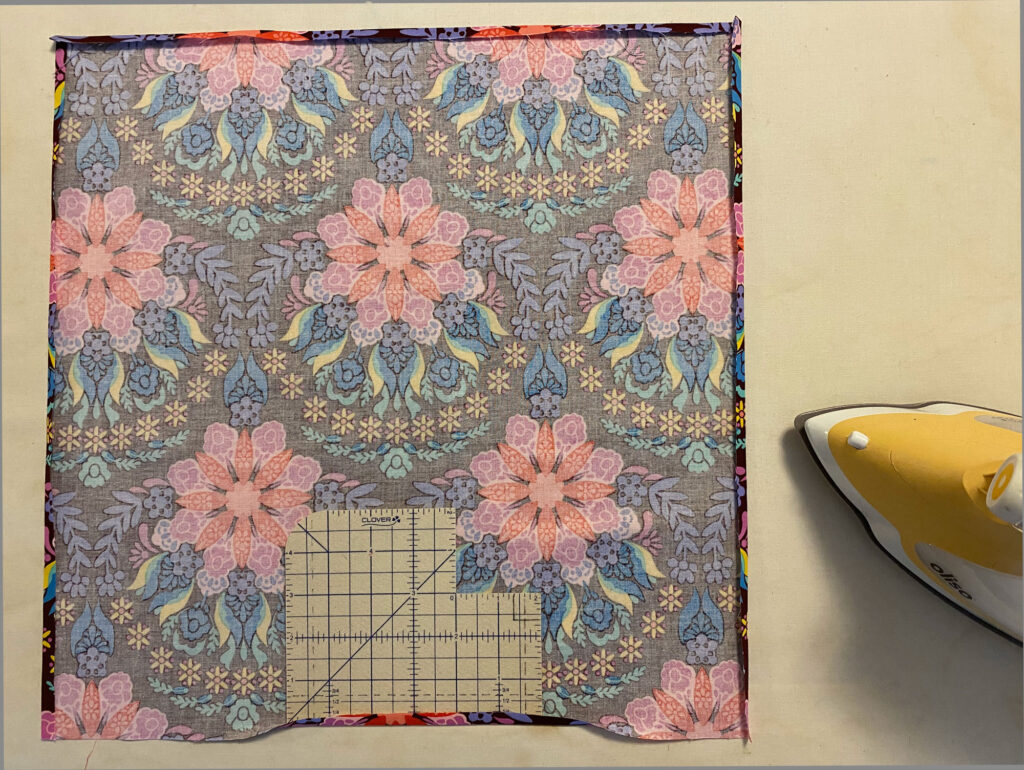
Fold the Edges
Using a pressing guide or a ruler, measure up your seam allowance on each edge and press. Press again to get a strong crease.
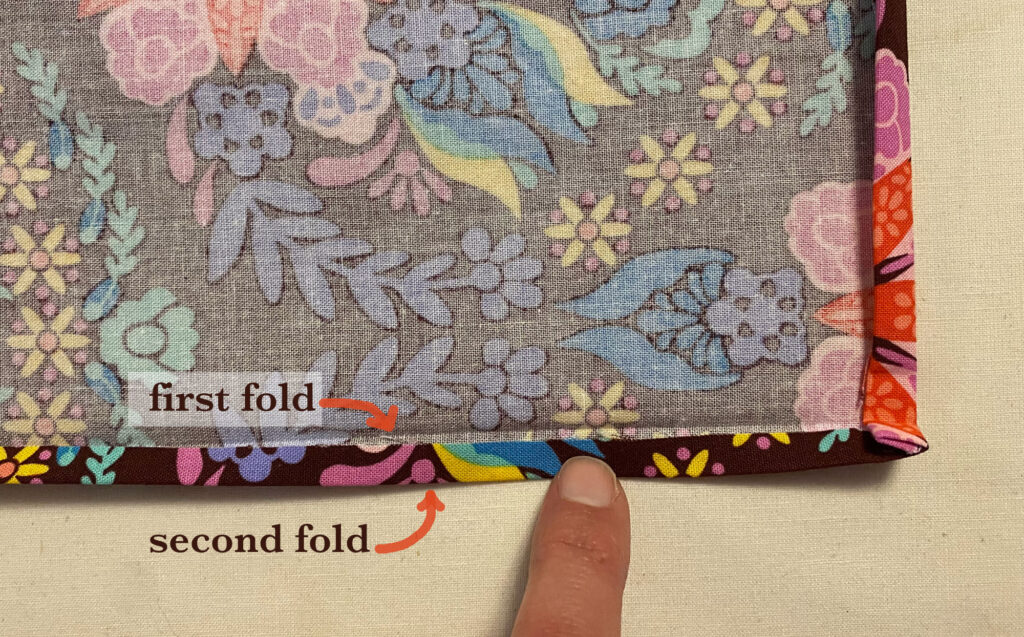
Unfold and place the raw cut edge to meet the crease.
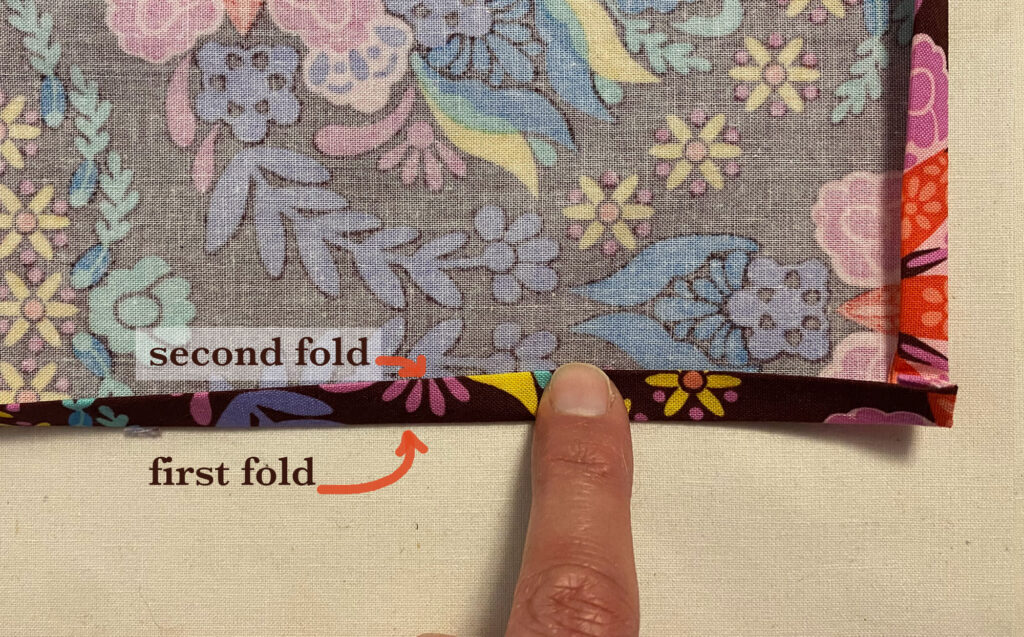
Refold on the crease to encase the raw edge. Press. Do this for all four edges.
You could, right here, take this napkin to the sewing machine and sew down the edges. However, the corners are a little bulky and I find that when the machine’s presser foot and needle encounter bulk, they don’t like it. They squish and push the narrow seam allowance out of their neat fold leaving a wonky corner.
So, instead of cursing and spending extra time at your sewing machine now, let’s take that time, miter the corners, and breezily sew them in a little bit.
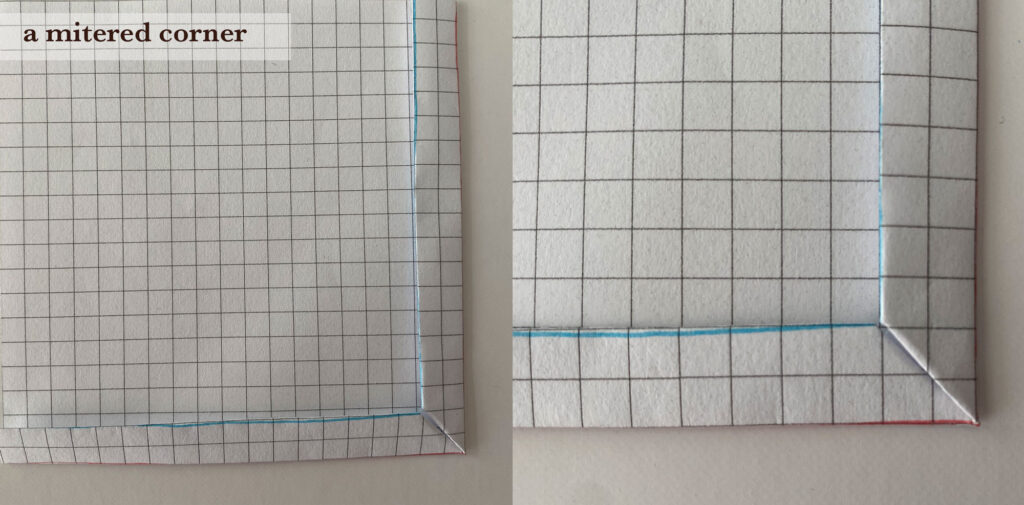
How to Miter a Corner (shown with paper first)

Fold up your seam allowance
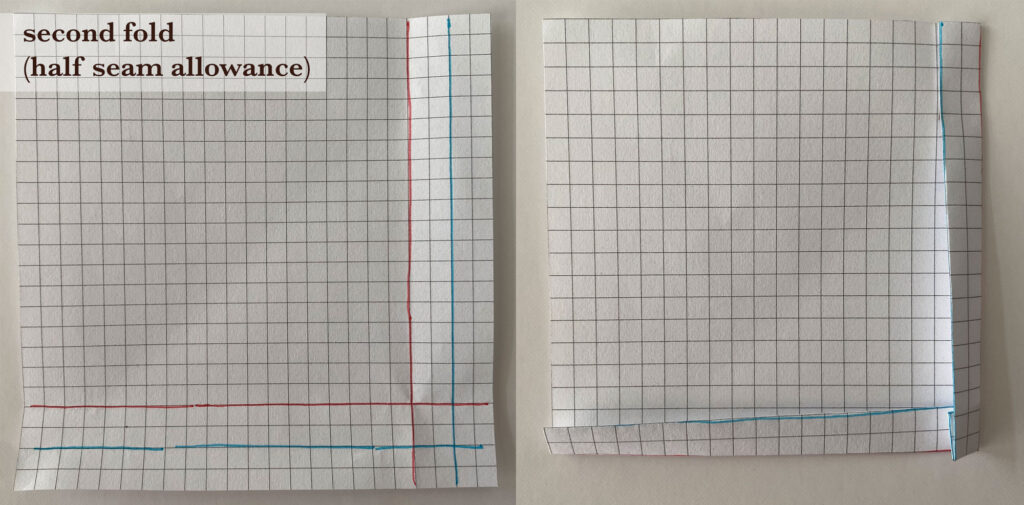
Fold up the raw edge to meet the crease of the first fold
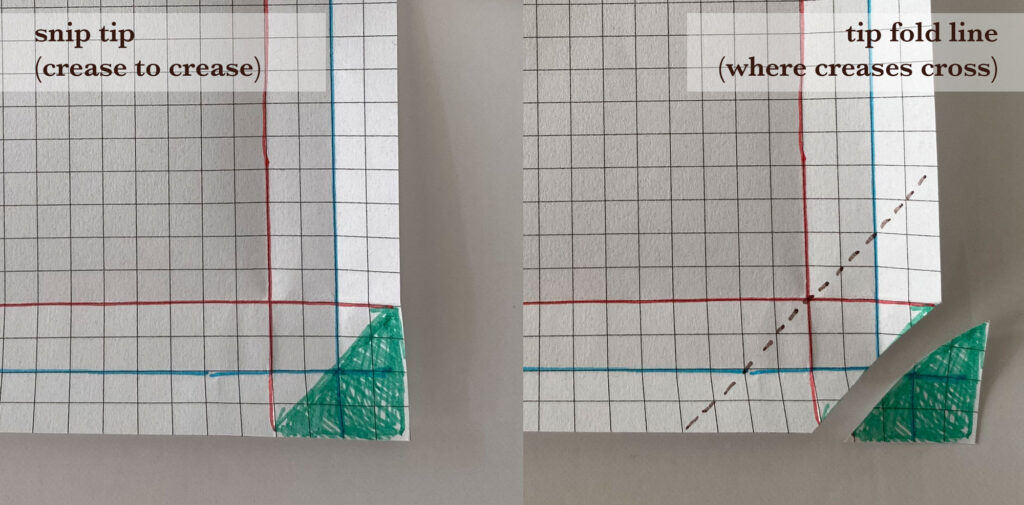
Un fold. Trim off the tip of the corner. Cut from the crease of the first fold on one edge across to the crease of the first fold on the other edge.
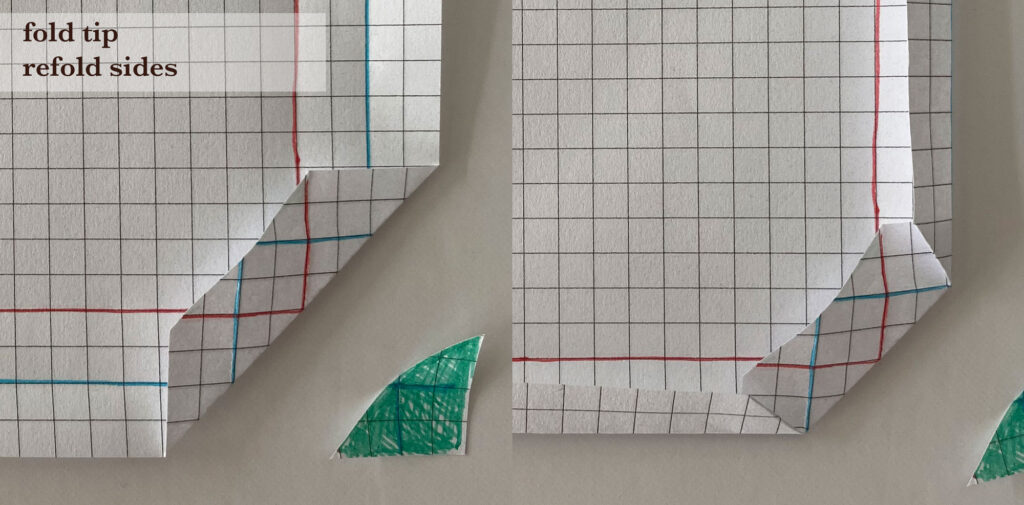
Fold trimmed tip over, across the point where the creases from the first folds cross each other
Refold the sides in
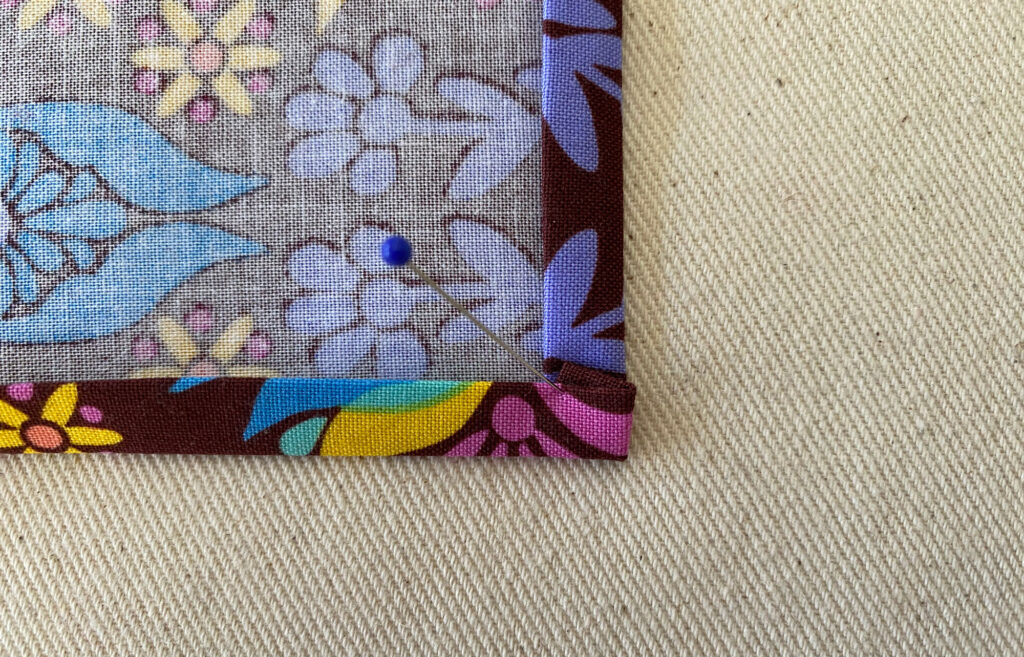
Miter the Napkin’s Corners
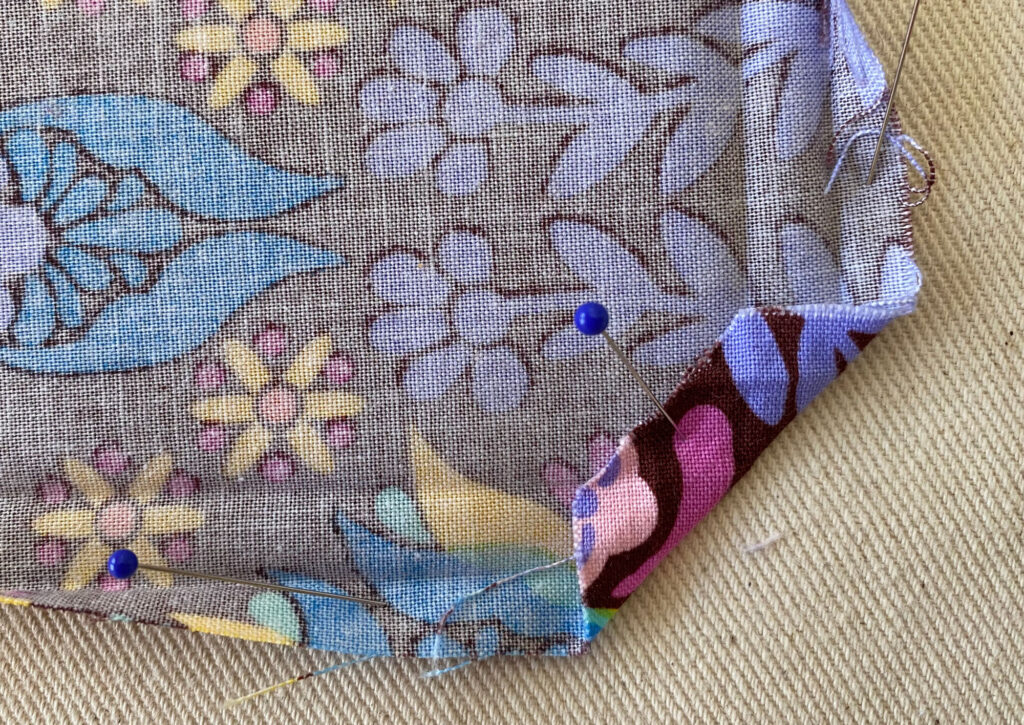
Trim off the tip of the corner.
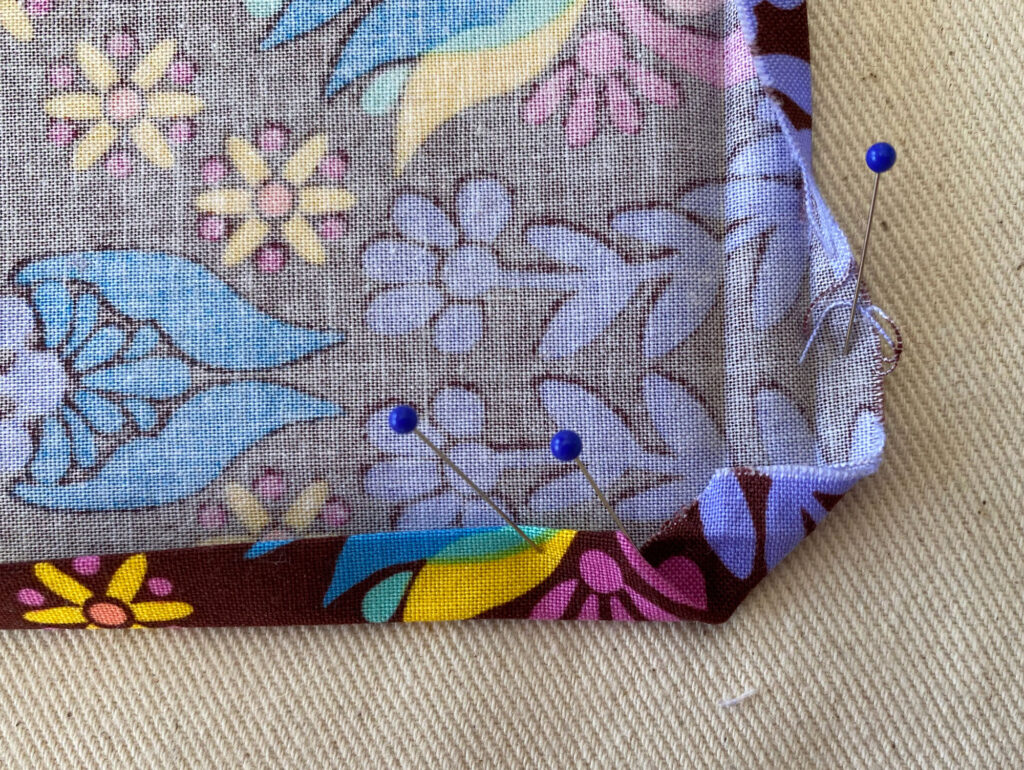
These corners can be fiddly to fold in fabric, especially if using a narrow seam allowance.
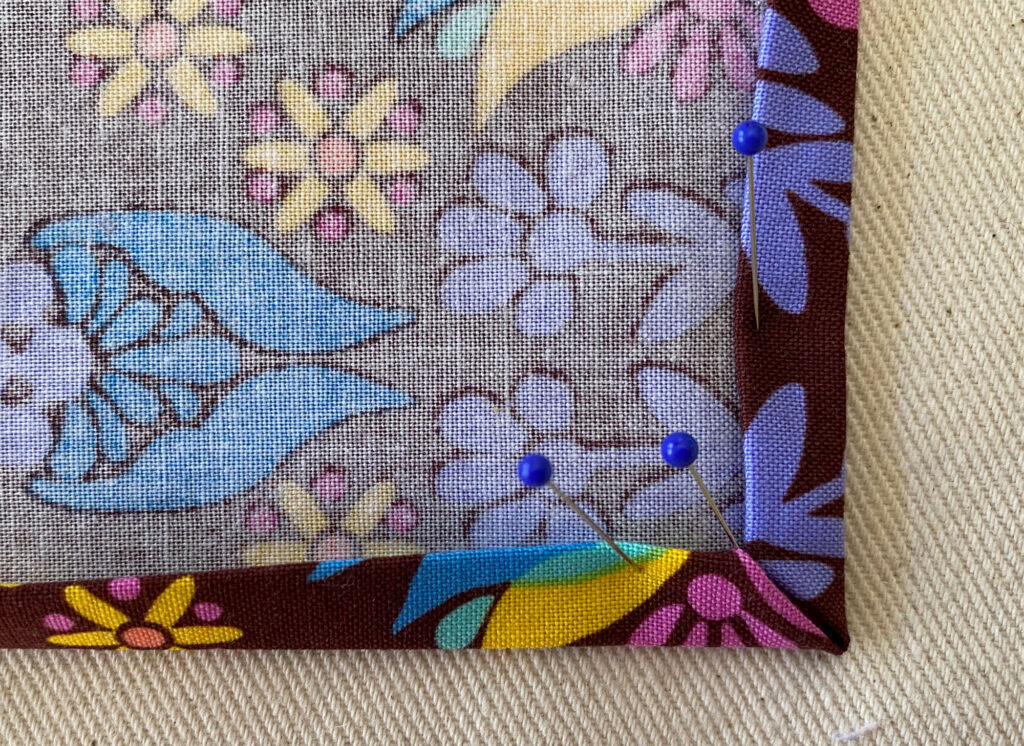
Refold if needed and pin them in place before you move on to the next corner
Sew the Napkin
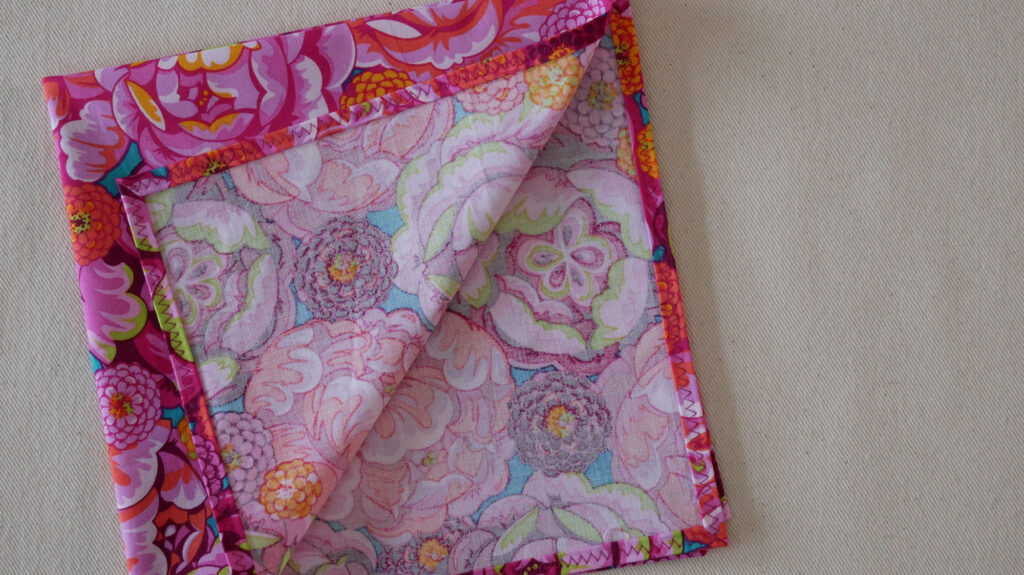
After all the corners are folded, sew the edges down.
You could use a straight stitch and sew close to the inner folded edge to be sure to catch all the layers.
Or you could use a wide zig-zag stitch and sew more in the middle of the folded seam allowance.
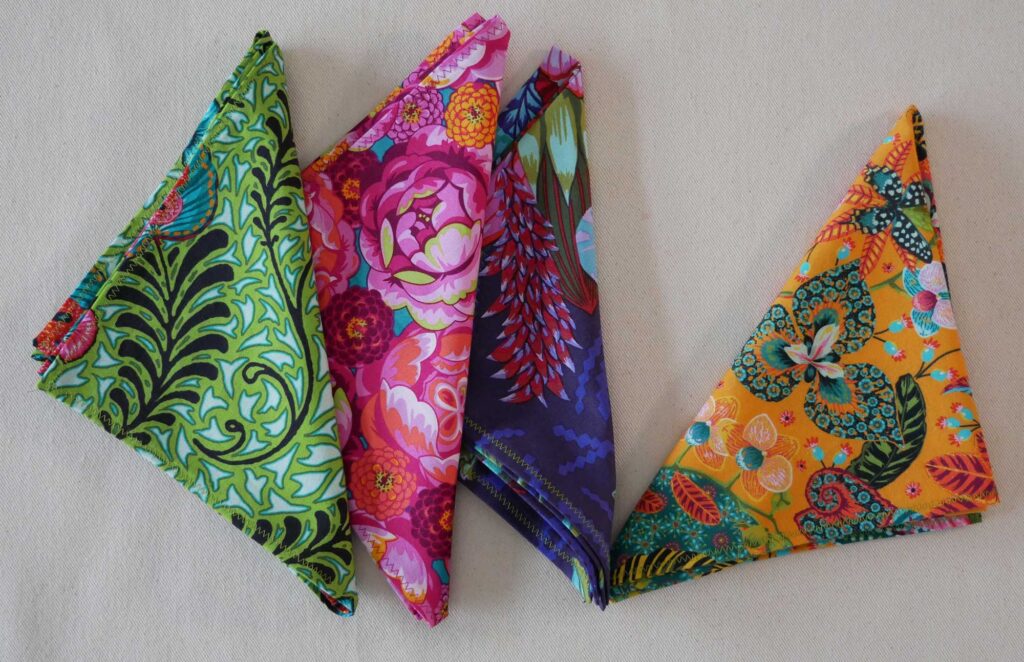
That’s it. Sewing napkins is easy and rewarding because you will use these daily, for years. A set of cloth napkins would also make a nice housewarming or hostess gift. Just keep them away from Atlas.
So well explained! Great visuals too.
Thank you.
where did you get your beautiful linen?
I bought the yellow-ish linen from fabrics-store.com https://fabrics-store.com/all-fabrics?article=IL019. It was years ago and they don’t seem to have that color anymore but they do have lovely linen