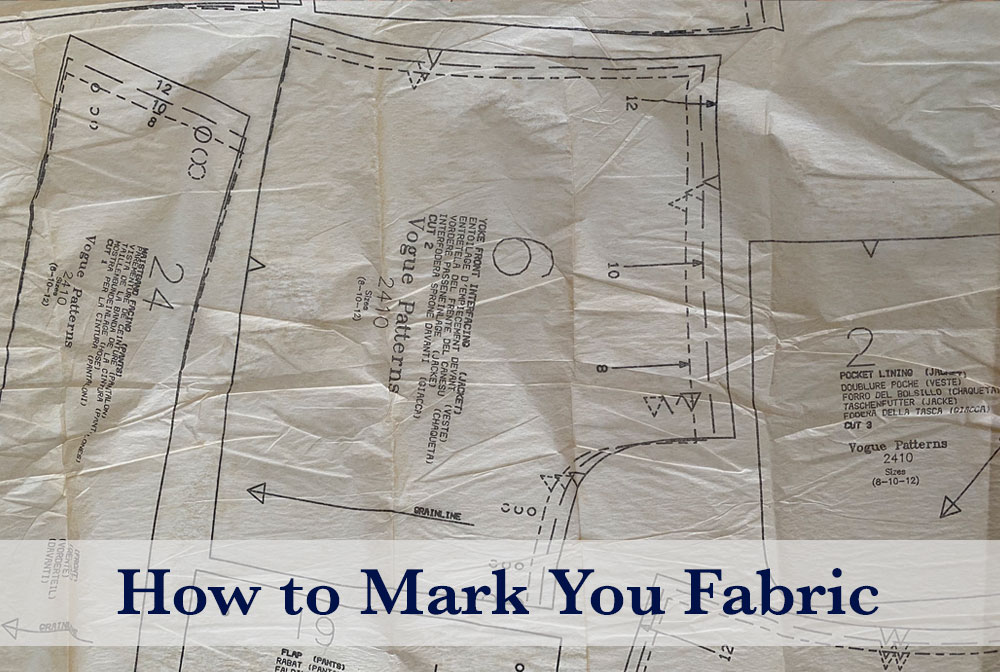
A pattern piece has a lot of information on it as discussed in a previous post/video “How to Read a Pattern”. You need that information when you are sewing all the pieces together, but you want to transfer that information, from pattern to fabric, at the beginning while the fabric is still on the cutting table. (Some of the info should be transferred later when you can try the garment on.)
Plus any information you transfer to the fabric must be done in a way you can see it when you are sewing but not see it after the garment is sewn.
This video is going to show what information you need to transfer and when to do it. And how best to transfer that information to the fabric, depending on what kind of fabric you have.
What Information Do You Need to Transfer?
While it’s still on the cutting table:
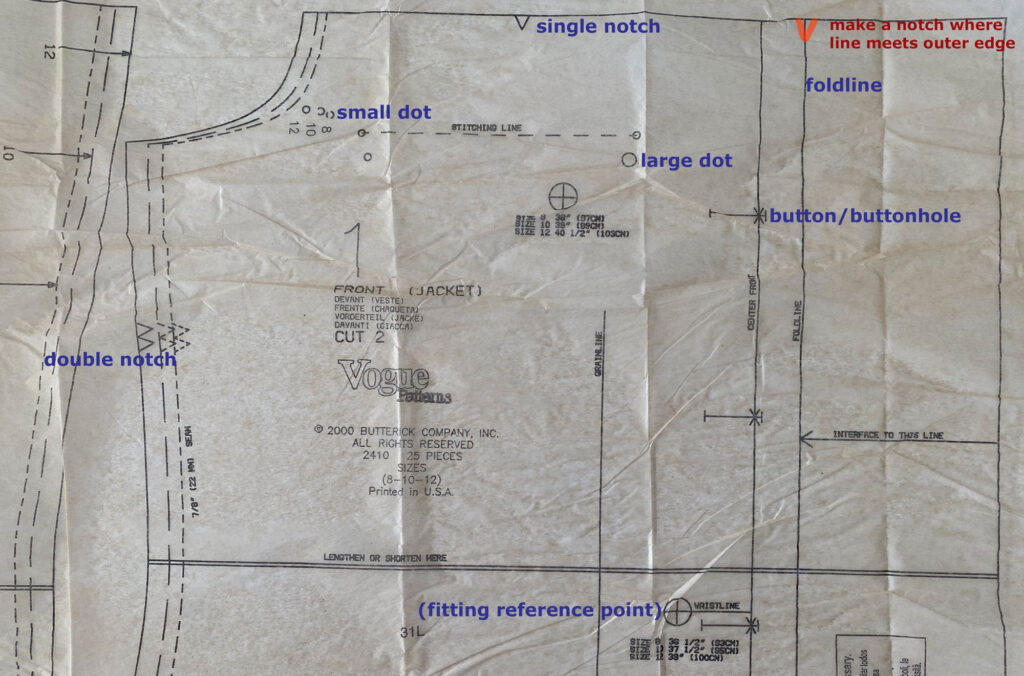
Notches
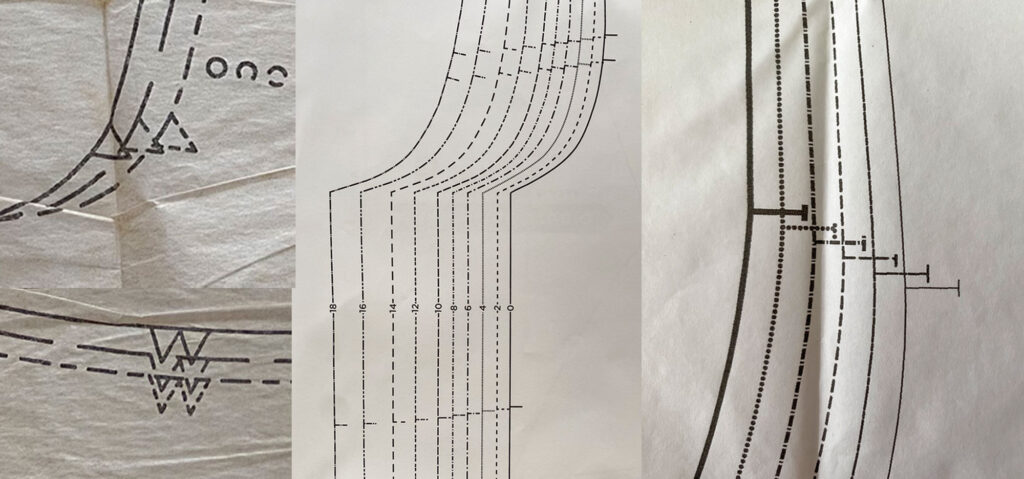
Notches vary in appearance from company to company. They can be triangle shape, be short lines perpendicular to the cutting line and sometimes look like a small capital “T”.
Does the information on a pattern piece have a hierarchy of importance? Maybe not, but in my head Notches are the most important and sometimes the only information you need. And most information can be marked with a notch.
Dots
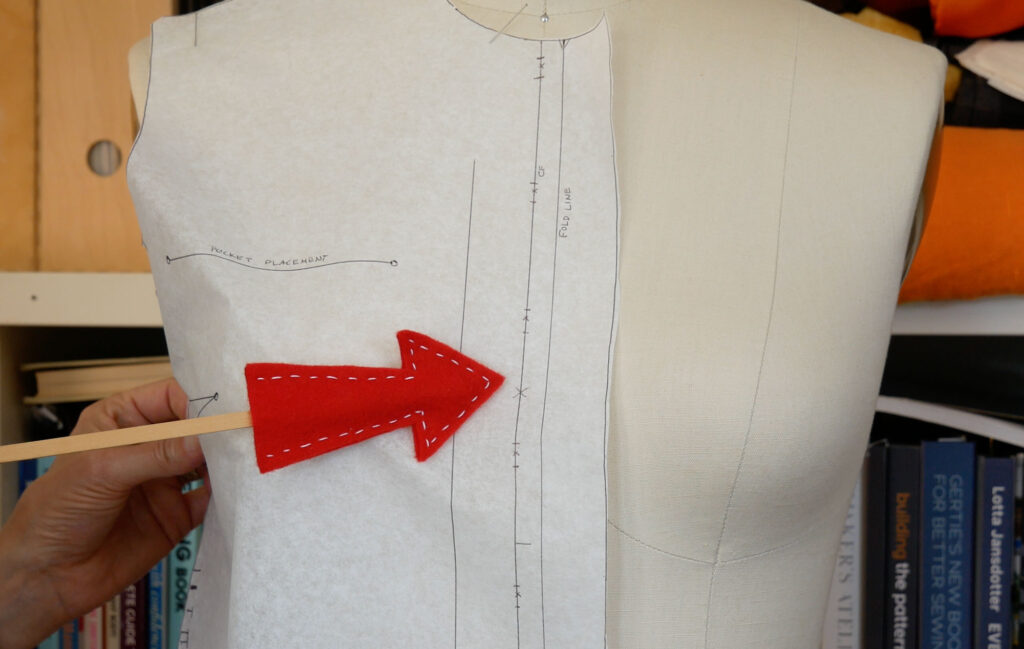
Dots can be large, small, solid or an outline. Sometimes you have all four types, each representing something different. Not all dots are needed right away.
Dots are the notches where you can not cut a notch, in the middle of the piece. They tell you where the dart ends, where a pocket is placed, where you snip the seam allowance to in a corner.
Information that is changed into a notch:
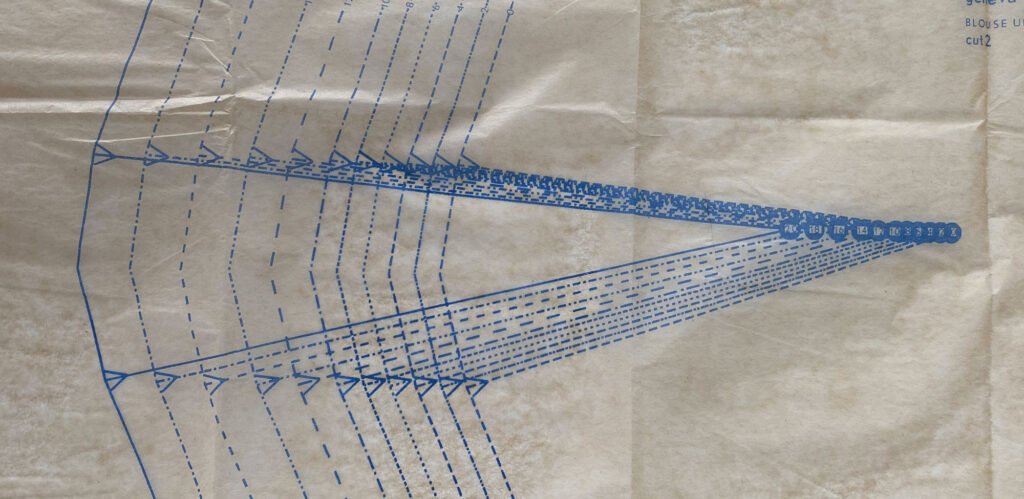
Dart legs and Pleats
Most patterns have a notch at the end of a dart leg. If it doesn’t You can easily make a notch at each leg. The same for pleat lines.
Fold Lines
Foldlines are used when constructing the garment. Where a shirt front is folded back to be self-faced, where the top of a pant leg is folded over to make its own casing. Since a foldline usually spans the entire pattern piece, instead of drawing a line on the fabric, I simply cut a notch into the seam allowance where the fold line is. Later I can fold where these notches are.
Information that is to be transferred later:
Hemline
The hemline across the bottom of a pattern can wait until you are able to try the garment on. This way if the t-shirt is way too long you can cut off a few inches then read or measure the pattern piece, how deep of a hem you should give the garment.
The same is true if the garment turns out to be a tad too short. You can then sew on some hem tape to give you back the hem allowance the pattern intended.
Some Pocket placements
For pockets with a strong design style, like patch pockets and welt pockets, it’s nice to know where the pocket is going to land on your body. Because pockets have to be sewn on to the garment piece before you have anything to try it on, pin the pocket piece on, roughly where the pattern suggest, and lay the garment on your body. Check the placement in the mirror. Looks ok then great – needs to be moved up or down, left or right, then great – you can do that now without getting the seam ripper out.
Pockets sewn into the seam will not matter as much but you could adjust them if you feel they are too high or too low for your arms.
Button and Buttonhole Placements for Center front openings
Mark your center front line (with a notch) showing where the two sides need to overlap but leave the button and buttonhole placement marks off until you can try the shirt, coat or dress on because one button has to go at the level your body/bust is widest to prevent gaping. If you have a tummy that pulls at shirt openings place a button at your widest part and space the rest of the buttons/buttonholes out evenly.
How to Transfer Notches
Simply cut into the seam allowance about half the width of the seam allowance. Whether it is shown as a triangle or a line on the pattern a simple snip into the fabric is all you need.
If the pattern shows a double notch cut a double notch. How many notches there is is a code that will be made clear to you when you sew that seam.
Notches can be made to show you where center lines, fold lines, and hemlines are too. Simply snip into the seam allowance a notch where the line crosses the pattern.
Note: Pleats are shown on a paper pattern as two parallel lines (one line will meet the other to create a pleat) and sometimes they will have a dotted line between two solid lines. The dotted line is the fold that happens when the two solid lines meet. You do not need to mark this dotted line. Just the solid lines.
Pleat lines are as long as they are to be sewn down on the garment; inches as on a skirt or an inch or less as on pants. Either way, you can only mark the pleat lines with a notch and not how far down to sew them. To mark that point – well, that’s like marking a dot so please read on.
How to Transfer Dots
After notches almost everything else is a dot – or can be transferred to the fabric like a dot.
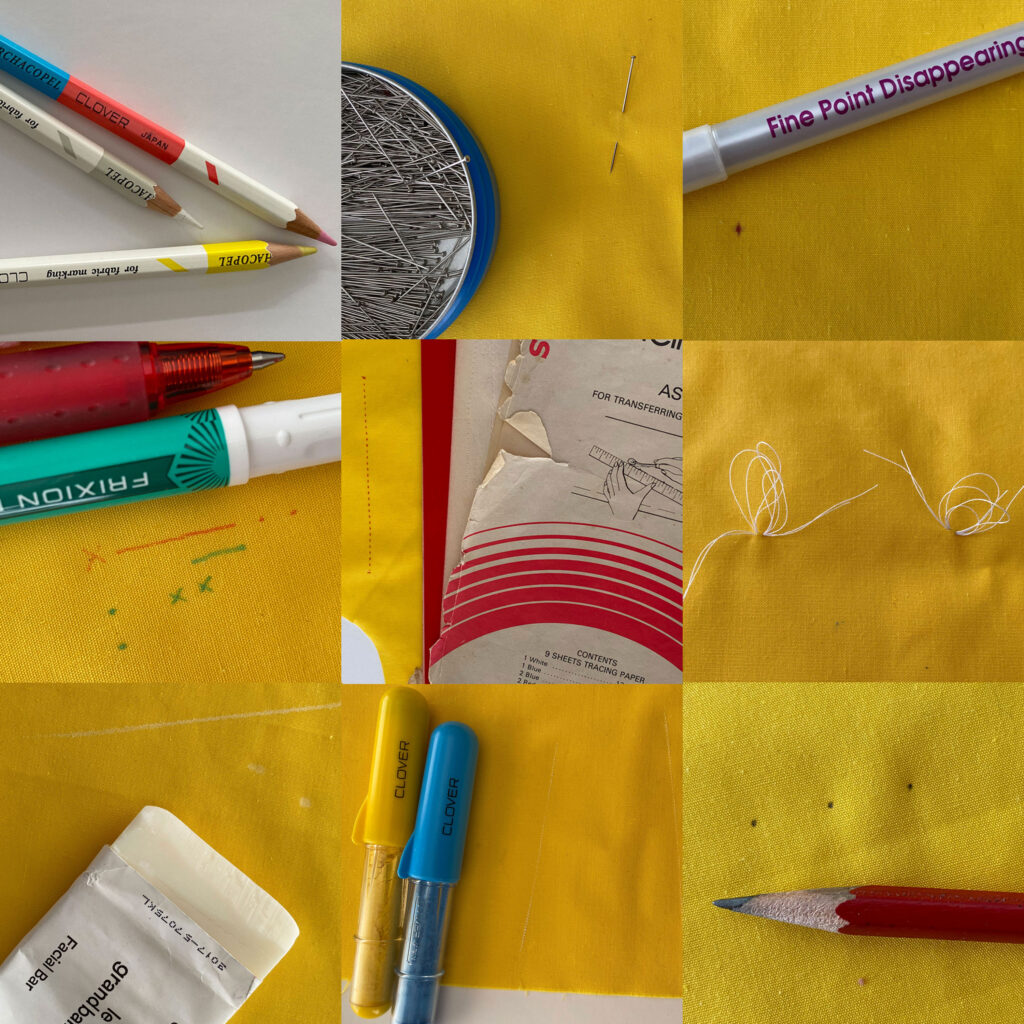
There are many ways and many products available to mark dots. Some methods only work with some fabrics or some situations so it’s good to know a few ways to mark a dot.
My favorite way to transfer a dot is with a pin. It’s simple and I always have them lying about. The downside is they can slip out if your pieces lay around awhile and keep getting moved from surface to surface
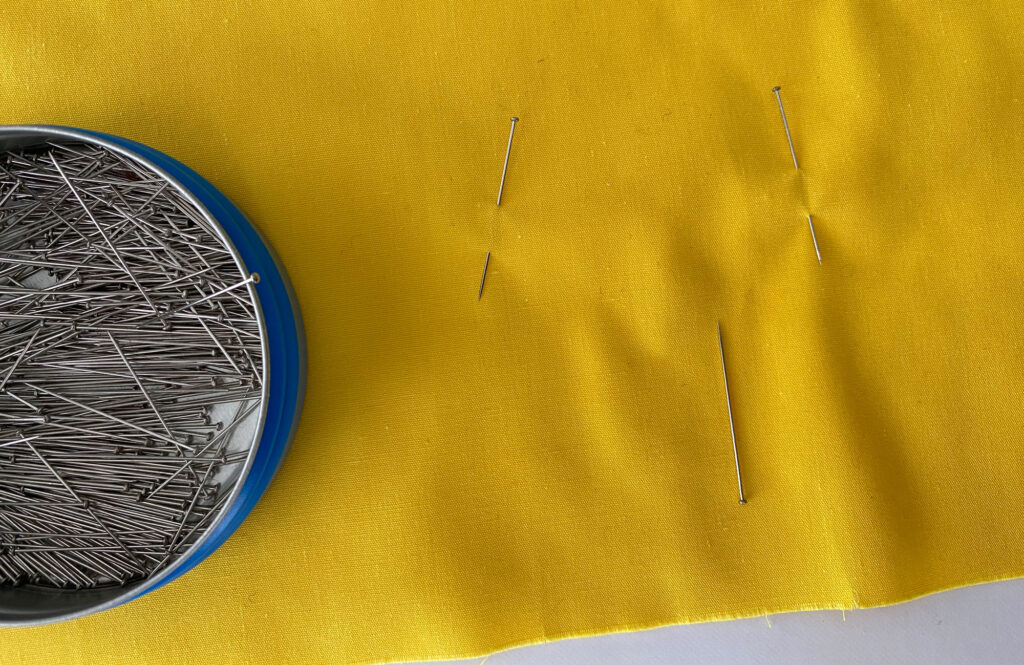
Pin Marking
Stick a pin in the pattern and fabric. Make a small hole in the pattern as you lift it over the pin (easy to do with tissue paper patterns) and secure the pin to the fabric. It’s important to make a rule for yourself about the pin placement. Mine is: where the pin goes in is the dot. Where it comes out doesn’t matter
This is particularly great for high-texture fabrics like tweed, and terry cloth where a mark from chalk would be hard to make and see.
Any product links to come are affiliate links to items that I have bought, used and recommend. You can buy them from anywhere but if you buy through the link (and Amazon) I receive a tiny percent back from that mega-retailer to help support this channel. Just letting you know 😉
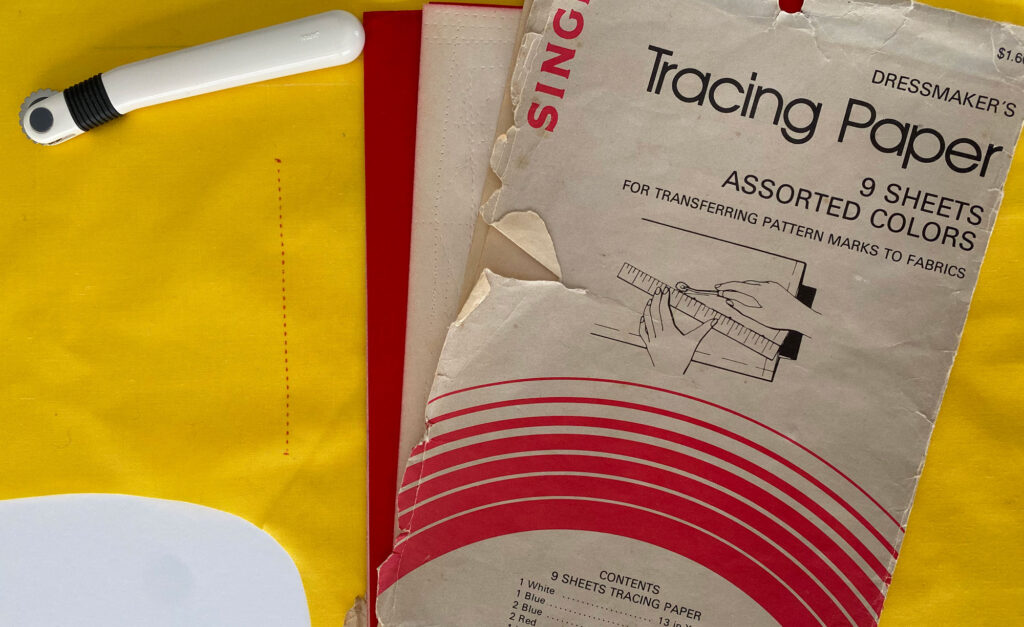
Transfer Paper and Tracing Wheel
You don’t see this method too much anymore but it’s a good one. Dressmaker’s tracing paper is like carbon paper and comes in many shades. You want to use a shade close to the color of your fabric to avoid accidental staining that will ruin your project.
By placing the paper under your pattern so the color side is touching the wrong side of the fabric and tracing over marks on the pattern with medium pressure, the carbon will transfer from paper to fabric. (I like my Clover tracing wheel for transferring lines. A pencil works well for transferring dots)
You can fold the paper, color side out and place it between two layers of fabric to transfer marks to both layers at the same time.
It’s super easy. However, ironing over them can set the lines to stains so be sure you mark the wrong side only.
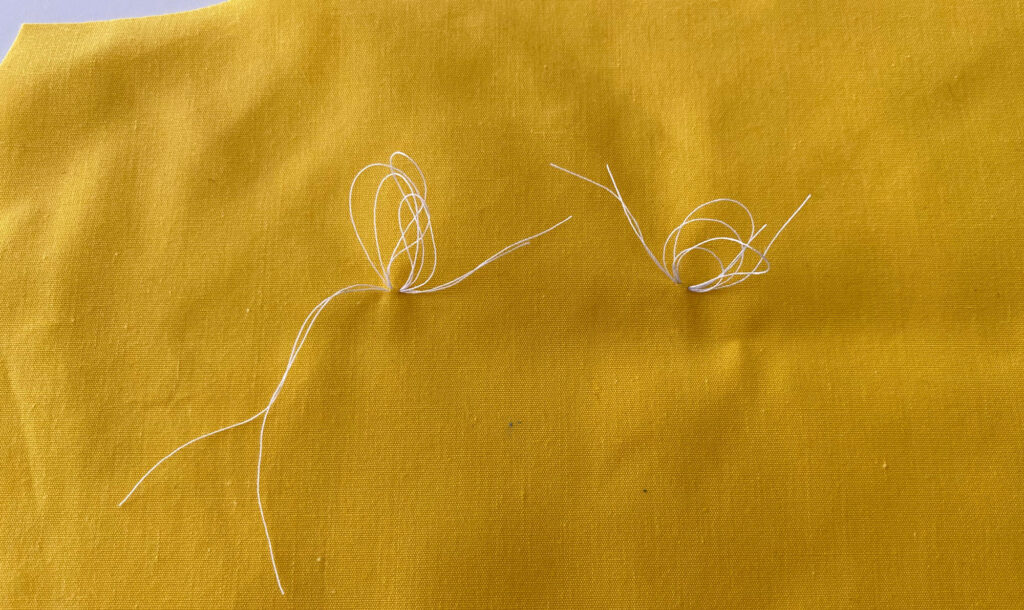
Needle and Thread
With delicate fabrics where a pencil mark might show and highly textured fabrics where a pencil mark will not show, use a thread tack or Tailor’s Tack to mark any dots that cannot be turned into a notch.
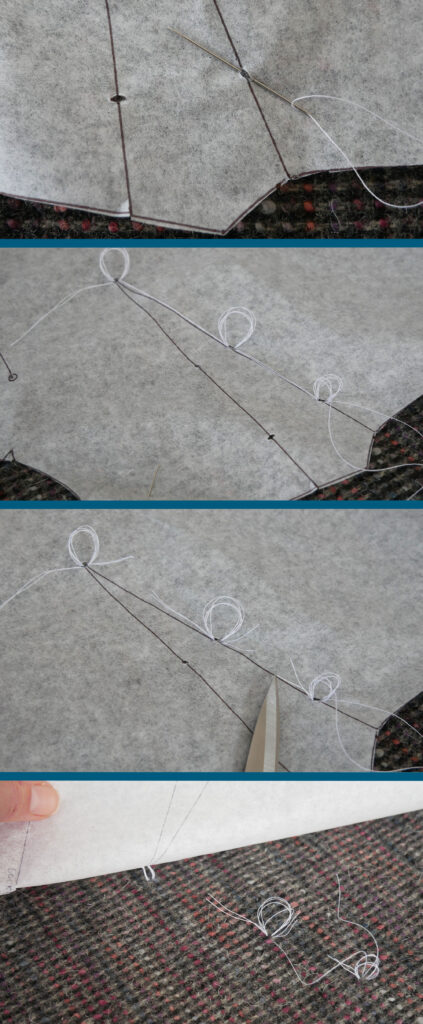
Make the thread tack after cutting the piece out of fabric but before removing the paper pattern from on top of it.
Make a small hole, a little larger than the dot on the pattern, through the paper pattern where a dot is or wherever you want to mark. I use an awl to make a hole in my pattern piece.
Thread a needle with a rather long piece of thread and bring the ends together so it is double-thick but don’t knot the ends. Do not use red thread unless the fabric is red.
Insert the needle through the hole in the pattern. Make a small back stitch on that point but do not pull the thread taught. Instead, leave a loop large enough for your finger to slip through. Make one more loop and without cutting the thread, go to the next hole and repeat, making two thread loops.
After you have made a tack at each hole, snip the threads that connect the tacks. Gently pull the pattern up over the thread loops. They will slip through the holes you made in the pattern.
Marking with Fabric Pens, Pencils and Chalk
There are so many types of marking instruments to pick from but they all mark in a similar manner.
If you cut out your pattern with the wrong side facing you you can poke a small hole in the paper pattern where the dot is and mark the back side of the fabric through that hole with a pencil or pen-type marking tool.
If you cut out the fabric with the right side facing you, insert a straight pin through the dot and both layers of fabric underneath it. Peel back the top layer of fabric leaving the pin in it and mark on the wrong side, with a pen or pencil-type tool, where the pin is coming through.
Marking Tools: What is What
Avoid tools that leave permanent marks. And don’t always trust marking tools that claim they will come out in the wash. Perhaps they will, but you can’t know until the end so TEST first – or go with what you know.
Warning: All marking tools should be tested on your fabric before you use them. Some fibers will hold on to the compounds that make the mark. So it may brush off your cotton but it might stain your cotton blend. You really do need to test. And never – if you can avoid it, iron over any of your marks. Something about the heat just wants to set those marks permanently (many marking tools use wax)
Here are some common marking tools
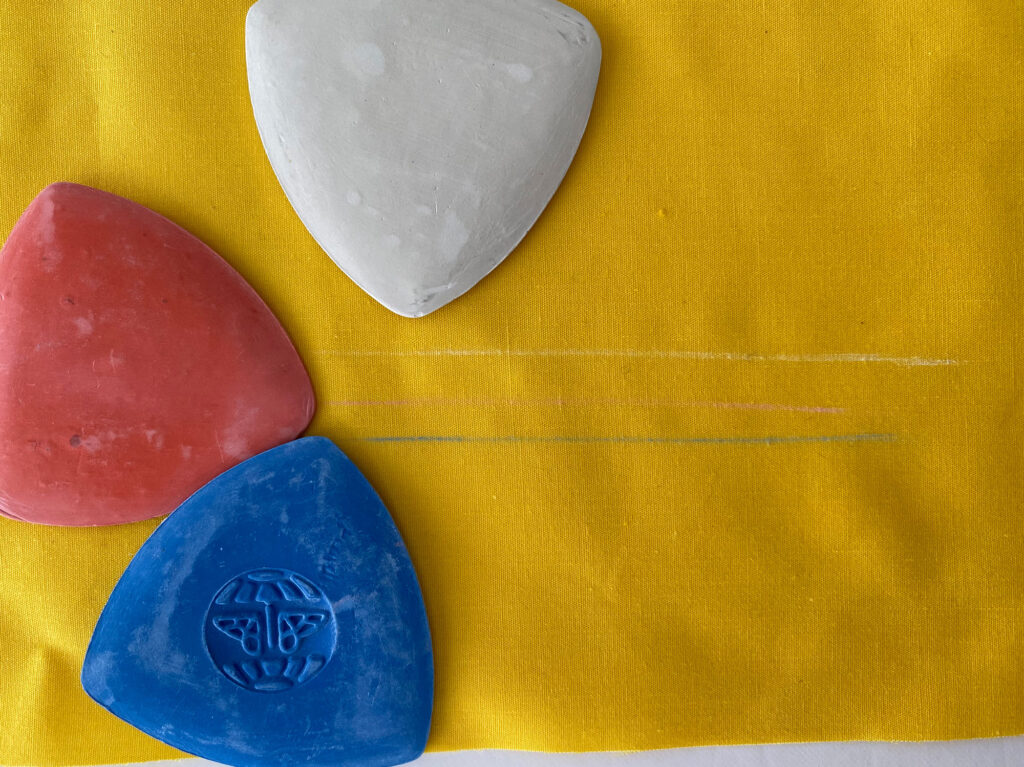
Tailor’s chalk wedges – These little biscuits of chalk fit nicely in your hand and are great for marking lines they are not so great for marking tiny dots. The mark lasts a nice while but be sure to remove the marks before ironing over them. I use a barely wet washcloth to rub them away.
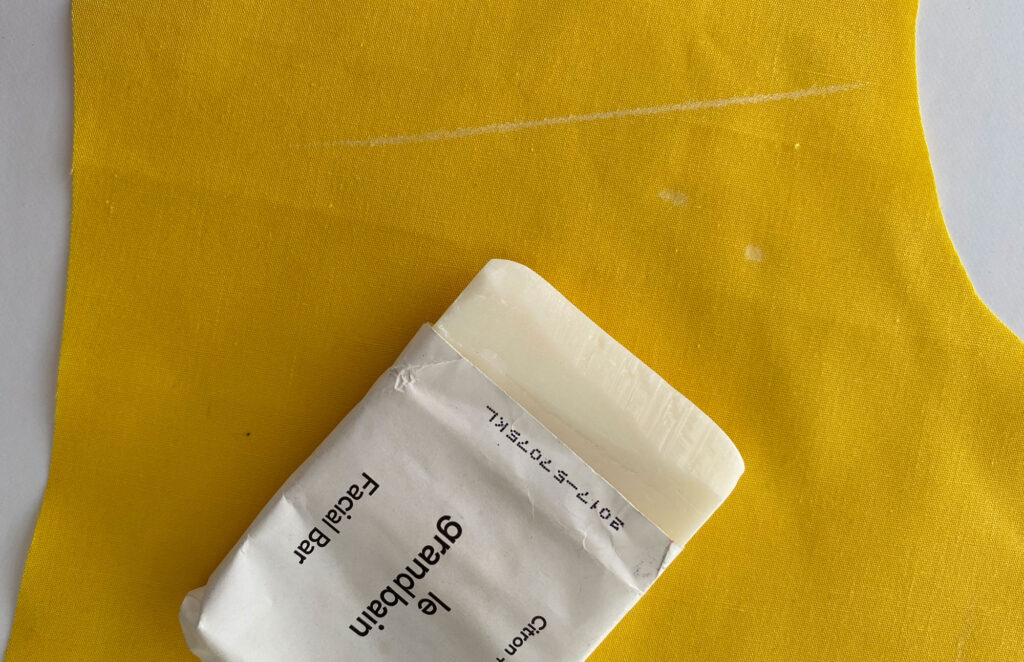
Soap is what my grandmothers used for marking fabric. A small bar of white soap whittled down on one edge makes a mark you can be sure will wash out. (keep an eye out for hotel bar soap)
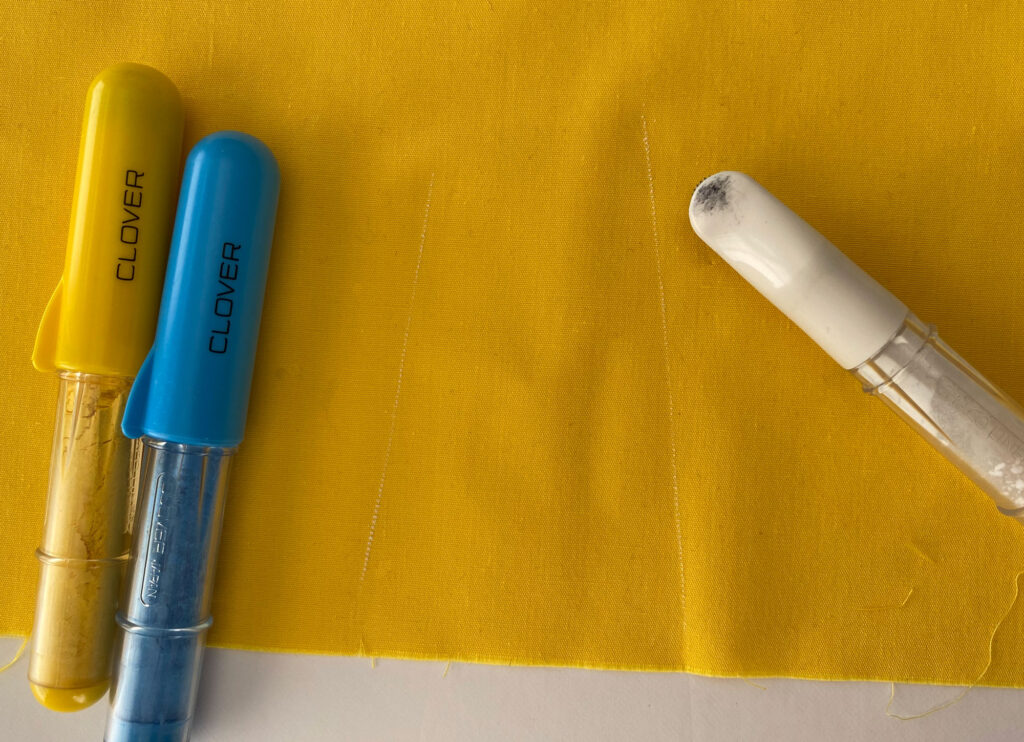
Chalk pens like Chaco liners by Clover are very handy and one of my favorite ways to mark my fabric. They look like a chubby, stubby pencil. There is a little wheel that only goes in one direction. When it is moved it leaves a fine powdered chalk line. The chalk powder will wear off sooner rather than later so it’s one of those, mark-and-sew-now tools. The liners are refillable which is smart.
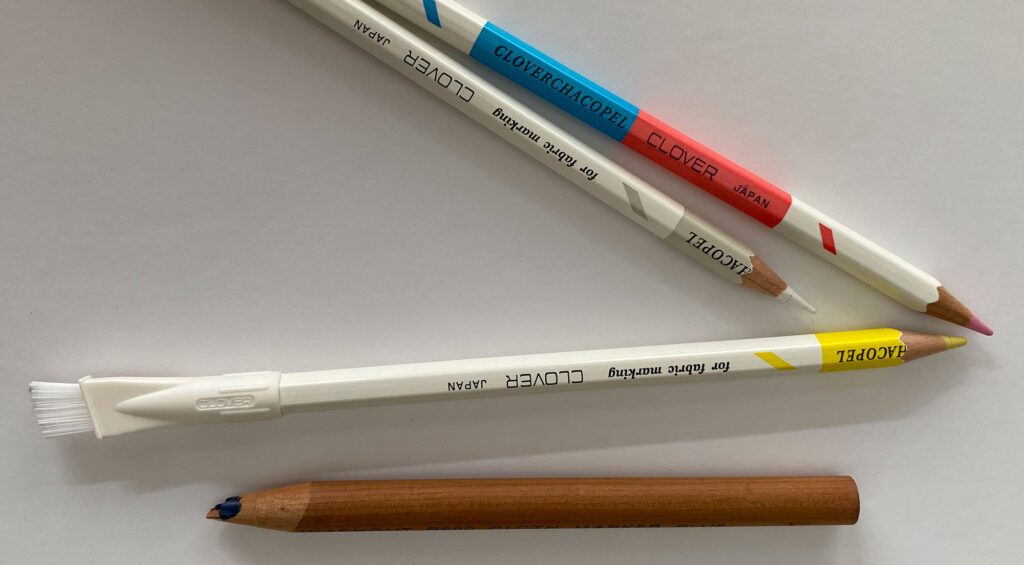
Chalk Pencils used to be horrible. The chalk tip was always breaking. However, Clover has a set out now that are both sturdy and makes a nice fine mark. They’re also easy to sharpen.
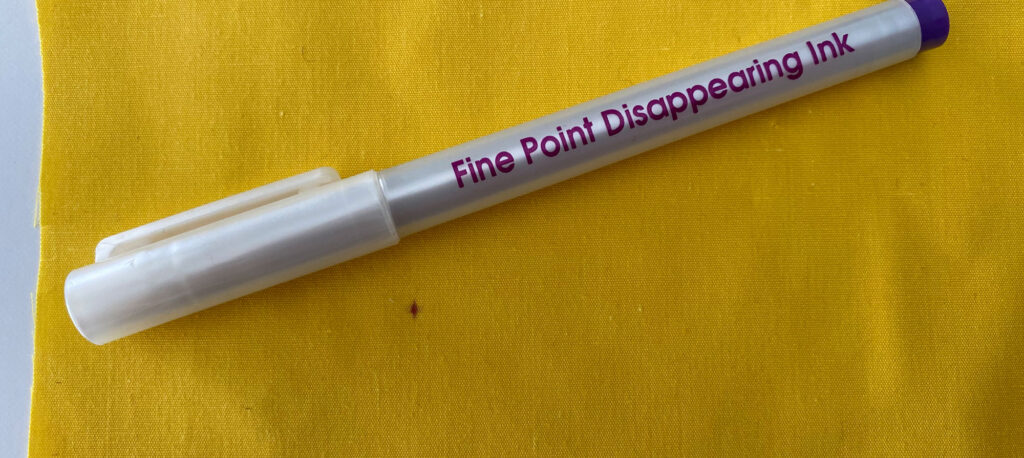
Air and Water soluble ink markers: I like and use these markers – especially the air-soluble marker. It only marks purple though but great for the wrong sides of printed fabric which are usually white. The ink disappears in 24 hours or less so it’s a mark-as-you-go sort of tool.
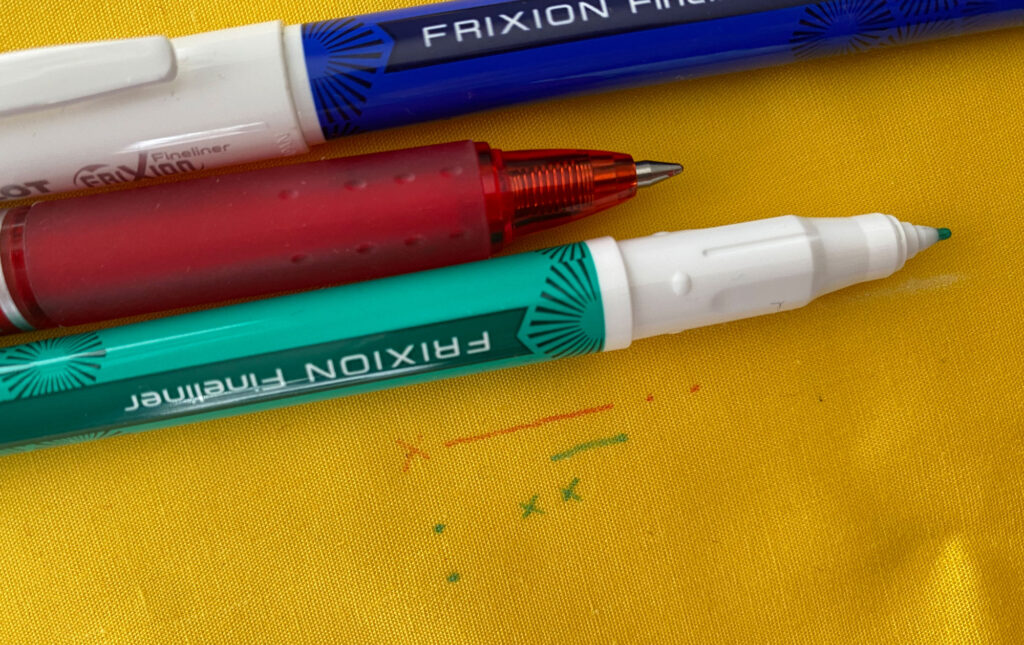
Frixion pens by Pilot – These are ballpoint and fine tip markers that disappear when heat is applied – as in an iron. I have tried these with mixed results. The ink came out with heat but it came back when the garment cooled off. A friend said it would probably come out after I washed it and it did but that was not a pleasant experience. The fine tip of the Frixion ballpoint is great for marking small points on the back side of the fabric. (All marking tools say “test-first” but really, do it this time) To be fair to Pilot, they didn’t design these as fabric pens.
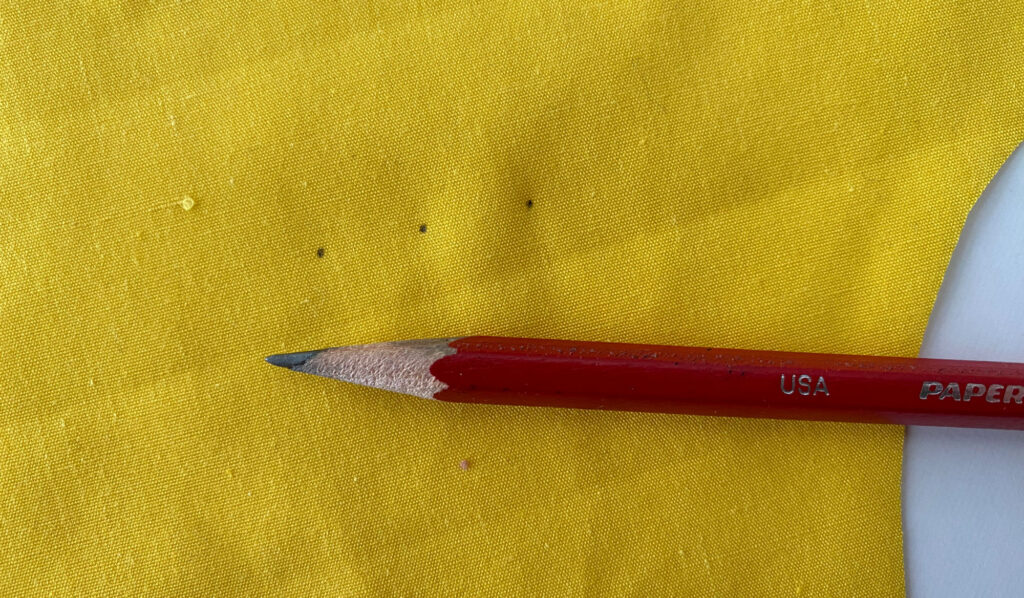
Number 2 pencil – I have been known to use a plain number 2 pencil to mark a dot on the wrong side of the fabric. I know it washes out of the cotton or linen I sew with and there is usually one close by.
If you use a different method for marking, please let us know in the comments below.