
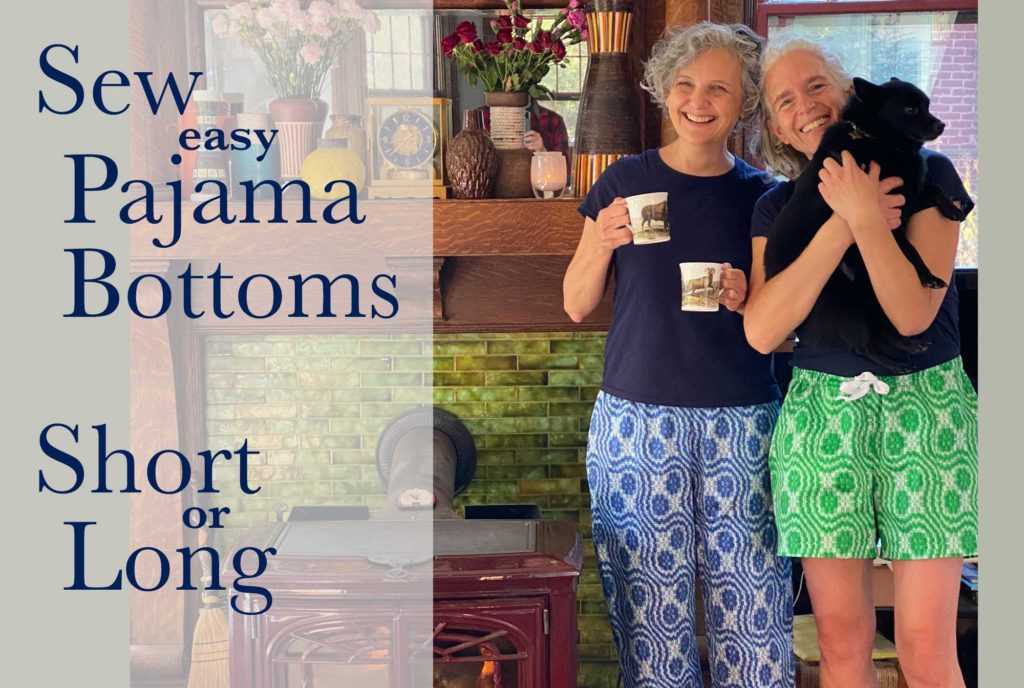
A wise woman once told me, when we dress for bed we dress for ourselves. I never thought of it like that. We’re not dressing for others. There is no dress code written or implied, or even socially enforced. So why not wear something we truly like?
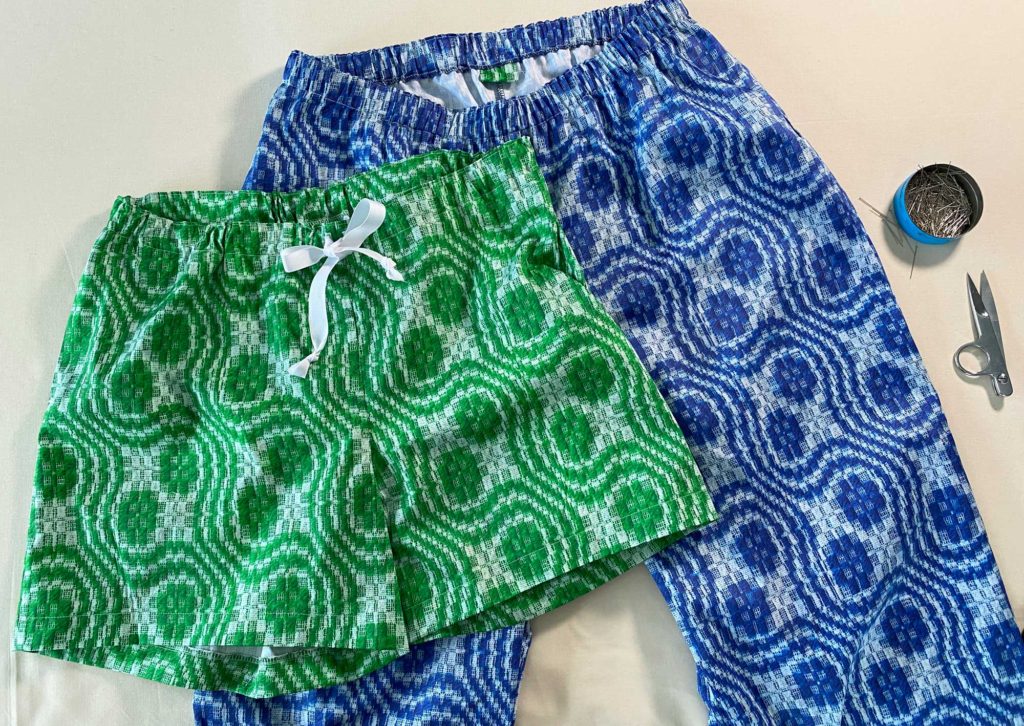
I like pajama pants with pockets (as I always have too many little odds and ends to carry upstairs at night) and my friend, Lisa, likes pajama shorts with a drawstring waist. So once again we collaborated. She designed the fabric and I made the pajamas with a little help from The Assembly Line.
In 2020, as a gift to everyone, the Swedish-based pattern company, The Assembly Line, released a free pajama set pattern for woven fabrics. It is a simple pullover top and elastic waist shorts. It really is free you don’t even have to sign up for their newsletter.
In my video, I show you how to make the pajama shorts as they are designed but also how to lengthen the pattern for pj pants, and how to replace the elastic waist with a drawstring waist if you prefer. You can watch all the steps here or if you prefer to read your instructions, read on. I’ve included lots of pictures.
The Pattern
The pajama pattern is a pdf pattern and if you are new to pdf patterns they are a digital file you download and print yourself or some patterns include a file that can be printed on a large format printer (like a copy shop would own).
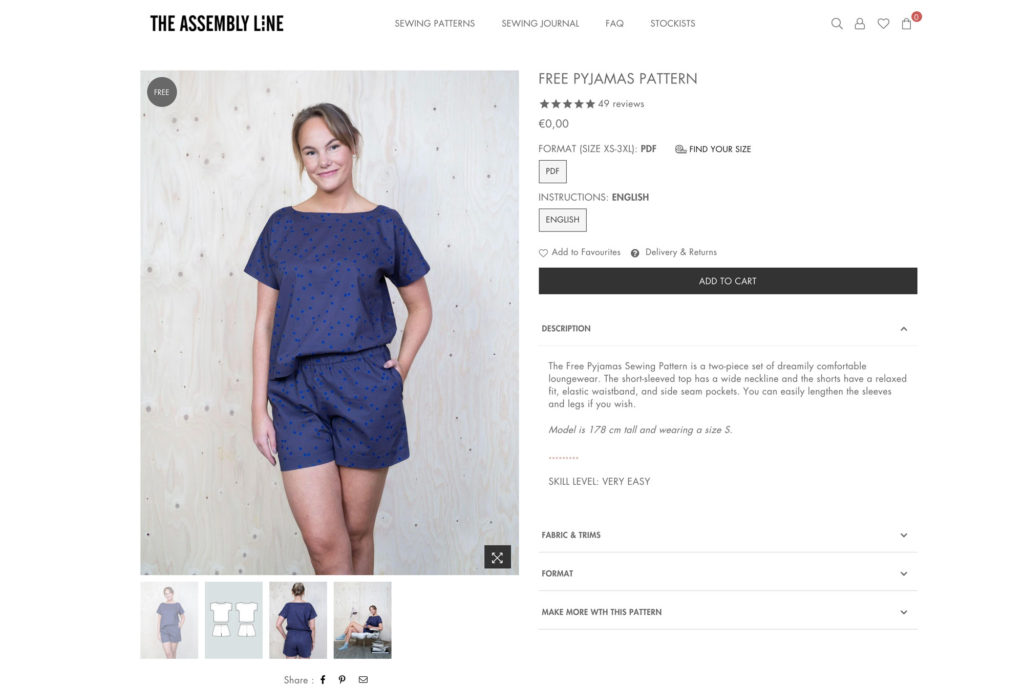
The pattern includes sizes xs – 3xl and each size is a separate digital layer letting you choose which sizes to print. Maybe print them all at once so you can make pajama bottoms for anybody who might appreciate a pair. (Just trace the pattern off in the size you need)
The Assembly Line uses the metric system. I will use inches in this post but you will need a tape measure that has centimeters (many do) or google a “centimeters to inches” calculator to help you find your size if you use inches.
The pattern is a beginner pattern but does require a serger or overlock machine. However, if you have a machine that can do a zig-zag stitch you do not have to have a serger. If you have a straight stitch only machine you could use pinking shears (old school) for the seam allowance finish.
(All of The Assembly Line’s patterns are well drafted with good instructions.)
The fabric
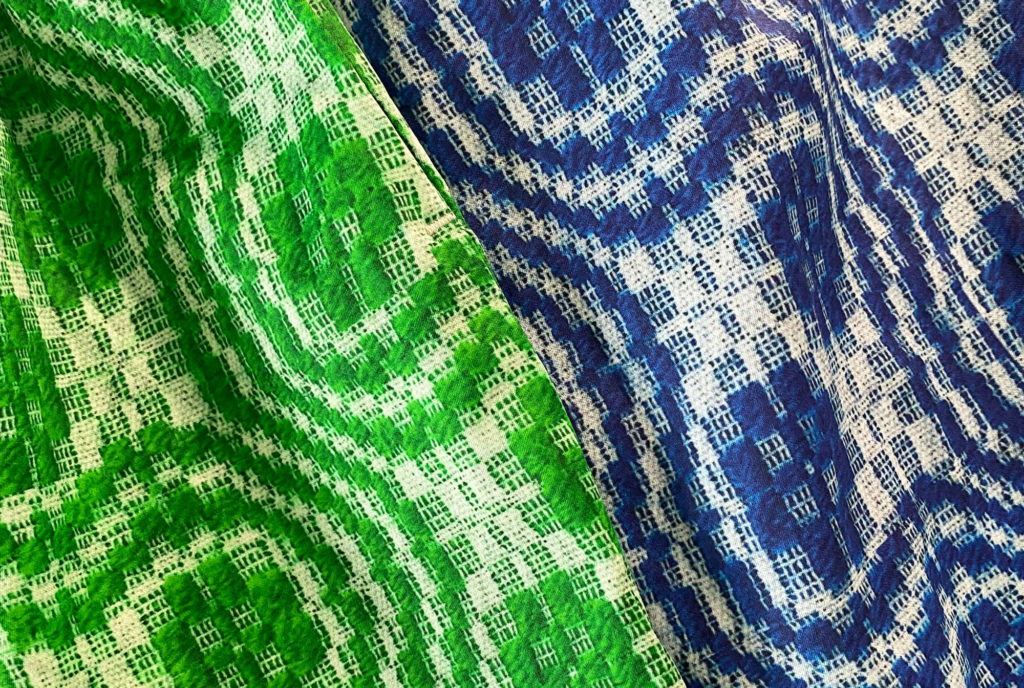
This fabric is another design from my friend Lisa at Poem Crown. The pattern is called “Cat Track”. It’s a traditional weaving pattern and one you can spot on the servants’ blankets in the downstairs quarters of the Biltmore House, here in Asheville.
I ordered Poem Crown’s fabric on Spoonflower’s Organic Cotton Sateen. It’s a nice light to medium weight, opaque and soft and perfect for pajamas.
Luckily it is also non-directional, meaning I can turn it upside down and not notice a difference. I have a video and post all about fabric nap (that’s the term for directional fabric) if you want to learn more.
Because this pajama pattern calls for non-directional fabric if your fabric has a nap to it you will need to purchase a bit more fabric to ensure the pattern pieces are all cut going the same direction.
Yardage needed
Non-directional fabric 56” wide – 1 yd for shorts
Directional fabric 56″ wide – 1 ¼ yd for shorts
Pants cut from 56” wide non-directional fabric need 2 ½ yards to 3 yards depending on size and length. I measured from my high hip down to the floor. Then double that length for an approximate amount of fabric needed (2 1/4 yards)
When in doubt I always lay out my pattern pieces in a certain width (example: 22” for 45” wide fabric folded in half. Remember you lose an inch because of the selvedge) and measure how long it takes to get all the pieces. That’s my yardage. And yes, I do this a lot.
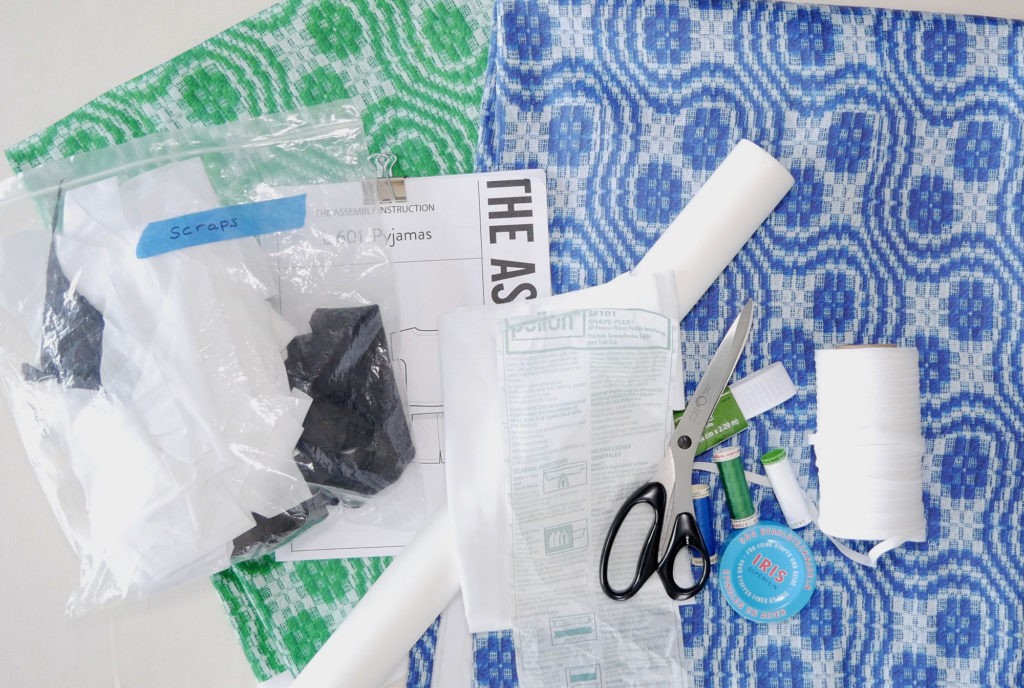
Supplies
- Fabric – washed and ready to cut
- The Assembly Line’s free pattern, printed out. Note that when you go to the pattern it says “add to cart” I promise you the cost is 0.00
- Tape to tape the sheets of the printed off pattern
- 1” wide or 30mm elastic OR drawstring cord or ribbon. (I used 5/8″ wide grosgrain ribbon).
- How much elastic you need is given on the pattern in centimeters. You can put the elastic around your waist and cut the length you need plus a ½” for overlapping the ends. If you have a large difference in size between your waist and your hips, be sure the elastic, when stretched, can go over your hips.
- The drawstring should be as long as the circumference of the bottoms plus 10 inches.
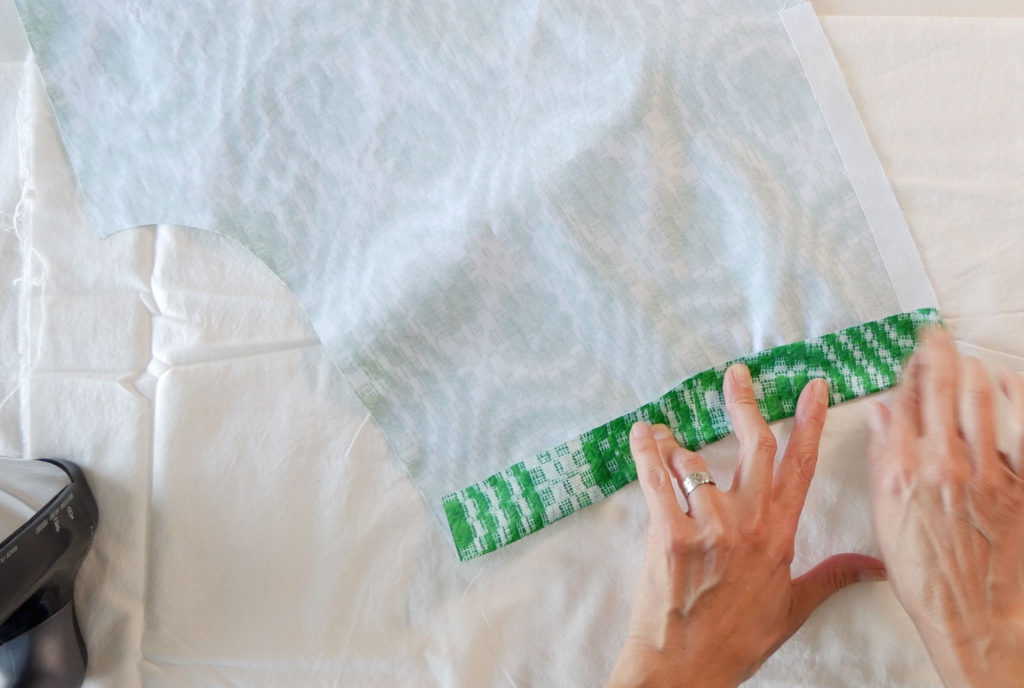
- Fusible interfacing – scraps really because you only need 2 or 4 pieces 7” by ¾” If you don’t have scraps Pellon SF 101 is a good choice and easily available
- Thread, pins, scissors, a bodkin or safety pin if using elastic
- Sewing machine and overlock/serger
- If you don’t have a serger you can use a zig-zag stitch. Or does a friend have a serger you could borrow? You won’t need it for long.
- If you don’t have a sewing machine you could use a running stitch to make these bottoms. I wouldn’t hand zig-zag the edges though. I would get some pinking shears and go old-school on those seam allowances.
Setting Up
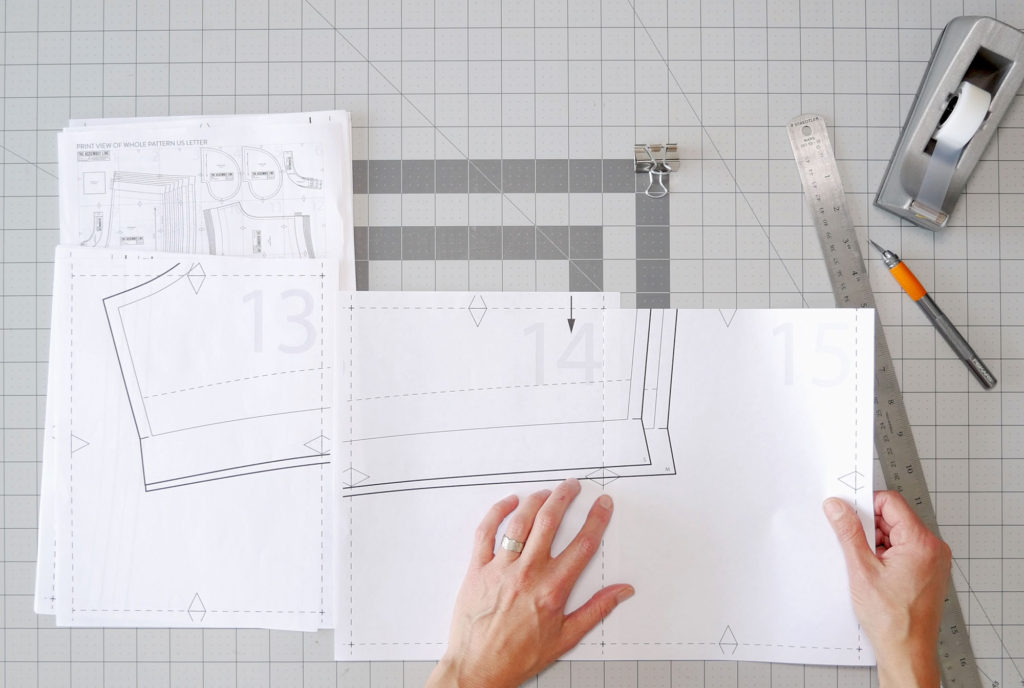
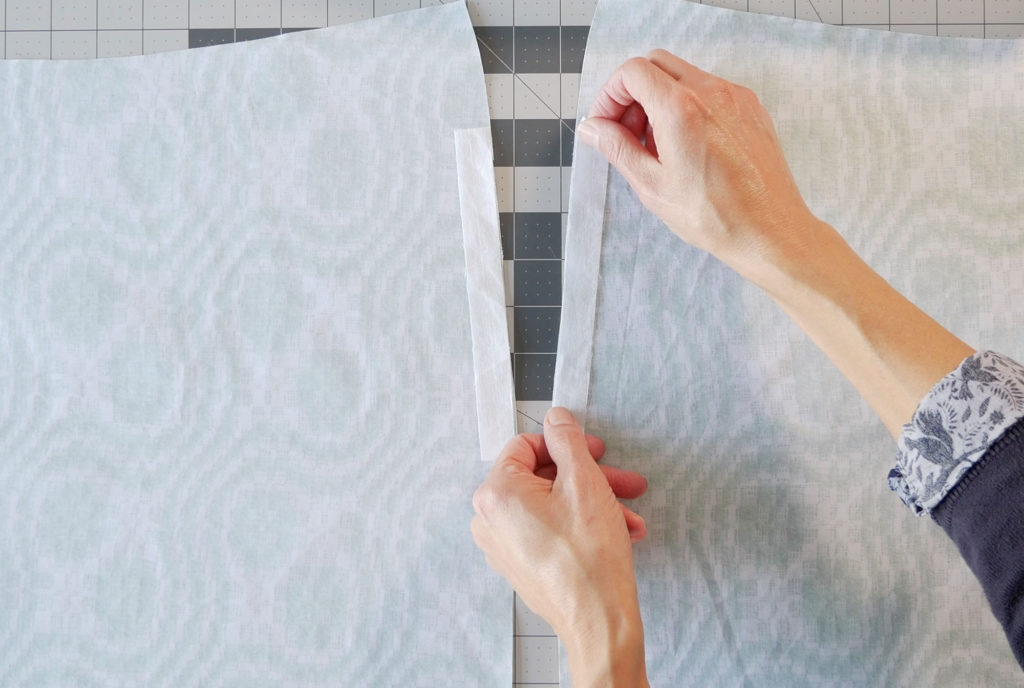
After printing the pattern, tape the tiles together. I cut off the same long side and the same short side on every sheet to make lining up the sheets of paper easier. Follow the tilemap that comes with the pattern. You can tape off just the tiles for the shorts back, then the shorts front. You do not need to tape all the pieces together into one large sheet.
Trace off the size pattern you want to use
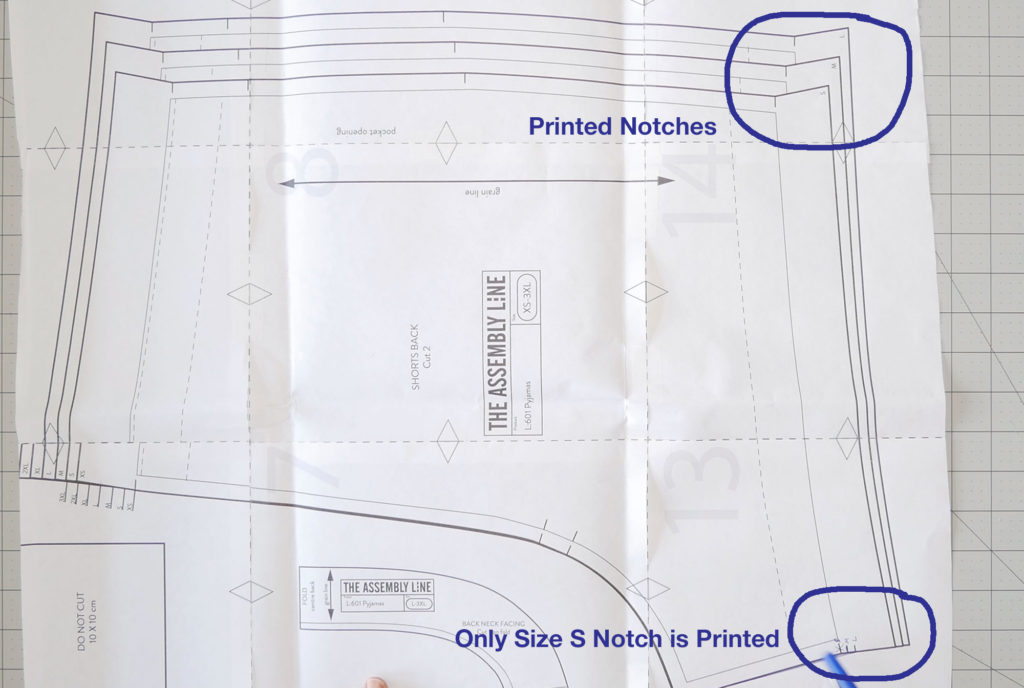
At the hem of the shorts, you need to make a notch on the inner leg seam for some sizes. There is a notch for all the sizes on the side seam to indicate the fold line for the hem but not on the inner leg seam. Since you need this notch, measure the distance between the notches on the side seam and then draw your own notch that same distance apart on the inner leg seam.
Want to Make Pants?
You can see this step on the video at 5:09
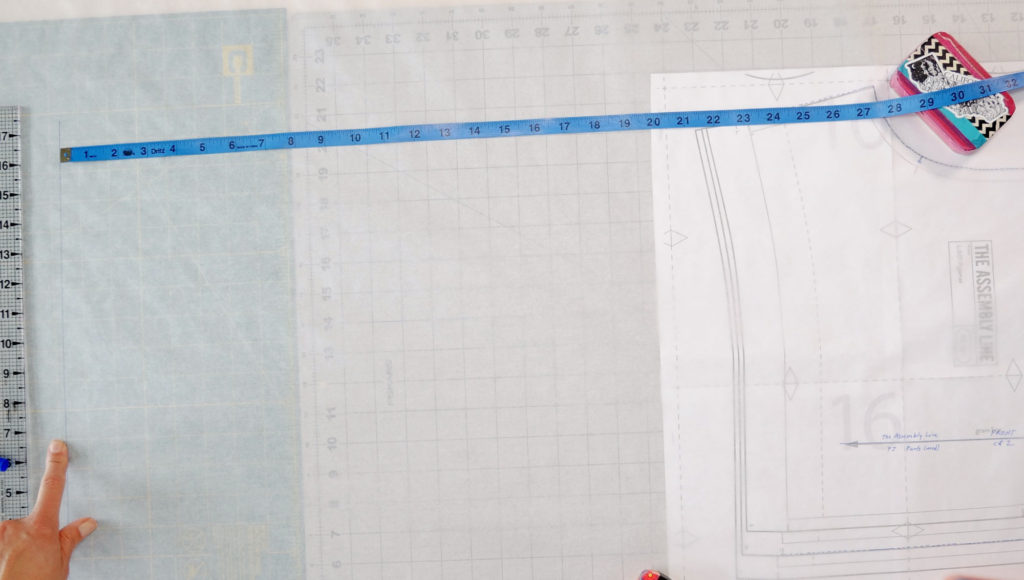
Measure on yourself from the crotch to where you want the pajama pants to end. Or measure the inseam of a pair of pants that are the length you want.
Trace off the shorts, front or back, pattern in your size but stop at the hem notches.
Measure down, from the inseam to the length you want the pants to be. Remember to start measuring at the seam line, not the cut line. The seam line is marked on The Assembly Line’s pattern.
Draw a line straight across at that distance. This line should be perpendicular to the pattern’s grainline.
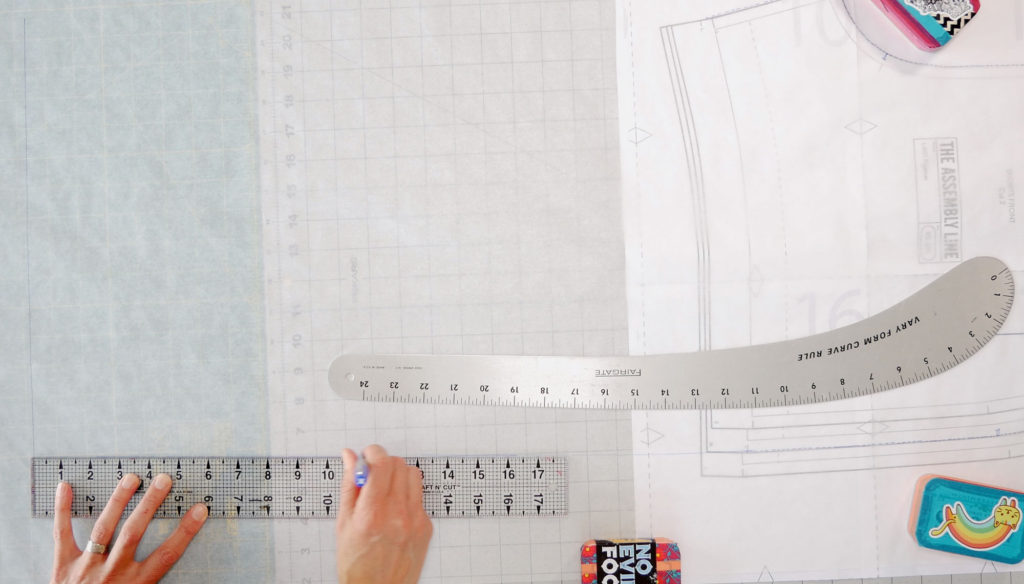
Draw from where you stopped tracing the inner and outer leg of the pattern to your new hemline. You can eyeball this as these are pajamas not fitted trousers. If you think about how pant legs look most of them taper in a bit. You will draw your pant legs as wide or as tapered as you like.
Add hem allowance to the bottom. I added 1” to my pattern.
To get the second pattern piece (the front or the back, whichever is left) Again trace off the shorts just to the hem notches. Lay this tracing on top of the one you just drafted into long pants. Line up the crotch seams and check that the grainlines are parallel trace the inner leg you drew onto the new pattern.
Shift the top pattern over to line up the outer seam, again check that grainlines are parallel. Trace off the outer leg.
A Couple Notes as You Follow the Pattern Instructions
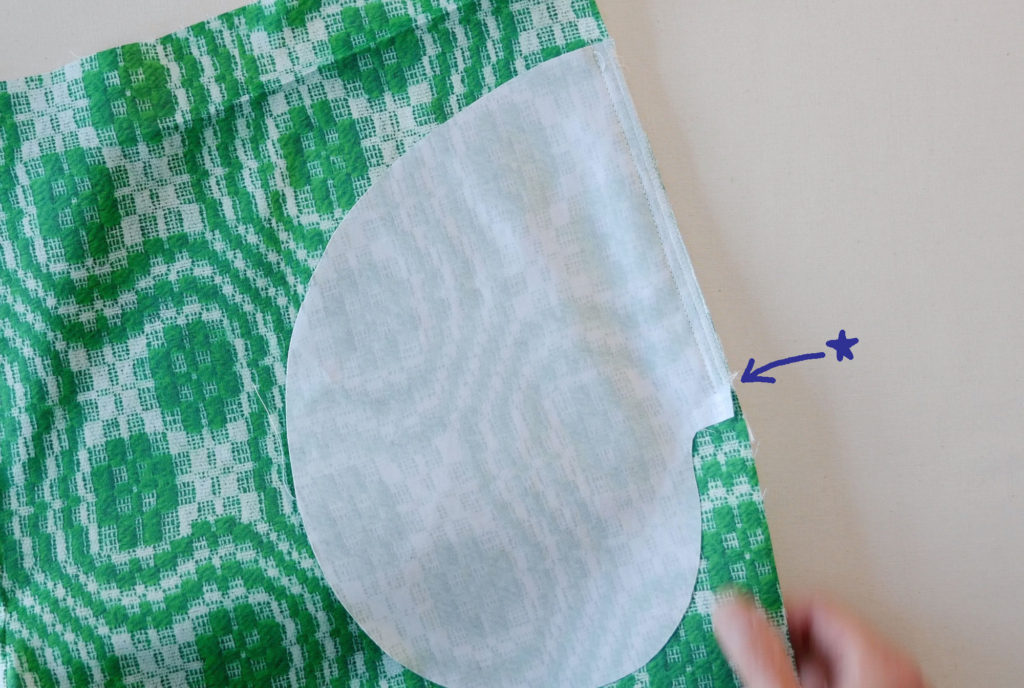
You need four pockets. If you are tight on fabric the pockets can be made from a different fabric.
Measurement in inches for the fusible Interfacing is 7” long by ¾” wide. If your fabric is lightweight cut out four strips and fuse to the back pieces as well as the front as per instructions.
The interfacing strips are a little longer than the pocket placement notches. They will be placed approximately one centimeter or 3/8″ above and below the notches.
All the pieces are folded and pressed at waist & hem notches and press. For inches, that’s 1 ½” at the waist and 1 ⅜” at the hem.
The waist is curved and the hem a bit too, which means you have to work a bit to get the fold. I found it easier if I folded and pressed at the outer edges, where the notches are, and then pulled the fabric gently from side to side as I folded up the rest. I double-checked with a ruler in a couple of places as I pressed.
The seam allowance is 1 cm OR 3/8″
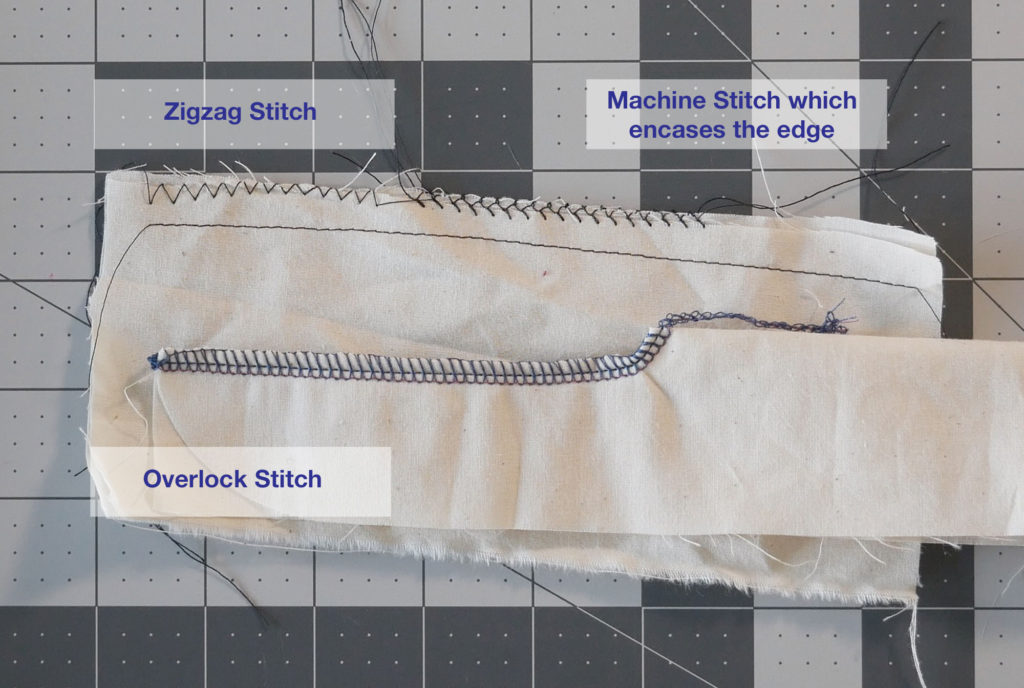
The pattern instructs you to overlock all of the seam allowances to finish the raw edges. If you do not have a serger you can use a zig-zag stitch to catch the raw edge. You may also have another stitch on your machine that will catch the raw edge. Take a look at all your available stitches.
One pocket is lined up on each side of the front and the back. Because the notches are on the pants pieces and not the pocket pieces, line up the pockets so they are centered between the notches. You will have about a centimeter (⅜”) of pocket beyond each notch on purpose.
Sew the pockets onto the shorts with slightly less than the 1 cm (⅜”) seam allowance. STOP at the bottom notch. I place a pin in the notch so I can see it when I sew.
I zig-zagged my pocket seam edges as it’s easier to stop the sewing machine at the notch than a serger.
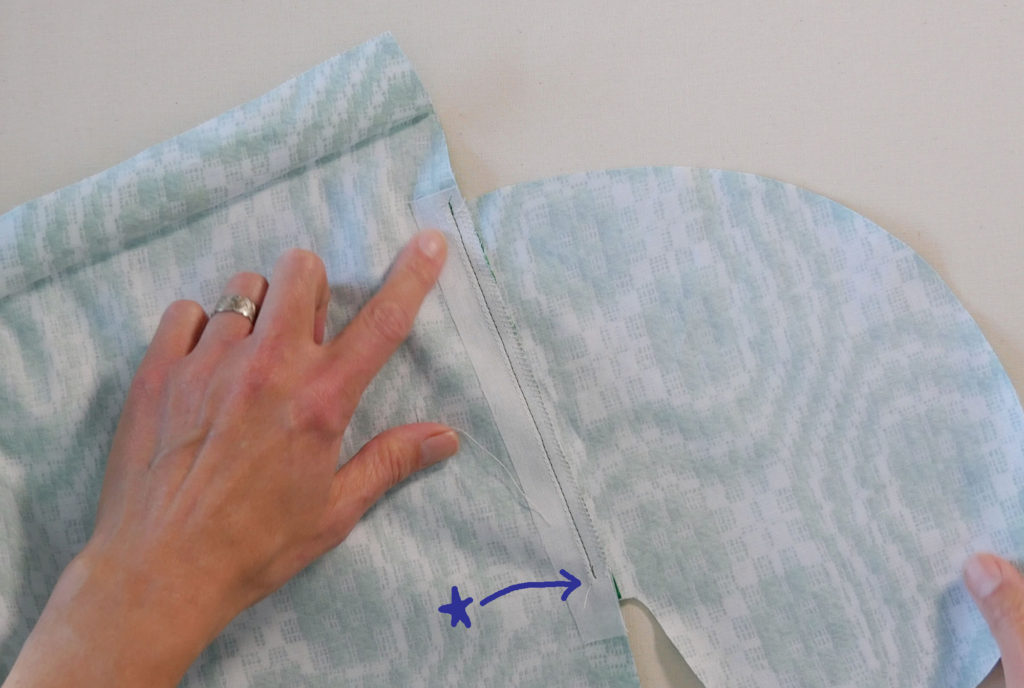
Understitch all four pocket pieces as per the instructions. This is when you sew the seam allowance to the pocket only. Not the shorts. You will have three layers of fabric; the pocket piece and the two layers of seam allowance. The understitch also ends at the notch.
When you sew the front pie to the back piece, sew down to the first pocket notch, pivot, sew around the pocket to the second pocket notch, pivot and sew the outer leg down to the end.
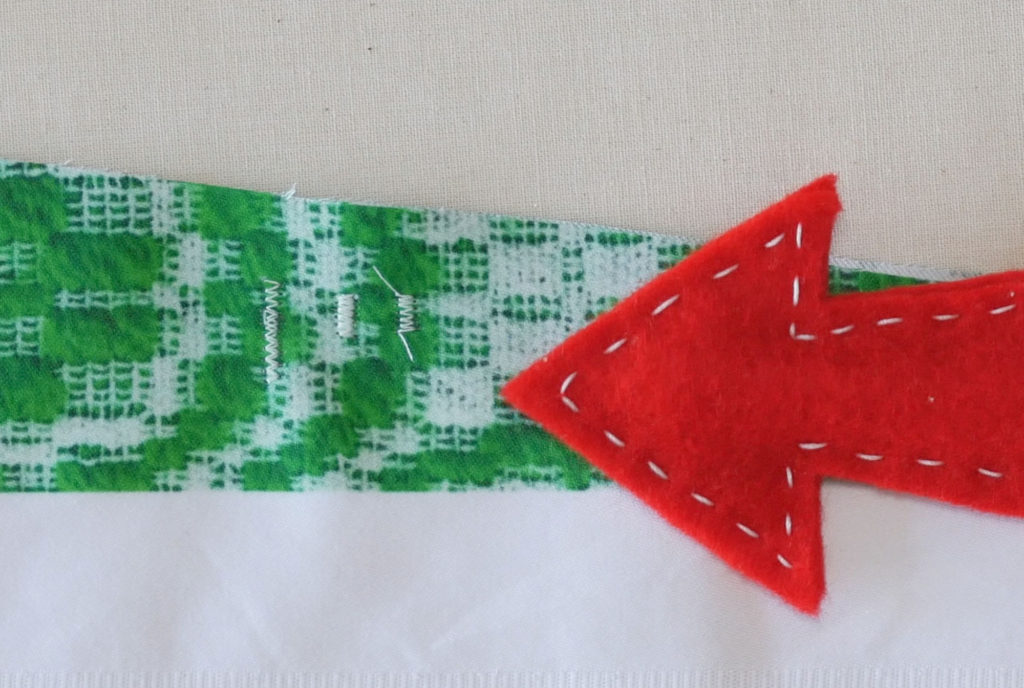
Making a bartack is simply making a short, very close together, and narrow zig-zag stitch. You may want to zig-zag down then reverse and zig-zag back up, over the stitches you just made to form a substantial-looking bartack. You definitely want to practice on scrap fabric to get the stitch settings you like
You can see more about the bartack on the video at 13:50
An alternative to finishing the top and bottom edges with a zig-zag or overlock stitch would be to simply fold the raw edge in on itself ¼”. This works great on the hem but on the waist edge, you want to be sure you have enough fabric to make a wide enough casing for your elastic or cord.
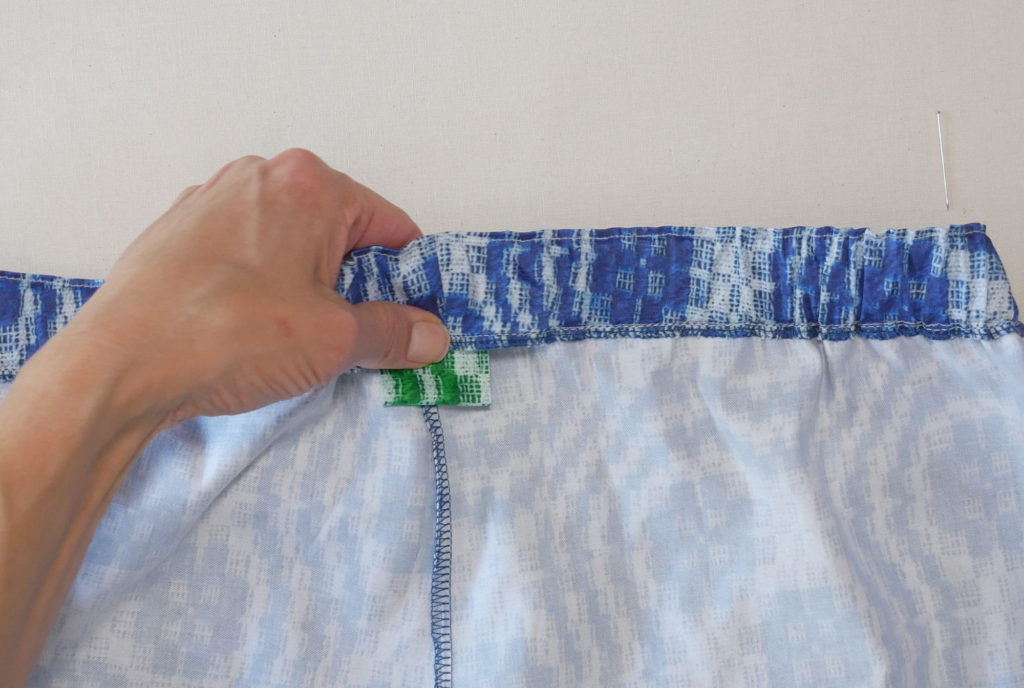
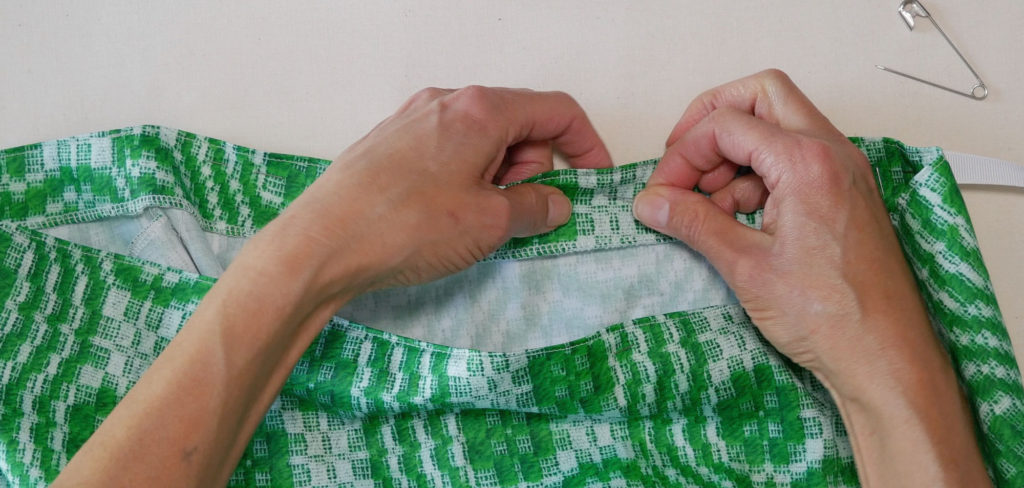
I like to add a folded piece of fabric (scrap) to the center back as I sew the casing shut (after the elastic is in). This serves as a “back marker” so when I get dressed I easily see which is the back and which is the front.
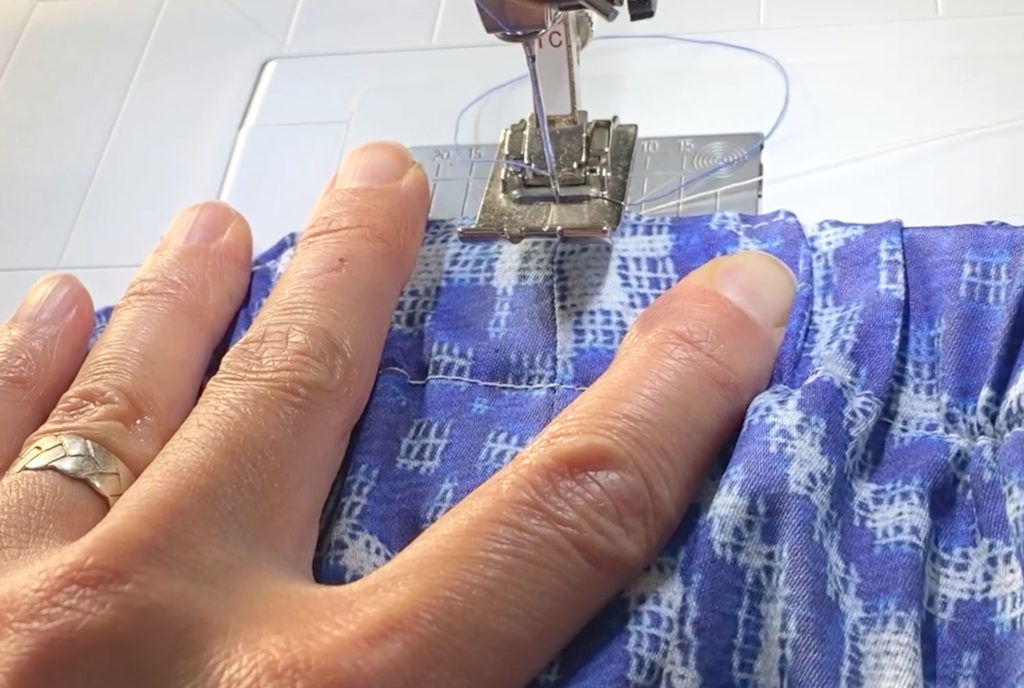
After distributing the elastic evenly around, stitch in the ditch at each seam through the elastic. This keeps the elastic from twisting which is a very nice detail.
I like to use matching thread and stitch on the right side of the garment. If you pull the seam so it opens more (like a book) and stitch right in the “valley” the seam makes, you will not see the stitches when you’re done
You can see this step on the video at 21:50

Drawstring Casing Option
You can see this step on the video at 16:07
Basically, drawstring casings are just like elastic casings except the cord needs an entrance and exit into the casing on the outside of the pajama bottoms. I find buttonholes make great openings for drawstrings.
First, measure how wide your drawstring is – this is the length of your buttonholes.
Unfold the waist casing and mark below the fold line where buttonholes will be going. I set them about 3/8″ down from the fold and equally apart from the center front seam – far enough away from the seam to avoid making a buttonhole through the seam allowance.
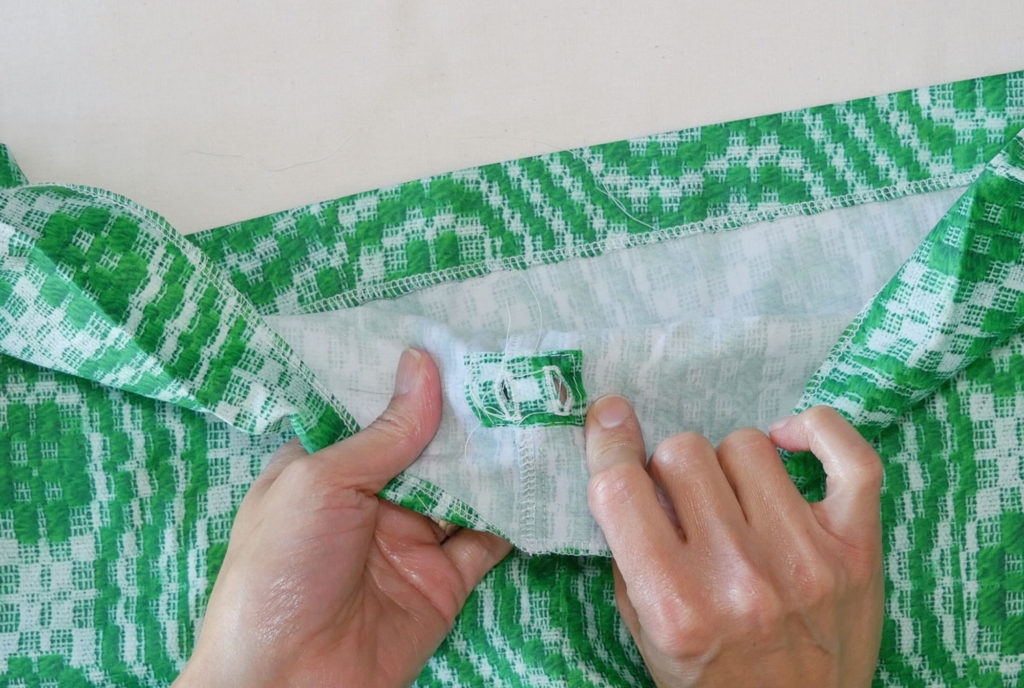
The buttonholes will be sewn on this one layer. Not through both layers of the waist casing. To get better-looking and stronger buttonholes add some interfacing or a scrap of fabric to the underside of where the buttonholes will be.
Cut the buttonholes open
Fold the casing back down and sew around the top edge. You can sew right next to the fold, as the pattern instructs for the elastic waist, or sew 1/4″ down from the edge if you want to make the casing narrower for narrow cord.
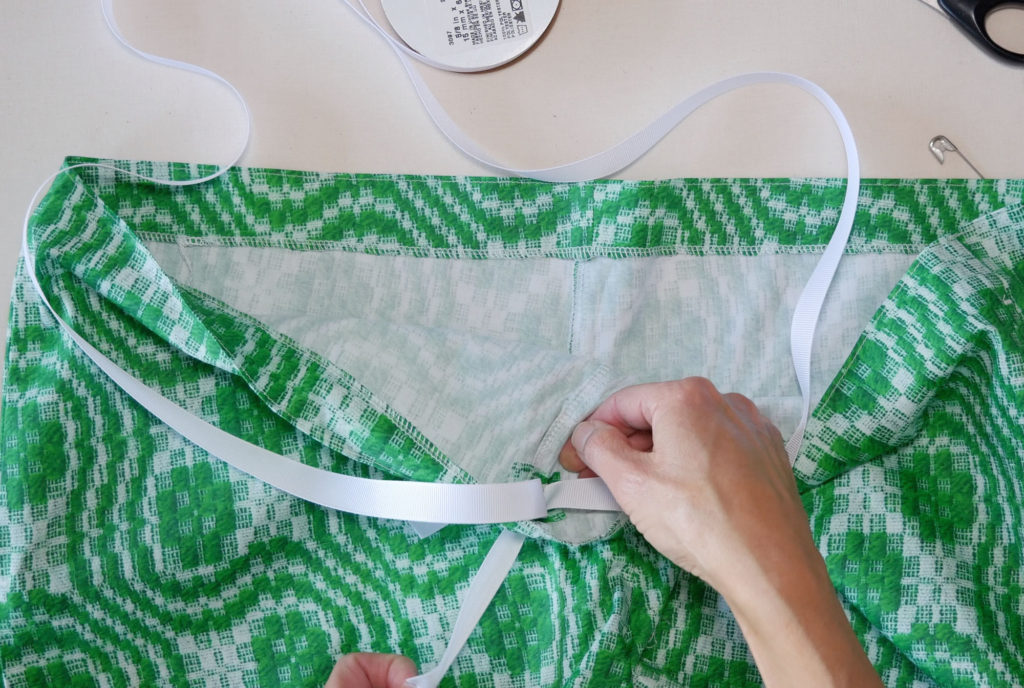
Open the fold back up and from the backside thread one end of the drawstring through the right hole and the other end through the left.
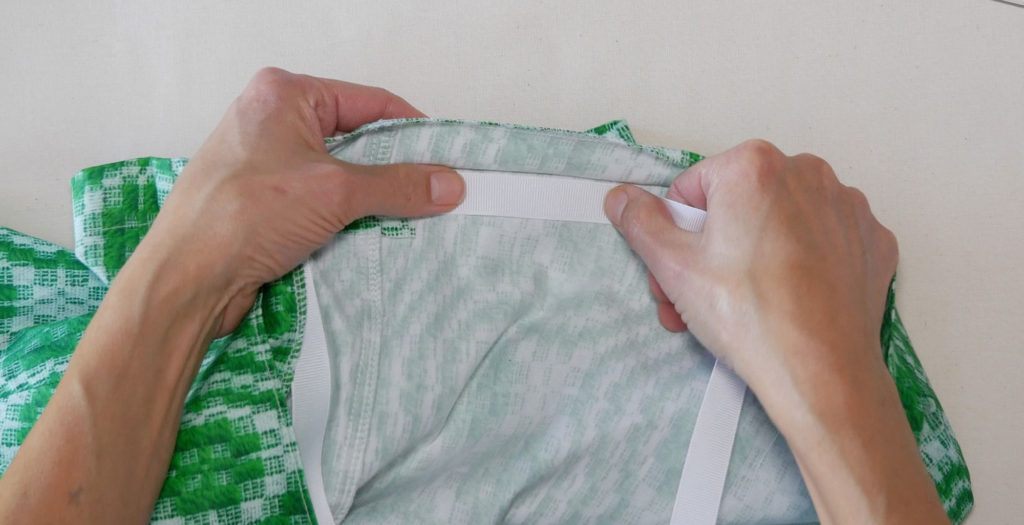
Place the drawstring up into the casing close to the top stitches and fold down the casing. Pin the drawstring in place through the casing to be certain it is safely out of the way when you sew the bottom edge of the casing down.
Sew the casing down.
If you are using ribbon dab a little Fray Check on the cut edges to keep it from fraying. I also knot the ends to prevent them from going into the casing.
Note: You will see a casing on lots of patterns; shirt sleeve hems, drawstring bags, etc. The method for constructing them is almost always the same.
Summary
These pajamas were a fairly quick make. They’re certainly comfortable and I can see using this pattern for years to come.
These could certainly be made in flannel and even a knit fabric.
