

Note that while this post is about taking in a lined, sleeveless dress along the side seams there are some basic tips for altering any garment included, mostly in the first two sections.
Do I Keep It? What to Look for Before Removing the Tags
I bought this dress because I liked the style and loved the colors and print. I ordered it in the size I thought would fit, but when it came it didn’t fit everywhere.
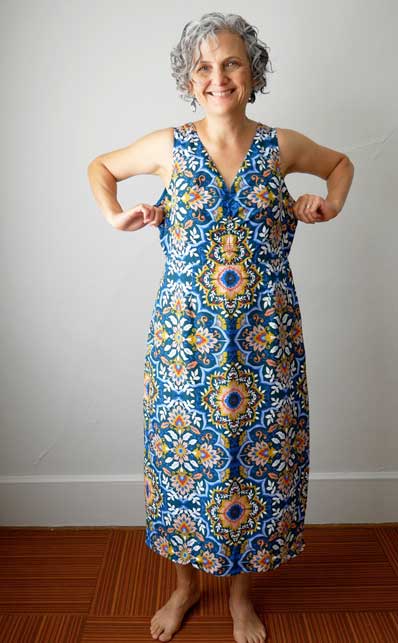
Since it fit in most areas and was too big in only the chest I thought, maybe, I could take it in. But before tags were removed I had to know for sure if I could.
When altering any garment you need to access how it was made in order to know if and how to alter it.
First, see if any vertical and horizontal seams in the area you need to alter. These are your friends because you can take in extra fabric at a seam without changing the style lines of the garment. The most common seams are center back and side seams. There can also be a center front seam, princess seams (front and back), and yokes. Some dresses have waist seams and some do not.
Second, check for any details like zippers and other ways of closing, pockets, and linings. These are the obstacles. At best they add more steps to the project (linings). At worse, they can make an alteration out of the question (side zippers, welt pockets in the way). By examining your garment you will get a good idea if the alteration can be done.
If you feel that the alteration is beyond your skills, take the garment to a tailor (before you are no longer able to return it). They can let you know if it’s possible and how much it will cost.
The Examination:
I have a center back zipper, side seams, (no sleeves, bonus) and a center front seam. Solution – take it in at the side seams.
Pinching out the excess fabric at the sides while the dress is on quickly showed that it would work. (Another option would be to take some fabric out at the center front seam, but then you could be changing the neckline so if I can avoid that, I will)
Is there anything I need to work around if I take the dress in where I have chosen? For this dress; side seam pockets that start at the waist seam and a lined bodice.
Possible Plan of Attack:
- A lining can be separated from the dress and altered the same way as a dress. It’s more to do but it can be done.
- Pockets could be in the way and I hate to give up pockets. I decided I would not be taking in the dress below the waist seam so I wouldn’t have to change the pockets.
Ok, Now the tags can come off the dress. I can alter it.
Want to skip all the reading? (but, hey, I offer a lot of details here) This 15-minute video shows you all the steps.
Deciding How Much to Take In:
Important first step: Launder the garment. You don’t want it shrinking after you alter it.
Set yourself in front of a mirror, garment on as you plan to wear it so you can see what you are doing and how it is going. (Not only should the dress be right side out but also; do you plan to wear a bra with it or over a t-shirt or turtleneck?)
Start by feeling for the side seam (or whichever seam you are taking in). You want to pin out the front and back evenly.
When the bodice is too big the side seam is not pulling forward or backward – it’s not pulling at all, it’s slack. But if you know your back needs more or less room than your chest you want to pin out more from the front or back – not evenly. – however, when you’re done with the alteration the side seam will be straight, not tilting to the front or the back. For more on an alteration that needs more fabric removed form one side than the other, see the end of this post.
Place the pins going down toward the ground as you pin out the excess. Pins in this direction are less likely to hurt you when you take the garment off.
Pin the left and right sides, going from one to the other so as not to pull the garment off center. If you have a center front seam check that it is staying in the center as you pin.
Notice if one side feels or fits better (check the mirror).
This is not going to be pretty. Think of these pins as your rough draft. They will be cleaned up before we sew.
Take the garment off and lay it on a flat work surface.
Measure how much you took out from each side. Chances are great they are not identical.
This is when you get to decide and if you remember that one side felt better than the other, start with that side.
I noticed I pinned ⅝” from one side and ¾” from the other which seemed like too much (double that because you are taking out ¾” from the front and from the back – that’s 1.5 inches and double again because right and left side, that’s 3 inches. That seemed crazy) But I remembered that ¾” side felt better. Also the ⅝” pinched out was further down the side which would mean I would take out more at the top. (this bodice really did have a “V” shape at the side seams). So I started with ¾”.
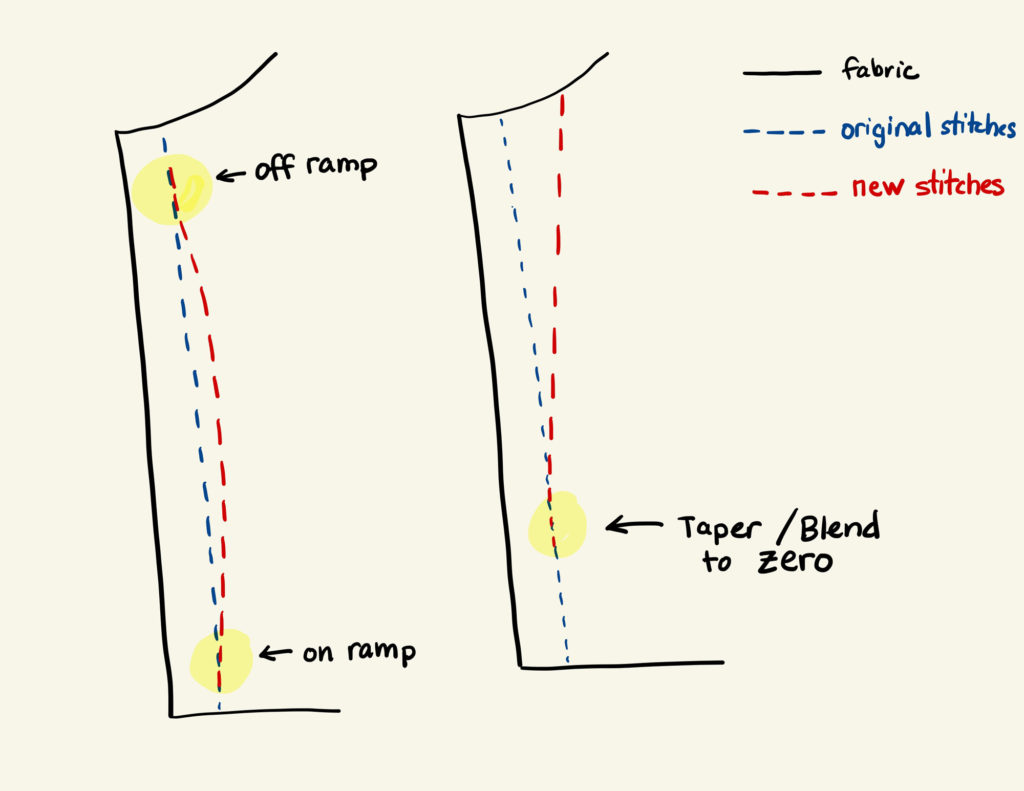
You always want any new stitch line to leave and rejoin the original seam line smoothly, like an on and off-ramp of a freeway. I’m starting at the top of the bodice’s side seam. There is no off-ramp from the original stitch line. I’m ending at the waist seam so I need an on-ramp to the side seam just above the waist seam.
It’s actually called “tapering to Zero” but on-ramps and off-ramps are good visuals.
Shift the pins into an orderly smooth line on just one side, taking in how much you need based on the measuring of the two sides earlier. Pin as if these were the new stitches. Measure these pins – how far over and how far down – so you can place pins the same amount in on the other side.
Try the dress on again (you don’t want to do the work only for it to be too tight or still too loose).
Be sure you can move how you want in it if you take in anything below the bust check that you can still sit comfortably. Reach your arms forward like you’re driving a car. Mimic any other activity you do regularly.
If it feels good and looks right to you then you’re ready to do the alteration. If you’re not yet happy with it repin until you get it how you want it.
Replicating the Pin Placement for the Stitch Line
Lay the garment flat. Measure and write down where the pins are now. Where the pins are is where you want to sew. Measure how far down the pin is on the garment and how far over from the seam.
Take the pins out. Good thing you wrote it down because now it’s time to take out any stitching that’s blocking the wrong side of the seam you’re taking in.
Reverse the Construction
Altering a garment is reversing the construction of it to the point where the seam you are altering was originally sewn.
Take a minute and work out how your garment was constructed. Keep in mind: Whenever you alter a garment that is lined you have to alter the lining in the same way.

Reversing the construction process for this dress:
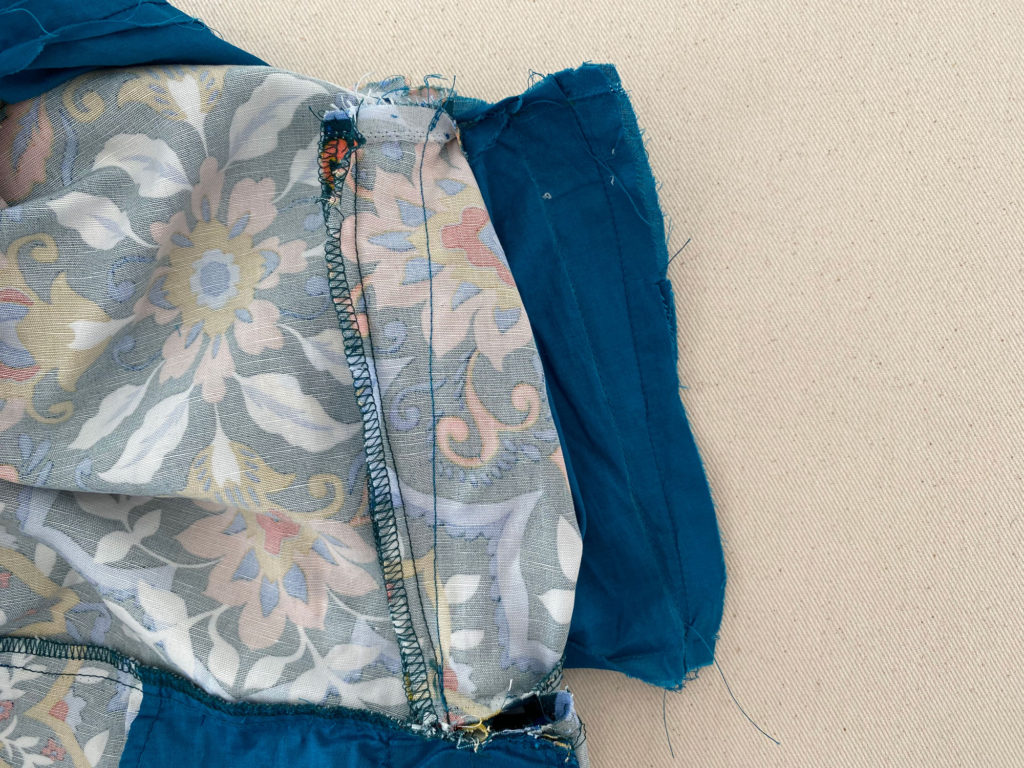
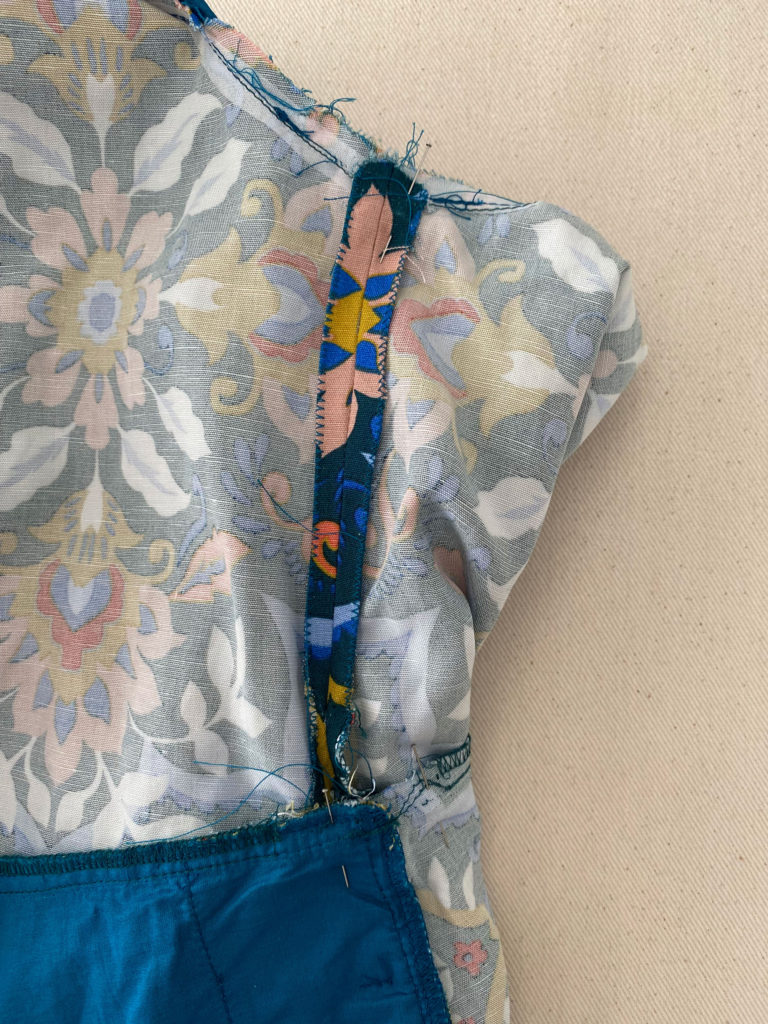
- The lining was sewn up closed to the waist seam last. Undo this first but only a little beyond the side seams. (Only the bodice is lined in this dress. If your garment is fully lined you will need to detach the lining only where it is blocking you from getting to your seam)
- The lining was understitched around the arm – undo enough of these stitches to do the alteration and a little beyond the seam you are altering. You do not need to undo the entire seam.
- If your garment is topstitched (stitching on the outside of the garment) it was probably not under-stitched. You’ll have to remove some of these topstitches to free the seam.*
- The lining was attached to the bodice around the arm – again only undo enough of these stitches to do the alteration and a little beyond the seam you are altering. I picked this seam out when I picked the understitching out.
- The bodice was attached to the skirt (and the seam allowance was finished with overcast stitches). Because I am taking in the side seam all the way down to the waist seam I need a little room for my machine’s presser foot beyond the waist seam. So I need to open up a couple of inches of the waist seam right where the side seam is attached.
You are allowed to change the construction (up to a point) when putting the garment back together.
I noticed that the dress lining was initially sewn to the waist by machine and the left side seam of the lining was left open to pull the dress right side out. I choose instead to close all the side seams so I could accurately see what I was measuring and taking in (I won’t have a consistent seam allowance to follow because I am not cutting the lining down before I take it in). I used another way to close up the lining to make it easier on myself.
When the seam you’re taking in is free and clear of obstacles press it flat so you can accurately measure and sew where you want.
The Alteration
Measure and mark your new stitching line according to the measurements you wrote down. Pin the sides to keep things from shifting. Sometimes with alterations, you are sewing in tight corners and you have to shift your project under the presser foot. Pinning will keep the layers evenly together.
Sew up your new side seams of the bodice and the lining. Trim the seam allowance if there is a lot.
Press the seam open or at least flat (if it’s serged and you didn’t trim it). You can finish the new seam allowance with zig-zag stitches or any method you prefer.
Reverse the Reversal 😉
Now to put the garment back together. It’s simply doing the reverse of how you took it apart.
Remember: You are allowed to change the construction when putting the garment back together if you know or prefer a different way.
For any seam you partially took out stitch a little beyond the opening at both ends following the original seam line.
- Sew the bodice to the skirt at the waist seam.
- Sew the bodice to the lining under the arms. Press the seam if you can get the iron there, finger press if you can’t.
- Understitch the lining to the bodice and lining seam allowance. If your garment is topstitched around the arm replicate the topstitching where you picked it out.* Press.
(Understitching leaves the garment piece free. Only the lining or facing is sewn to both the seam allowances near the seam. This keeps a lining or facing from creeping out or the garment while you are wearing it)
4. Reattach the bottom of the lining. My lining is attached to the waist seam. A fully lined dress usually has a free hanging lining but is tacked to a seam at some location. For those, you simply re-tack the lining to whatever seam it was tacked to before the alteration.
For a partial lining, we could sew it back down entirely by hand. It’s easy and doesn’t take very long.
Or you can use the Burrito Method to reattach most of it by machine.
* Topstitching is meant to be seen therefore you want to match the thread you are removing. If you cannot consider removing all of the topstitching around the arm and restitching it in an all-purpose thread that closely matches the garment fabric (as other topstitching thread would not match the topstitching on other parts of your garment)
Attach a Lining With a Burrito
The burrito method is a way to close up a lining to a hem (or waist seam) by machine instead of by hand. The garment is wrapped up inside of itself resembling a burrito.
It sounds complicated but I have a lot of photos here to guide you.

Place the dress so its hem is away from you and the back is facing up (Because I opened the front. If I had opened the back the front would be facing up)
Starting at the hem, roll the dress up
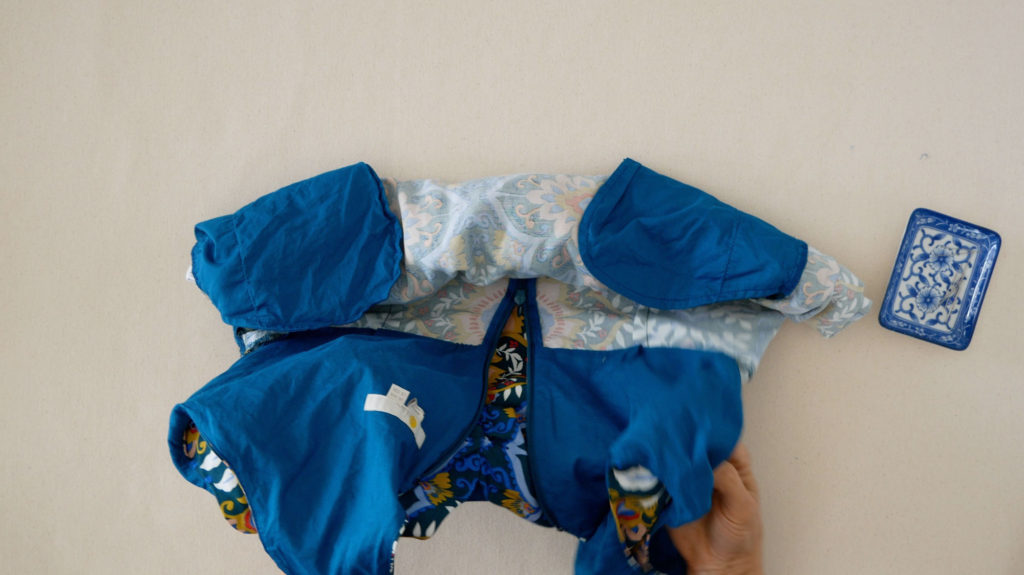
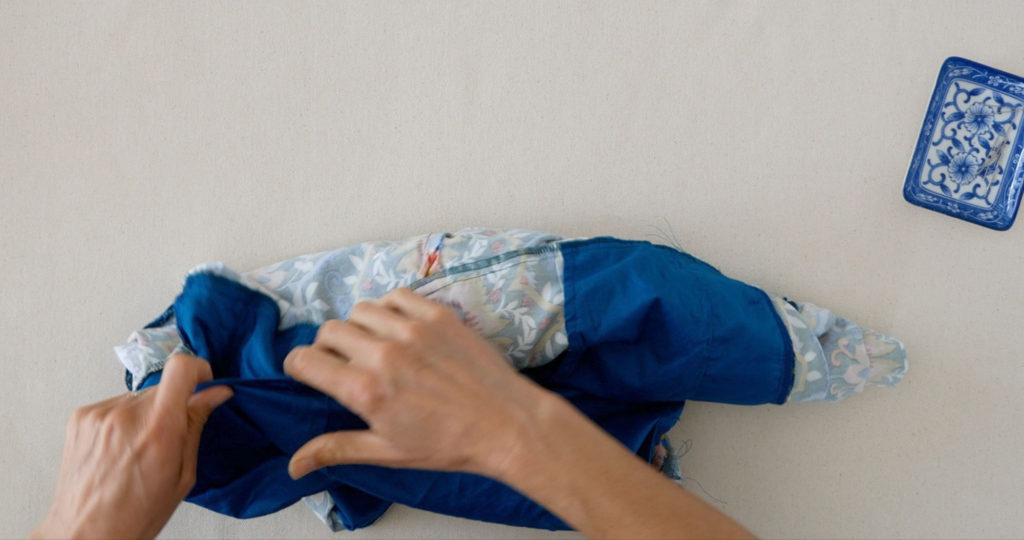
Bring the lining up and over.
Have where you are attaching the lining visible.
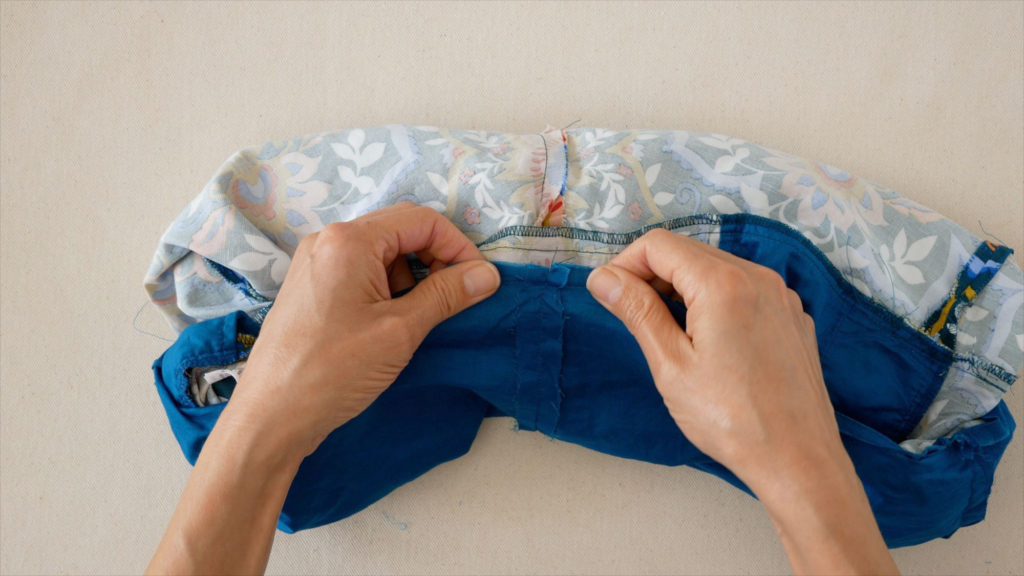
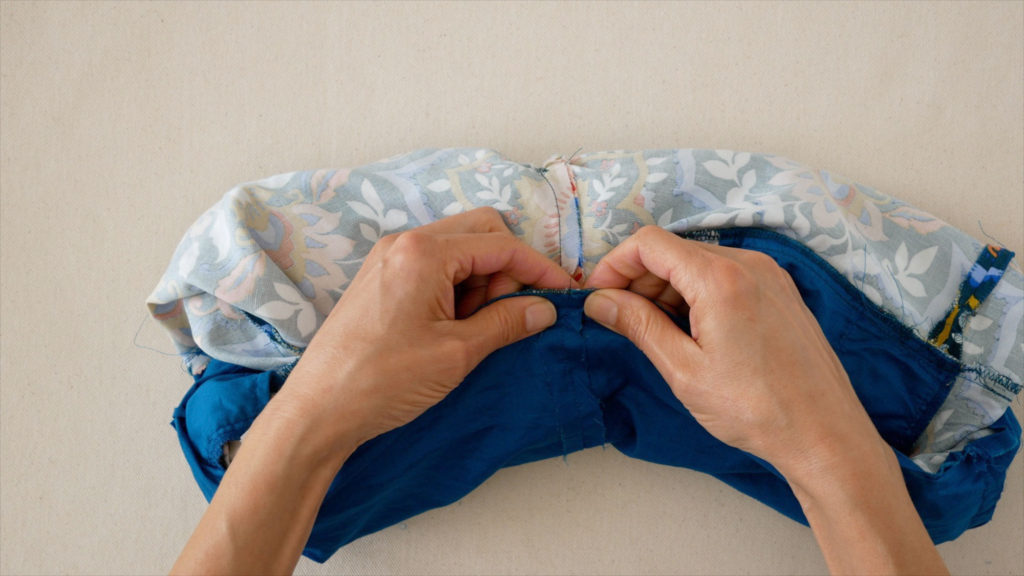
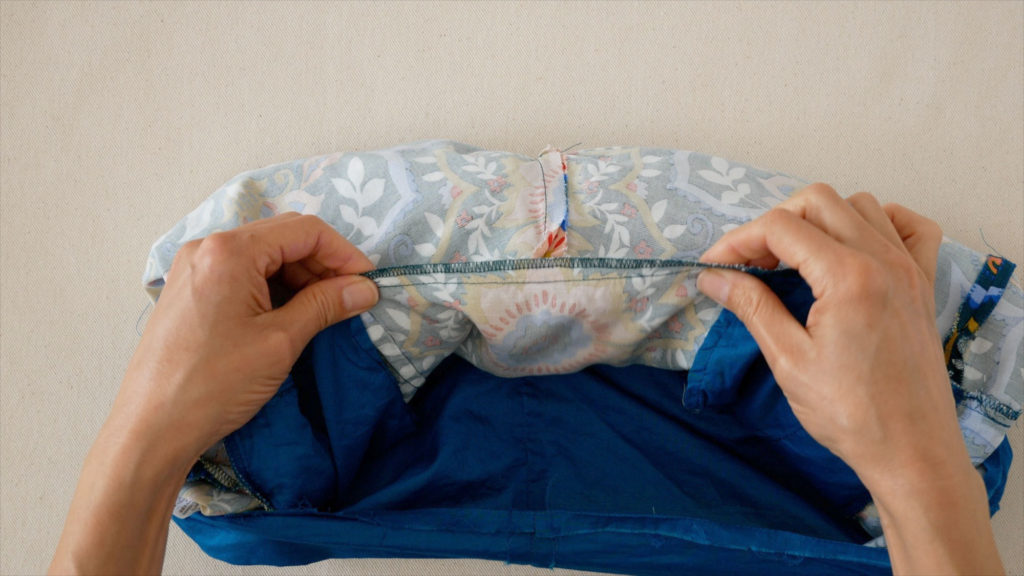
The right side of the lining is touching the wrong side of the dress and the raw edge is lined up to the waist seam or where you are attaching it.
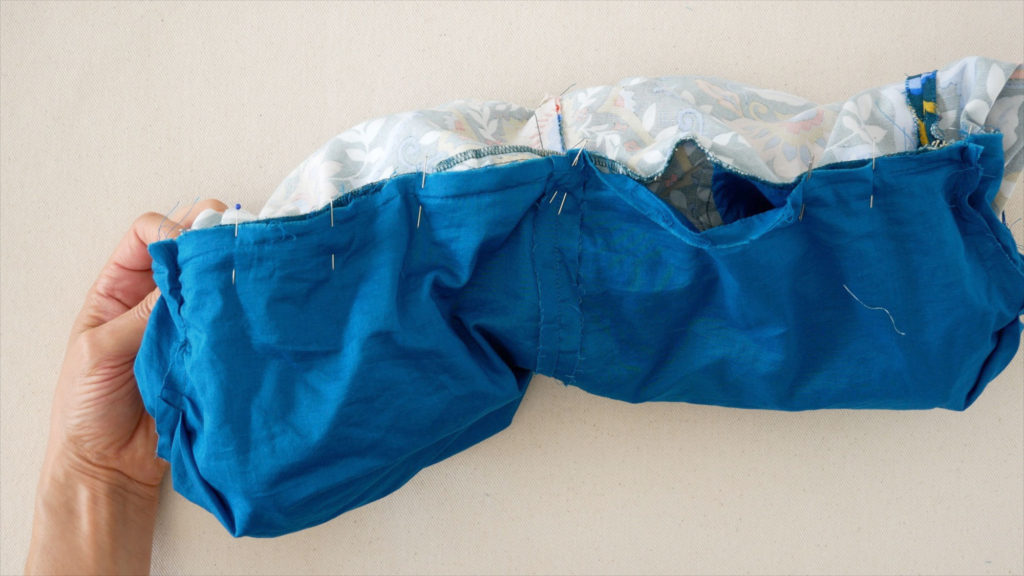
Pin the lining’s raw edge to the waist seam starting at any obvious matching points (where seams meet) And then pin from the ends toward the center. Around the center leave a 5” gap. This needs to be left open when machine sewing the lining back down. It is how you will pull the dress out of the “burrito”.
Resew the lining to the dress at the waist seam leaving those few inches in the center unattached.
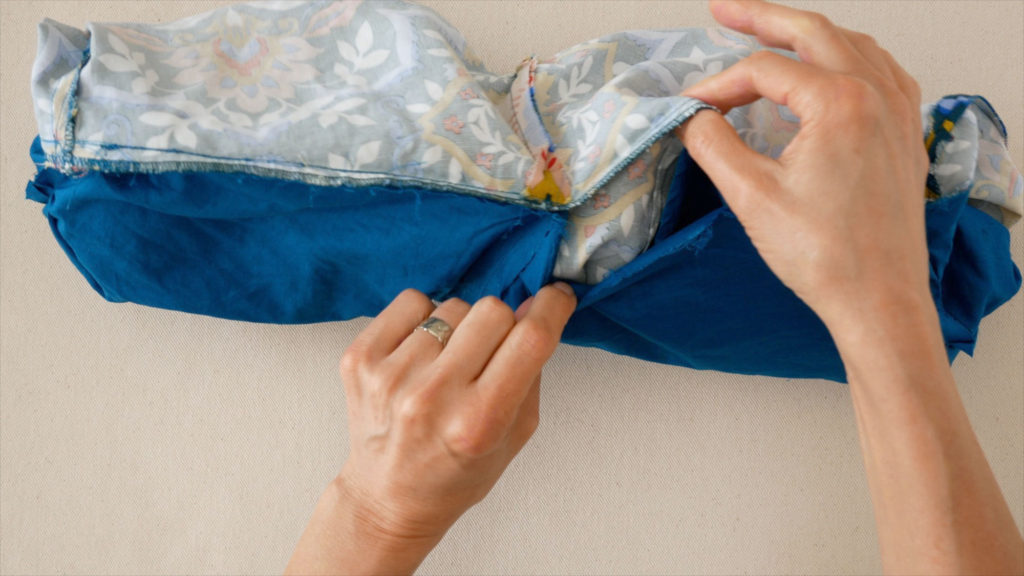
Reach your hand into the opening and pull the dress out, carefully.
Press the seam (it will be a wrinkly heap) making sure to press under the seam allowance of the opening.
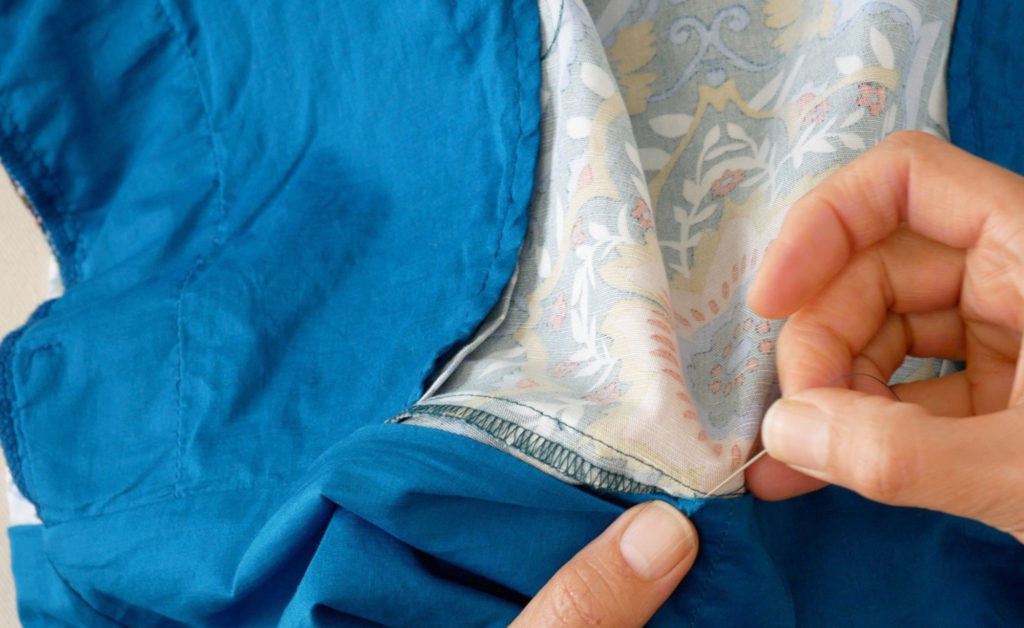
Close the opening by hand with a slip stitch and press when done.
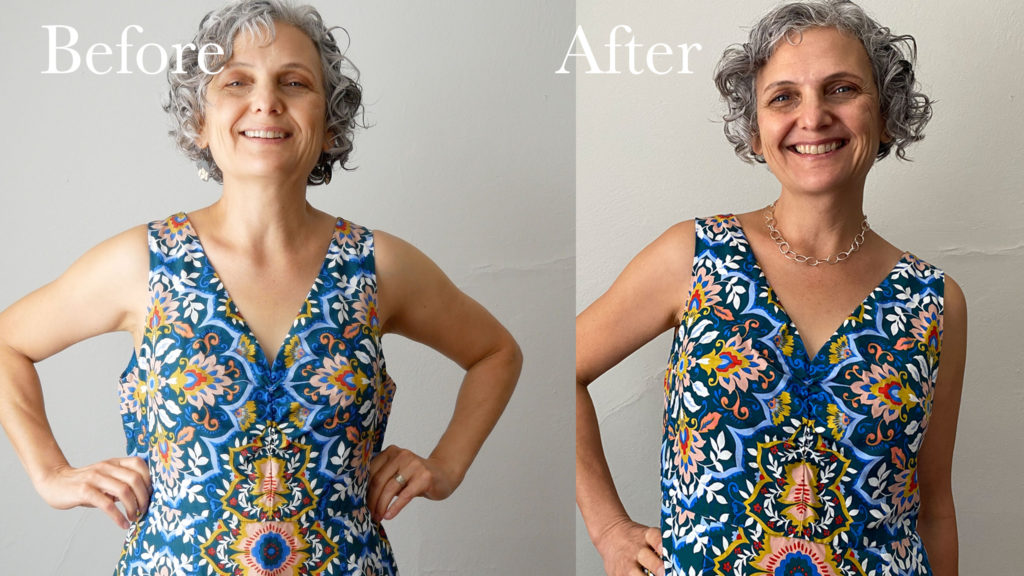
That’s It. You’re Done.
This basic alteration isn’t that hard, just a lot of steps but now you have a garment that really fits you. Yay!

When Only the Back Needs to be Taken In
I received a great question about this alteration on YouTube.
“My dress is only too large (wide) on the back from armhole to waist is this something you can help me with please?”
My Reply: (for now – I will be adding more detail and drawings soon)
Yes, this can be done. It might be a little tricky for me to explain only with words but here goes:
Pin out the excess on both sides as in the video except you are not pinching evenly from front and back. You’re just pinching out excess where it is. When you’re done look in the mirror with a critical eye for the fit. Does either side look better than the other? (if you prefer one to the other you can just measure the favorited side (the next few steps) and use those measurements for both sides – unless you are noticeably asymmetrical then ignore that and measure both sides)
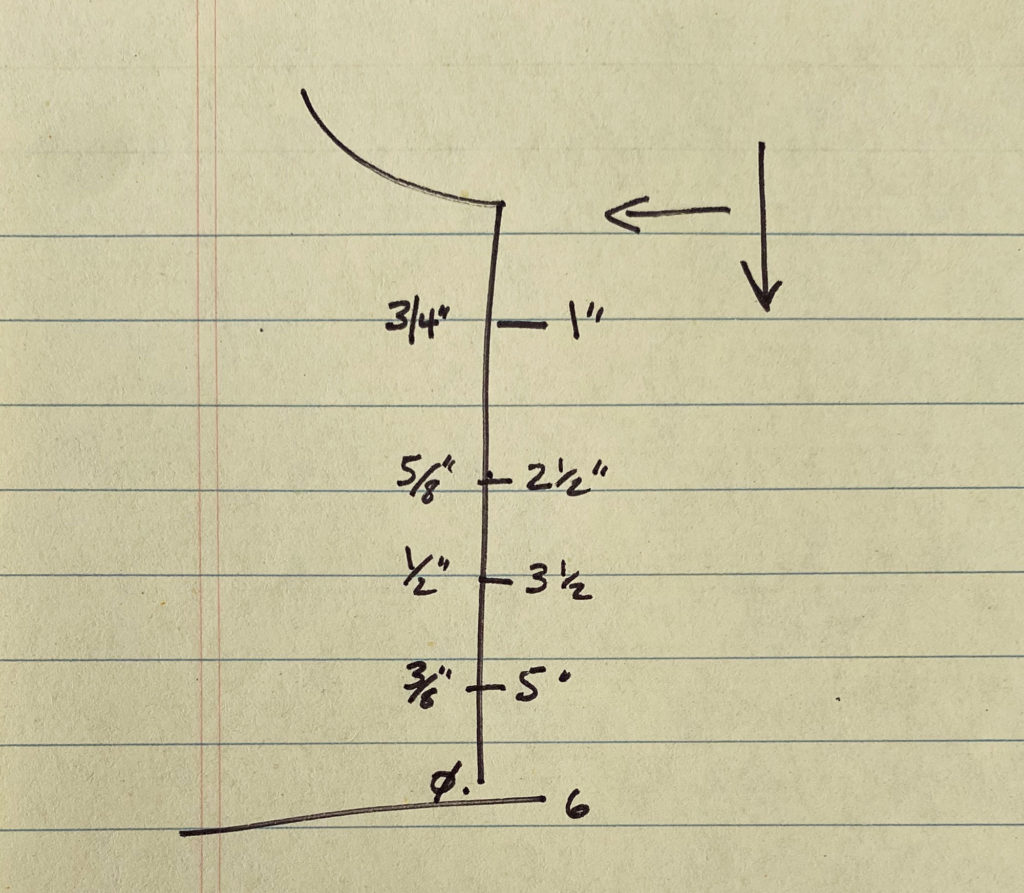
Leave the pins in and take off the dress. Have a good look then measure what you pinched out. Notice how far down from the underarm seam you started to pinch out the side seam. Write this down. Where did you pinched out the most fabric? Write this down. How far down the side seam did you stop pinching out excess fabric? Write that down. Then measure the other side and compare. You can blend these reference points together.
Example: The right side starts 1″ down from the underarm seam. The left side starts 3/4″ down. You could split the difference and start them both at 7/8″ down or pick one to use for both sides. Same for where you pinched out the most and where you stopped.
Then measure how much you pinched out at the place you pinched out the most. For example: You may see you pinched out 1/8 from the front and 3/4 of the back on the right side and on the left you pinched out only 1/2″ of the back and a minuscule amount from the front. (You’ll know from the side seam what you pinched from the back and front)
Unless you know you are noticeably asymmetric (one high hip, curving spine, dropped shoulder) add the amounts you took out from the back together. So 3/4″ + 1/2″ = 1,1/4″. Ignore the tiny amounts from the front because, as you said, the front fits as it is. Divide that total in 2 1,1/4″ /2 = 5/8″
You will unpick the side seams where you pinned and a little beyond. Then repin the seams following your notes. You’ll be shifting in the back pieces so it will not line up with the edge of the front piece. Using the example above; at the point you started pinching out the back the edge of the front and back will match. Then you will measure down to where you pinched out the most. There you will move the back piece in so that it sticks out 5/8″ from the edge of the front. Where you stopped pinching, the edges will again line up.
Now you need to pin the back to the front (where it’s open) so it smoothly goes from 0 to the deepest point to 0 again. If the total length of all of this is over 7″, or if you feel more comfortable with more info, You could have another point down from the underarm seam as a reference for how much you took out of the back piece.
whew, I hope that makes sense. I’ll add this to the blog post that accompanies this video (link in the description) and there I will add pictures/drawings and more detail.
Thanks for the question. It’s helpful to others as well.
Great video of this alteration. Love the way you illustrated the precise measuring at the start. Your Demo answered any question I could have had regarding the process. Great job!
thank you. I’m glad you found it informative and hopefully straight forward
Such a practical and reassuring guide! I loved how the method walks you through pinning the lining exactly at the waist seam before adjusting—this kind of approach builds confidence while ensuring precision. The way you recommend basting first, testing the fit, and trimming only after feels respectful of both the fabric and the garment’s structure. As someone who’s adjusted lined dresses before, this kind of step-by-step, measured workflow really takes the guesswork out of alterations. Thanks for such clear and balanced instruction!
Thank you very much.