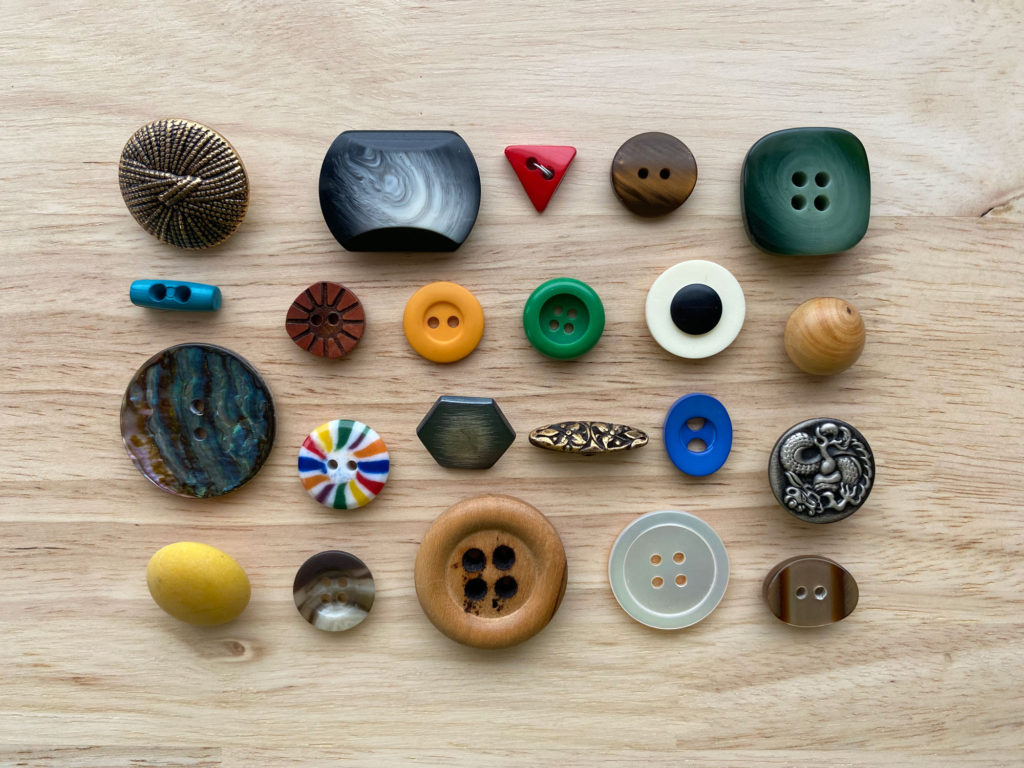
People say, “I can’t even sew on a button.” to mean they don’t know how to sew at all as if sewing on a button is the easiest thing in the world. And, yeah, it might not be hard to sew on a button but there’s a lot more to it than you may realize.
For instance, button placement, where do the buttons go if it’s not marked or if you altered the pattern?
Or how far off the fabric should a button rest? (It’s not directly on the fabric.)
And exactly where do you sew the button so it stays buttoned and you don’t flash the clerk at the grocery store?
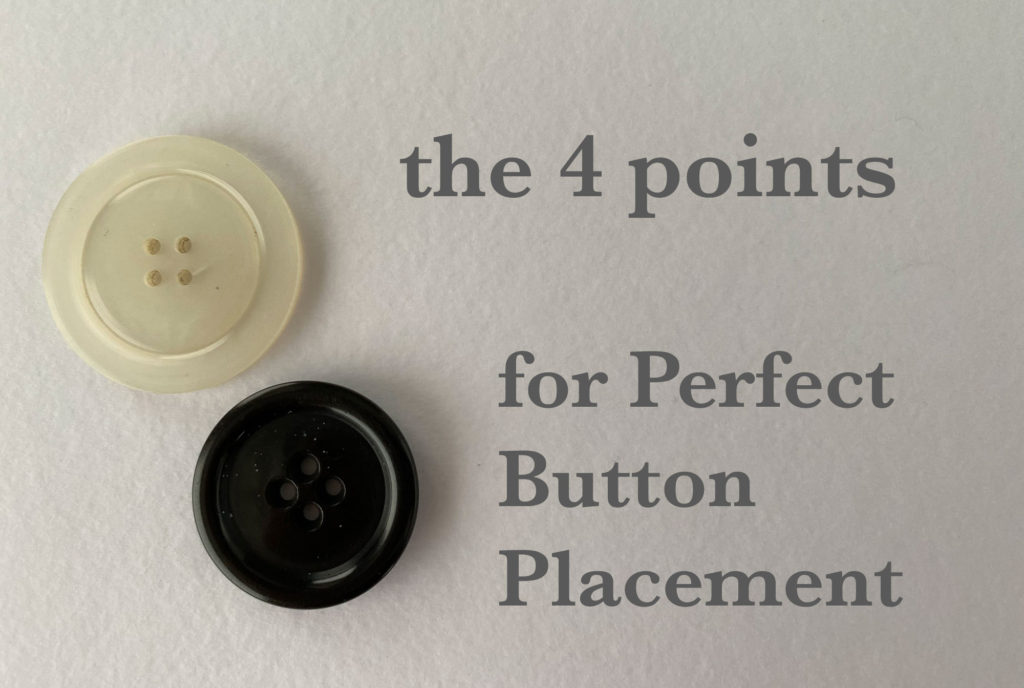
Button & Buttonhole Placement
There are 4 positions you need to consider
- Where buttons & buttonholes go on the garment from top to hem
- Where buttons & buttonholes go on the garment from side to side (and how much should the overlap of the garment be)
- Where are buttons sewn in relation to buttonholes?
- How far off the garment should a button lay?
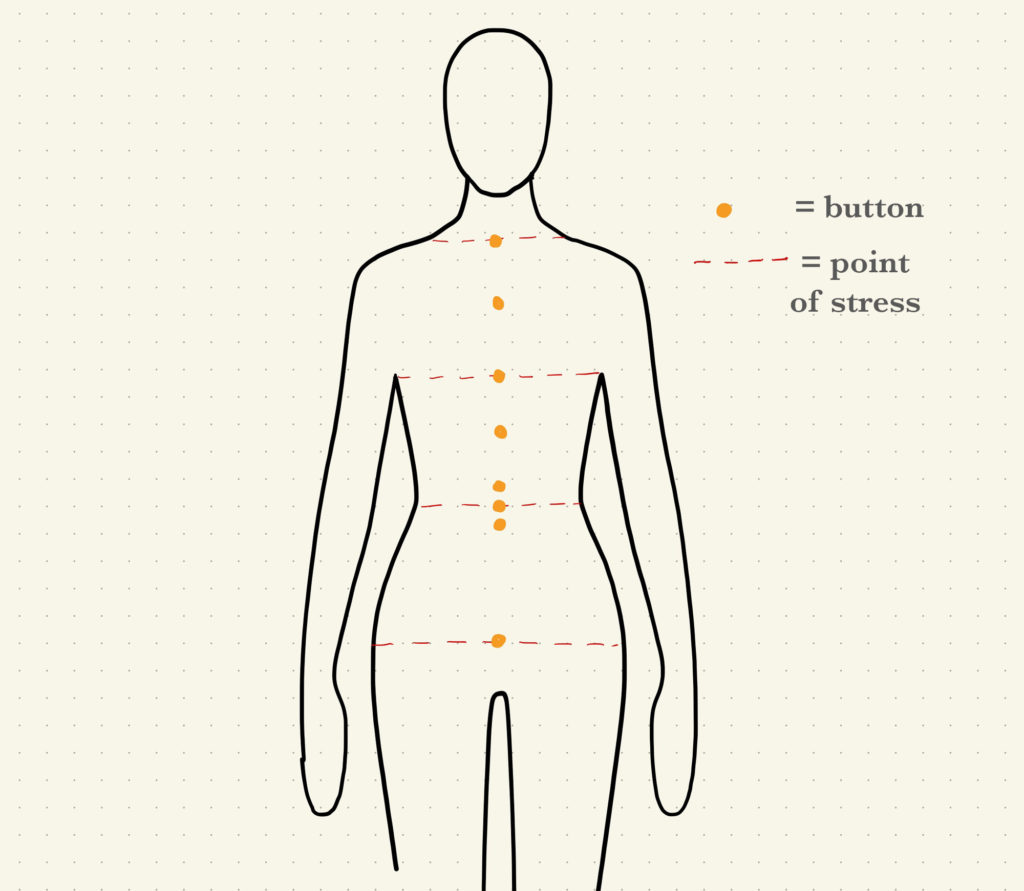
The Top to Hem Placement
If you’ve altered the garment’s length, shortened, or lengthen, you may need to alter the button placement.
Be sure there is a button located at all points of stress; the full bust on a shirt and dress, the waist on a jacket. You also want a button between the waist and bust and at least one below the waist.
Avoid placing a button at the waist on a shirt (or wherever your pants will hit) because you don’t want a button directly under your waistband when the shirt is tucked in. If the garment has a belt or will be worn with one, be sure the buttons are placed far enough above and below the belt to not interfere.
The Side-to-Side Placement
With so many independent patterns not using buttons at all, you may have forgotten, or never realized that the position of the buttonholes and buttons revolve around the closure line. In most garments, the closure line is also the center front or center back. Asymmetrically closing garments will not close on Center Front or Center Back.
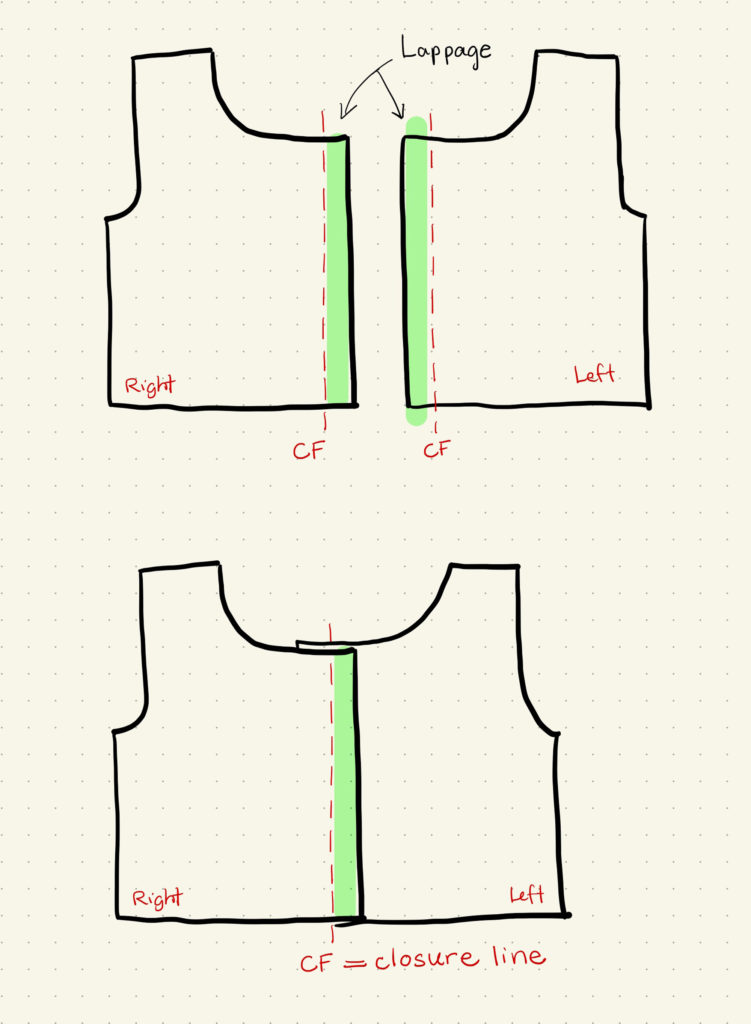
When you overlap the two sides of the opening, you need to line up the closure line. (Again, in most garments this is the center front for a front opening or center back for a back opening.) It is important to mark your closure or center lines when you are going to be sewing on buttons and buttonholes. Some people mark the line with hand basting, you could also use pins but I would be careful with chalk or marker because you really and truly want to be sure the mark comes all the way out being as it’s a center (therefore noticeable) line. And it doesn’t matter if it’s right over left or left over right, you’ll still line up the center lines.
The fabric that extends beyond the closure line, is called the “lappage”. The lappage should equal the width of the button so if you swap significantly different button sizes than the pattern suggests, I recommend adjusting the lappage width too to keep everything in balance.
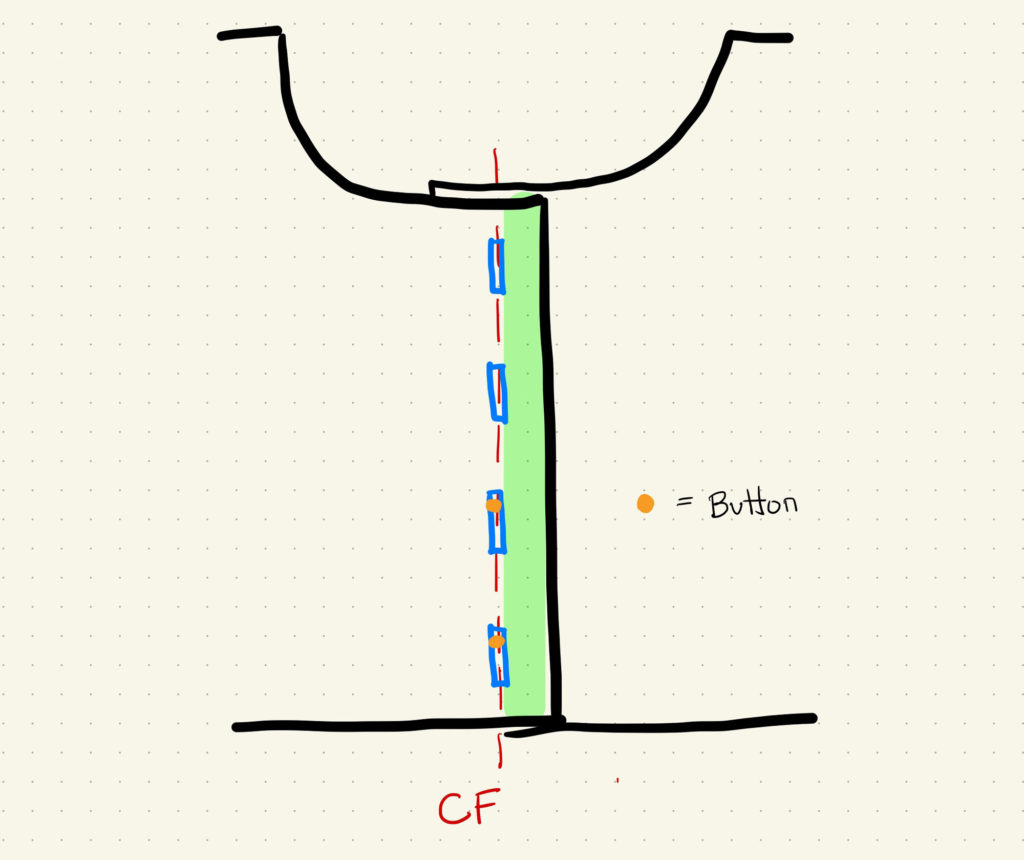
Vertical buttonholes are stitched on the closure line (Center Front or Center Back)
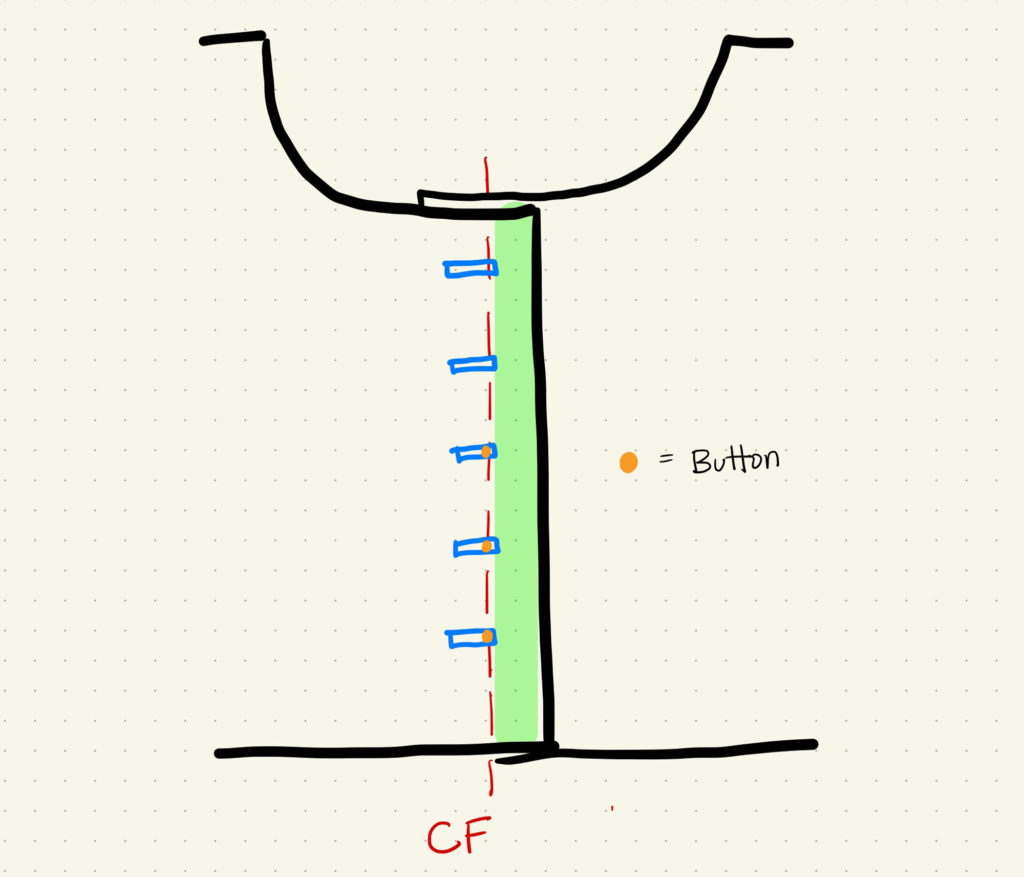
Horizontal buttonholes are stitched ⅛” over the center line into the lappage. This is true for garments that overlap left over right or right over left.
Where the button is sewn
This is the placement of where a button is sewn down in relation to the buttonhole and this makes a difference between keeping your buttons closed and having them work themselves free.

For vertical buttonholes sew the button ⅛” down from the top of the buttonhole on the closure line (usually center front or center back).
For horizontal buttonholes sew the button on the closure line (usually center front or center back). This not only helps the buttons stay closed it insures they are in a straight line.
When a button is sewn in the center of a buttonhole it can easily work itself free, especially the combination of a front button closure and a crossbody bag. You want the button to lay on top of the garment not just on top of the buttonhole.
Literally lay on top of the buttonhole. This brings us to:
How Far Off Should a Button Be?
If you sew a button down tight against the fabric where does the buttonhole fabric go? It gets squeezed under the button. It can’t move freely as you move under the garment. It strains, it might make little visible pulls and under this pressure, it might even work itself out from under that button.
The button lays on top of a buttonhole. They lay directly on top. Like Goldilocks they are neither too loose, nor too tight, they are just right.
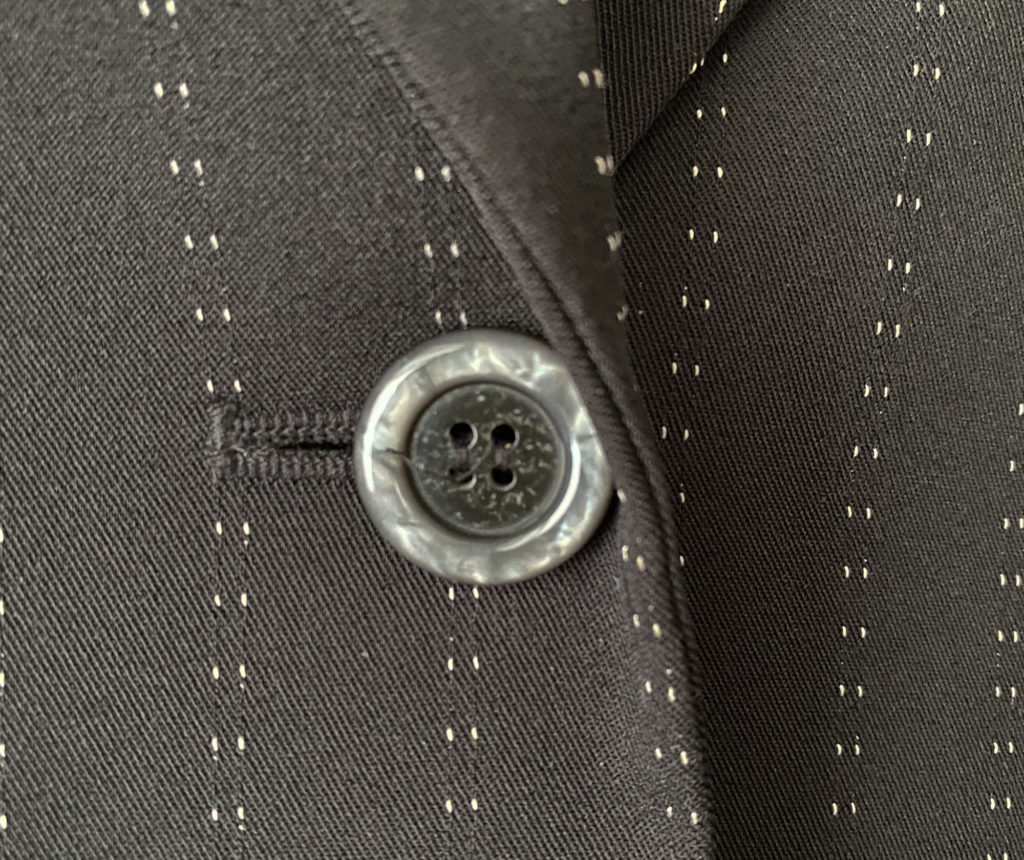
Buttons need a shank to lay perfectly on top of the buttonhole. This accommodates the thickness of the overlapping fabric (and its facing – and any interfacing that may be sandwiched in between). The thicker your fabric the larger the shank needs to be.

Some buttons have a shank built into them. Shank buttons are sewn flat to the fabric with the shanks going in the same direction as the buttonholes.
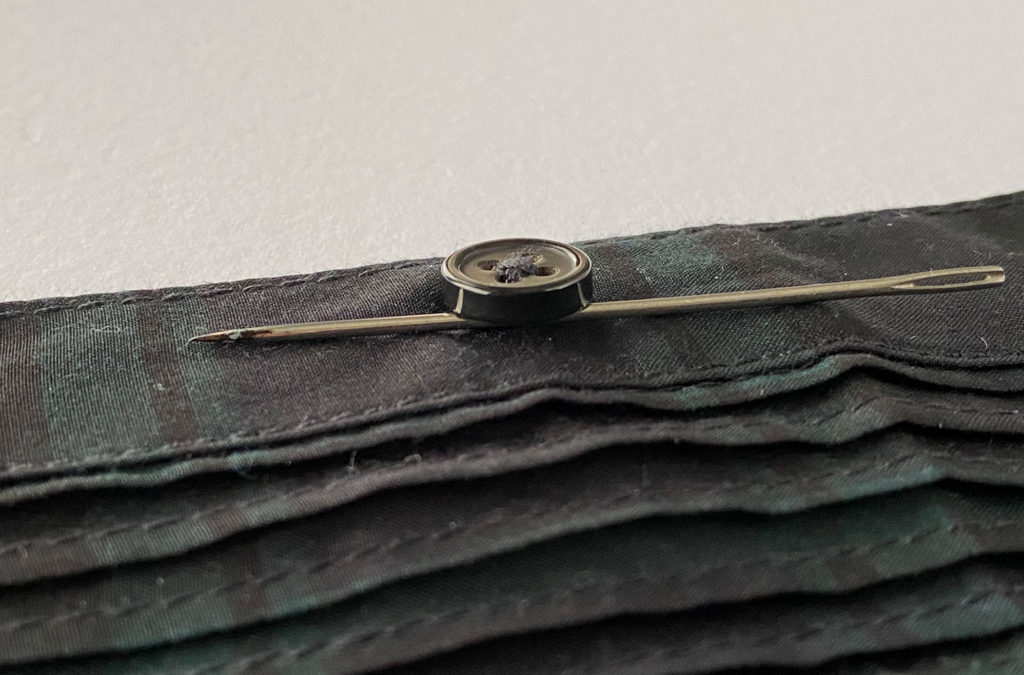
Sew through buttons need a thread shank that you make while sewing them in place. It isn’t hard to do and you can read the complete details HERE in an earlier post but here’s the quick and dirty:
- Get a “spacer” as thick as the buttonhole side of the garment, for example, a toothpick, a matchstick, or a darning needle.
- Place the spacer on top of the button and as you sew the button down, bring the thread over the spacer
- When done, pull the spacer out and lift the button to its highest point.
- Wrap the needle and thread around the threads between the fabric and the button. This is your thread shank.
While sewing on a button is still easy, it’s even better knowing your button isn’t going to pop open.