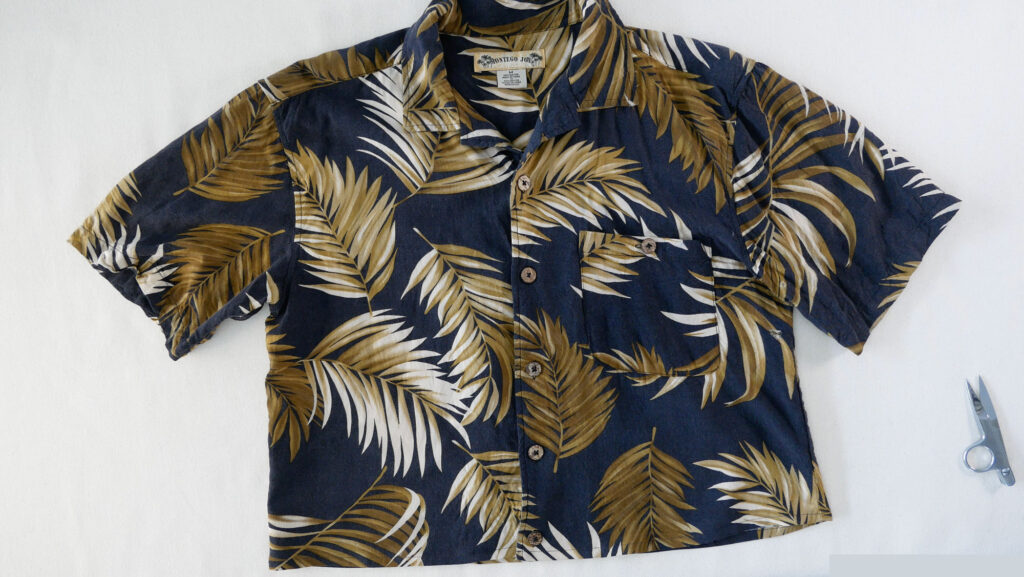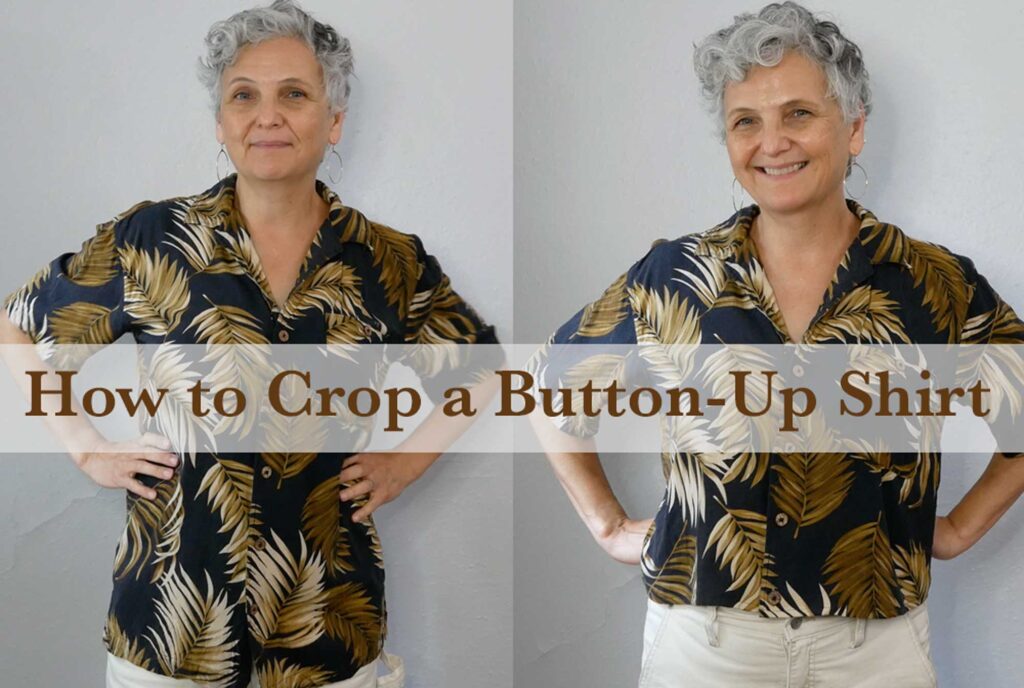
Taking an existing item of clothing that isn’t being worn and changing it in some way so it is worn is exciting. And even though I won’t be following the cropped button-up shirt trend, I want to show you how you can. Get out that shirt that’s being ignored and crop it, freshen it up, and give it a new life.
Clothes were made to be worn. It’s their purpose, their value, their dream. So if you’ve been wanting to crop a shirt, or just shorten it a little but don’t know where to start, this sewing tutorial is for you.
This hemming guide will help you achieve a professional finish regardless of your shirt’s original style or fabric content. There are instructional steps for:
- constructing a narrow hem or a wide hem
- what to do if your shirt has a wide facing
- how to handle a slippery fabric like rayon (Viscose)
So if you’re ready, let’s go!
If you would rather watch the process, this video is for you.
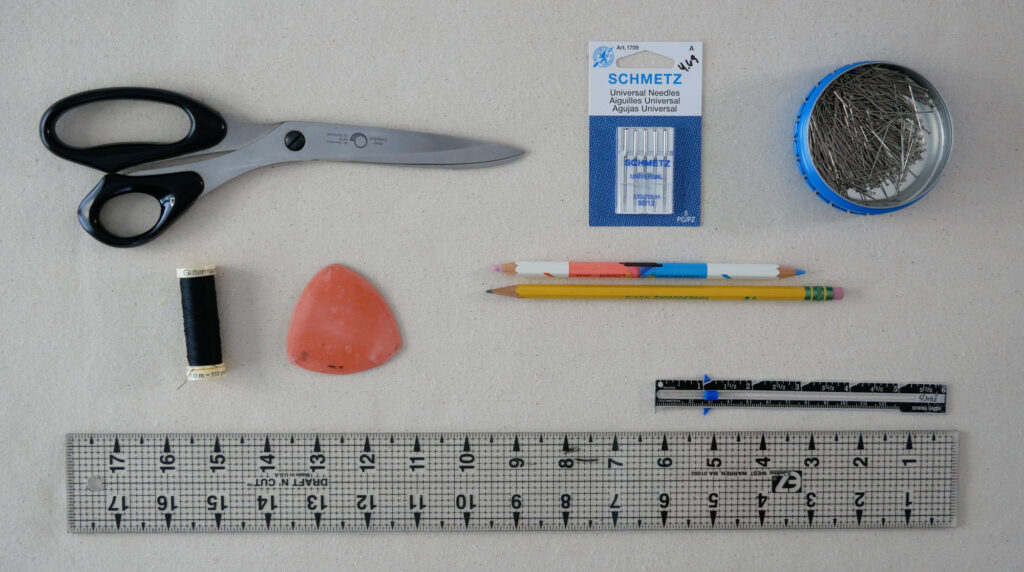
Supplies Needed to Crop Your Shirt
- Thread: Match your shirt color, or match the existing topstitching thread.
- Needle: Sewing machine needle suitable for your fabric weight. Check out my guide to needle sizes and types.
- Marking Tool: Fabric chalk,in a color you can see on your shirt fabric. Tailor’s chalk comes in a wedge shape. Fabric chalk pencils are also available – I like Clover brand. You might be able to use a standard No 2 pencil but you need to be able to see it on your fabric.
- Measuring: Ruler.
- Cutting: Fabric scissors.
- Tools: Pins, iron.
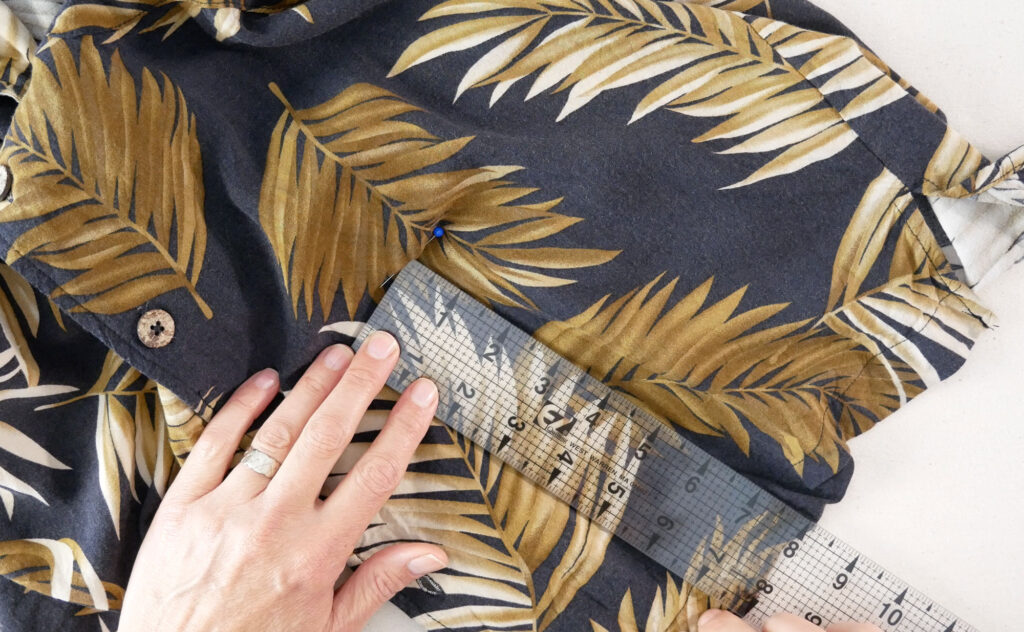
Prep the Shirt
Determine the new Length: Try on the shirt and place a pin or safety pin at your desired new length.
Measure: Lay the shirt flat on your work surface. Measure up from the bottom of the shirt to where the pin is. Write this measurement down.
Iron: Wrinkles and creases get in the way of accurate measuring and marking. Press the shirt wherever you’ll be working on it.
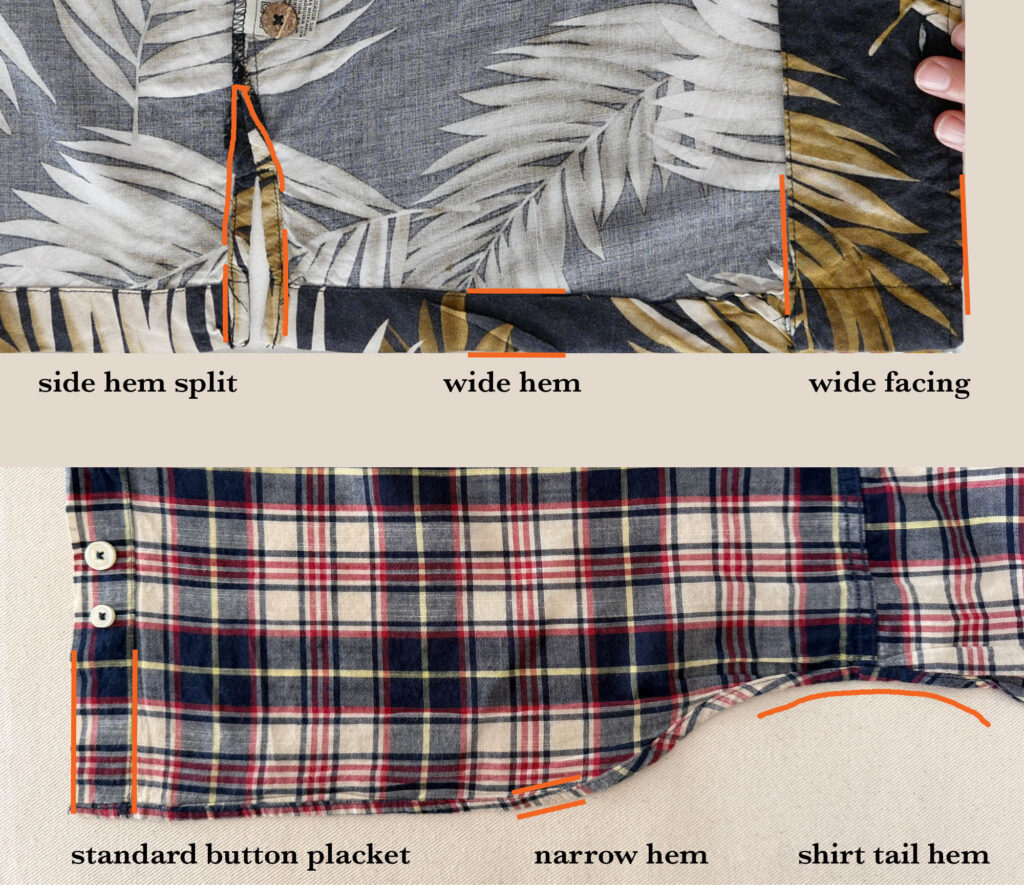
Analyze the Shirt’s Construction: While ironing, examine your shirt. How is it constructed?
- Hem Type: Is it a wide hem or a narrow hem?
- Center Front Opening: How is the shirt’s front opening finished? Is there a wide facing (a piece of fabric sewn or attached to the opening and folded back to the inside) or does it have a standard button placket (a 1” to 1 ½” wide strip of fabric added to the opening edge)?
- Edge Finishing: How does the hem meet the front opening? Is it simply folded up and over or is there something else going on? Typically, for a shirt with a button placket and a narrow hem, the hem is folded up and over the placket, then sewn down. On a shirt with a facing and a wide hem, the facing and hem are sewn together across the bottom edge first, then the rest of the shirt is folded up and hemmed. The hem is not on top of the facing. (construction details to follow)
- Slits and Shirt tails: Does your shirt have side slits or a shirt-tail hem? These design details are integrated into shirts to allow for the hips to move freely (especially when sitting). This is vital in shirts that reach the hips. Because you are going to crop your shirt, you do not need to replicate these features. A cropped shirt is not long enough to impede hip movement.
Before You Cut Anything
Hem Allowance: What is it?
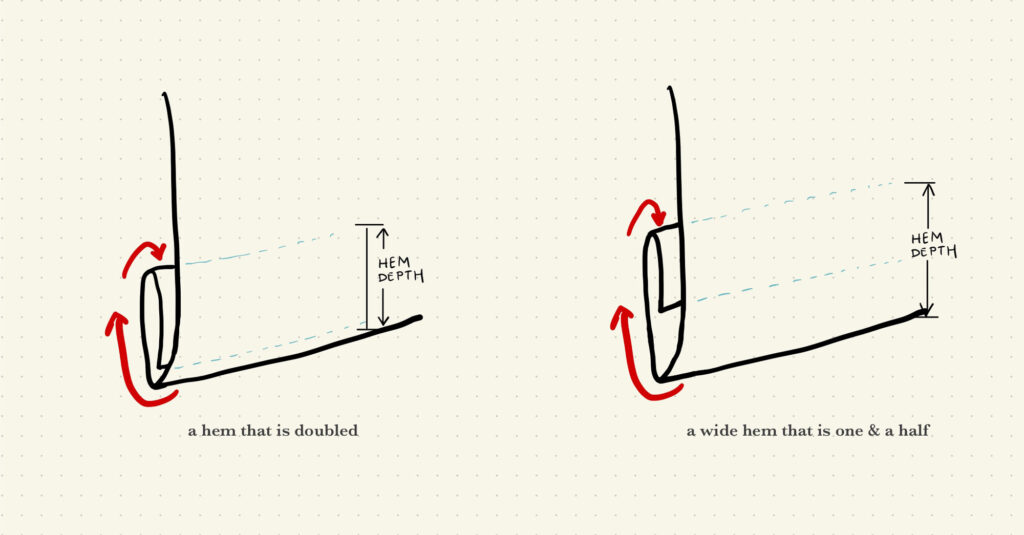
A typical hem is made by folding an edge up and over twice. This results in three layers of fabric (the outside layer, and then the hem allowance folded twice). Wide hems might be three full layers or two and a half. (Meaning the first fold is only half the depth of the second fold. You usually tell by feeling the hem.) You can decide what you want to do and how deep/wide you want the hem to be. You could also measure the existing hem and copy that depth.
Terminology Note:
In sewing, you will hear/read that a hem is X wide. To clarify, this is referring to how deep a hem is. A hem is as wide as the bottom edge of the piece being hemmed (a skirt, pants, a sleeve, etc). How deep the hem is is how much fabric is folded up to the inside and sewn down. Then there’s the hem allowance, which is how much fabric is folded up to the inside and stitched down PLUS how much fabric is sandwiched in between the outside and inside layer.
Decisions:
Do you want to replicate the shirt’s original hem? If so, measure what the shirt has now. Double that, or add half, depending on the current hem, and write down how much fabric you will need to make the hem. This amount is your hem allowance.
Do you want to change the hem for what it is currently? How wide/deep do you want the new hem to be? Double it or add half depending on what you want to do and write down this amount. This is your hem allowance.
Examples:
- A half-inch wide finished hem needs 1” of fabric if it’s folded twice on itself.
- Many modern shirts have a ⅜” hem (1 cm) and need ¾” (2 cm) hem allowance.
- A 1” wide hem that’s made of only two and a half layers is constructed by folding the edge up ½”, then folding it up an inch. A hem like this would need a 1 ½” hem allowance.
Warning: The buttonhole placement on your shirt might make a wide hem impossible. Read through the instructions first.
Fabric Weight:
Lightweight fabrics (Rayon/Viscose) benefit from a wider hem. A narrow hem on a lightweight fabric can easily flip up to the outside (not always, and not everywhere). The extra weight a wider hem adds also helps the shirt hang and drape nicely from the shoulders. A cotton shirt typically has enough inherent structure in the fiber for a standard narrow hem.
This is not to say you cannot give a rayon shirt a narrow hem or that you won’t buy a rayon shirt with a narrow hem. This is just information so you can decide what you want to do. (You have to know the rules to break the rules)
Check the Button Placement:
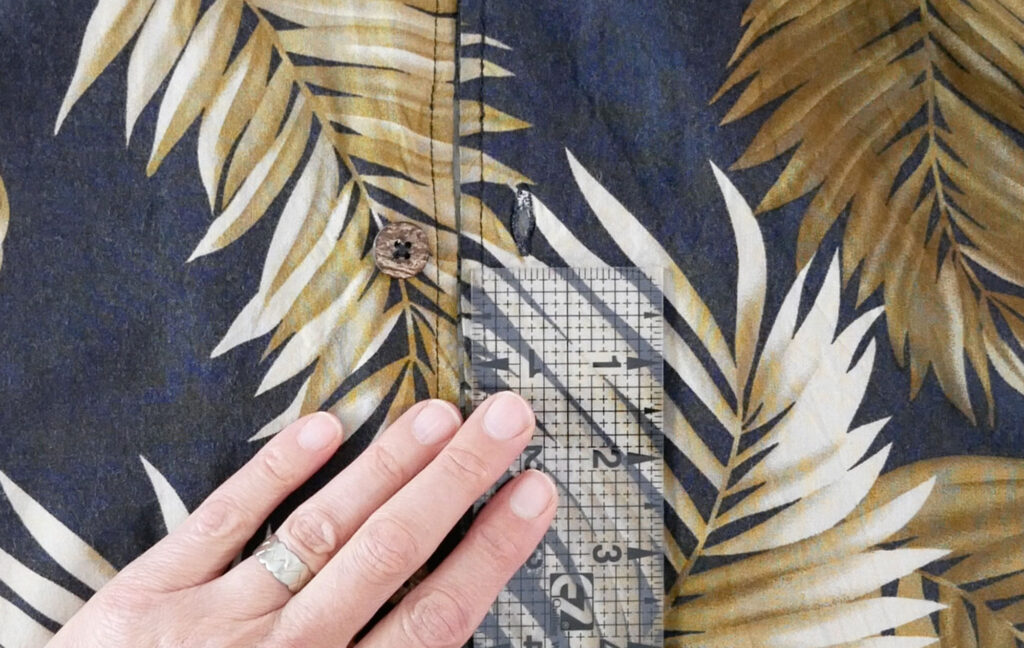
Measure up along the front opening edge, from the hem to your desired new length. Determine if a button or buttonhole will interfere with the new length, or the hem allowance.
While a button can always be removed, a buttonhole is literally a hole in the shirt. Even if the new length will clear the buttonhole, the folded-up hem may not. Check and double-check. If the buttonhole is in the new hem allowance, can you work with it?
You may need to adjust your length higher or lower or how wide the new hem will be to avoid a buttonhole.
Warning: The buttonhole placement on your shirt might make a wide hem impossible. Read through the instructions first.
Write it Down:
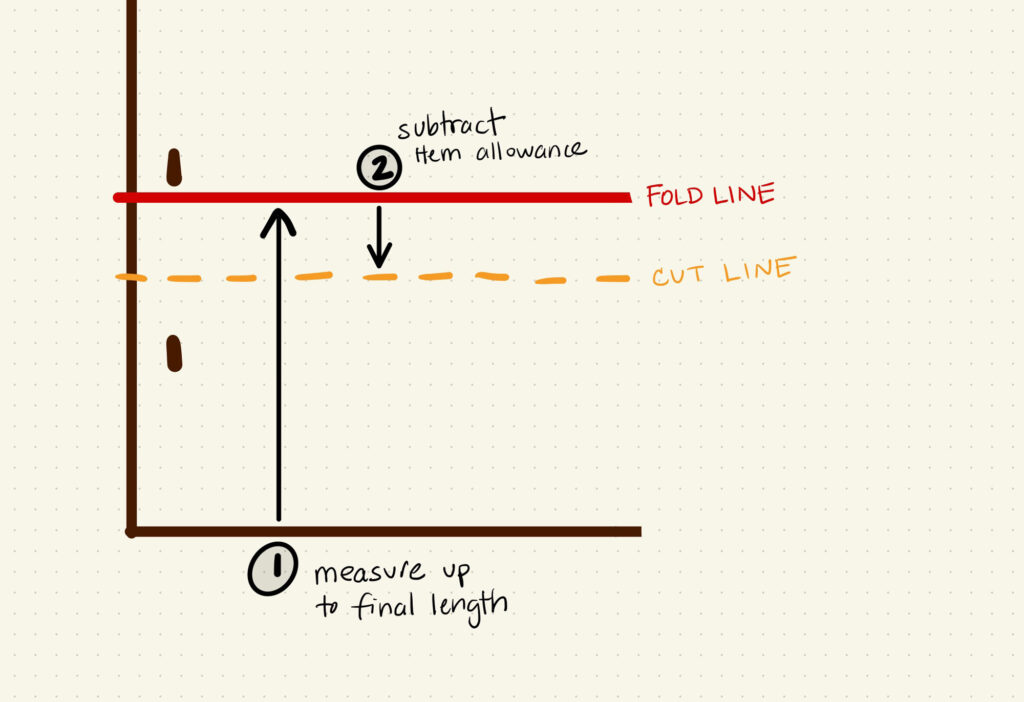
After deciding how much you are shortening the shirt by, and how much you need for the hem allowance, write it down. One never knows when the next distraction will come. Write it down now.
Subtract the hem allowance amount from the amount you are shortening the shirt and write that down too. Example: I want to shorten my shirt 7 ½” . My finished hem will be ⅜”, so my hem allowance is ¾” (⅜” x 2 = ¾”). I subtract the hem allowance, ¾”, from the amount I’m taking off the shirt, 7 ½”, and I get 6 ¾”.
It’s those two numbers you need next – the amount to be taken off and the amount you get when you subtract the hem allowance from it.
Measuring and Marking
NOTE: I mark both the fold line (amount I’m shortening the shirt/final length) and the cut line (amount I’m shortening minus the hem allowance). If you want to measure and mark only the cut line, this is ok. Later in the process, you will need to measure the hem allowance as you fold it up to form the hem. My personal preference is a belt and suspenders when I alter clothes.
Make it flat: Lay the unbuttoned shirt flat on a work surface and open it up so you see the inside. We measure and mark the inside of the shirt in case the marks don’t wash out.
If you have slippery fabric, apply spray starch to the lower portion of the shirt OR line up the bottom edge of the shirt against a straight edge (a ruler or table edge).
Measure: Measure up from the bottom of the shirt and mark both the cutline and the fold line (see note above).
Marking: Mark these measurements in about three spots across each shirt front and about 5 places across the shirt back.
Get the shirt flat and as straight as you can (you can only do this in sections). Then draw a perpendicular line from the center opening edge toward the side seam, lining up your marks as best you can for both the top line (fold line) and bottom line (cut line).
Tip: I mark both front sections of the shirt using the straight center opening as a guide. Then I can join the marks on the back to the front lines at the sides.
Cutting and Folding the Hem
Cut: Cut on your bottom “cut line” all the way around. Cut only a single layer of shirt at a time wherever you can to avoid distortion. You can not cut a single layer at the opening because you have either a facing or a placket there.
How you fold the hem allowance will depend on if you are constructing a narrow, standard hem or a wide hem with a wide front facing.
NOTE: If your shirt has a facing and a wide hem, you can still do a narrow hem as described above in the Placket/Standard Technique
Placket/Standard Technique:
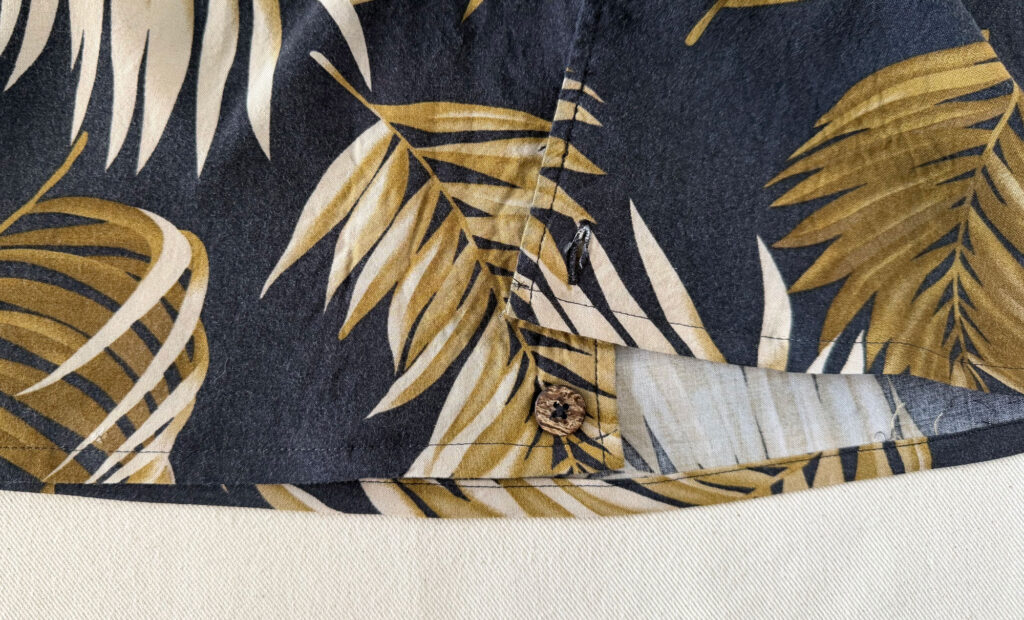
Note: My shirt in the photo above has a wide facing, but I am choosing to hem it with a narrow hem—the style you would find on a shirt with a standard button placket. I chose the narrow hem because the buttonhole placement would not allow for a wide hem.
Typically, on a shirt with a standard button placket, the placket is folded up with the hem and the hem is sewn on top of the placket on the inside of the shirt. To construct a narrow hem, fold on your fold line (the final length line) all the way around the shirt. Pin it up as you fold and press the fold to make a crease.
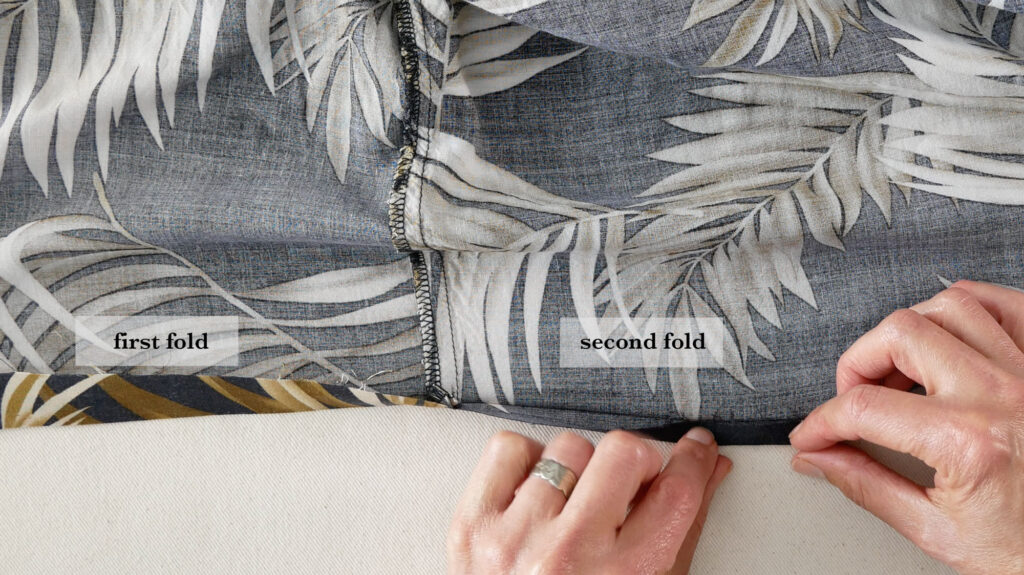
Unfold the fold you just made and line the raw edge (the bottom cut edge of the shirt) up to meet the crease. Refold for a double-folded hem. Pin this double fold down as you fold it all the way around the bottom of the shirt.
Pay attention to the opening edge when folding the hem. The inside layer of the hem can easily poke out beyond the opening edge. When you fold it up at the edge, also place it in slightly from the edge. Pin it in place.
After the shirt hem is all pinned, you will sew this fold down. Check now if a button is going to be in the way of your presser foot when you sew the hem down. Come up with a plan for that before you get a surprise. Maybe that’s taking the button off and sewing it back on when you’re done, or getting out the hump-jumper to level up the foot or switching to a narrow zipper foot to sew the hem.
Wide Hem with Facing Technique:
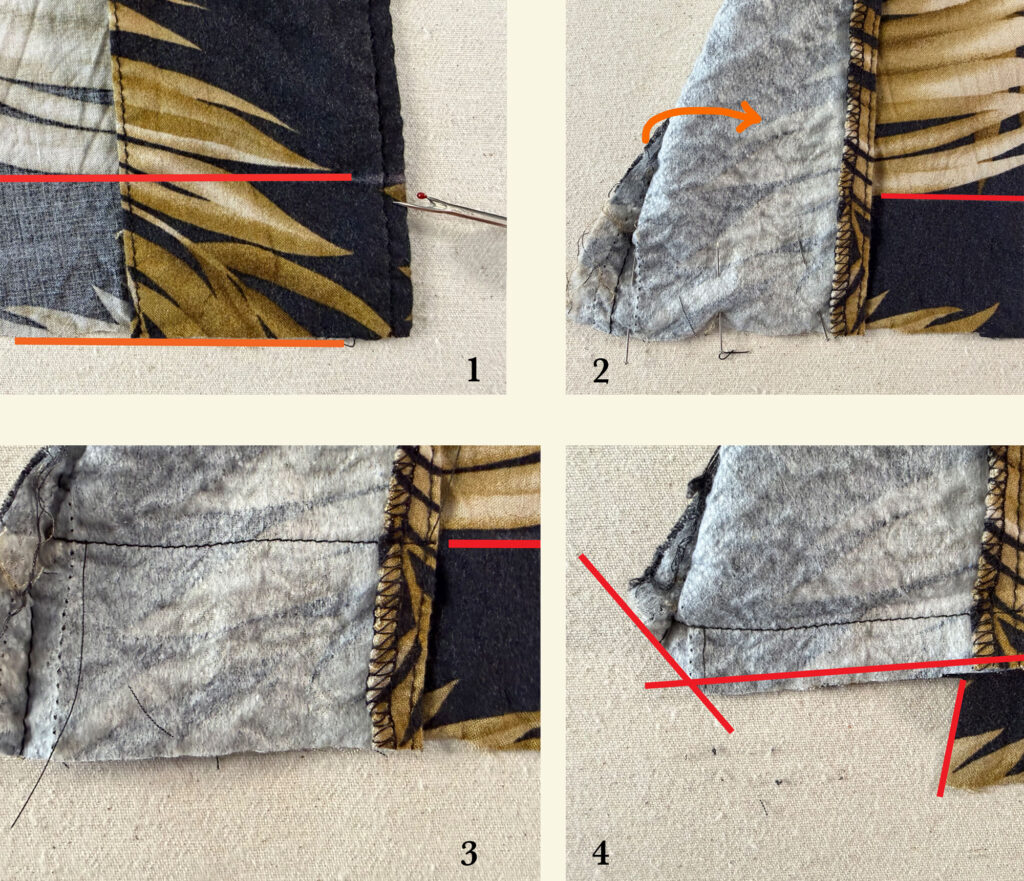
If your shirt has a wide facing ( and by wide I mean wider than 1 1/2″ ) the hem was sewn so it does not overlap the facing. This is a different technique than explained above, but it is just as easy.
Warning: The buttonhole placement on your shirt might make a wide hem impossible. Read through the instructions first.
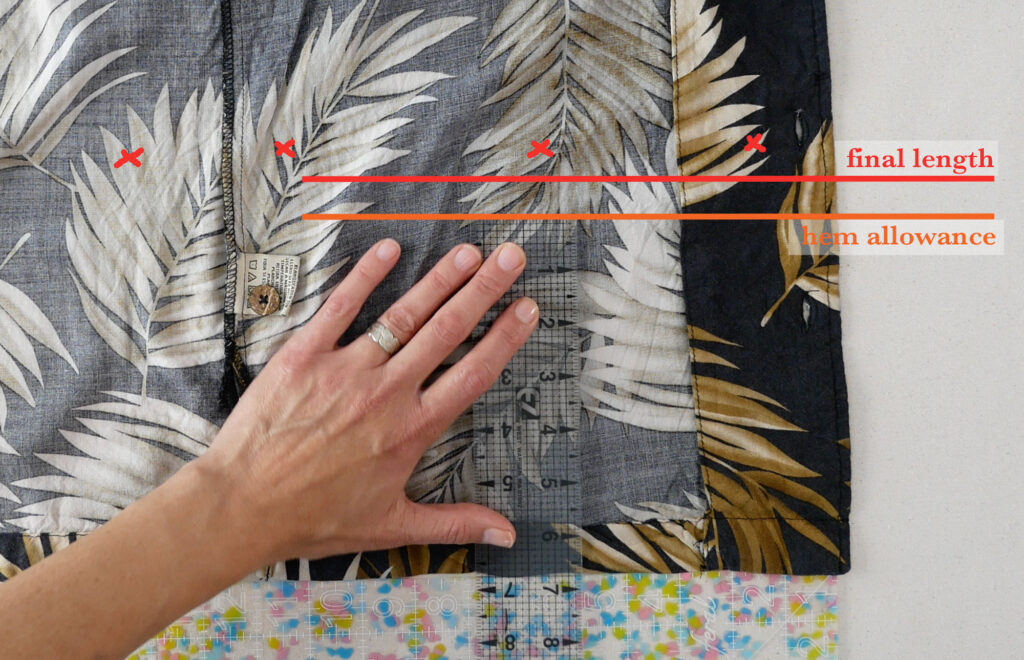
In the 4-step picture above, picture 1 shows the red line as the fold line. This will give the shirt it’s finished, desired length. The orange line is the cut line. This was the final length minus the hem allowance. The space in the middle of the lines is the hem allowance. The facing should have been understitched, and that is the stitches the seam ripper is pointing to. Unpick the stitches from the cut line / bottom edge to the fold line.
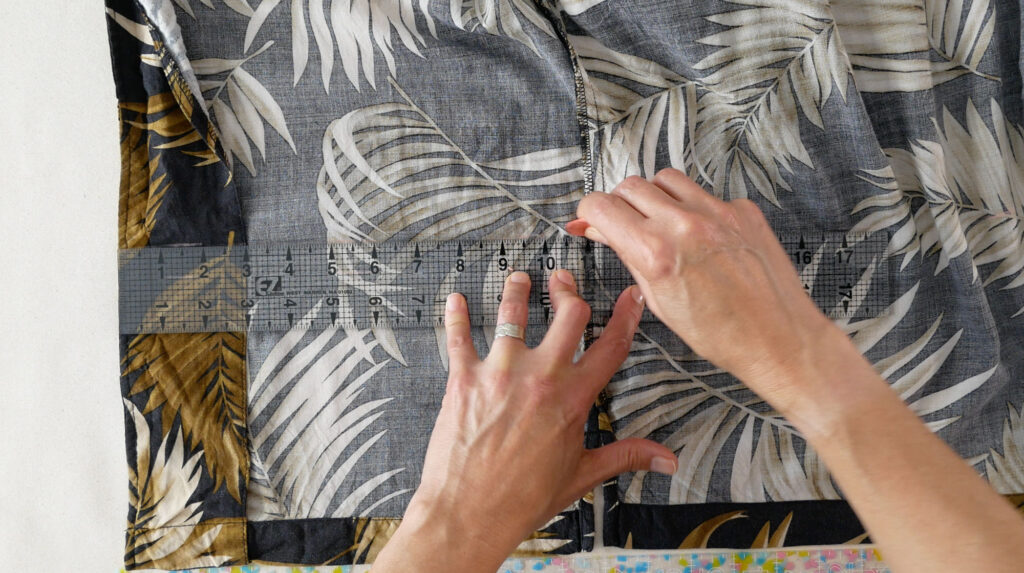
(picture 2 above) Open the facing and fold it back to lay on top of the front of the shirt. Right sides of fabrics will be touching. This only needs to happen at the bottom of the shirt.
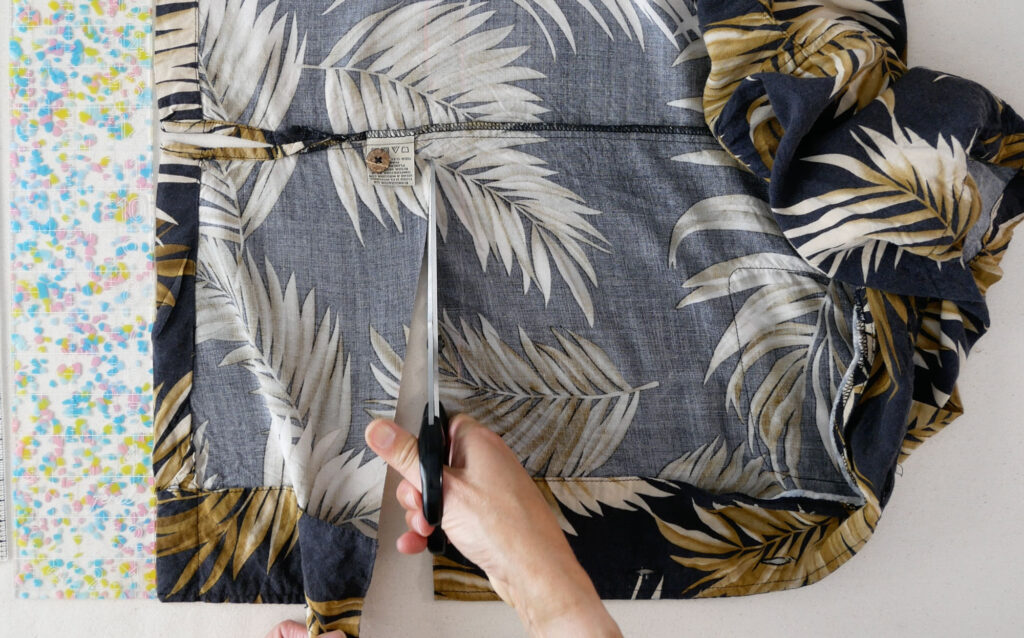
(picture 3 above) Sew across the facing, catching the shirt, on your fold line (the final length line). Stop sewing at the end of the facing.
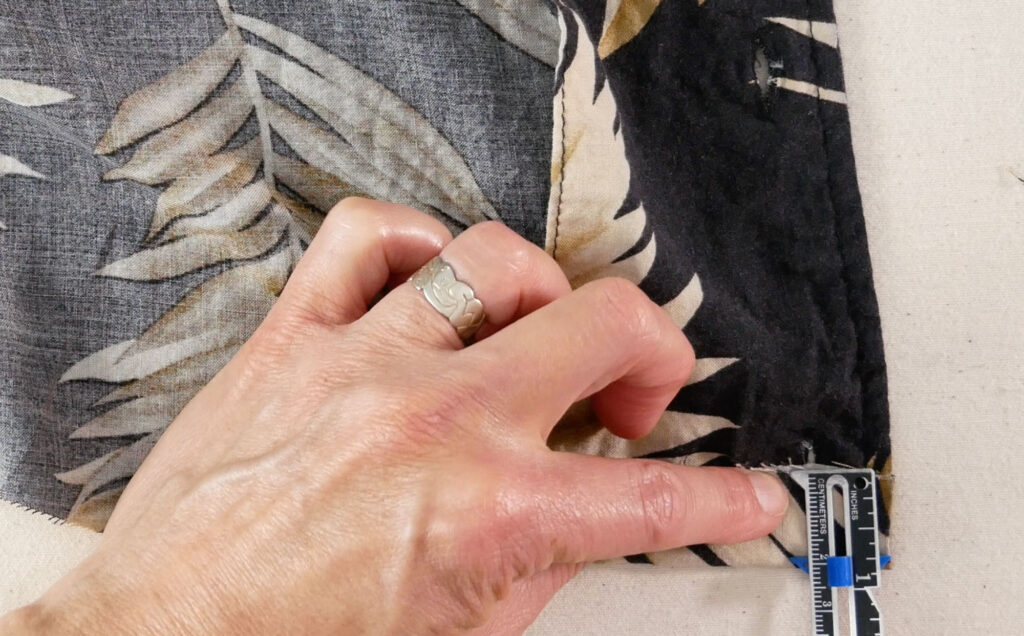
(picture 4 above) Clip the front corner of the seam allowance to reduce bulk. Trim the facing’s seam allowance by half. Trim away much of the shirt’s seam allowance but stop about 1/2″ short. You want the shirt’s hem allowance to underlap the facing so it can be caught and concealed under the facing when you sew the facing back down to the shirt.
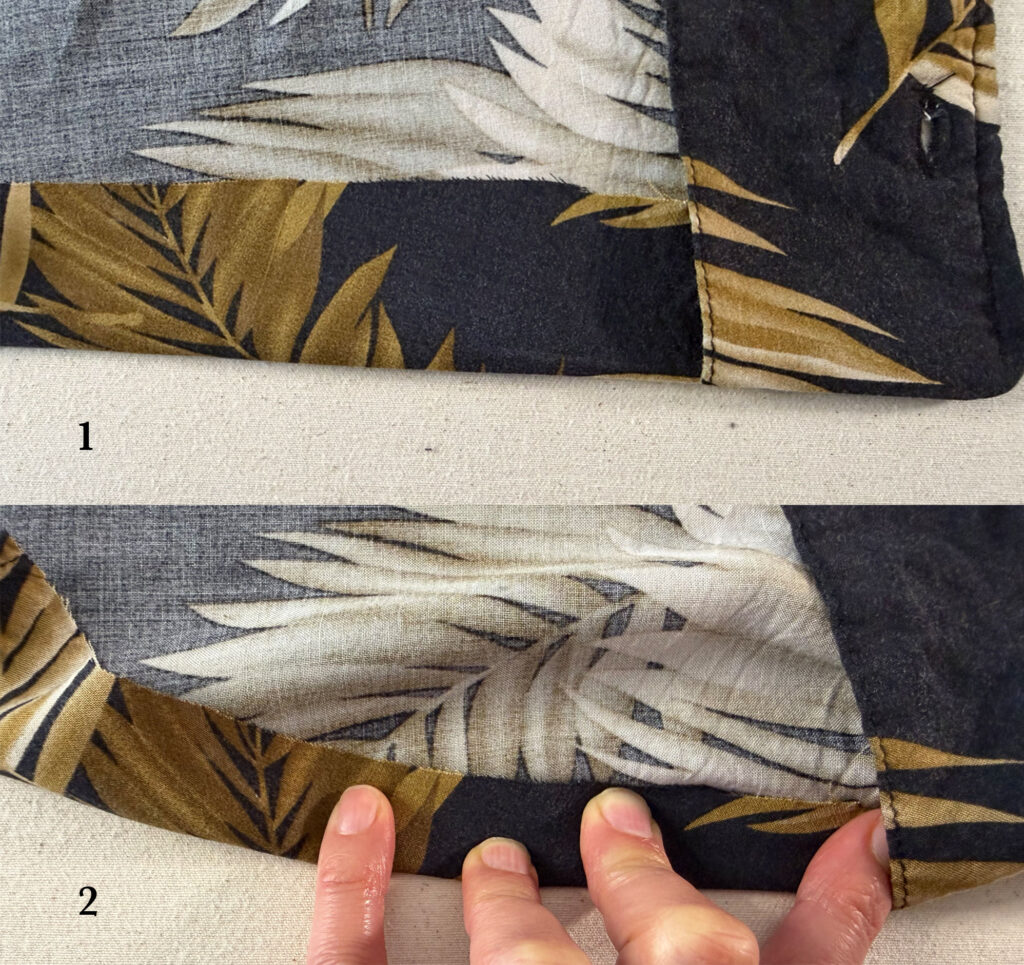
(picture 1 above) Flip the facing back to the inside. Do the same to the other side of the front.
(picture 2 above) Fold the remaining hem allowance up to the inside of the shirt on the fold line (the final length line). Pin as you fold and press with the iron to make a crease on the fold line
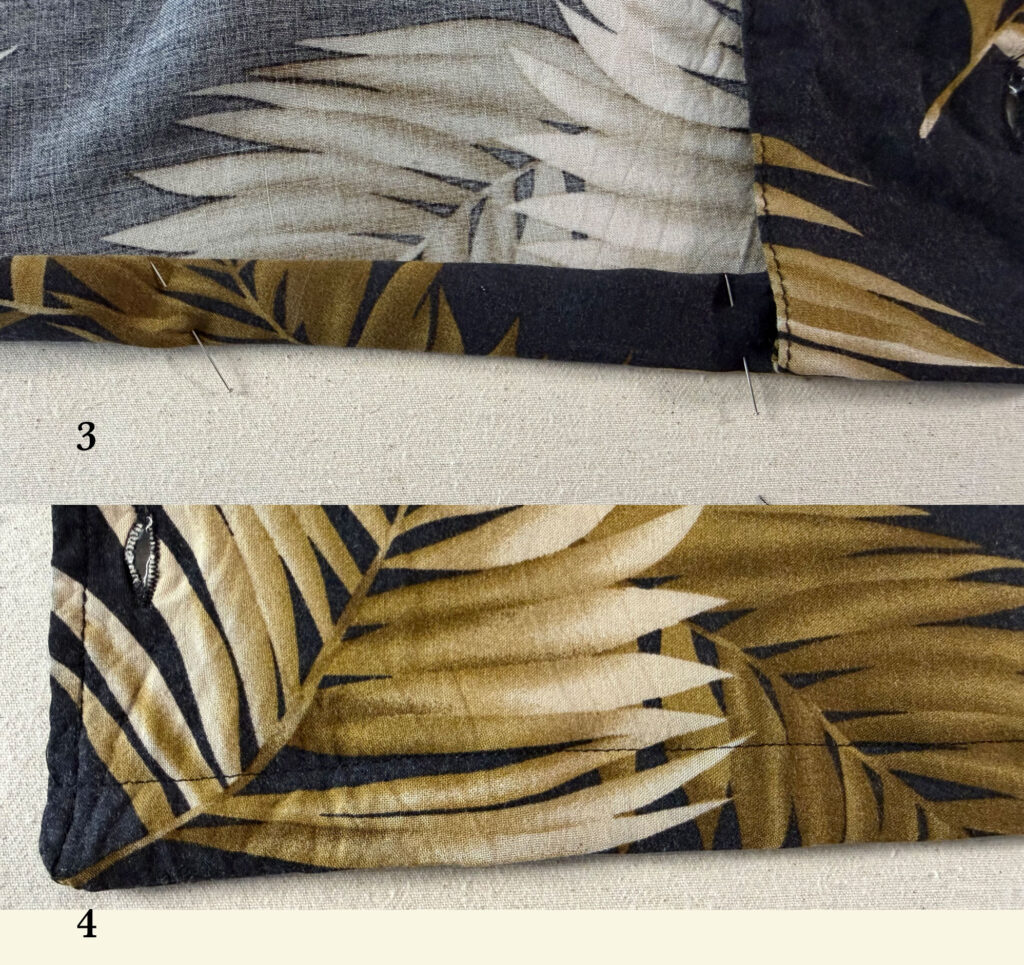
(picture 3 above) Unfold the fold you just made and line the raw edge up to meet the crease. Refold for a double-folded hem. Pin this double fold down and do this all the way around the bottom of the shirt. if your hem is doubled.
If your hem is not doubled, fold the raw, cut edge of the shirt up as much as you decided earlier. Then refold on the crease. Pin the hem in place
(picture 4 above shows the finished wide hem)
Sewing the Hem
Starting Strategy: Starting the hem is the hardest part of sewing it because The presser foot goes from nothing to a thick and narrow piece of fabric. The needle doesn’t like these conditions. Especially when sewing lightweight fabrics. The needle wants to push the fabric down into the machine. Place a scrap of fabric under the presser foot just behind the needle.
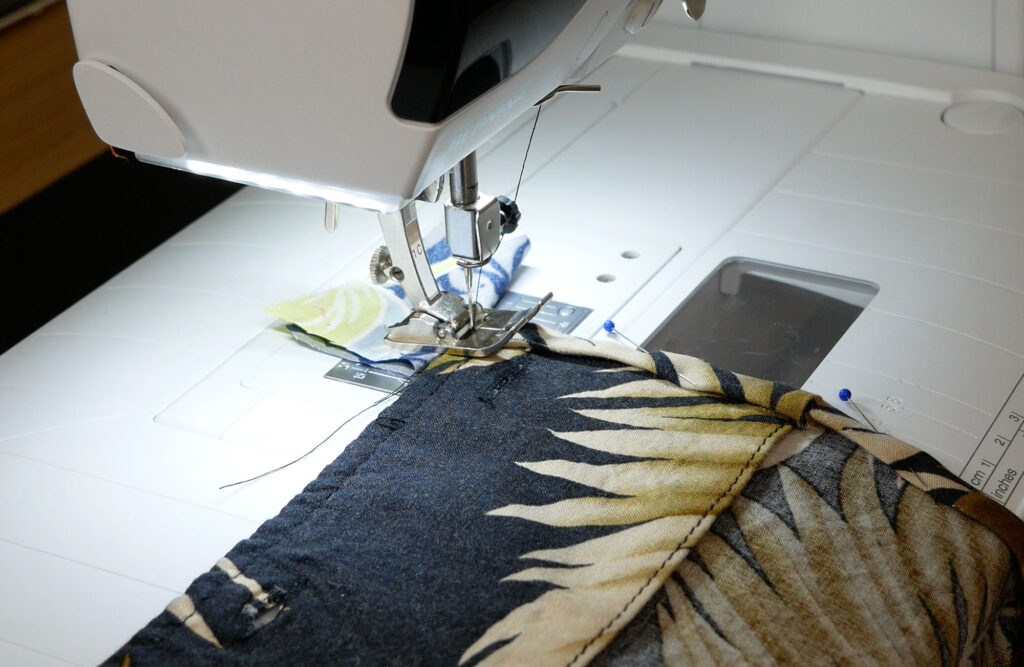
You don’t sew on this scrap but if you accidentally do, You can cut it off when you’re all done. Take a couple of reverse stitches at the start of your sewing
Use the stitch guides on the machine to keep the stitches far enough over to sew close to the top of the hem. You need to catch the inside folded edge.
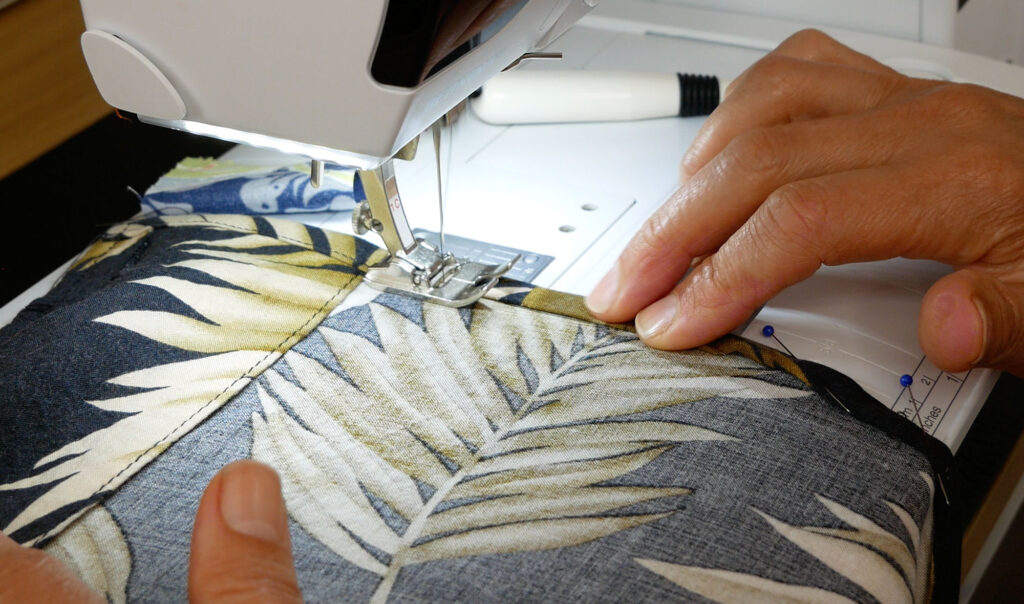
Stitch: Sew close to the inner fold. Use the machine’s stitch guides to maintain a consistent distance.
Finishing: Check that the entire hem was caught in the stitches. If you missed any sections, sew them by hand using the existing machine stitches as an anchor. Press the final hem thoroughly.