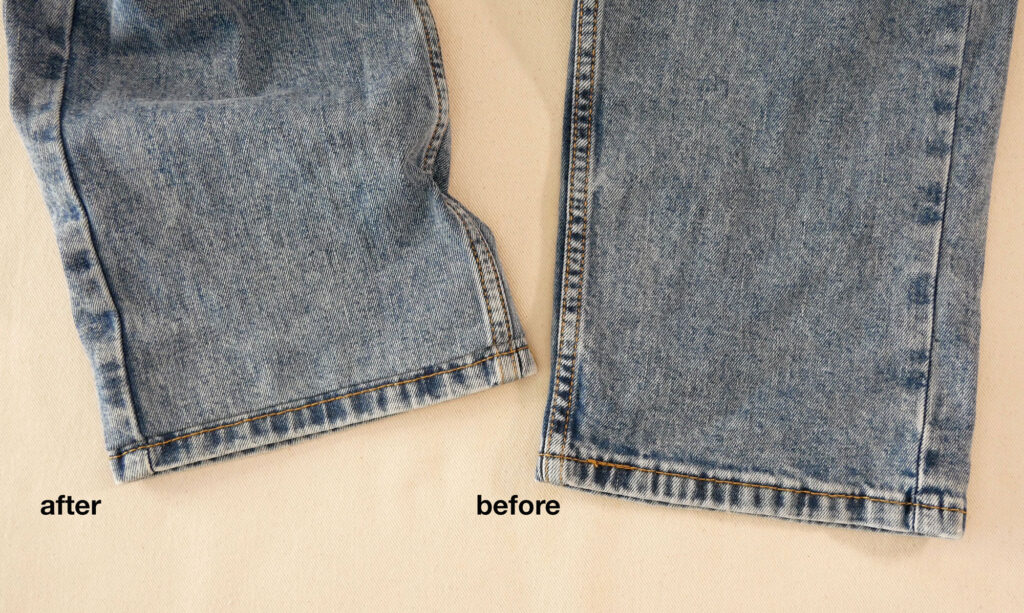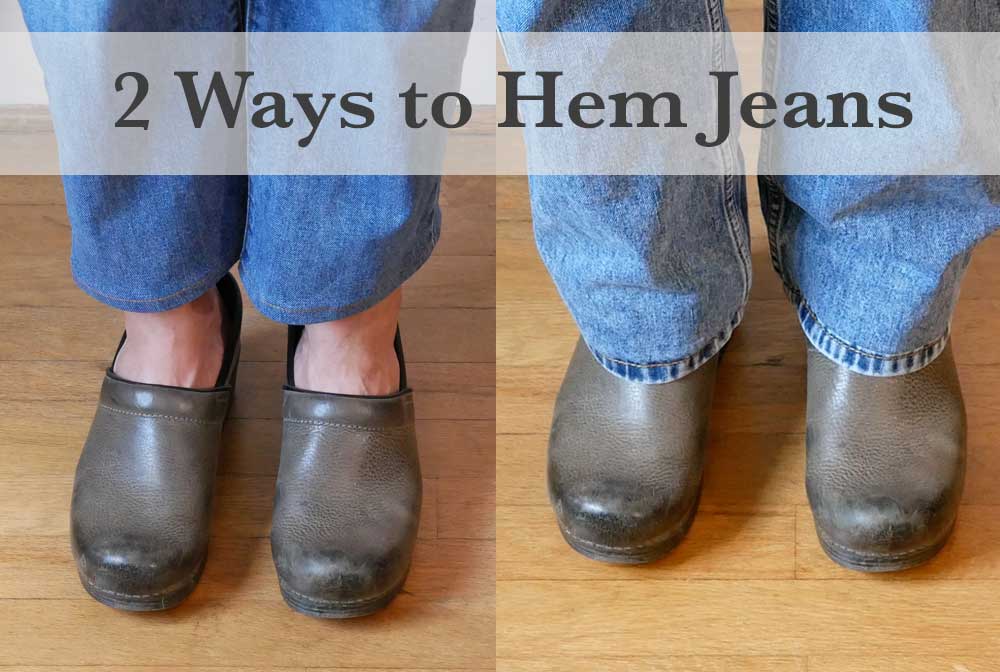
Your jeans are too long, or one of your favorite people’s jeans are too long. All good; you have a sewing machine – you got this.
I’ve always hemmed jeans and jean-styled pants the traditional way: cut off the excess, fold under a new hem, and sew it down. Simple, reliable, straight-forward.
But there’s another way, and it might be the way you need, particularly if you want to keep the original hem or if you’re hemming a child’s or teen’s pair of jeans and will need to reclaim that extra length when they get handed down to a younger but taller sibling/cousin/friend.
When would you want to keep the original hem?
- The hem is distressed, and you want to keep that look/distressing
- You can’t match the topstitching thread – not even close
This video (and following post) explains two ways to hem jeans: the traditional method and an alternative method that keeps the original hem (the topstitching and the well-earned or purchased distressing). Choose the method that is best for the jeans you want to hem right now.
So if you’re ready, Let’s Go!
What Supplies Are Needed
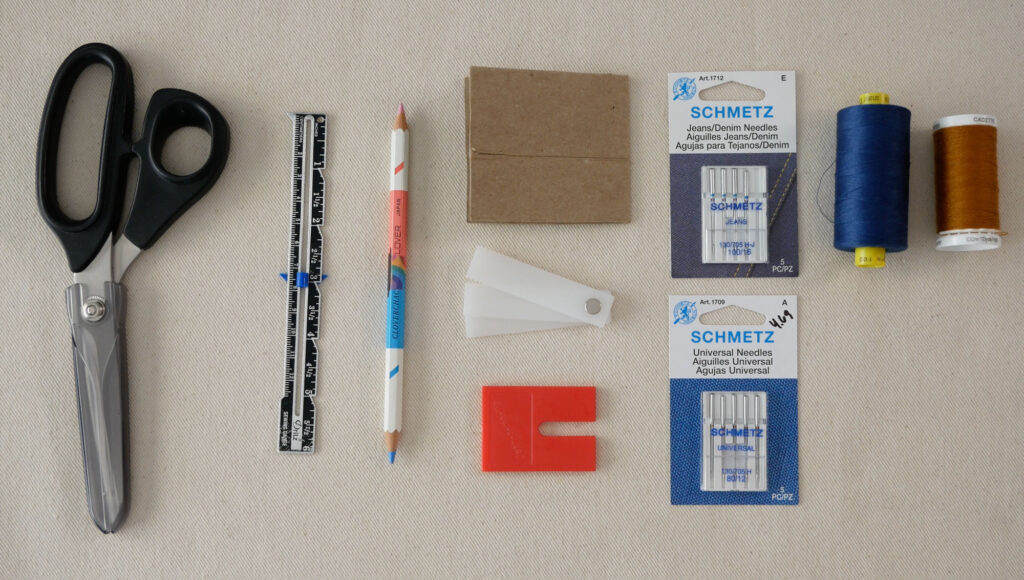
- Scissors that are sharp and strong enough to cut through the thick denim inseam
- A ruler
- Tailor’s chalk, a chalk pencil, a regular pencil, or something to mark on the inside of the jeans – best if it can wash out
- A Jean-a-ma-Jig, a seam jumper, hump jumper, or a piece of thin cardboard. All of these tools are used for the same purpose – keeping the presser foot level as you sew over thick seams.
- A sewing machine needle thick enough to sew through your denim.
- Use a Jeans needle for non-stretch jeans
- Use a Universal needle for stretch denim jeans size 100 or 110
- Thread
A note about thread
When hemming the traditional way, you need a matching top stitch or jeans thread. This thread is thicker than all-purpose thread and comes in limited colors. But believe it or not, there is a spool named “Levis Gold” and another named “Lee Gold”
If you can’t find a top-stitch thread to match the thread on your jeans, you can:
- Take two spools of all-purpose thread that, when threaded through the machine together and fed through the same needle eye, will blend together to match the thread on your jeans. For example, a light orange and a khaki to make a gold.
Note: the threads are threaded through the machine and needle one at a time.
- Hem the jeans using the method that keeps the original hem, with its original topstitch thread.
When hemming and keeping the original hem you need an all-purpose thread that matches the color of your jeans
Prepping the Jeans
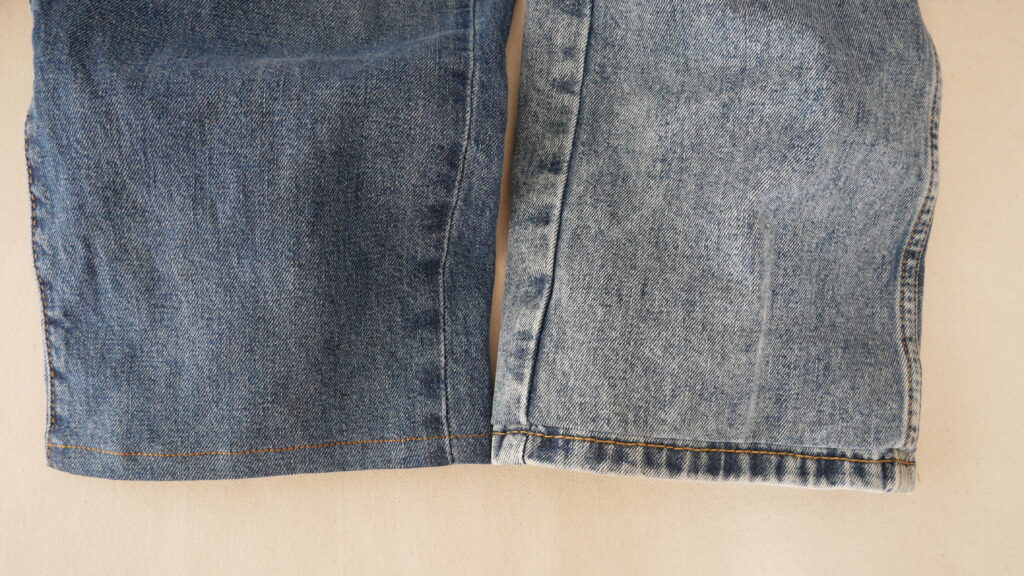
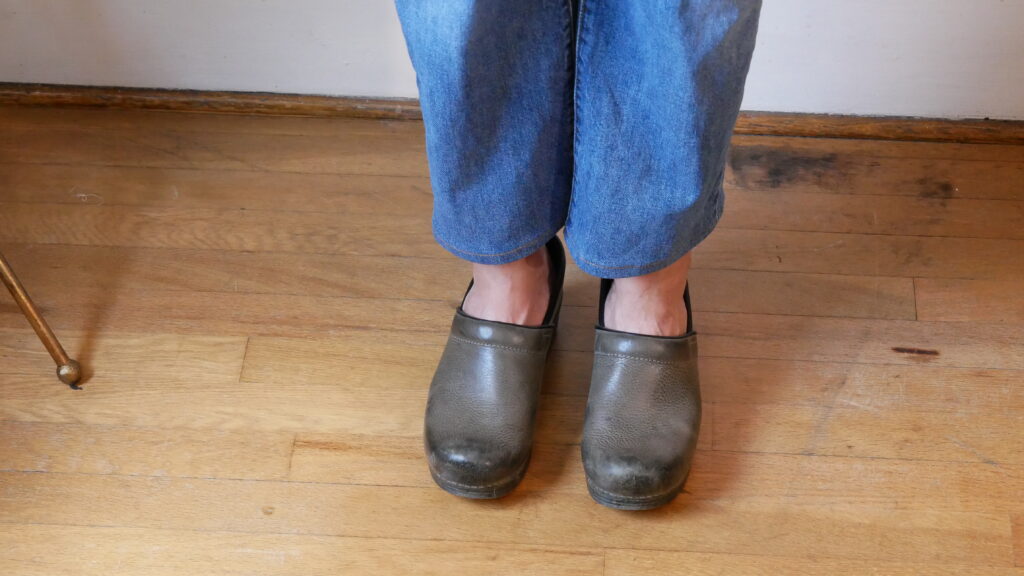
If you don’t already know how much you wish to shorten the jeans, put them on, or have the person put them on, and stand in front of a mirror. Fold up to the inside any excess length until you or everyone agrees that’s the spot. Safety pin the folded-up part to the leg in one or two places.
At the work table, measure how much you folded under and write it down.
There is some advice to check that the legs of the jeans and the hem of each leg are even. This seems like good advice, and if you want to, yes, double-check. This also seems like something one could skip. If the legs or hems of your jeans are a bit uneven, is it something you’ve noticed earlier before measuring? If not, then just hem sans checking. It’s ok if my obvious, store-bought jeans look store-bought with their slightly uneven hems. This post will continue as if everything is even.
Hemming Jeans the Traditional Way
After you know how much the jeans need to be shortened you need to decide on the depth of the hem. A standard jeans hem is ⅝”. My jeans had a ½” hem. After you decide the amount, double it ; ⅝” final hem x 2 = 1 ¼”, a half inch hem doubled is one inch. This amount, the hem allowance, is then subtracted from the amount you want to shorten the jeans. Write down what this is.
Example: Shorten 2” | hem ½” x 2 = 1” for the hem allowance | 2” (amount to shorten) – 1” (hem allowance) = 1
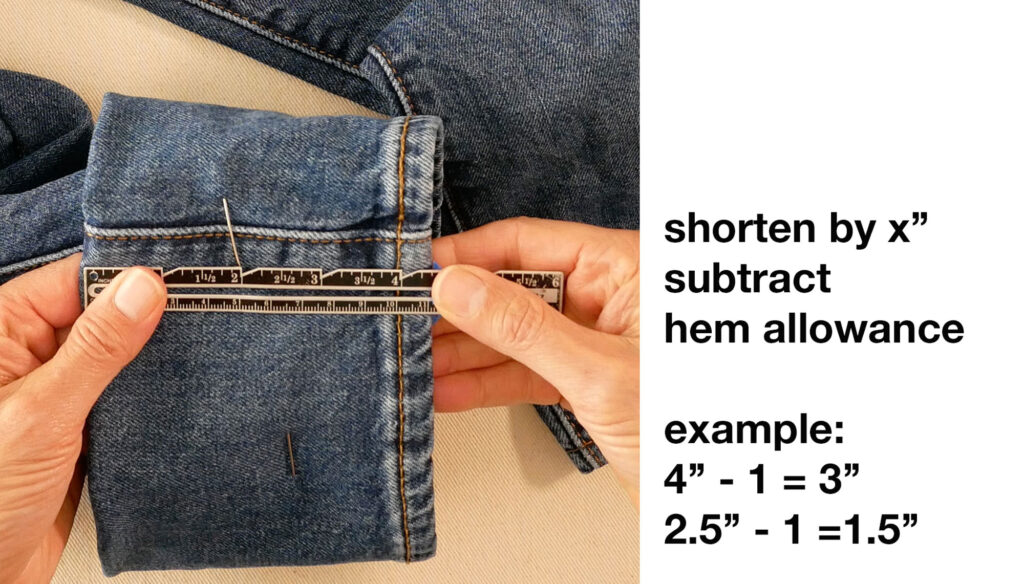
Turn the jeans inside out and place on a flat work surface.
Measure up from the bottom edge of the pant leg the amount you wish to shorten the jeans and the amount after you subtracted the hem allowance. Mark these measurements on the jeans in three spots across the front of the leg and the back of the leg. I measure and mark in the center and about an inch in from the side seam and the inseam.
If you are shortening your jeans only a little, you may need to unpick the original hem in order to have enough fabric for the new hem. Or to avoid unpicking that hem, try the second method of hemming jeans described in this post.
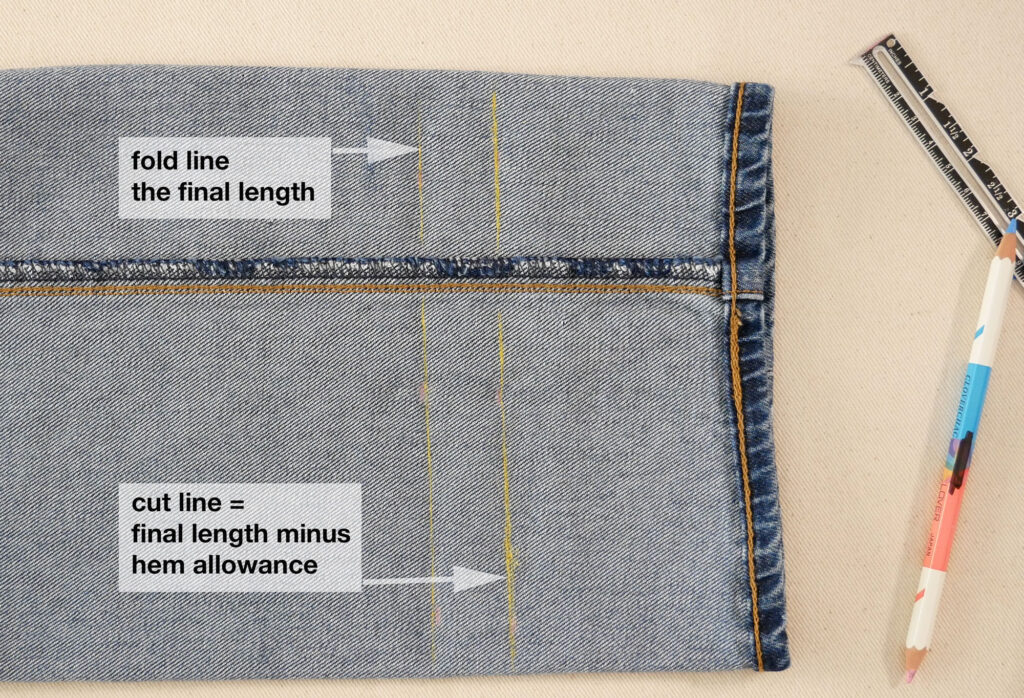
Connect the marks you made to form two lines going around the circumference of the leg.
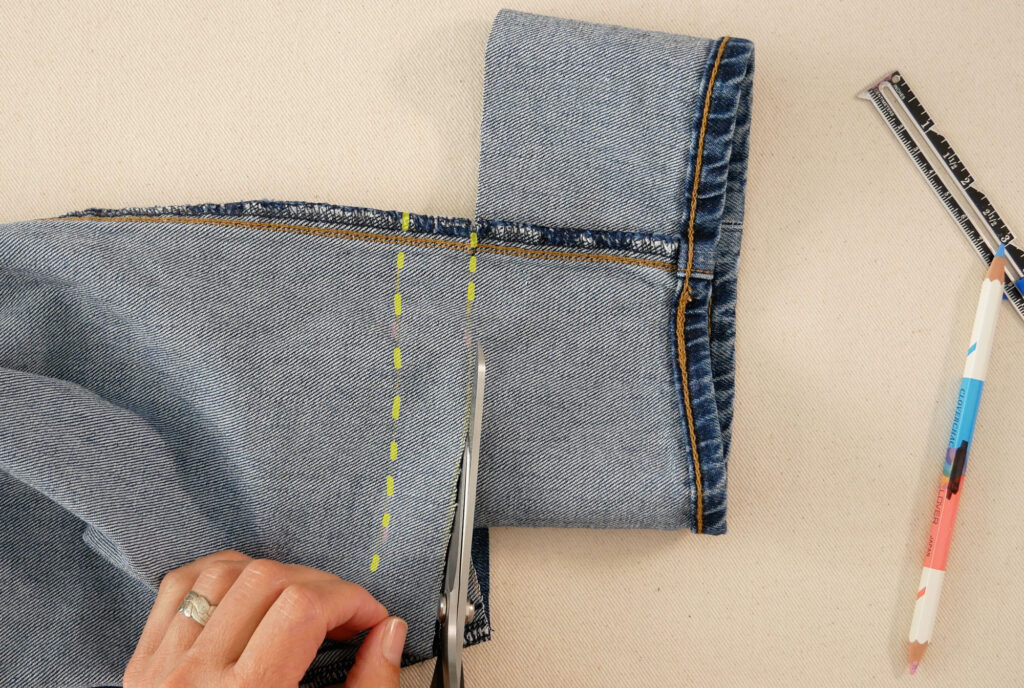
Cut the jeans off on the bottom line. Make a snip/nick in the side to get the tip of the scissors in and then cut the excess off all the way around. You’re cutting only a single layer of denim. (You’ll get a more even cut when cutting one layer plus you’ll avoid the fabric dipping down at the fold that happens when you cut a fold.)
Fold the bottom of the leg up to the inside on the top line. This is the line marking the amount you want to shorten the jeans.
Press this fold with an iron.
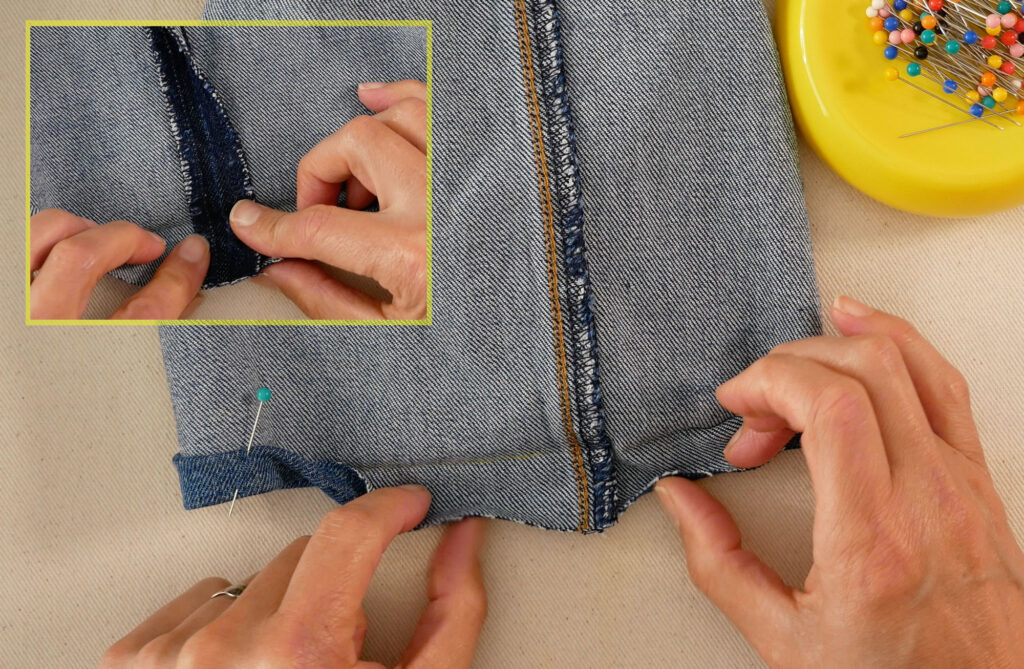
Unfold and refold the hem allowance so the raw, cut edge meets the crease you just ironed in. Pin down the folds as you go around the leg. Pin so the heads of the pins are down, below the leg opening.
When folding the outside seam, open up the seam allowances and spread them apart before folding the hem up. This will reduce the bulk you have to sew over.
Turn the jeans so the legs are now right side out. Jean hems are sewn from the top side. The thicker topstitch thread is in the needle. All-purpose thread is in the bobbin.
Decorative Topstitching, which this is in its thicker, contrasting thread, has a slightly longer stitch length than seam construction stitches. Adjust the stitch length to between 3 and 3.5. Sew a sample on a piece you cut off the legs to check the length/look.
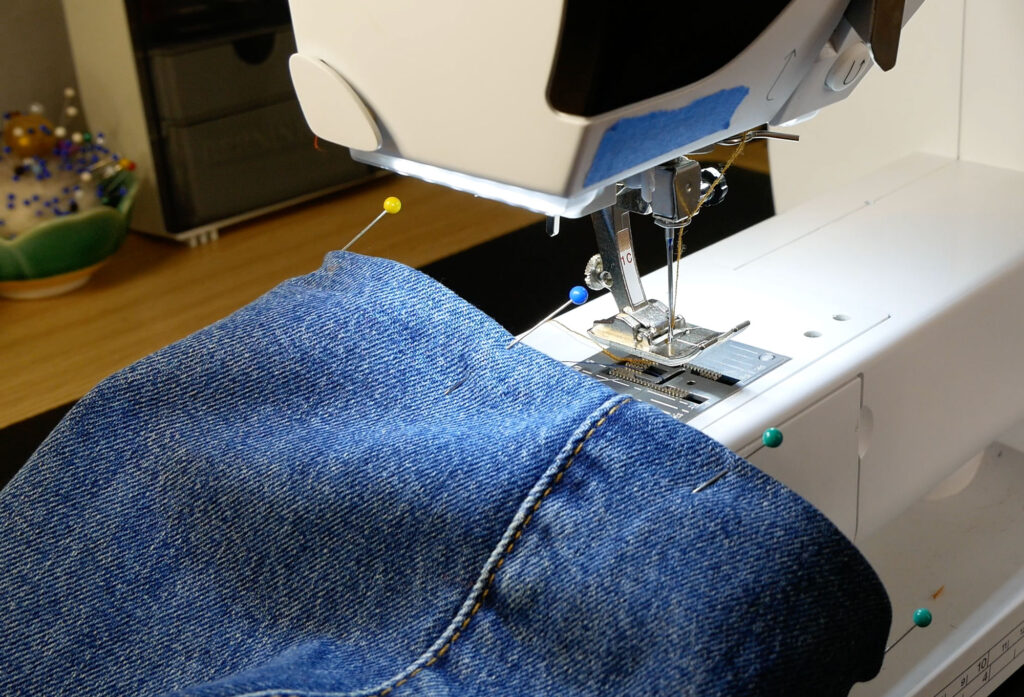
Take the table off your sewing machine and slip the leg around the free arm. I like to start just past the inseam.
Feel the folded hem under the pants with your fingers as you sew to be sure the needle is catching it. You use the seam guides etched into the stitch plate on your machine as well.
Sew around the leg until the tip of the presser foot starts to tip upward at the side seam. The thing is, you always want the presser foot to be level. When it’s not level, it can’t feed the fabric evenly, and when that happens, the stitches cannot maintain the length you’ve selected. So stop sewing, leaving the needle down in the fabric, and get out one of the tools – a Jean-a-ma-Jig, a hump jumper, or a piece of cardboard – for going over the seam.
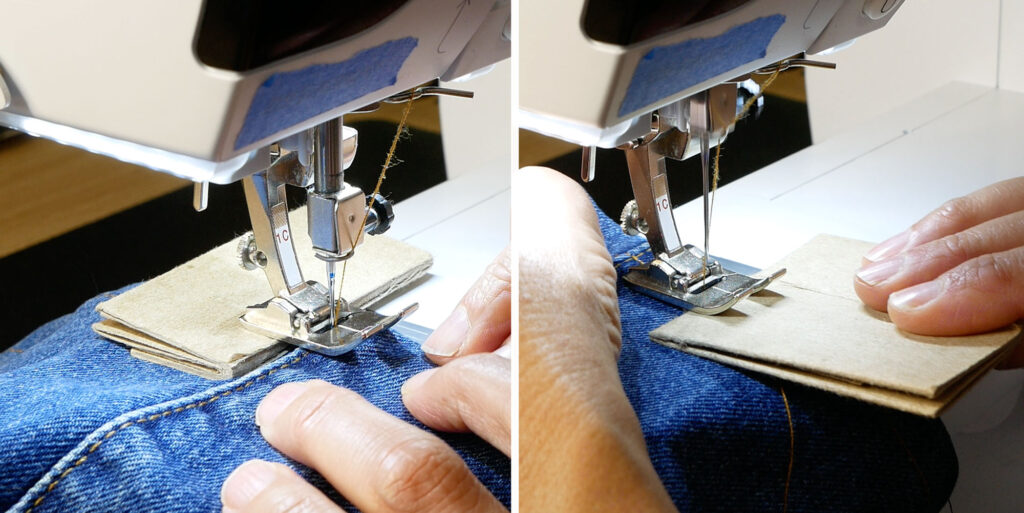
Place the tool of choice behind the needle, under the presser foot as the needle approaches the thick seam. Sew slowly over the thickness. Switch to using the hand wheel instead of the pedal when you feel the needle resisting. Turn slowly toward you.
If you take your time and use the correct needle, your domestic machine should have no trouble sewing denim.
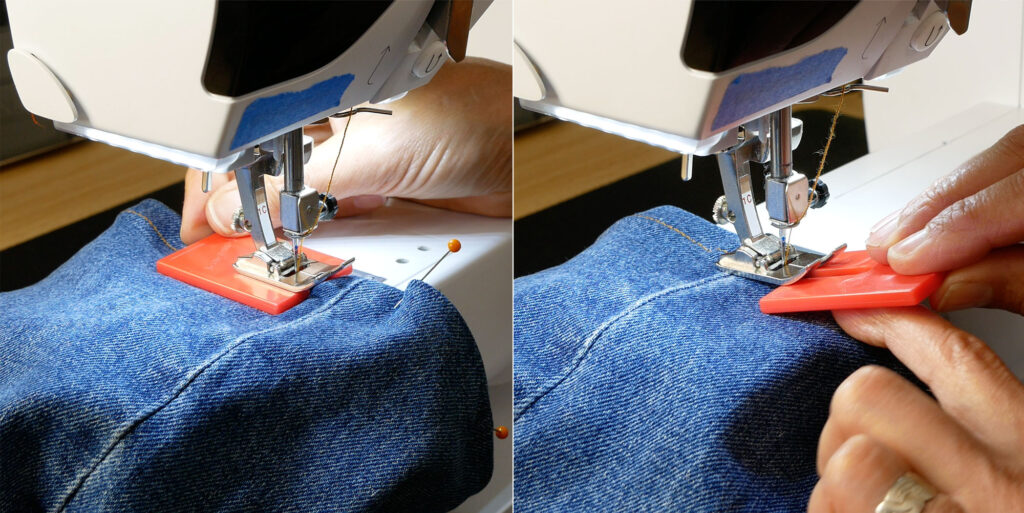
Move the leveling tool in front of the needle, under the presser foot, when the presser foot begins to tilt downward, after sewing over the thickest part. You’ll have to keep moving the tool when it’s in front to prevent the needle from hitting it.
Sew until you meet back up to where you started. Use the same leveling tool and slow sewing when sewing over the inseam. Take a couple of reverse stitches to lock your thread.
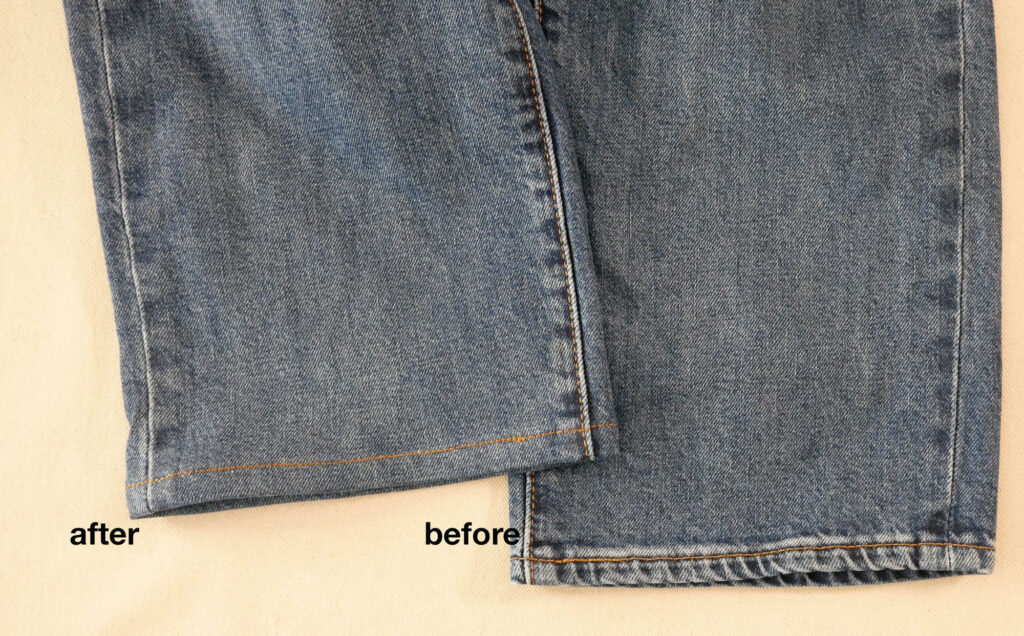
Check that the hem was caught all the way around and give the hem a good press with the iron.
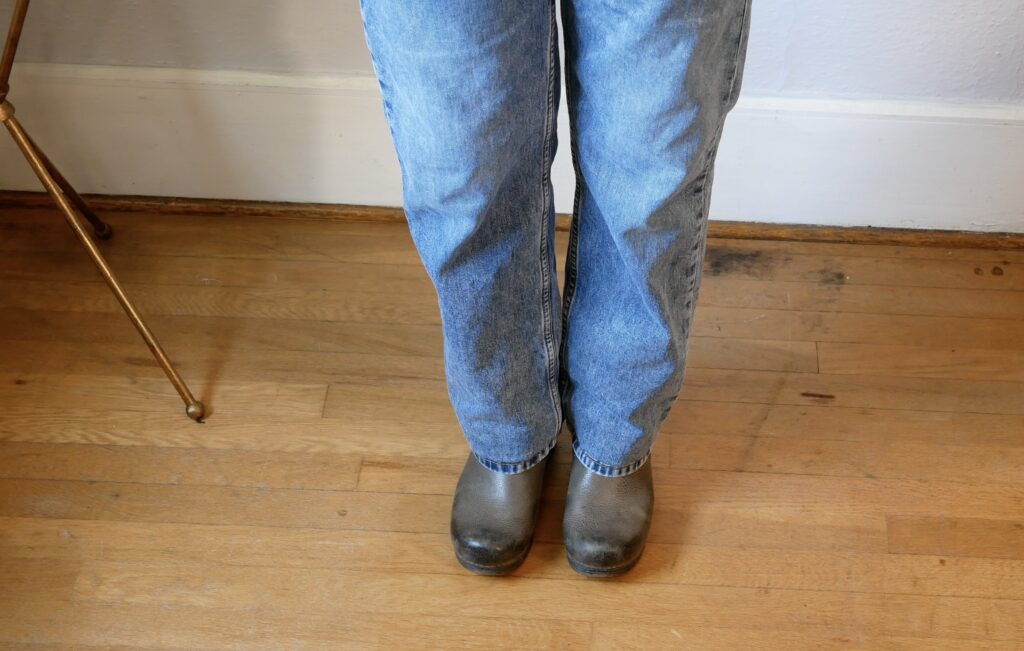
Hemming Jeans to Keep the Original Hem
A word of caution: This way of hemming and keeping the original hem works with straight-legged jeans. The circumference of the leg has to be the same at the original hem and at the new length. So this method does not work with flared leg, boot cut, or tapered jeans.
After determining the new length by pinning the excess up, measure how much was pinned up before removing the pin(s) and write this down.
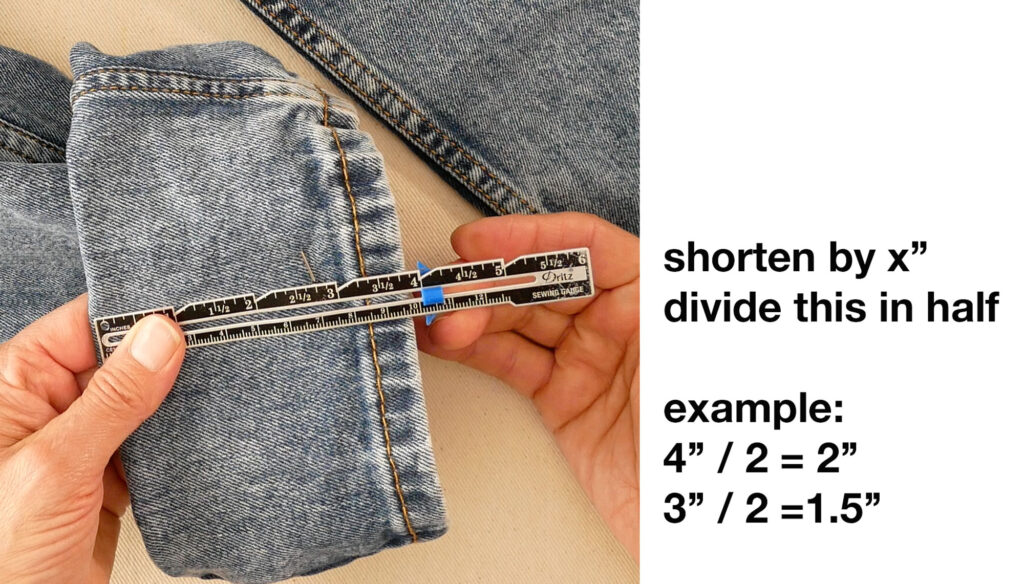
Divide the amount you want to shorten the jeans in half. Write this down.
Turn the jeans inside out and measure up from the hem stitching to that amount and mark the jeans with fabric chalk or a pencil. Example: I want to shorten the jeans 3”, divided in half is 1 ½”. Measure up from the hem stitches 1 ½” and mark.
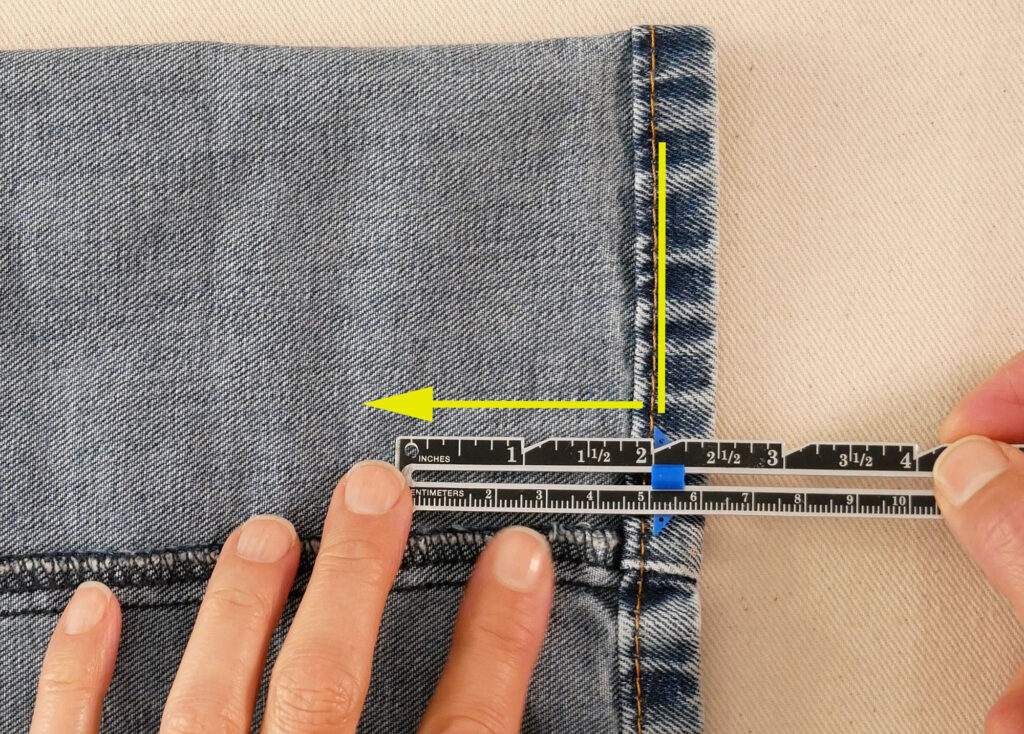
The important distinction here is you are not measuring up from the bottom of the leg but from the line of stitches used to sew down the original hem.
Measure and mark in about three spots across the front of the leg and three places across the back of the leg. I like to mark in the center then about an inch in from the two seams (the side seam and the inseam).
Join your marks to form a line going around the leg.
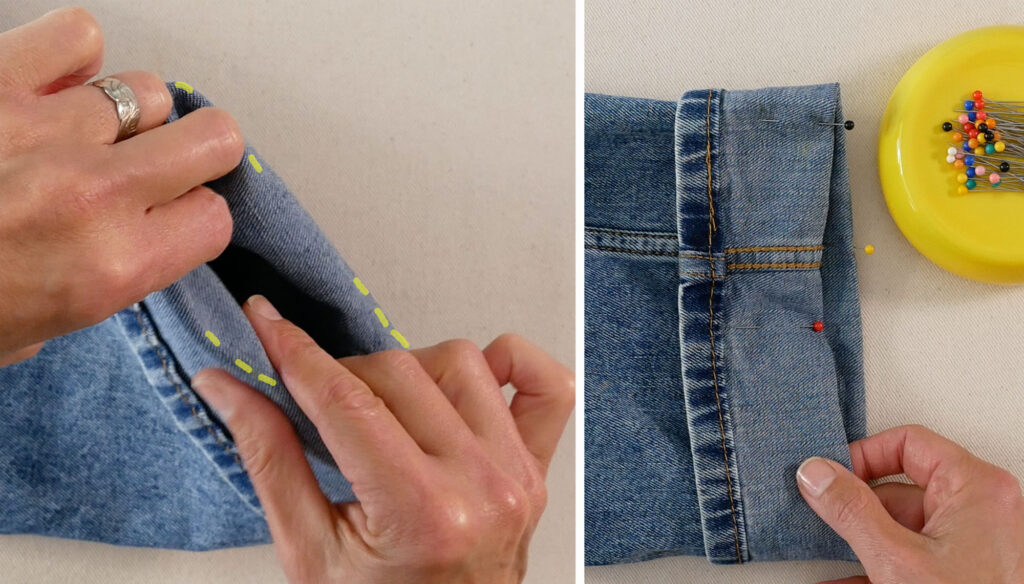
Turn the jeans right side out. Fold on your line to the outside as if you were cuffing the jeans. Pin the fold down in place.
Take the time to line up the side seams and inseams. When the seams are lined up the finished alteration will be less noticeable.
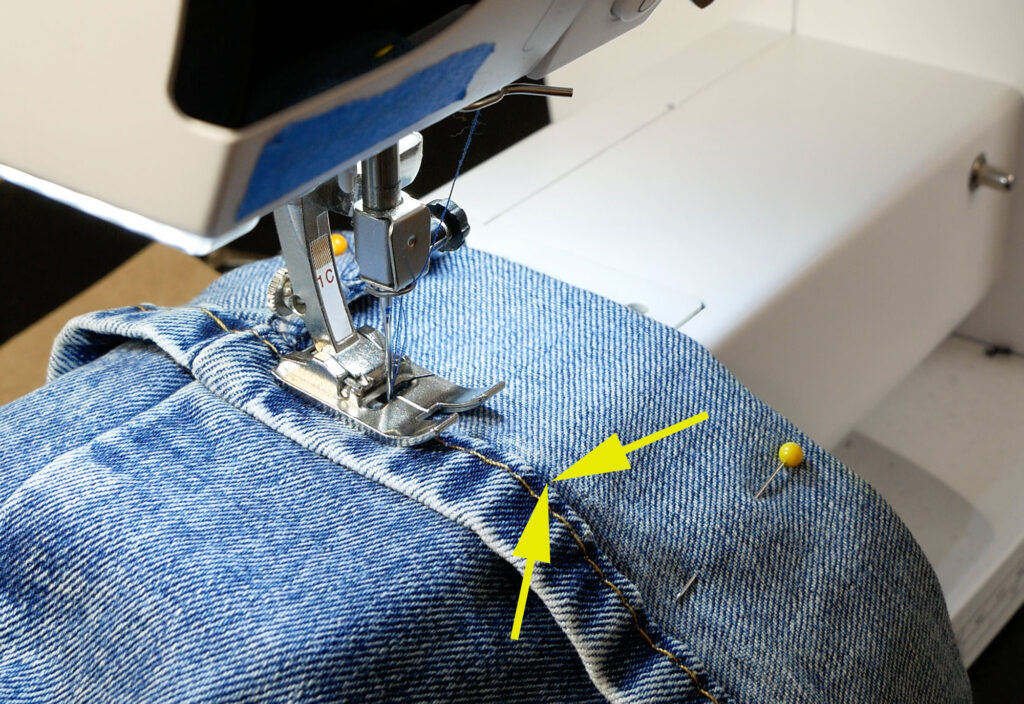
Take the jeans to the sewing machine. Have the machine threaded with an all-purpose thread in a color that matches the denim not the topstitching.
Take the table off the machine so you can put the leg opening around the free arm.
Line the machine needle up so it sews as close as you can to the edge of the original hem. You could use a zipper foot here if it lets you get closer than your all-purpose presser foot.
Start sewing around the leg. Don’t catch the hem but sew right up to it.
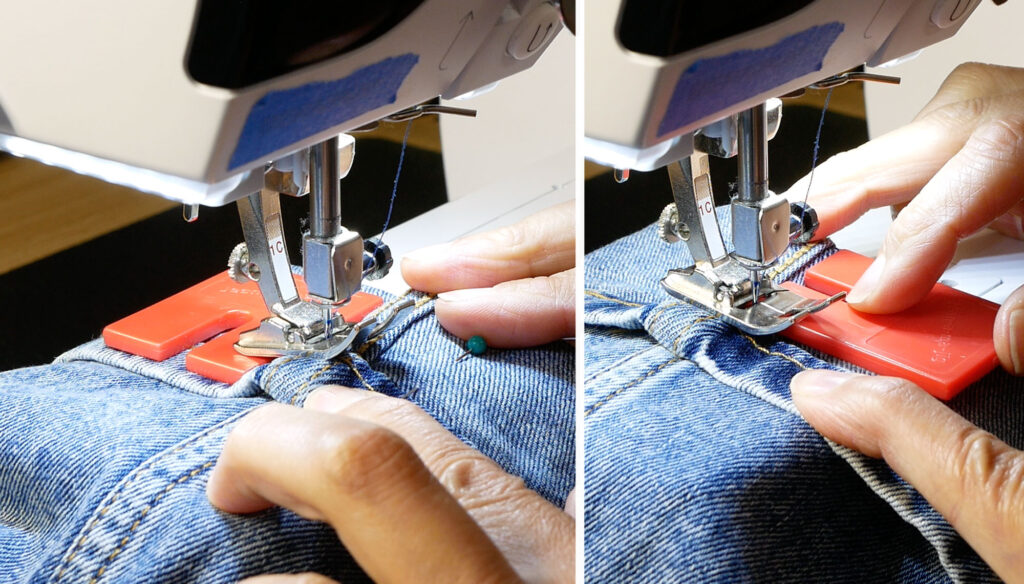
When you get to a bulky seam you need to use a hump jumper, jean-a-ma-jig or piece of cardboard to keep your presser foot level. Leveling and raising the presser foot allows it to go over the bulk without getting stuck. When the foot gets stuck your needle still goes up and down but since the fabric doesn’t move you get those teeny-tiny stitches. And when the foot comes off a bulky seam it’s like rolling down a hill and it rolls off too quickly giving you skipped or extra-long stitches. Keep the foot level and you will have even stitches.
Place the tool of choice behind the needle, under the presser foot as the needle approaches the thick seam. Sew Slowly over the thickness. Switch to using the hand wheel when you feel the needle resisting. Turn slowly, toward you.
Move the leveling tool in front of the needle, under the presser foot, when the presser foot begins to tilt downward, after sewing over the thickest part. You’ll have to keep moving the tool when it’s in front to prevent sewing over it.
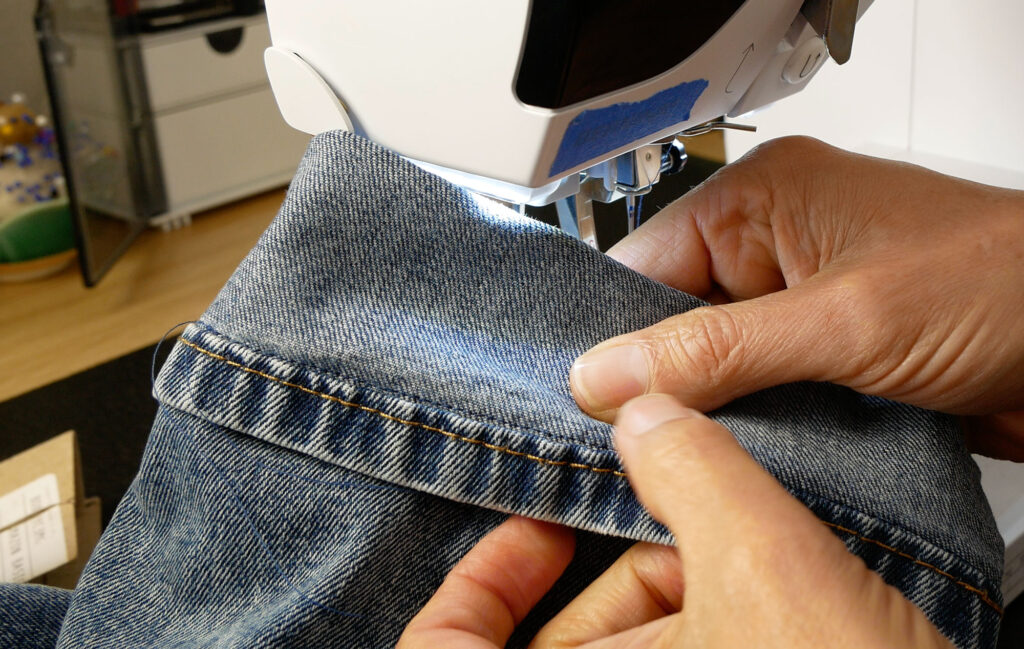
Sew until you meet back up to where you started. Take a couple of reverse stitches to lock your thread.
Fold the original hem down and any excess fabric up into the leg. Give the hems a good pressing.
Now you can keep the extra length (if you want to reclaim it later when ankle length goes out of style 😉 or you can cut it off.
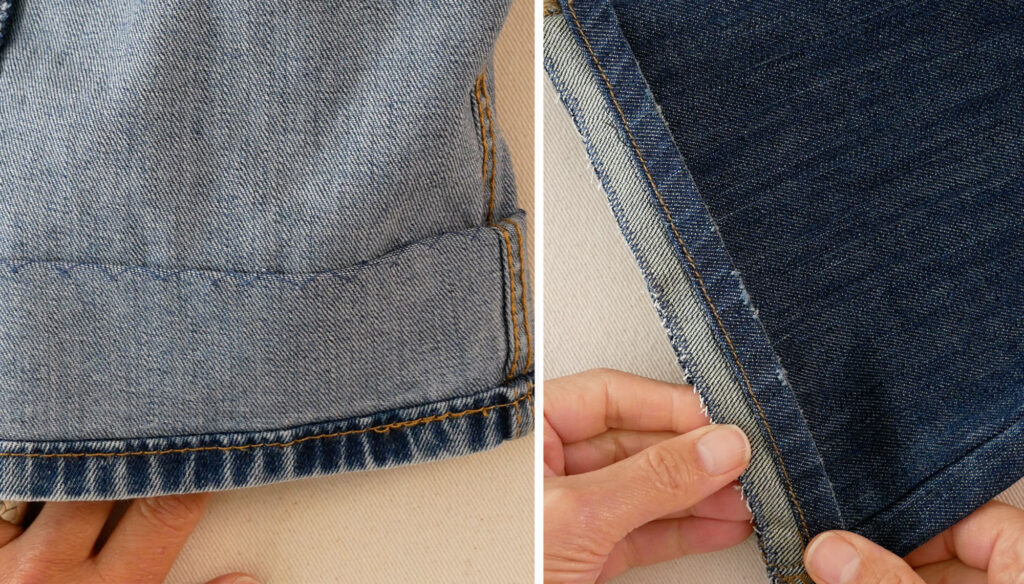
If you keep the extra length sew it down, by hand with the catch stitch. It’s easy and won’t show on the right side if you use matching thread and only catch a couple threads of the denim when sewing.
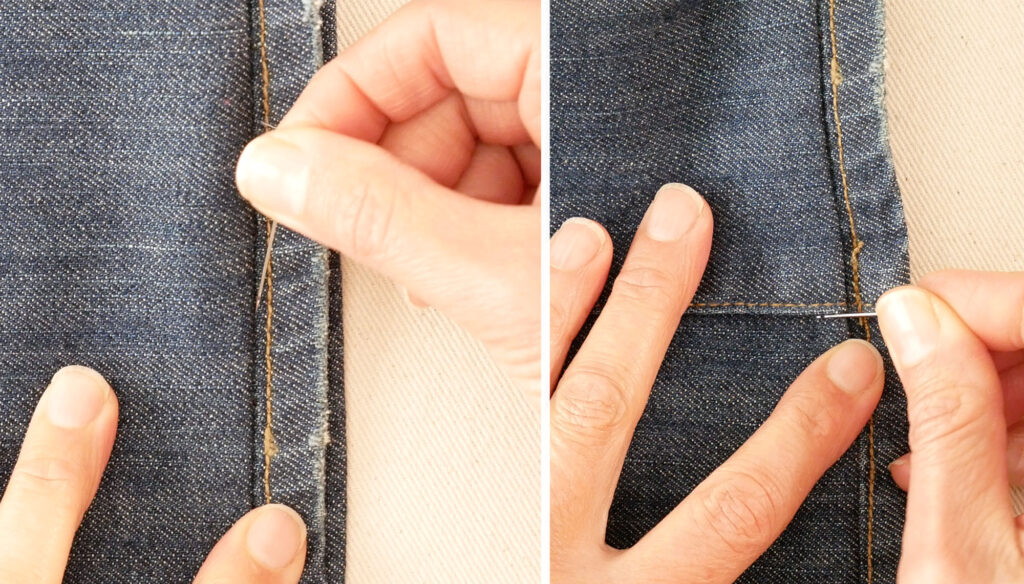
If you cut off the excess fabric, cut it off about ⅜” to ½” above your stitches. Overcast the raw edge with a serger, overcast stitches, zig-zag stitches or a hand whip stitch. To keep this bit of fabric tucked up and out of sight, tack it down by stitching in the ditch on the outside. You could stitch in the ditch of the seam you just created or in the ditch of the two side seams.
And, as always, give the hems a good press when you’re done.