
Many of us know the names of stitches, and we know some stitches, but we don’t always know the name of the stitch we use or how to get started on the stitch we need.
This is one of five posts covering 10 commonly used and much-needed hand stitches for garment sewing and mending, with the accompanying video demonstration. I’ve included the time stamp with the instructions below so you can jump right to it in the video.
Oh! and don’t forget to press your stitches when you’re done sewing. It helps set the thread and makes the finished work so much better looking.
So if you’re ready, let’s go
The video demonstrates the Tailor Basting Stitch and the Slip Basting Stitch. If you know which stitch you want, the timestamp for each stitch is noted in the video description as well as below with the stitch explanation.
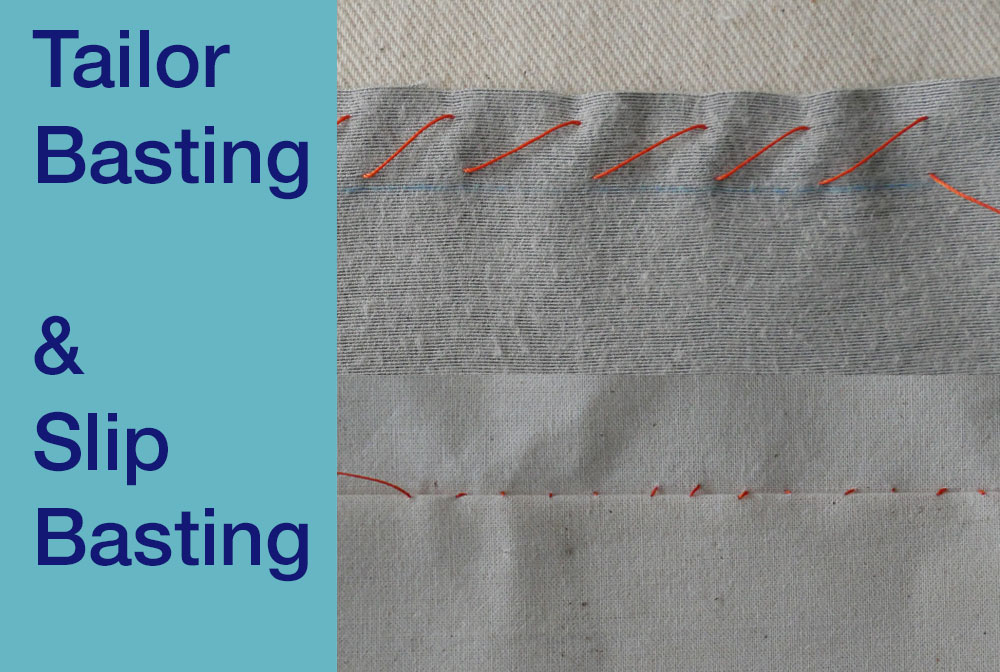
Tailor Basting
(timestamp :30)
Basting stitches are temporary, like pins. They are meant to hold layers of fabric in place while you try something on or sew it down, and then they are removed. Unlike a running basting stitch, the horizontal stitches of the Tailor Basting Stitch prevent the layers from shifting as you machine sew, which is what makes this stitch so much better than pinning to keep plaids, stripes, and slippery layers lined up!
Because they are temporary, the stitches do not need to be small. If you have very shifty fabric, like silk, you may want more stitches per inch.
Baste along the seamline, but not across the seamline for easier removal of the stitches after the seam is sewn(either inside the seam allowance or on the garment side of the seam allowance). All is not lost, should a stitch cross over the seam line, it can be removed with a seam ripper 😉
It’s good to use a contrasting color thread for basting; it will be easy to see when one removes it, but don’t use red thread for basting. Red lint may be left behind and, well, that’s not good.
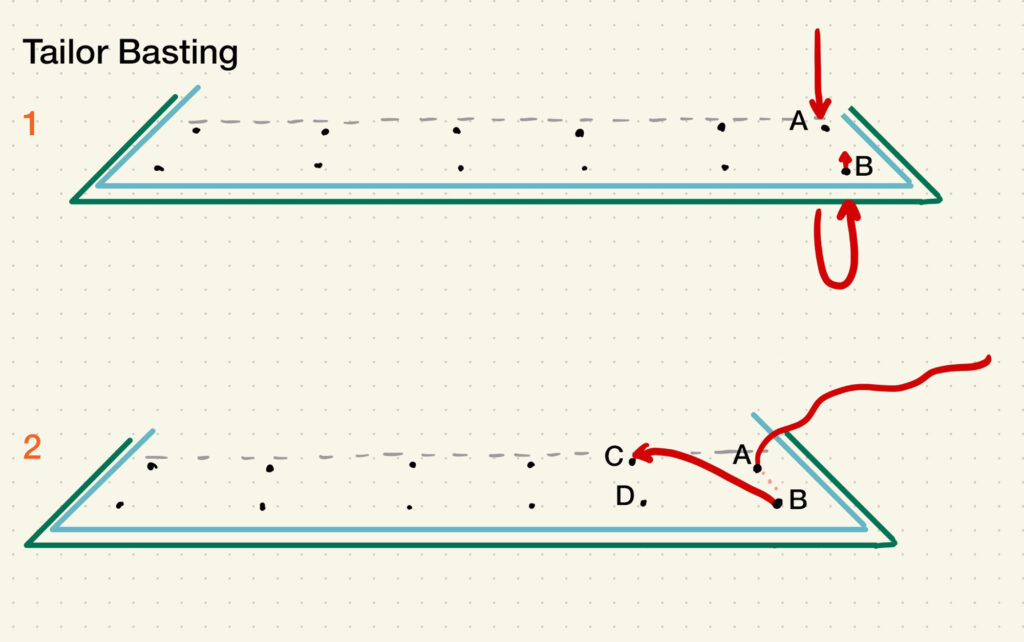
- How you start
- The Tailor Basting Stitch is worked right to left if right-handed and left to right if left-handed. It’s worked with the fabric flat on a smooth surface.
- First step
- Next to the seamline, in the seam allowance, insert the needle from top to bottom near the start (1, A). Do not knot the thread since this is a temporary stitch. Instead, leave a long tail of about 4”. This long tail is a safety measure in case you pull the needle tightly, you won’t lose that first stitch.
- Second step
- Bring the needle back up to the top, a short distance away, but instead of to the right, go toward the cut line or cut edge, or some direcrtion directly across from where the needle went into the fabric (1, B).
- Third step
- Insert the needle into the fabric to the left and on the same imaginary line/level that the needle originally went into the fabric near the seam line (2, C).
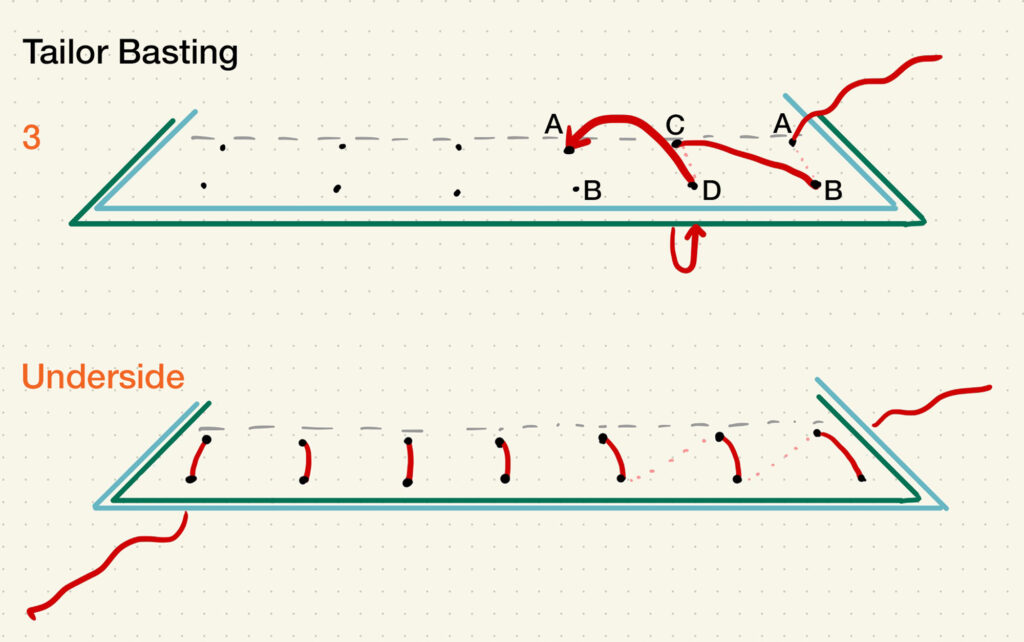
- Repeat
- Continue stitching repeating these two strokes; across, from the cut edge to the seam line, and over from the seam line to the cut edge. (3)
- The stitches will form a row of diagonal lines on one side and a series of short perpendicular lines (to the seam) on the other (See Underside, above).
- Clip the Thread
- When you come to the end, there is no need to knot the thread, but leave a tail of at least 4″ so the stitches do not come out before you sew the seam.
Slip Stitch Basting
(timestamp 5:58)
The slip basting stitch is the hero stitch of fittings and alterations because after fitting and pinning the garment so carefully, transferring the new seam location can be tricky. You need the pieces to stay in their exact place, but moving the pins or safety pins is going to be a problem.
The slip basting stitch is a temporary stitch sewn from the right side – allowing the pins to stay in place until you’re done stitching, and leaving a line of stitches showing the exact location where the new permanent machine stitches will go.
During the fitting, one layer of the garment is placed over another. This could be a seam that is being taken in or the sleeve being placed exactly where it needs to go on the shoulder. In all cases, the seam allowance of the top layer, plus any excess fabric when taking in a seam, is folded under itself. The fold is where the seamline will be for that top layer. The slip basting stitch is always used with a folded edge.
After basting, pins can be removed, and the top layer is unfolded to be sewn on the machine. The basting stitches form the stitching guideline.
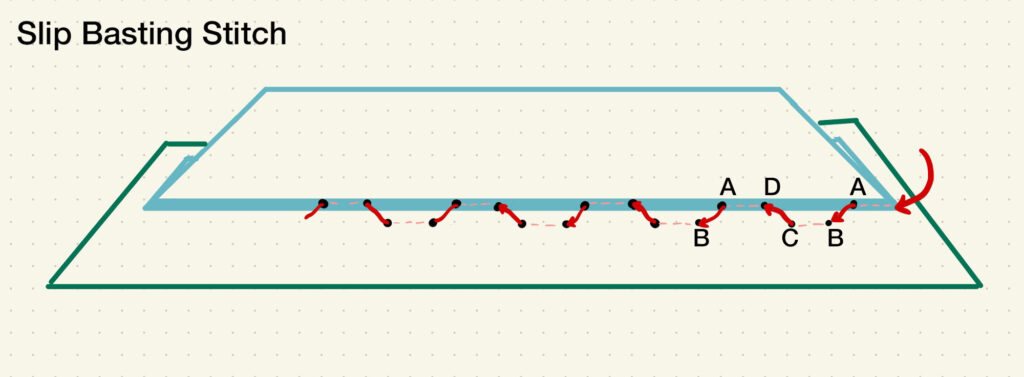
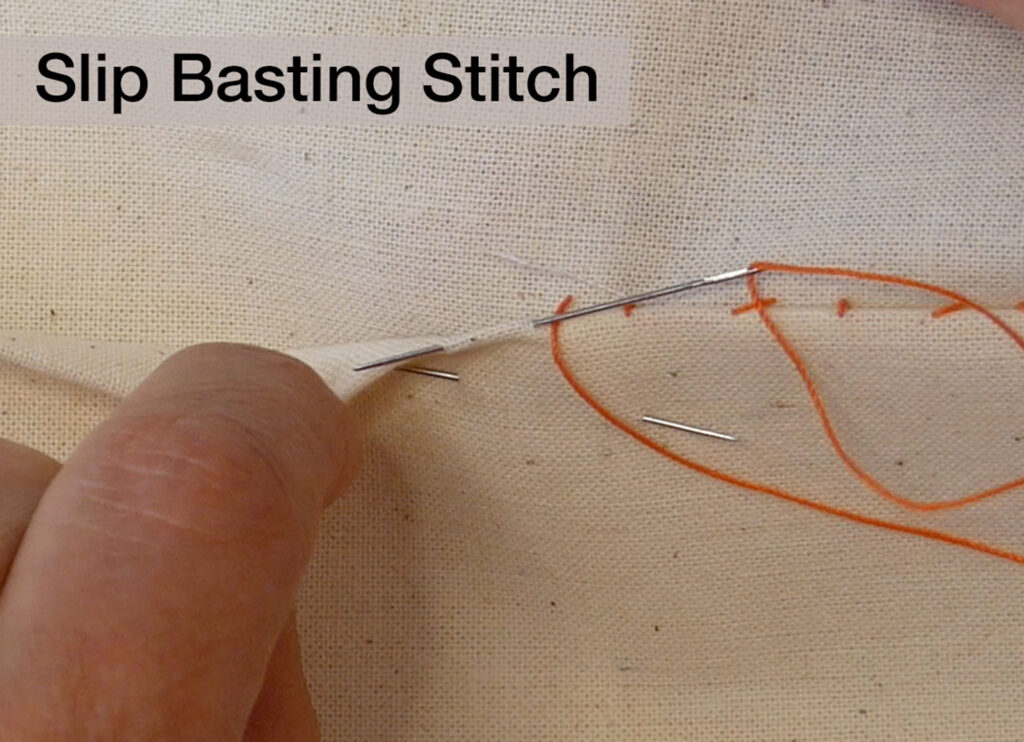
- How you start
- The slip basting stitch is worked right-to-left if you’re right-handed and left-to-right if you’re left-handed.
- You can have the folded top edge closest to you or furthest away from you.
- First step
- Insert the needle into the fold of the top layer from underneath or behind the fold (A). You’re slipping the needle into the fold. Leave a tail of thread about 3 to 4 inches long.
- Second step
- The needle emerges from the fold. It then takes a stitch into the base layer near to where it exited the folded edge (B to C). Because this is a basting stitch, your stitch length is larger than that of permanent stitches. Aim for about 1/2″ or a centimeter.
- Third step
- The needle then goes back into the tunnel of the fold, close to where the needle exited the base layer (C to D).
- Repeat
- There are two parts to this stitch: in the fold, in the base layer
- The stitches are alternating between the fabric layers. You are never capturing both layers in one stitch.
- Remember not to pull the thread too tight or it will cause puckering and straining.
- Clip the thread
- No knotting
ICYMI
Be sure to watch the other video (more to be published in the coming weeks) in this series of essential hand stitches:
Or read the blog post here: