
Many of us know the names of stitches, and we know some stitches, but we don’t always know the name of the stitch we use or how to get started on the stitch we need.
This is one of five posts covering 10 commonly used and much-needed hand stitches for garment sewing and mending, with the accompanying video demonstration. I’ve included the time stamp with the instructions below so you can jump right to it in the video.
Oh! and don’t forget to press your stitches when you’re done sewing. It helps set the thread and makes the finished work so much better looking.
So if you’re ready, let’s go
The video demonstrates the Back Stitch and the Prick Stitch. If you know which stitch you want, the time stamp for each stitch is listed in the video description as well as below with the stitch explanation.
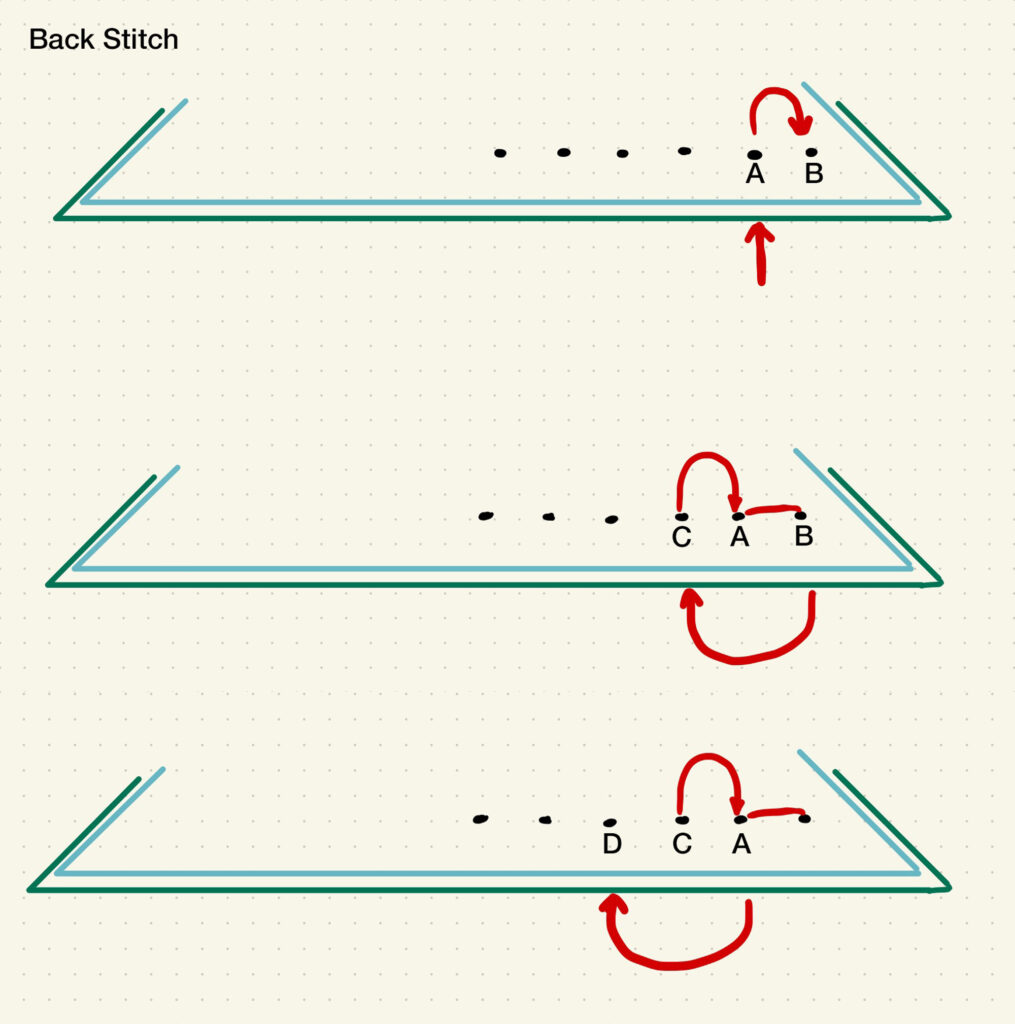
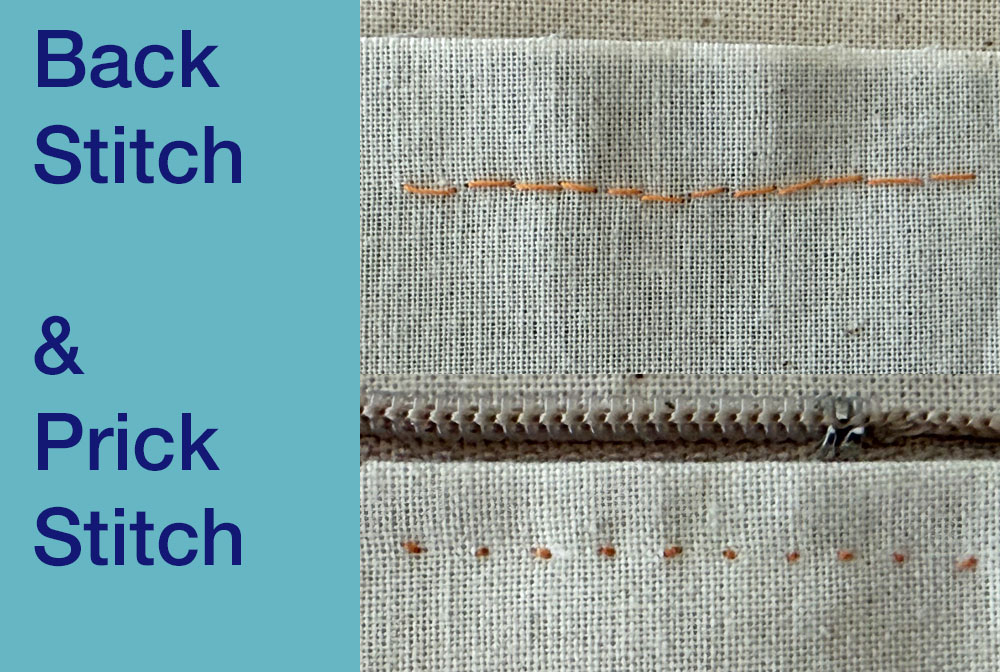
Back Stitch (at :19 in video)
The Back Stitch is one of the strongest hand stitches, and that makes it perfect for mending seams in places that your sewing machine can’t reach and/or seams that are under strain, like underarm and crotch seams.
- How you start
- The backstitch is worked right to left if right-handed, left to right if left-handed. Bring the needle up to the upper side slightly in from the start of your seam. (A)
- First step
- Insert the needle back down through the fabric, back, or to the right, toward the start of the seam. About ⅛” or 3mm away from where the needle originally came up. (B)
- Second step
- Bring the needle back up to the top about ⅛” forward on the seam, to the left of where the needle originally came to the surface. (C)
- Third step
- Insert the needle into the fabric where the first stitch started, or where the needle originally surfaced. (A)
- Repeat
- Keep inserting the needle into the end of the last stitch and bringing it back to the top one stitch ahead. (D)
- You never want to pull the thread tight. There should be no puckering. The thread should not look strained.
- Knot and clip the thread
- You’ll see that the stitches on the underside are twice as long as the stitches on the upper side.
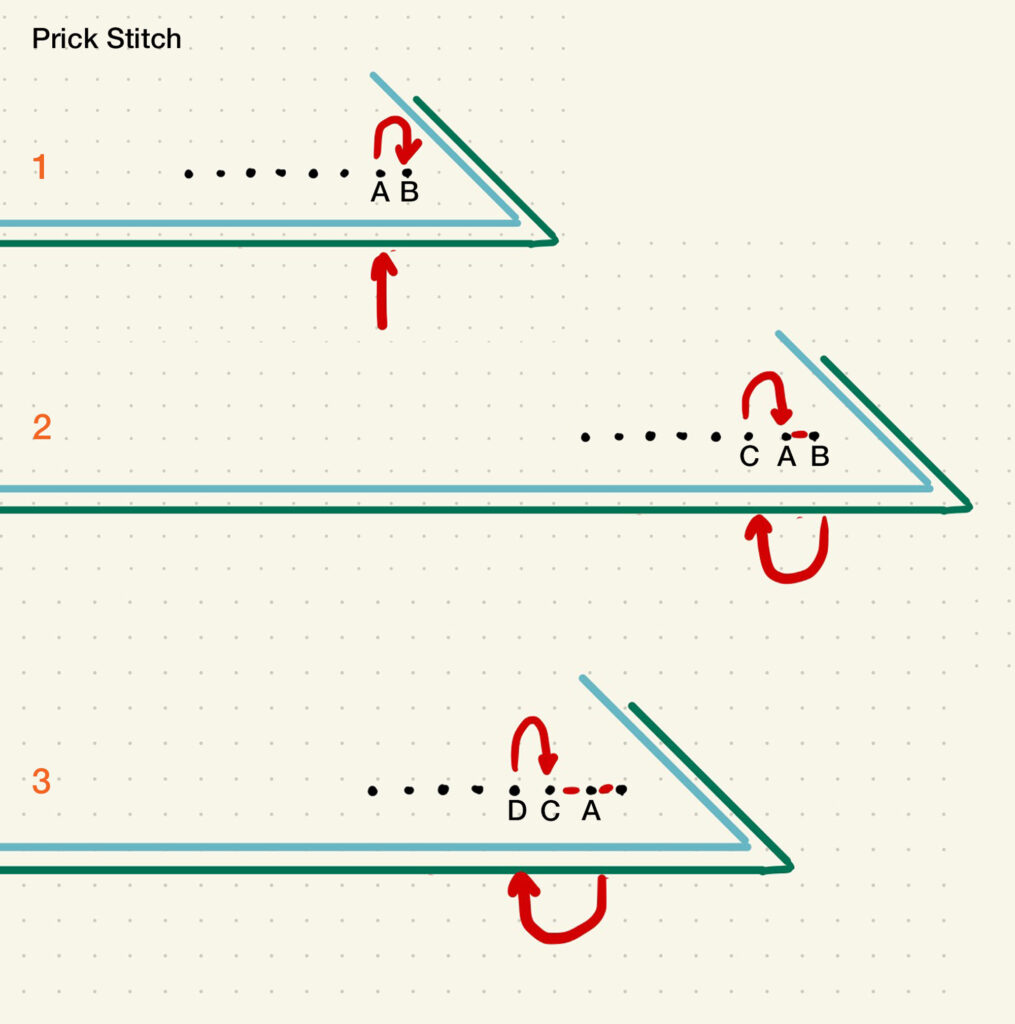
Prick Stitch (at 5:38 in video)
The prick stitch is a variation of the back stitch. It’s as strong as the back stitch, but because it uses such small surface stitches, it’s ideal for applications other than interior seams, such as Sewing a Zipper in By Hand. It’s practically invisible on the right side of the garment, but it can handle the strain of a zipper.
- How you start
- The prick stitch worked right to left if right-handed, left to right for left-handed. Bring the needle up to the upper side slightly in from the start of your seam (1, A).
- First step
- Insert the needle back down through the fabric, back, or to the right, toward the start of the seam. Just a couple of threads away from where the needle originally came up (1, B).
- Second step
- Carry the thread across on the underside and bring the needle back up to the top about ⅛” to ¼” forward on the seam, to the left of where the needle originally came to the surface (2, C)
- Third step
- Insert the needle into the fabric a couple of threads back to the right from where the needle surfaced (2, C to A and 3, D to C)
- Repeat
- Keep inserting the needle a couple of threads to the right and bringing it back to the top a ¼” ahead of the last stitch.
- You never want to pull the thread tight. There should be no puckering. The thread should not look strained.
- Knot and clip the thread
- Notice that the stitches on the underside are long.