
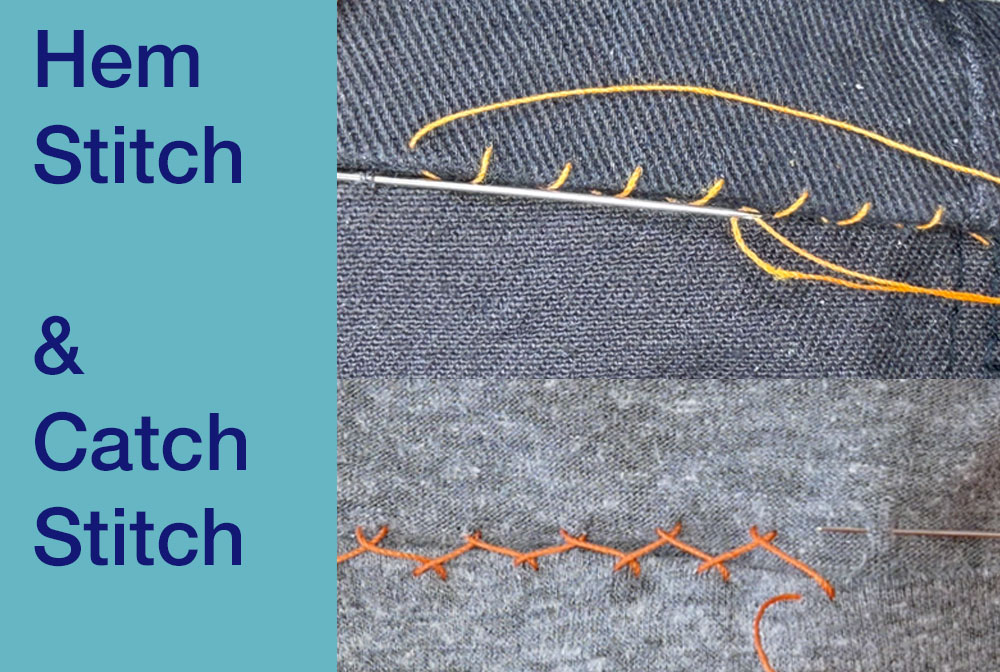
Many of us know the names of stitches, and we know some stitches, but we don’t always know the name of the stitch we use or how to get started on the stitch we need.
This is one of five posts covering 10 commonly used and much-needed hand stitches for garment sewing and mending, with the accompanying video demonstration. I’ve included the time stamp with the instructions below so you can jump right to it in the video.
Oh! and don’t forget to press your stitches when you’re done sewing. It helps set the thread and makes the finished work so much better looking.
So if you’re ready, let’s go
The video demonstrates the Hem Stitch and the Catch Stitch. If you know which stitch you want, the timestamp for each stitch is listed in the video description as well as below with the stitch explanation.
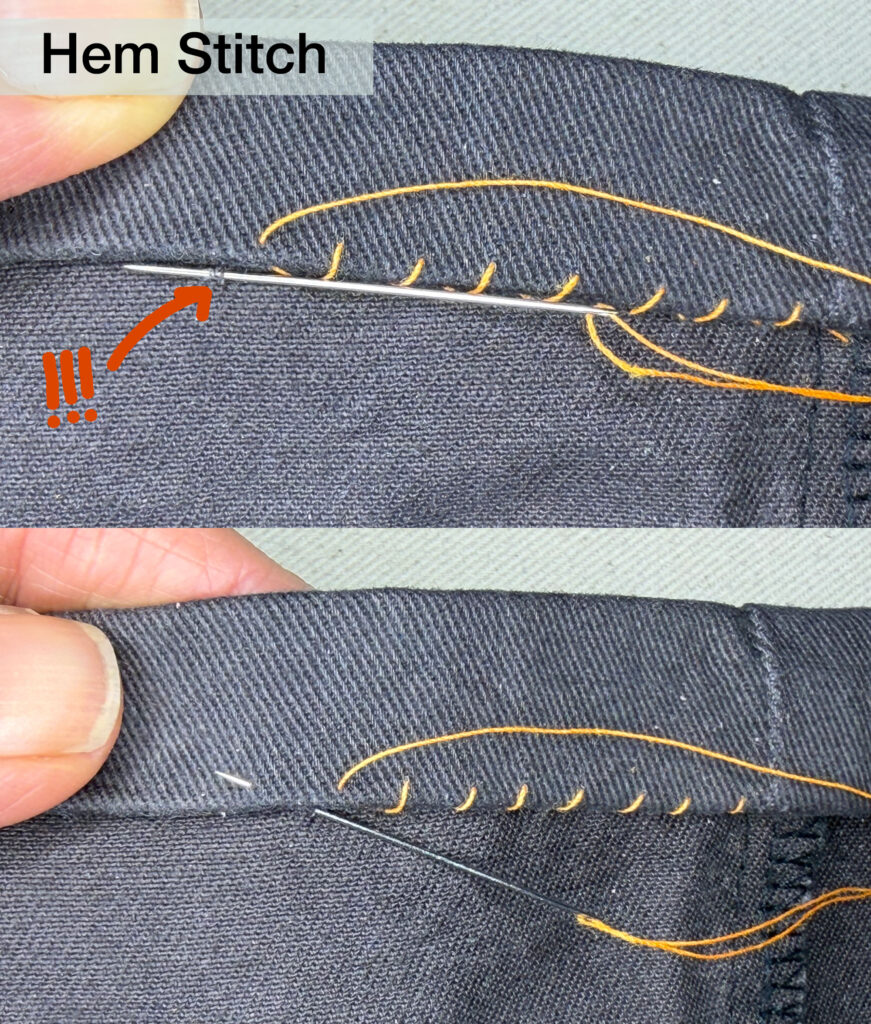
Hem Stitch (0:00:24)
This stitch can be used for all types of hemming and especially when you are using hem binding or have a non-folded but clean finished edge to tack down (example: a serged/overcast edge because you are trying to extend the length of the garment and do not have enough fabric to fold under).
This stitch does go through to the outer side of the garment, but should not be seen, therefor use thread that matches the garment. If you can’t find an exact match, choose the closest shade that’s slightly darker than your fabric, rather than a very close match that’s a little lighter. The darker thread will blend in and disappear better than a lighter thread shade.
(If you’re hemming dress pants, my post How to Hem Dress Pants may be helpful)
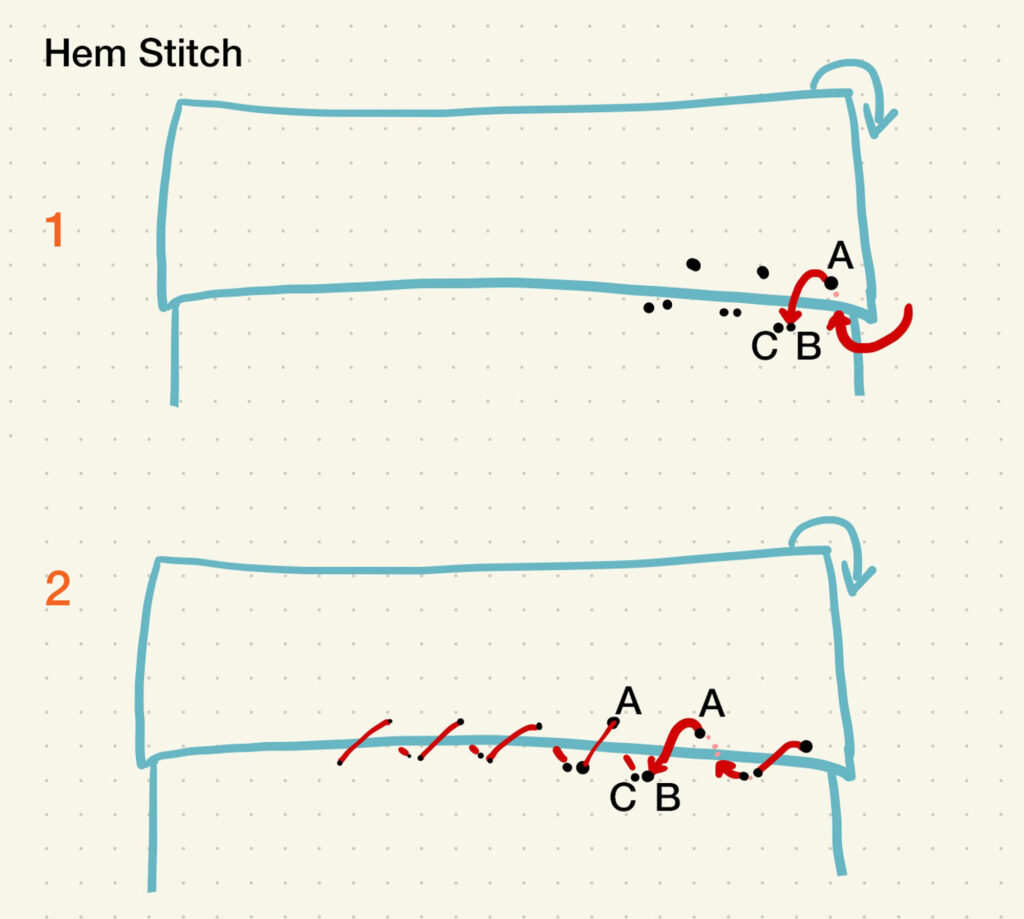
- How you start:
- The hem stitch is worked right-to-left for right-handed folks and opposite for lefties. The garment is turned inside out. The folded-up hem is on the top, and the top edge of the hem, the edge being sewn down, is closest to you.
- First step
- Anchor the knot behind the hem, or if there is a seam crossing the hem, anchor it into the seam allowance.
- The needle comes to the top of the hem and over the edge of the hem (A). It picks up a couple of threads of the garment just above the hem’s edge (B to C).
- Second step
- Slip the needle just under the edge of the hem and bring it up diagonally through the edge (A), whether this is a single layer of hem tape or a hem that has been folded to make a clean edge.
- Repeat
- Continue, spacing the stitches about ¼” or 6mm apart
- You are only picking up a couple of threads of the garment on the needle. You do not want to see the stitches on the right side of the garment.
- You never want to pull the thread tight. There should be no puckering. The thread should not look strained. A strained thread will show puckering on the right side of the garment.
- Knot and clip the thread.
- Knot the thread so it’s on the inside of the garment.
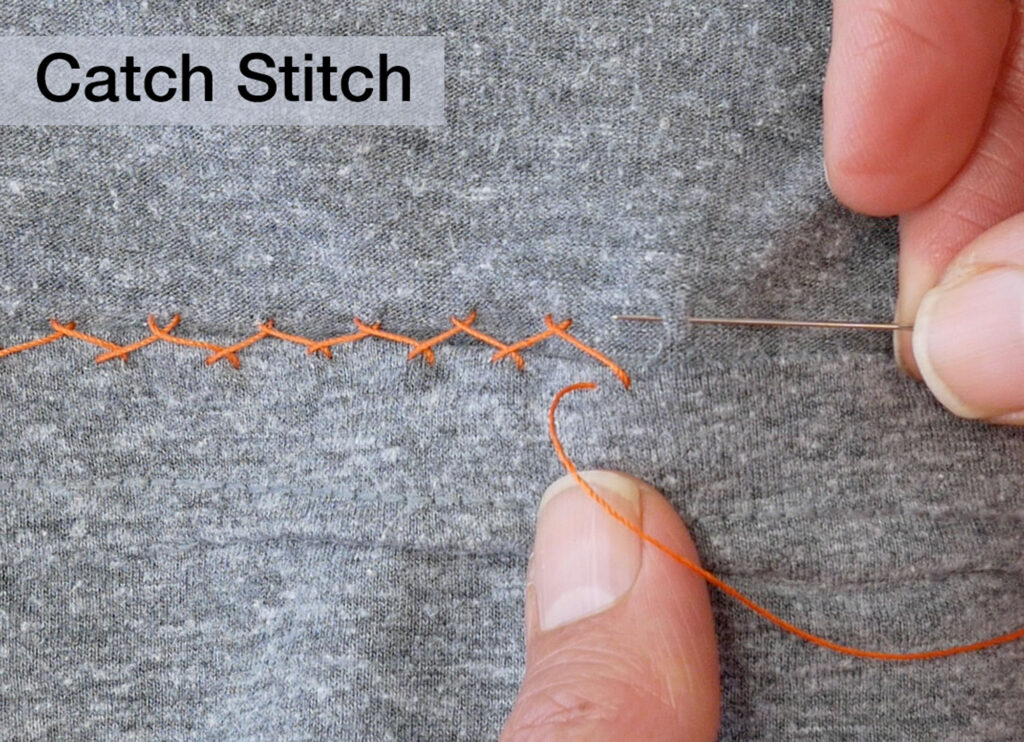
Catch Stitch (0:05:58)
The catch stitch is used to hem knits, to hold pleats in linings, and to sew in non-fusible interfacing. It is used in any situation where the layers being sewn together require some flexibility. It is not a stitch used for sewing seams.
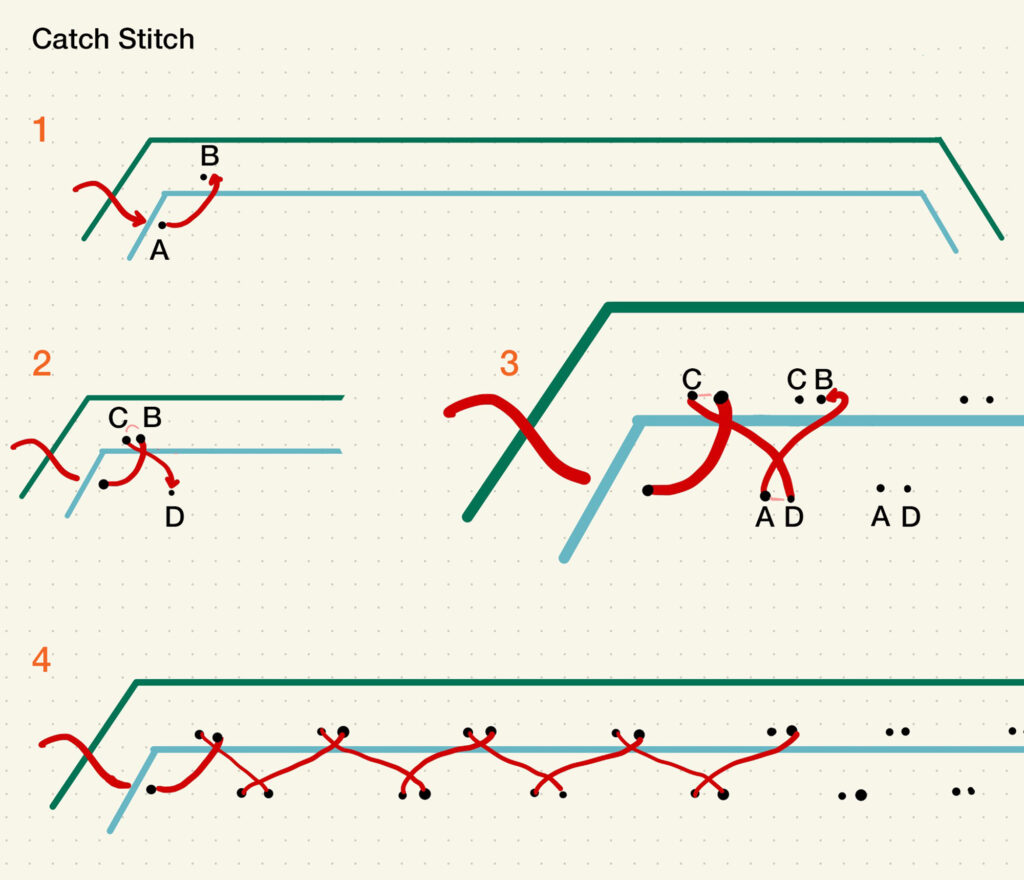
- How you start
- The catch stitch is worked left-to-right if right-handed and right-to-left if left-handed. This is the opposite of most hand stitches.
- The needle is inserted in the top layer of fabric, coming from underneath the layer to the top, on the left end of the project (1, A).
- First step
- Insert the needle over to the right and just above the top layer’s edge into the base layer (1, B).
- Take a small horizontal stitch, right to left (2, B to C). This stitch is only in the base layer. The entire stitch is worked left-to-right, but the small horizontal stitches, one step in the catch stitch, are worked right-to-left.
- Second step
- The needle is inserted into the top layer only, to the right of the last stitch (2, D). Take a small horizontal stitch, right-to-left, in the top layer only – about ¼” away from the edge of the fabric (3, D to A).
- Third step
- Insert the needle into the base layer, over to the right, and in line with the small horizontal stitch taken in step 1 (3, B to C).
- Repeat
- Repeat this criss-crossing until the end. (4)
- Each stitch is only catching one layer of fabric and alternating which layer it catches.
- These stitches should be a little loose to maintain some flexibility between the two layers.
- Knot and clip the thread.
More Hand Stitches for Your Skills Box
The Essentials: The Back Stitch and the Prick Stitch
Secure Placement: Tailor Basting Stitch and Slip Stitch Basting