
Many of us know the names of stitches, and we know some stitches, but we don’t always know the name of the stitch we use or how to get started on the stitch we need.
This is one of five posts covering 10 commonly used and much-needed hand stitches for garment sewing and mending, with the accompanying video demonstration. I’ve included the time stamp with the instructions below so you can jump right to it in the video.
Oh! and don’t forget to press your stitches when you’re done sewing. It helps set the thread and makes the finished work so much better looking.
So if you’re ready, let’s go
The video demonstrates the Slip Stitch and the Whip Stitch. If you know which stitch you want, the time stamp for each stitch is listed in the video description as well as below with the stitch explanation.
Slip Stitch (time stamp 0:05:20)
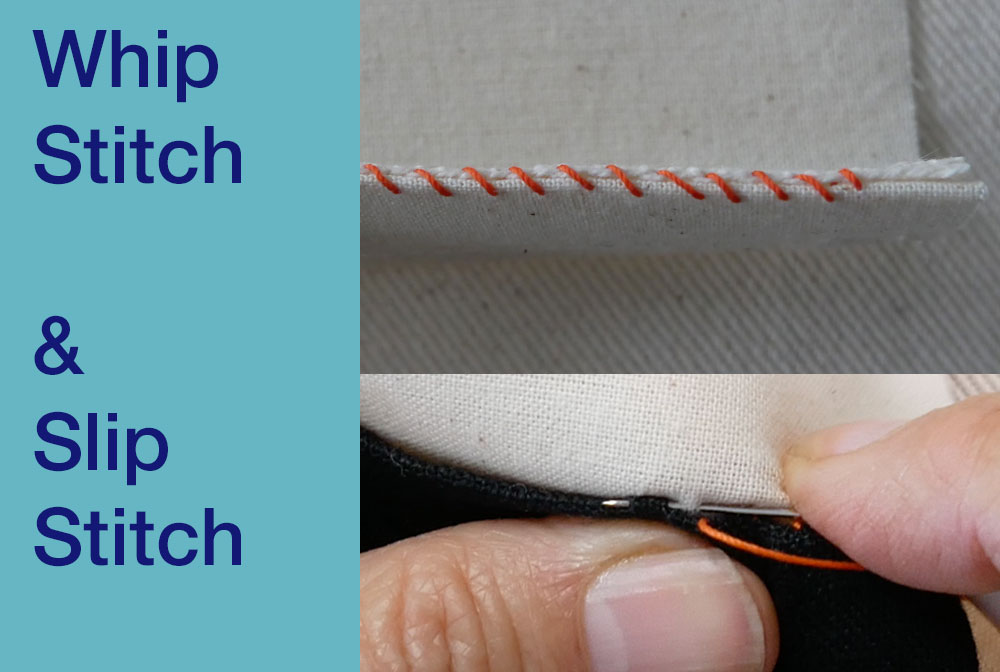
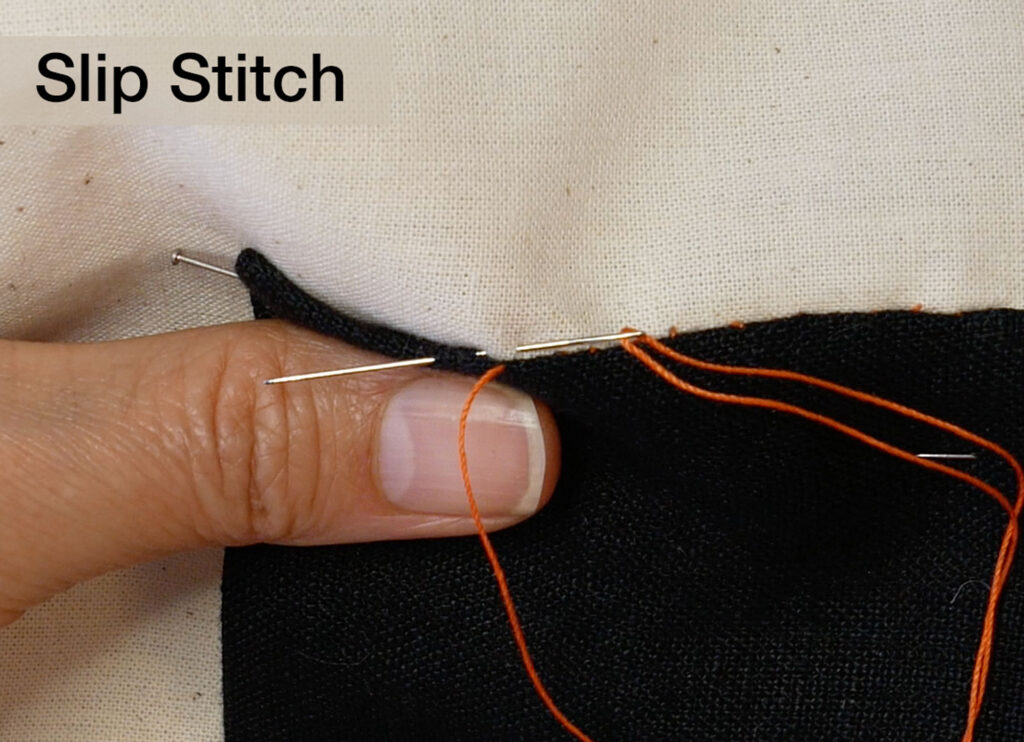
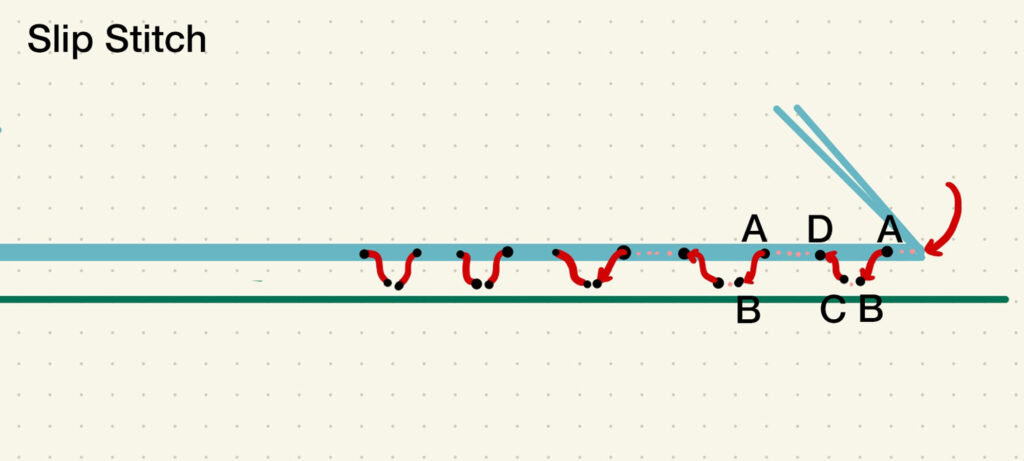
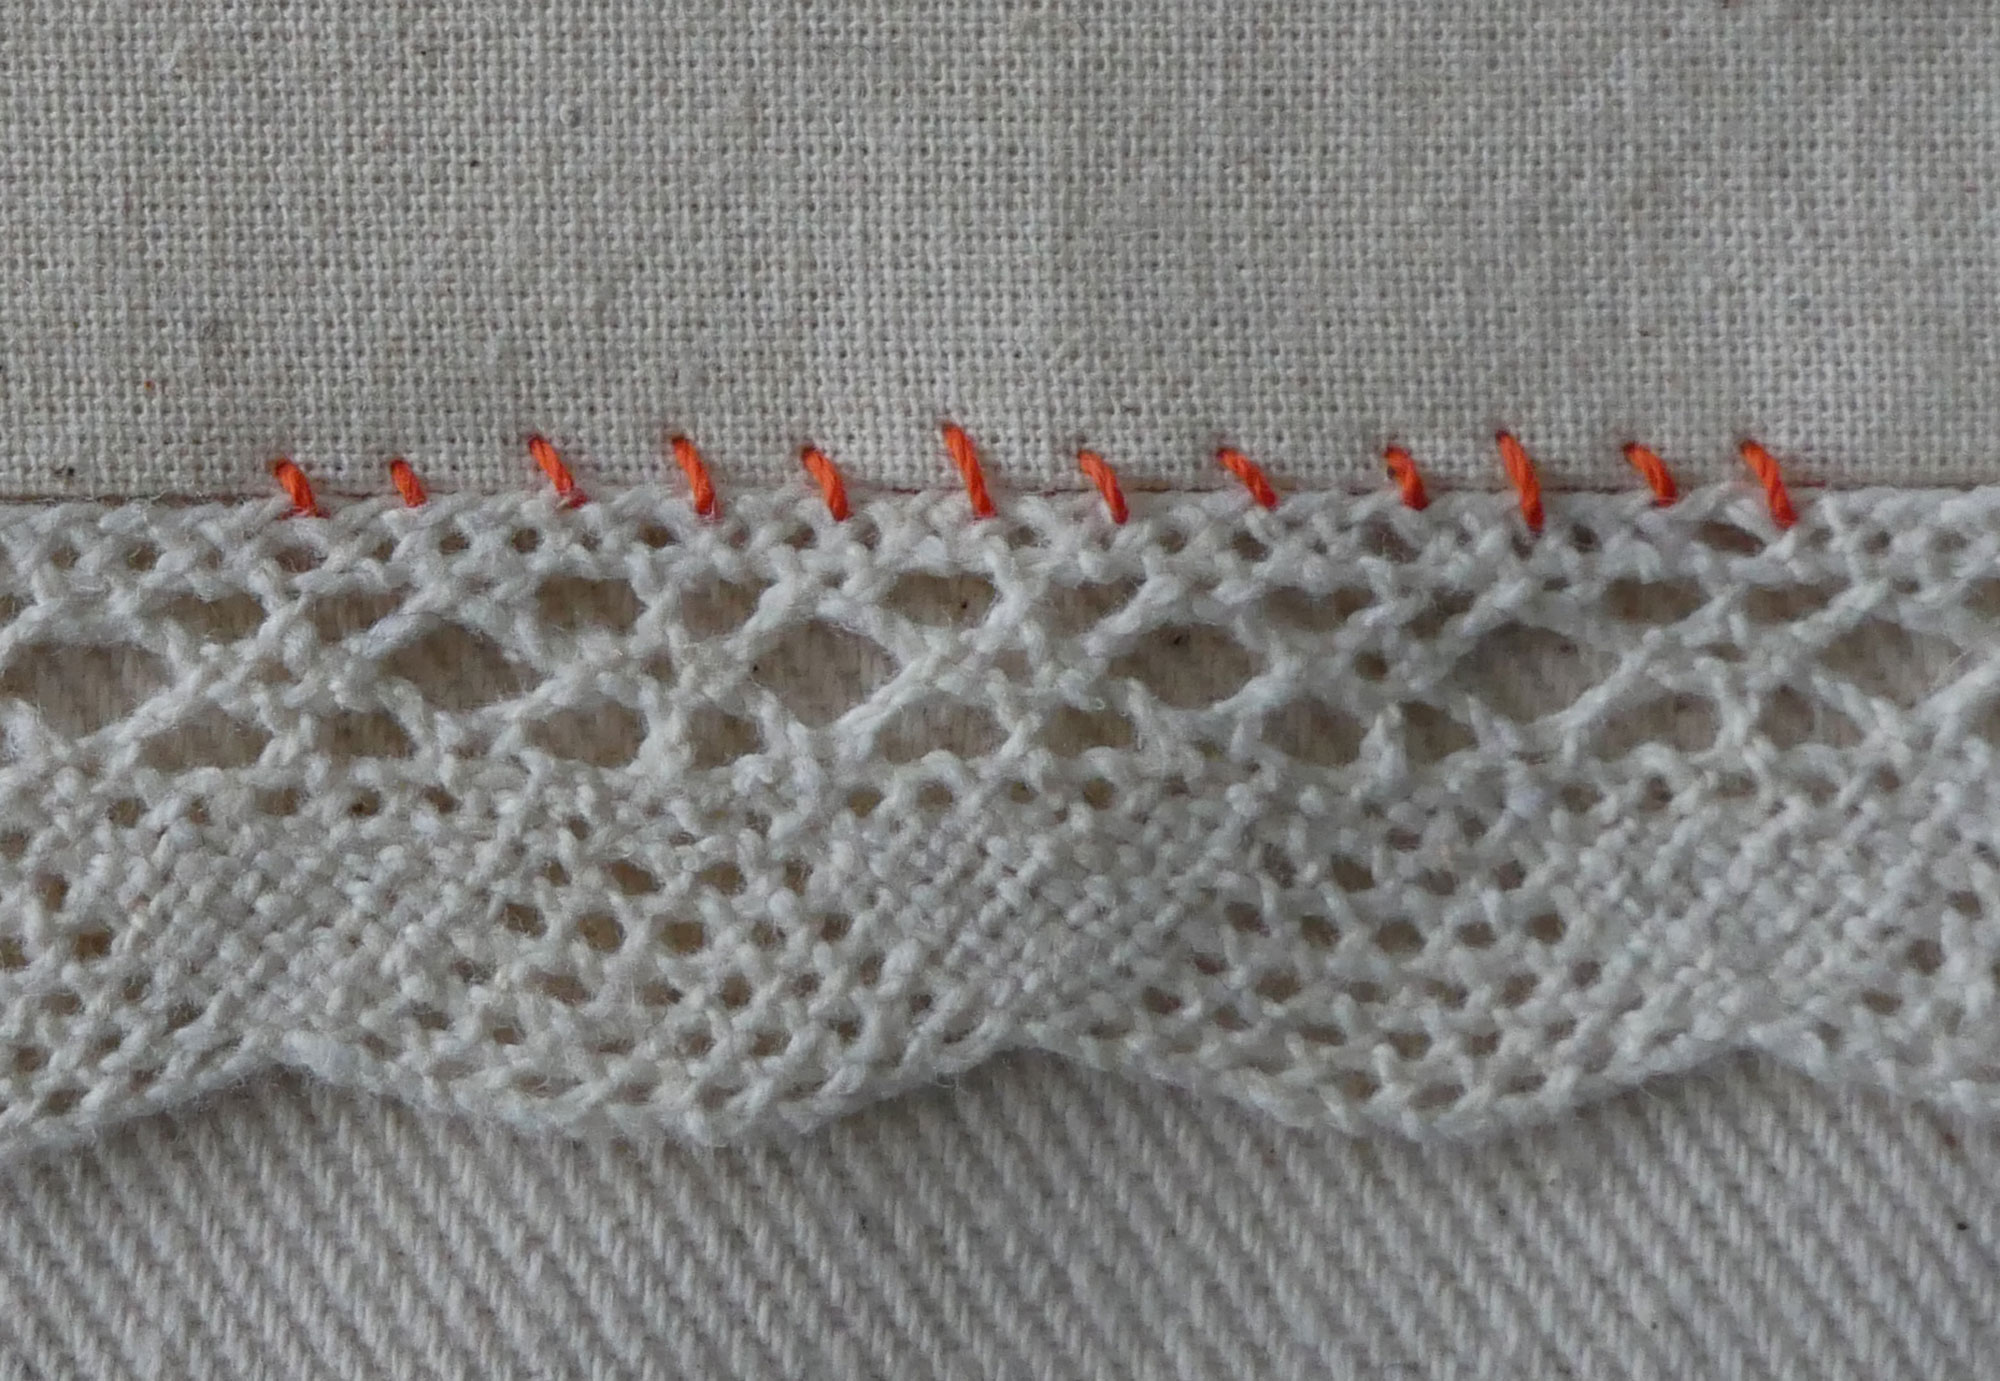
The Slip Stitch is an almost invisible way to sew down a folded edge, like folded hems and linings, or to attach something that has a folded edge, like a patch pocket or bias binding.
- How you start
- The slip stitch is worked right-to-left if you’re right-handed and left-to-right if you’re left-handed.
- You can have the edge being sewn down closest to you or furthest away from you.
- First step
- Insert the needle into the fold of the folded edge from underneath or behind (A). You’re slipping the needle into the fold.
- Second step
- The needle emerges from the fold, on the fold. From there, it picks up a couple of threads of the base layer (B to C). The stitch is less likely to be seen if the needle can come out of the fold closer to the base and not emerge from the top of the fold near the top of the piece being sewn down.
- The size of the stitch depends on your application; a smaller stitch is used for attaching patch pockets, and a larger stitch is used for attaching a lining to the hem. Stitch size will also be influenced by the thickness of the fabric.
- Third step
- The needle then goes back into the tunnel of the fold directly, or slightly left, of where the needle emerged from the base layer (D).
- Repeat
- This is repeated until you come to the end.
- Remember not to pull the thread too tight or it will cause puckering and straining. You also don’t want it too loose or the thread can catch on something and break.
- Knot and clip the thread
- When hemming garments with this stitch, I like to start and finish on a seam so I can use the seam allowance to anchor the thread
Whip Stitch (time stamp 0:00:23)
The whip stitch attaches two finished edges, as when attaching lace to a garment’s edge. It’s not a stitch used for seams.
A larger whip stitch can be used to stitch over the edge of a single layer of fabric to prevent unraveling. In this application, it is called the Overcast Stitch.
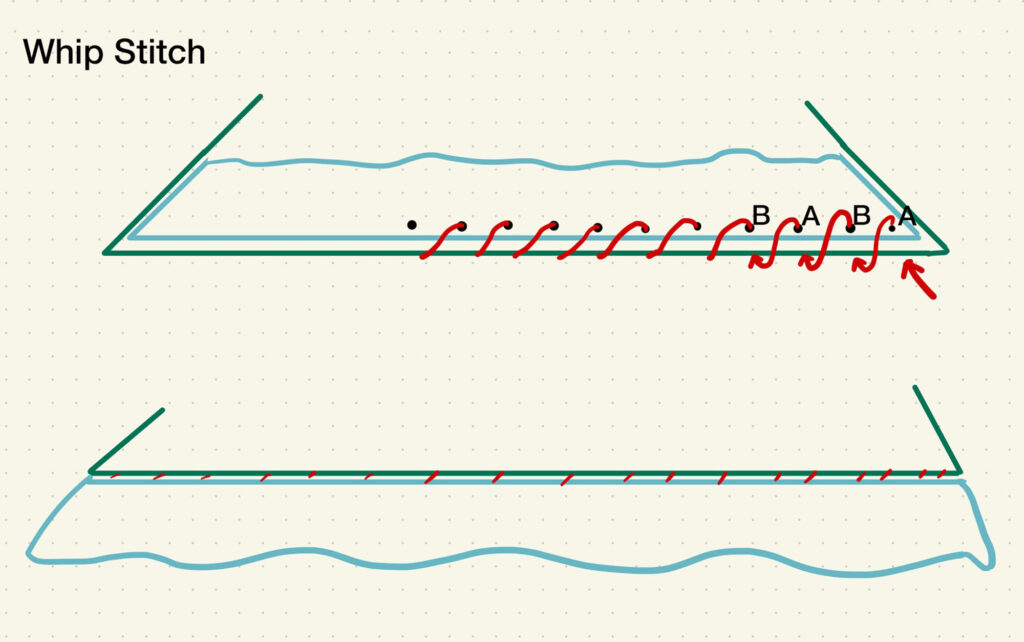
- How you start
- The whipstitch is worked right-to-left for right-handed folks and left-to-right for lefties.
- Insert the needle from the bottom or back layer to the top layer slightly in from the edge of the fabric or trim. (A)
- First step
- Carry the needle to the bottom layer, going over the edge not through the fabric. Insert the needle up into the bottom layer a little to the left and through to the top layer. (B)
- Second step
- Repeat this, always inserting the needle in the bottom layer and exiting through the top layer.
- Repeat
- The whipstitch forms diagonal stitches over the edges of the two layers of fabric.
- Try to keep the stitches the same length and all starting on the same imaginary line parallel to the fabric edge.
- Knot and clip the thread
- The whip stitch is like a hinge. It allows you to “unfold” the two layers after connecting them together.
More Hand Stitches for Your Skills Box
The Essentials: The Back Stitch and the Prick Stitch
Secure Placement: Tailor Basting Stitch and Slip Stitch Basting
Professional Finishes: The Hem Stitch and the Catch Stitch