

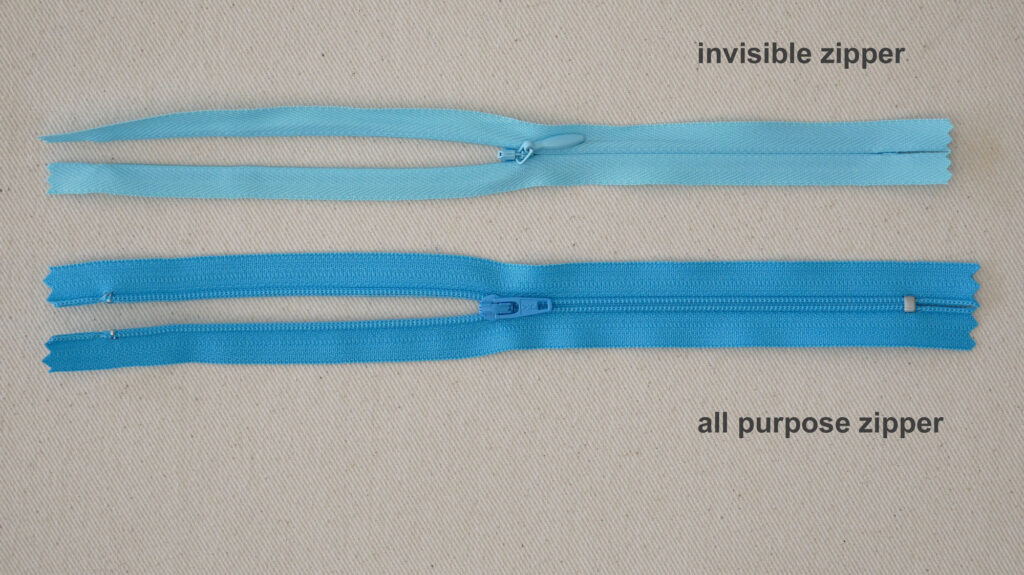
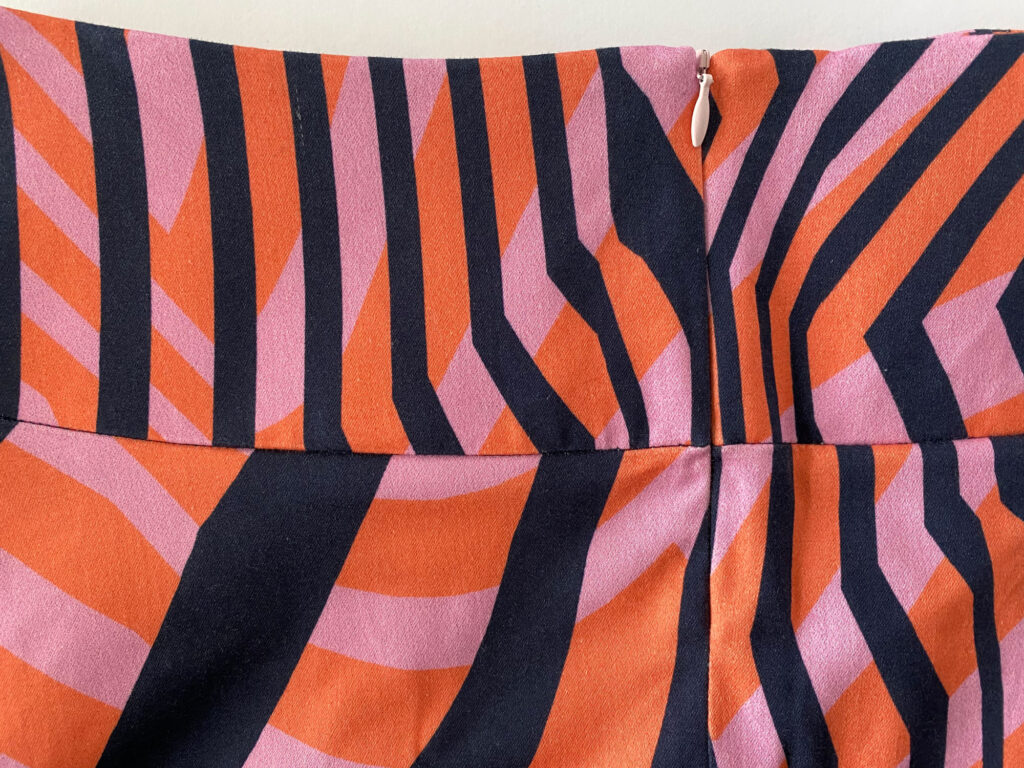
Invisible zippers, also known as Concealed zippers, are just that: so concealed once they are sewn into a garment that they appear to be invisible. Unlike other zippers, there is no outside stitching around the zipper, no obvious lapped fabric or fly. Nothing but a slim zipper pull gives it away.
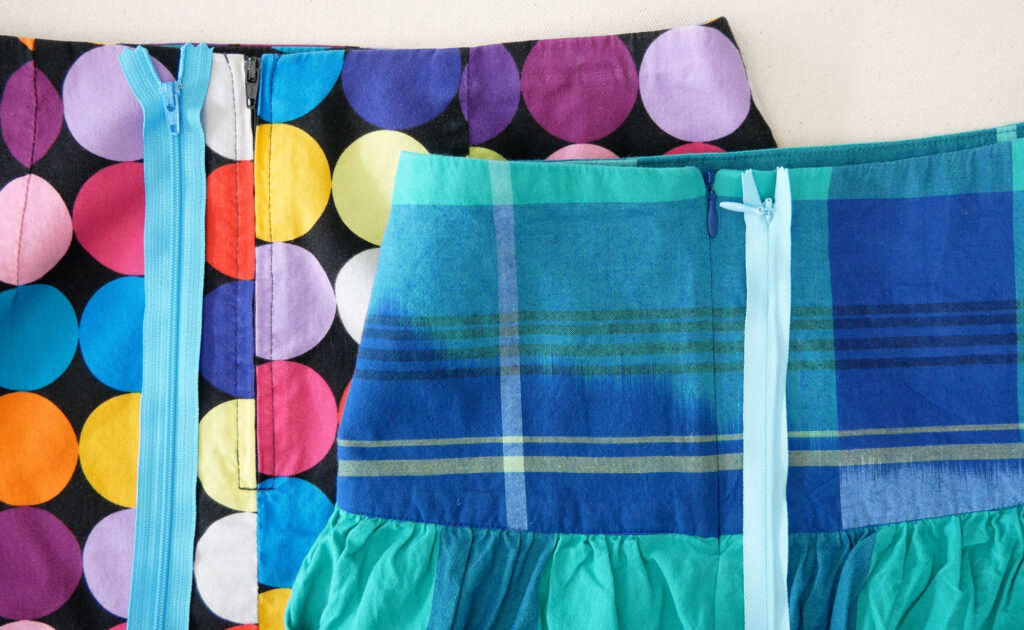
This makes invisible zippers a popular choice for home garment sewing. The clever design of the invisible zipper’s teeth and the way you sew it only to the seam allowance eliminates the struggle of sewing perfectly spaced rows of straight stitches to sew in a centered zipper by machine and the need to hand sew a zipper in to be “invisible”.
Watch the video here to see how to easily and beautifully sew an invisible zipper or read on.
The Fine Print
Genius, right? However, they do require a special presser foot for your machine. One that you almost always have to purchase separately.
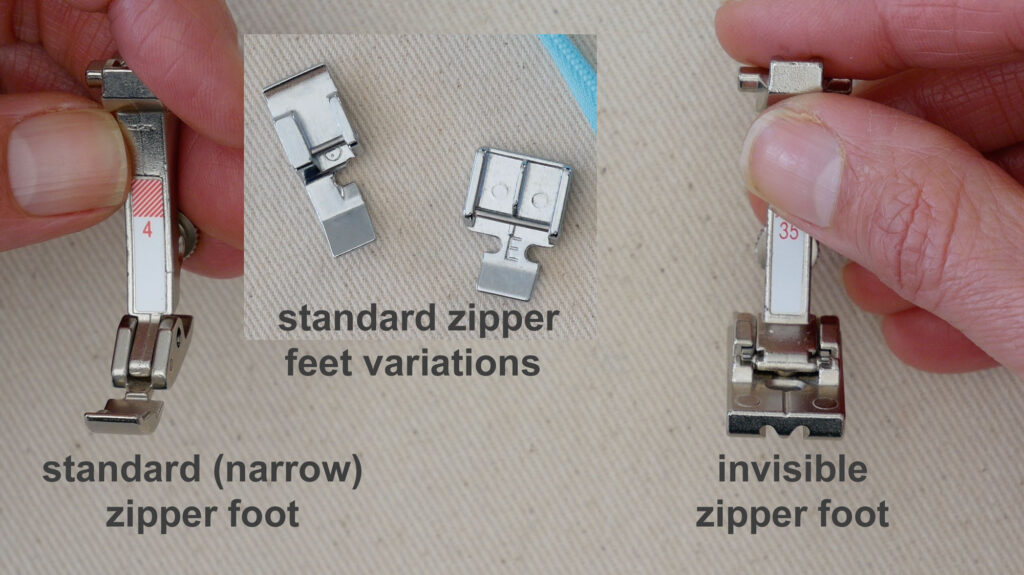
This special invisible zipper presser foot has two grooves in it. The teeth of the zipper slip under one groove or the other as you sew (depending on which side of the zipper you are sewing). The groove rolls and holds the zipper teeth out of the way so the needle can stitch very, very close to them. Practically under them.
Can you sew an invisible zipper into a garment with a regular zipper foot?
I have and you certainly can depending on the shape of your regular zipper foot but it isn’t ideal because the set-in zipper isn’t as invisible. But read on if you want to know how.
If I only had a narrow standard zipper foot I would try it before I bought another specialty foot. However, since I know how different the results are, I would go ahead and invest in the invisible zipper foot if I was planning to sew even one more garment requiring an invisible zipper.
You will come across a few methods for sewing invisible zippers as you sew different patterns or read different books. When you find a method you like, stick to it. You can replace any pattern’s invisible zipper instructions with the method you prefer. (Hopefully this one 😉
Sewing in an invisible zipper can be a head-scratcher if you’ve sewn in a lot of all-purpose zippers. If you’re new to zippers, just follow the steps. If you’ve been inserting all-purpose zippers up to now Trust The Process – it might be confusing but it works.
Big Differences with Invisible Zippers
Big Difference 1:
You need an Invisible Zipper presser foot. (AND a regular zipper foot to finish the seam)
Big Difference 2:
Unlike most other zippers, invisible zippers are sewn in BEFORE the seam below it is sewn
Big Difference 3:
They are lined up and sewn to the garment backward to putting in all-purpose zippers.
Big Difference 4:
You cannot sew all the way to the end of the zipper
Big Difference 5:
You cannot move the zipper head out of the way as you sew. You must move the pull to the very bottom of the zipper when you start to sew and leave it there.
Let’s Sew
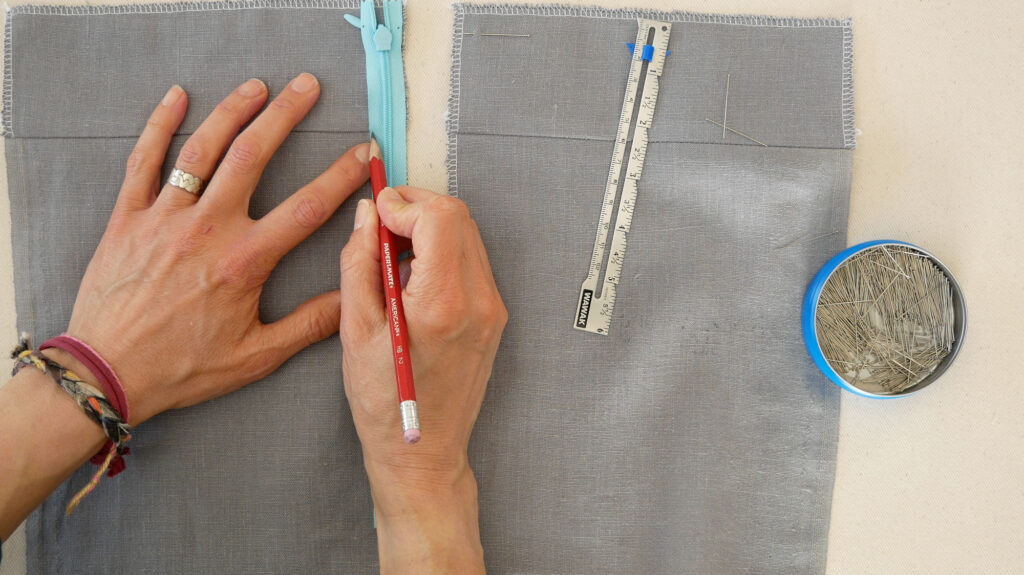
Lay the two pieces of the garment that will make the seam, side by side, right sides facing you. The seam below the zipper is left unsewn.
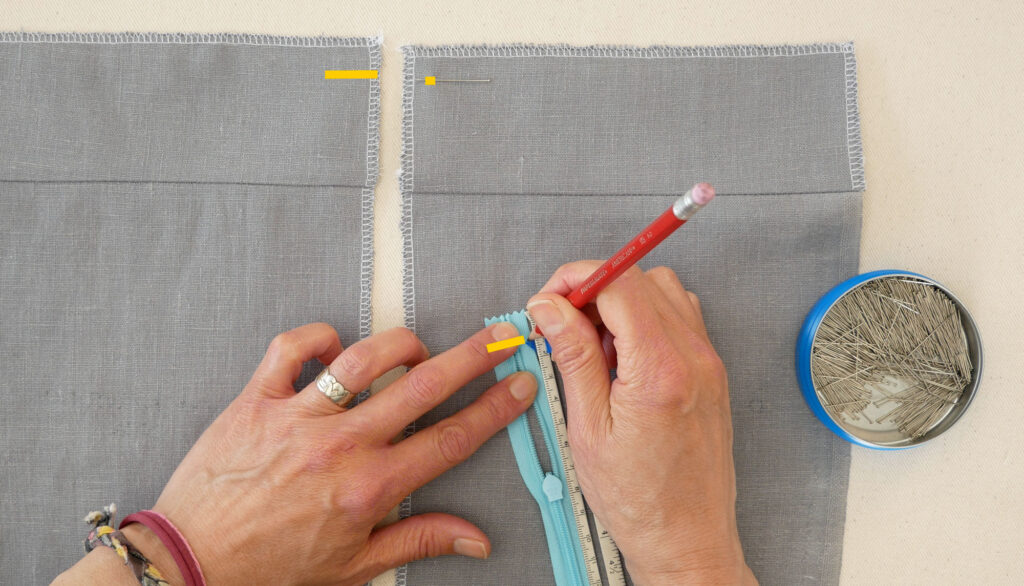
Mark the top seam line on your garment with a pin or a notch (this is where a facing or waistband is attached). Mark the same distance down from the top of your zipper on the back of the zipper tape.
Unzip the zipper.
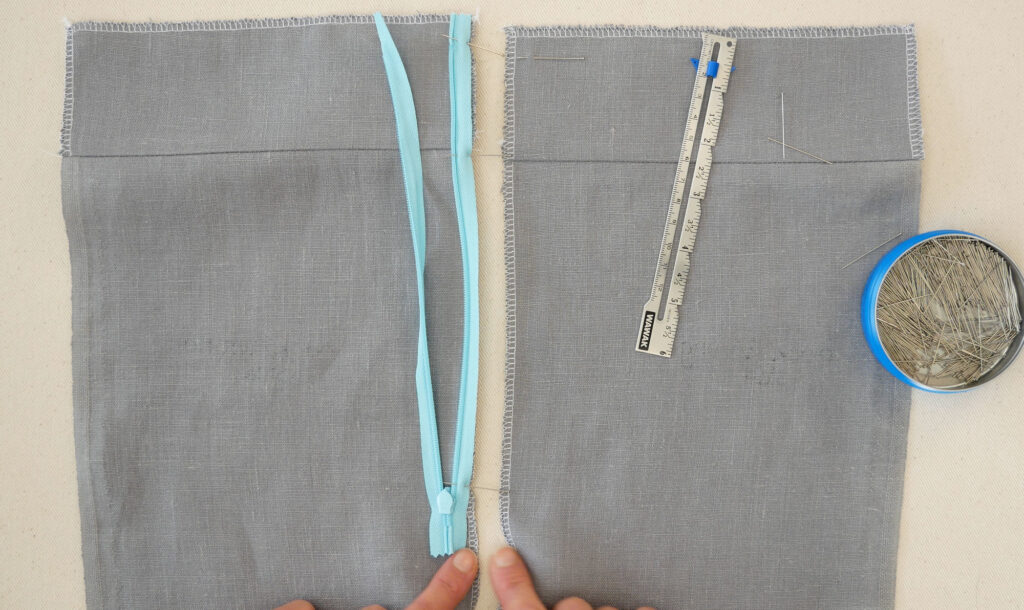
Lay it face down on the right garment piece with the top seamline marks aligned with each other. The zipper teeth lay on the seamline. NOTE: the zipper teeth are 1/2″ in from the edge of the zipper tape. Therefore, if you have a 1/2″ seam allowance you can lay the edge of the tape on the edge of the garment. IF you have a different seam allowance, you can change it to be 1/2″.
The zipper is lying entirely on the garment piece.
Pin or baste to hold the left zipper tape in place. Some people skip pinning and just sew – it’s your choice.
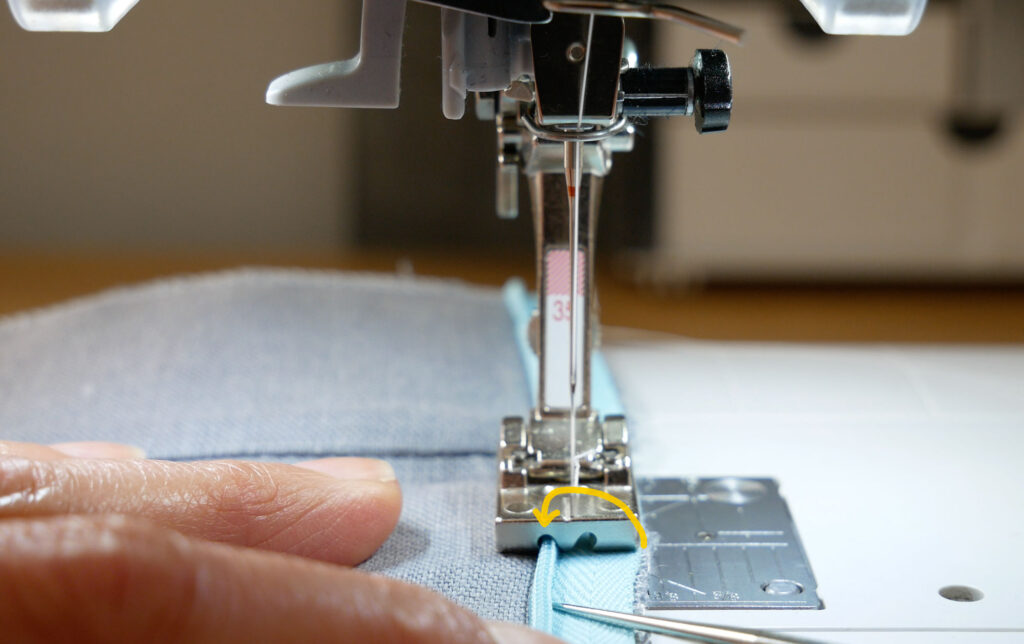
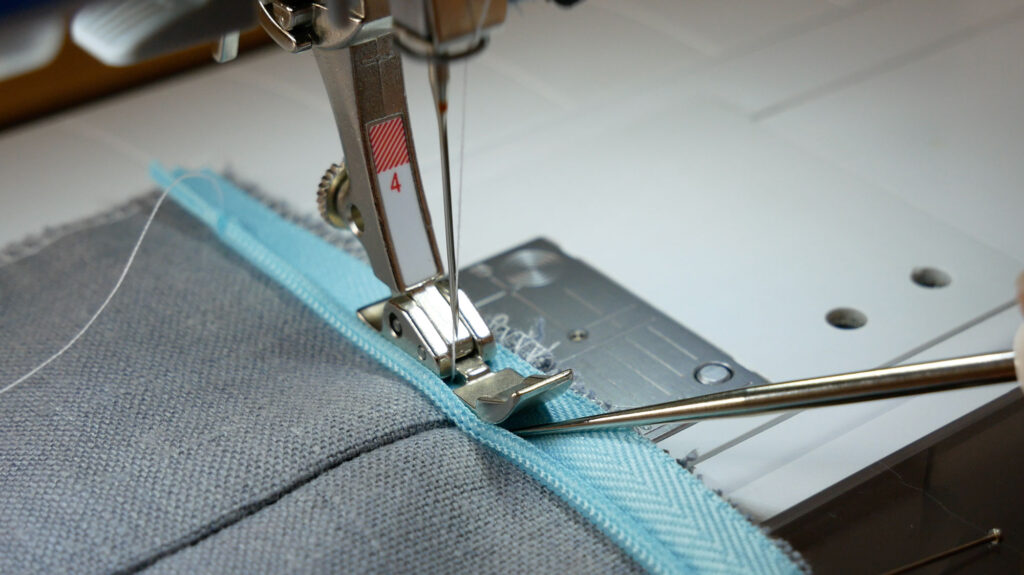
At your machine, place the zipper teeth on the left side of the zipper, under the right groove of the invisible zipper foot. You are using the groove that is farthest away from the edge of the zipper tape.
Sew the zipper down to the top of the zipper pull and watch that the teeth stay in the groove of the foot. It can be helpful to pull a little on the front and back of the zipper tape as it is being sewn down. This can prevent any puckering.
If you are using a regular zipper foot try to stitch as close to the teeth as you can.
When you get close to the pull of the zipper you have to stop. Back tack.
Back at the workspace, Mark the zipper tape where it crossed any seam. Transfer that across the tape to the free side.
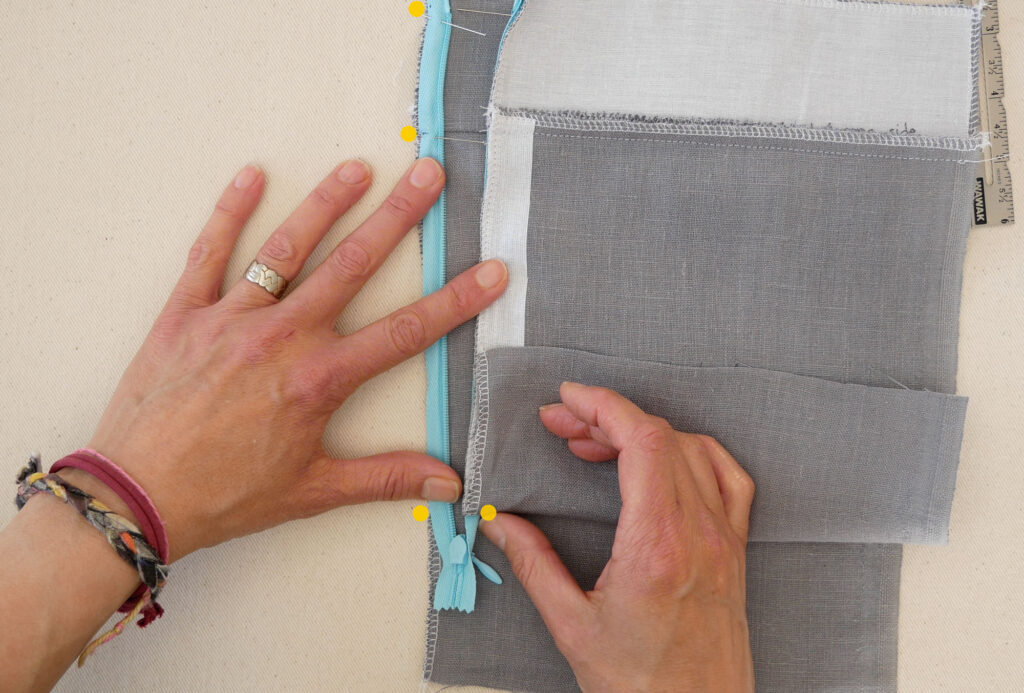
Pin the right zipper tape to the left garment piece lining up the marks you made at the top and where it crosses any seam. This way, when the zipper is closed the seam will go straight across and really make that zipper seem invisible.
Notice where the stitches ended on the first side and mark with a pin or chalk so you can end the stitches on the second side at the same distance down.
Pin, baste, or tape the zipper tape down.
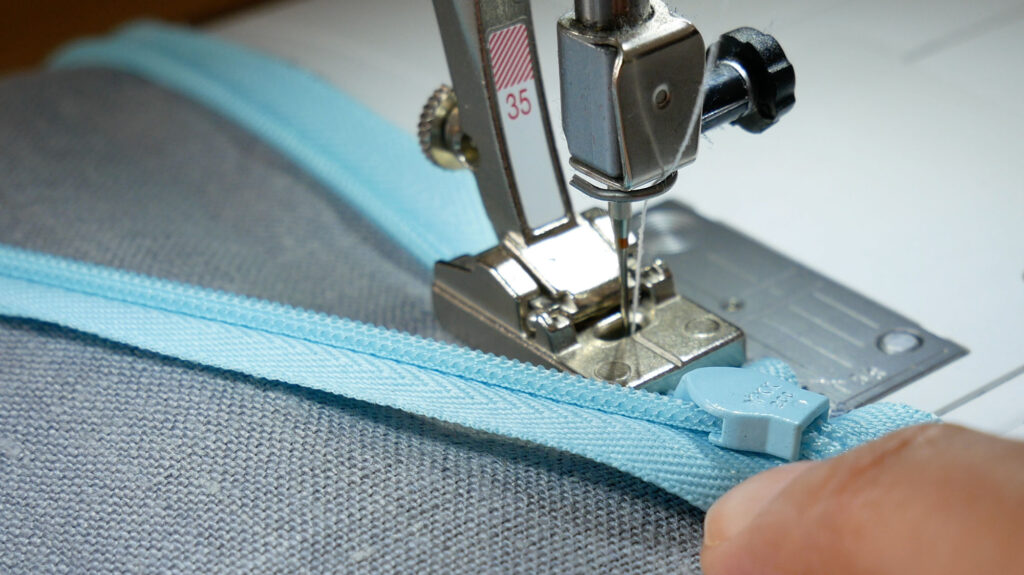
At your machine, place the zipper teeth (of the side you just pinned down) so they are in the invisible zipper foot’s groove that is farthest away from the edge of the zipper tape. Again, sew the zipper down, keep the teeth in the groove of the presser foot, and stop when you can’t go any further. Back tack.

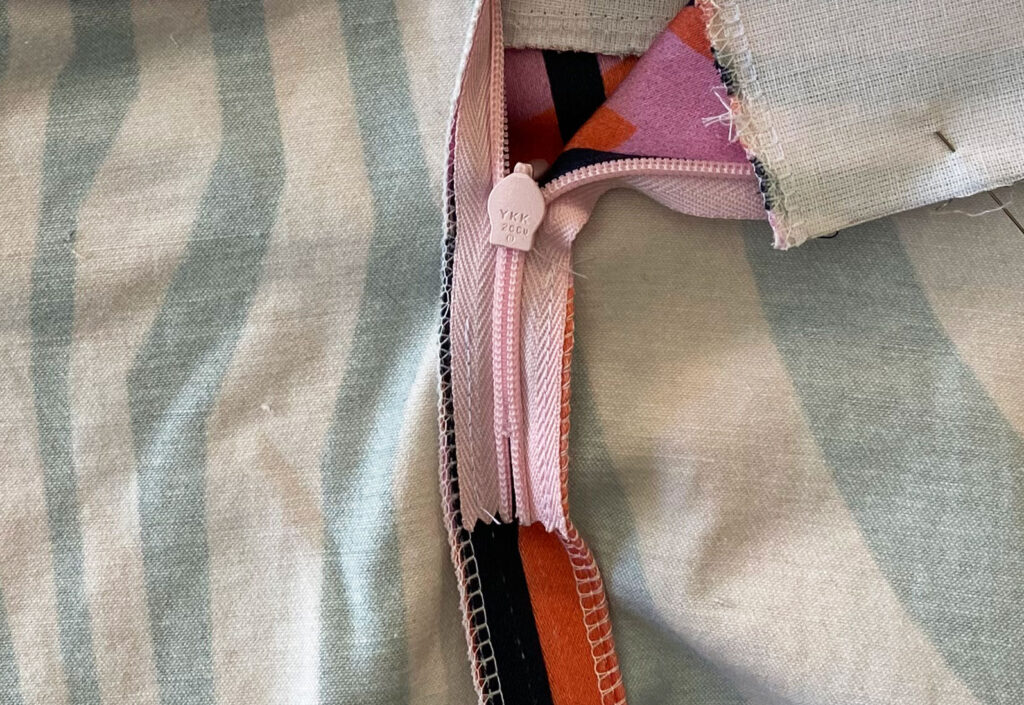
Zip up the zipper. It is a tight zipper, especially where it crosses over any seams.
Line up the garment below the zipper to sew the open seam.
Pull the unattached end of the zipper out of the way and pin the seam for sewing.
With a regular zipper foot start sewing on the seam at the base of the zipper. The narrow zipper foot allows you to sew on the seam line which is very close to the bulky zipper right at the zipper’s base. After you sew past the zipper’s base you can continue sewing the seam with the zipper foot or stop and switch to a standard presser foot to sew the seam closed.
You can sew the free zipper tape ends down to the seam allowance.
Be aware that the bulk of the garment can pull it down or out of alignment when you are sewing in the zipper. Shift the garment’s fabric as you sew the zipper so it is supported by the table.
That’s it. It isn’t hard, just a little different from sewing in other zippers.
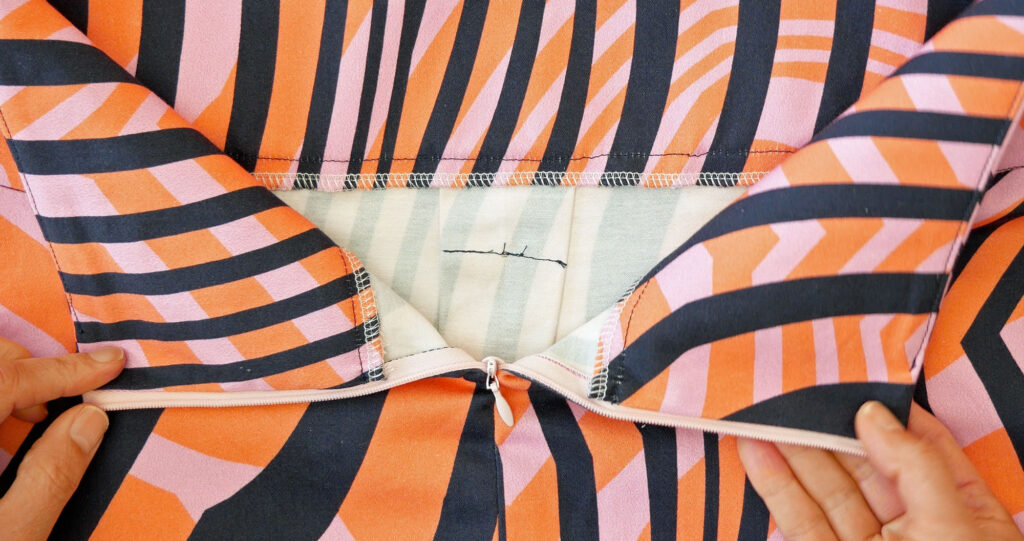
But What About the Facing? How is That Sewn In?
The facing finishes off the top seam. This is true for a waist seam or a neckline. The facing attaches to the seam across the top of the zipper, folds to the wrong side of the garment and as per most pattern instructions, sewn down, by hand around the zipper.
Well, no longer. In fact this facing installation is also going to pull the zipper teeth and edge slightly inward to make it even more invisible.
If you don’t already have one, make a notch on the top edge of the garment (skirt, pants or bodice) where the seam allowance is. Example: if you have 1/2″ seam allowance where the zipper is sewn, you will make a notch 1/2″ in from the edge where the zipper is sewn on the top.

Before attaching the facing, trim off 1/2 of the seam allowance from the short ends. My seam allowance is 1/2″ so I will trim off 1/4″ from BOTH ends.

Line up the short ends to the garment, right sides touching.
With a standard zipper foot sew the facing to the garment. The top seam is still unsewn. Trim the seam allowance at the top.

Remember how you trimmed the facing making it too short to line up around the top? So in order for all to fit, and to pull the zipper slightly inward, fold the short end on your notch toward the facing.

Now line up the side seams, or shoulder seams of the facing and the garment and the center fronts.

Pin the top edges together and sew.

The pattern will then have you understitch the seam allowances to the facing which has nothing to do with zippers so I don’t show it. However, when you understitch with this method, you will not be able to understitch at the very beginning and end of the seam. The corner is too tight. Sew as close as you can – it’s all good.
Flip the facing to the inside and use a point turner to assist with the corners.
Press gently and you’re done.
My favorite places to buy zippers: (NOT affiliate links – just trusted resources)
