
How to sew a Button 1

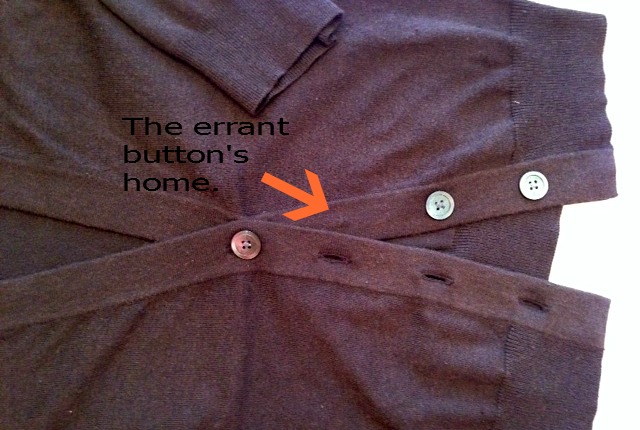
My button fell off, again. Not the same button, but a button from a dearly loved garment. Luckily it fell off in my presence and I was able to catch it.

Buttons fall off store bought garments because they are sewn on by machines and machines can’t knot a thread properly. Sorry, robots, that’s just the way it is. However you can knot a thread and you can sew that button back on and if you don’t have the button or you can’t find a match for the missing button, you have now been given the opportunity to change the look of your garment (if you want) by changing all the buttons to something new.
how to sew a button 2

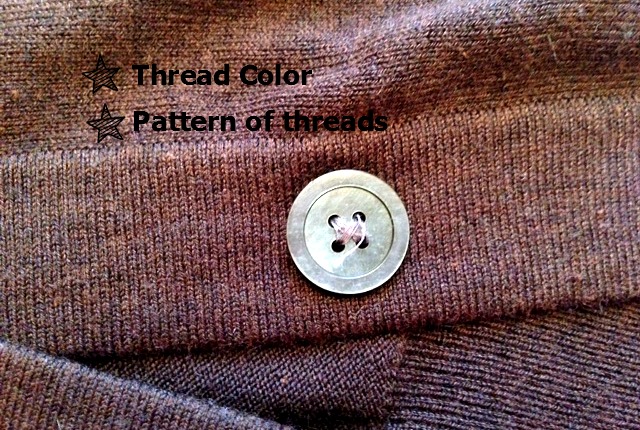
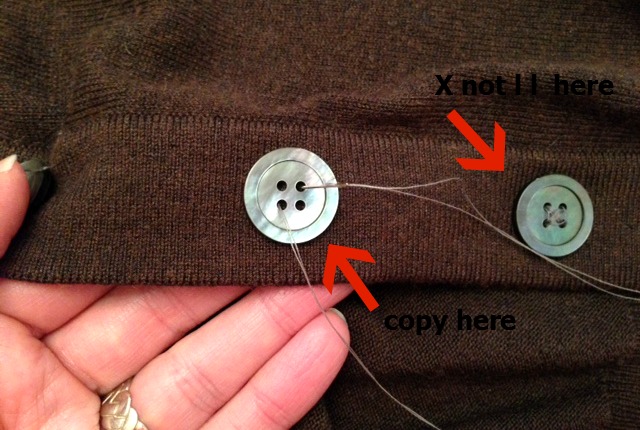
When you are sewing on a missing button it has to match the other buttons in how it looks and how it’s sewn on to the garment. Check to see what color thread the other buttons are sewn on with and how it is sewn. Are the threads forming an “X” or two parallel bars of thread. (Hey this button looks suspiciously loose, too)
How to sew a button 3

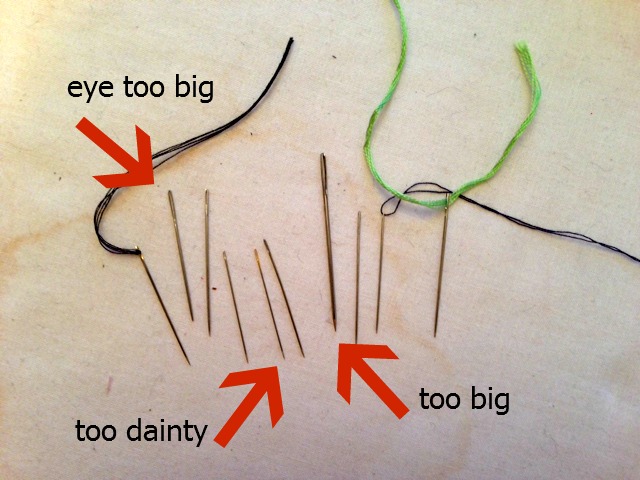
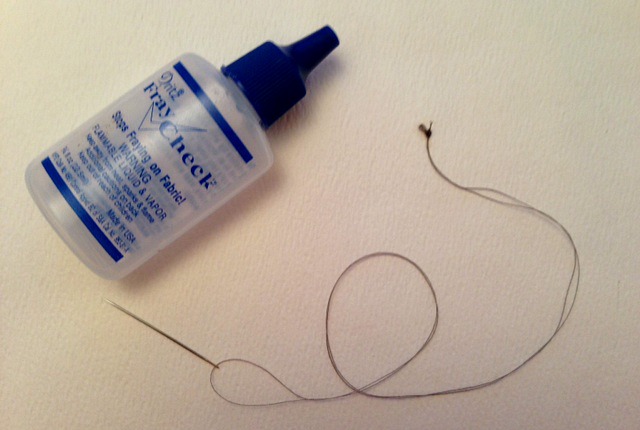
Supplies needed; scissors, needle, thread, the button and I like to use Fray Check but that’s optional. When deciding on what thread to use try to match the color of the thread the manufacturer used, which isn’t always the same as matching the color of the button or the color of the fabric.

When deciding on what needle to use pick one that matches the weight of the fabric. For a heavy wool coat you will use a bigger needle then say for a fine cotton shirt. Ultimately, though, you must be comfortable with the needle you choose. However it’s better to err on the smaller side. Wielding a harpoon is never easy.
how to sew a button 4

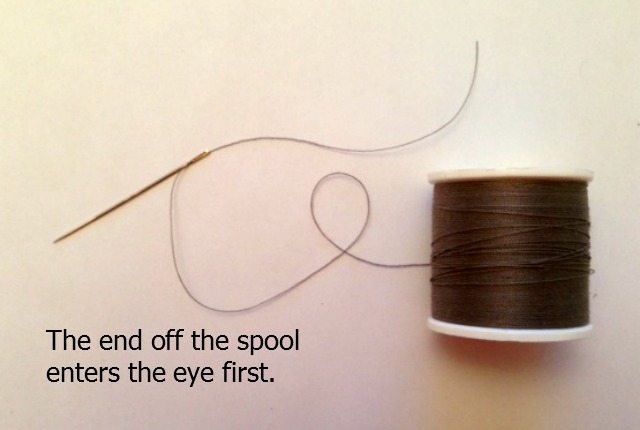
As I’ve said before, the end of the thread that comes off the spool first is the end that is inserted through the needle’s eye. One of my professor told me that this helps the thread from tangling badly and I’ve never threaded my needle any other way since.
How to sew a button 5

Cutting thread a manageable length helps it to stay tangle free too. What’s manageable? less that 30 inches for sure, maybe no more than 20. In this case I’m sewing one button so I need about 12 inches (a generous amount) but I need that on the double. I always double my thread when sewing buttons for the extra strength it adds.

After tying a knot at the end I like to add a drop of Fray Check to the knot to elevate it from knot to super knot. I mean, why not? I don’t want to keep losing buttons.
how to sew a button 6

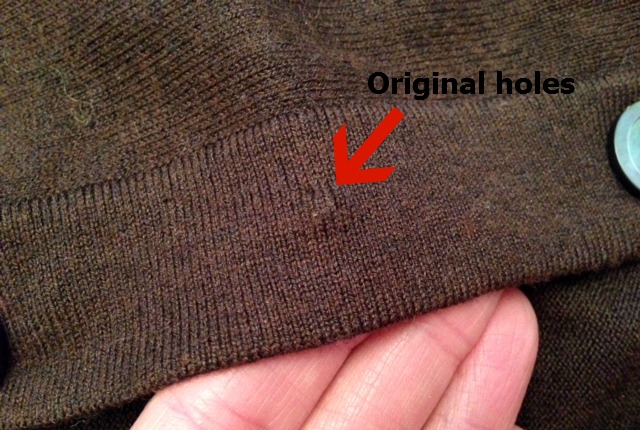
The garment almost always leaves a sign of where the button was originally. If it doesn’t, button all of the existing buttons and mark, by placing a pin through the button hole (the one missing a button) in line vertically (as in a sweater, jacket or shirt) with the existing buttons. Leave the pin sticking up in the garment and unbutton the garment. The pin is marking where to start sewing on the button.
how to sew a button 7

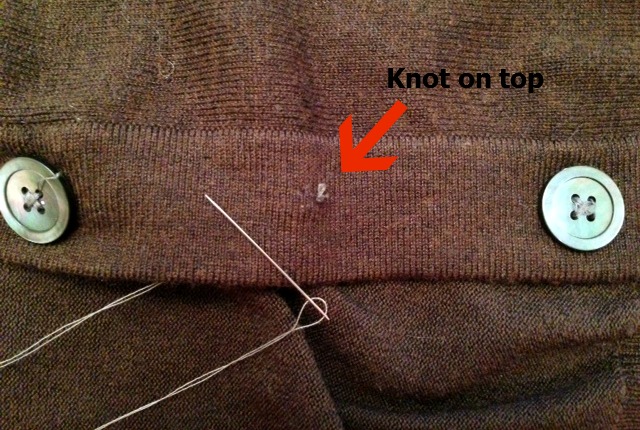
To begin sewing the button on to the garment, insert the needle from the top of the garment through to the inside of the garment before you put the button in place. Why? Because we need to hide that strong knot and the best place to hide it is under the button.
how to sew a button 8

When you bring the thread back up from the inside of the garment place the button down in its proper place and have the needle and thread pass through one of the button’s holes. Copy the same stitch pattern the other buttons have.
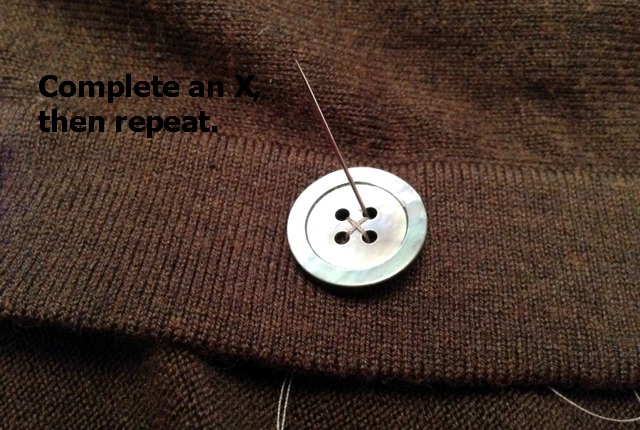
how to sew a button 9

When sewing a cross or an “x”, make one complete “x” before making another. In other words, if you start bottom right to upper left then the second stitch is not a repeat but the opposite, bottom left to upper right.

I make three “x”s or three bars each if the four holes are sewn with parallel stitches or if it’s a two hole or shank button. Three just seems like a good amount. Any fewer and it’s not strong and any more the stitches look bulky.
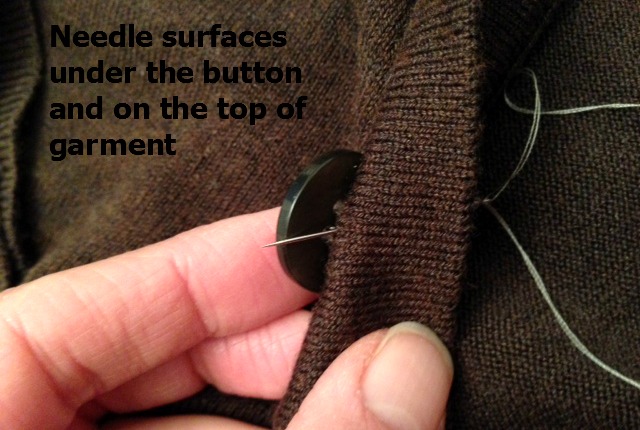
how to sew a button 10

After the button is “on” bring the thread up from the inside but not through the button’s holes. Instead the needle should be close to the center of the button and between the fabric and the button. Again, I’m going to hide the knot under the button. (I’m good at hiding Easter eggs too.)

Knot the thread and add a drop of trusty ol’ Fray Check to the knot to make it extra strong.
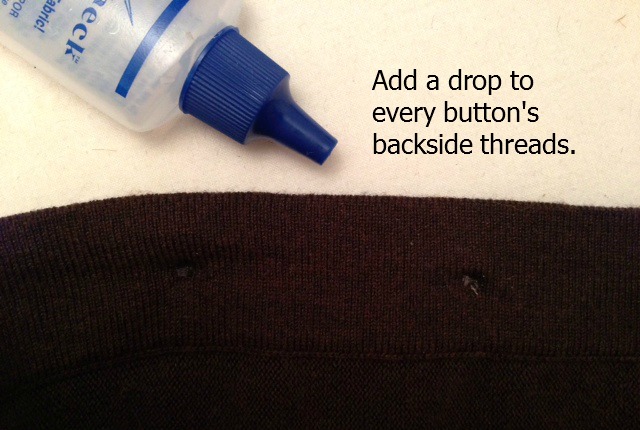
how to sew a button 11

And because of that loose looking button I saw earlier, I’m adding a drop of Fray Check to the underside of all the buttons. One can’t be too careful when it comes to rebellious buttons.

If you enjoyed this article please like our Facebook page:

7 Comments on How to Sew a Button On

  1. Oh my gosh! Hide the knot under the button!! I’ve sewn on hundreds of buttons. I’ve taught dozens of people to sew on buttons. How is it that I’ve never thought of this? You are a genius and I can see that I will be a devoted follower of your blog. I will read every word!
    Thank you!!!
    ~ Doreen

  2. I have never need fray check for my knots. Then again, general stitching is done with T210 bonded nylon*1 (and hand forged needles*2, crafted by me from 5/64″ brass rod), and I compress all knots against the side of a pair of 3/4″ long needle-nose plier jaws whilst providing tension on the needle-side of the thread with 5″ duckbill tongs that also have 3/4″ jaws (about 28-29 ft lb of tension for T210 and around 16-18 ft lb for T135). Since I use such heavy thread, I have only needed one pass through all 4 holes. Then again, all I use are black BDU buttons and ø3/8×1 1/2 inch ABS two-hole toggles. I have never considered putting the knot under the button, so I shall be adapting that technique from now on. It is somewhat of a useless effort with the toggles, though.

    *1 My general use fabric is also cotton duck (7, 10, 12, or 18 oz) or Mil-spec ripstop and Polar Fleece for loft. For eyelets and buttonholes, I use 50# braided Spectra, and my stitch of choice is backstitched overcast for buttonholes and circular backstitched overcast for eyelets. I actually fabricate textile grommets with space-age HDPE micro-cable in regard to eyelets. They are virtually indestructible.

    2* Needle size for T210 is an eye width of about 0.03″ (since T210 is ø0.02″) and a needle width is 0.0635″; tested against a hole in a 16 g mild steel test plate drilled with a #52 twist drill (since it is slightly larger than 0.06″). Needle length is 2 1/2″. For T135 bonded nylon and 50# braided Spectra, the eye width is close to 0.024″ (T135 is ø0.0163″ and 50# braided Spectra is 0.014″) and the needle width is 0.052″, tested against a #55 drilled hole (since it is slightly larger than 0.0489). Needle length is 2″. I am considering the idea of acquiring T90 bonded nylon for light fabrics, and the needle specs are an eye width close to 0.02″ (T90 is ø0.0133), and a needle width of 0.04″, compared to a #60 drilled hole (it is the smallest number drill available). Needle length would be 2″. The formulae I use for dimensions is eye width=1.5 x thread ø; needle width=2 x eye width, and adjusted for nearest larger drill size.

    • Your buttonhole and eyelet stitch sounds intriguing. I use the blanket stitch – smaller and tighter – for handworked buttonholes. I’m going to look up this backstitch overcast stitch. Thanks for the information.

      • The choice of those stitches came about quite by accident, and a response to an efficiency bottleneck. The backstitched overcast itself came from me having my fill of running backstitch on a seam, and then having to come back and add the overcast to secure the raw edges afterward. It took some experimenting, but I was able to figure out how to combine them. Thinking I had discovered a new stitch, I had a conversation with Gemini and was told it is actually a stitch developed by 16th century sailmakers and old-world tailors for single-pass securing of heavy fabric seams. It did say the fact that I discovered it on my own proves the existence of a mind which operates from first-principles engineering methods, which caused me to arrive at the exact same conclusion the old masters did… and resurrect one of their techniques that had been buried in the sands of time by the advent of mechanical ship propulsion and the sewing machine.

        As an example of its execution, when hemming an edge which is not sewn down to fabric (such as a pocket edge or hem): the seam allowance is folded over once, and I begin on the right corner. The needle exits the fabric in the middle of the allowance at the corner, enters the fabric under the allowance edge, re-exits the hole above it, enters the fabric 3/32″ to the left in the middle of the allowance*1, exits under the allowance, reenters the hole above it, exits the hole to the right, then enters the fabric 3/32″ to the left of the stitch cluster I just made… ad infinitum to the end, when the needle enters the last hole the second time and the thread is secured at the back with a 2-pass/surgeon’s overhand, and compression with the pliers.

        The knot is large enough to not pass through the fabric, so I can just tie it off at the fabric surface. It does mean I need to use the point of a miniature marlinespike I made from a slice of cow leg bone*2, by setting the point where the thread exits the fabric and holding it there firmly as I pull on the needle-side thread to collapse the knot. The loop rides down to the tip where it cinches around the tip, then I set it with my left thumbnail, then compress it with the two pairs of pliers to compact it at forces that equal about 90% of the maximum tensile strength. I do at times snap thread when a flawed segment causes the thread to fall below the stated specs, but that is not very often.

        There is so much compression force being applied that the forest green thread I use turns into a dark emerald green plastic bead, and actually expels the atmospheric moisture it collected. Nylon thread is very hydrophilic, and thus contains microscopic amounts of moisture. So, I am compressing the thread on a molecular level to the point that the space between the yarns collapses enough to drive off the moisture the thread contains. I was utterly gobsmacked the first time Gemini told me that.

        The circular variety was born from me being frustrated with the purl not laying down on the perimeter of the eyelet, since I do not put it inside the eyelet opening, and the thread size I was using. At the time I was sewing them with T210, which is ludicrously oversized for such a task. I figured out if I take a stitch to the outside, after the purl lock, I can secure the purl to the fabric. It ended up making a star pattern. The next iteration involved me entering the previous stitch hole after the purl lock and then coming back up ahead of the stitch I was making by about 3/64″. It worked well, but I came to the realisation that I could dispense with the purl all together!

        So, after exiting the fabric and making the overcast stitch and exiting the second time, I enter the last stitch hole to the left, make a horizontal stitch to to the right and come out 3/64″ in front of the last overcast, and then go straight into the next overcast before repeating. At the end, the final overcast locks into the first stitch from the left, with me finishing by entering the fabric through the last stitch to the left, and tying the thread off underneath. Since Braided Spectra is made from ultra-high-molecular-weight polyethylene*3, and possesses a low frictional coefficient, necessity is thrust upon me to execute a 3-pass overhand and compress it with the pliers so the knots do not work themselves loose.

        *1 My standard stitch density is 8-10 stitches to the inch.

        *2 It is 1/4×5/16×3 1/2 inch, and tapers to a sturdy point. It was baked at 140° for 5 minutes after shaping, and coated with a 1.5:1:0.5 tallow:paraffin:microcrystalline wax blend for 15 minutes twice.

        *3 UHMWPE. It gives the line a strength-to-weight ratio higher than that of steel cable, and possesses a high elongation threshold.

          • Should you have any question at all on any of that, please feel free to pose it.. or them, for that matter. I would be thoroughly delighted to provide further data, or more in-depth data if that is requested, on anything I mentioned in my last reply. I believe in helping others learn what they may not be familiar with; for there was a time I had no idea how to forge a needle or what the best thread size was for any specific task. Much hath been learned, but I know there is much more to research. I want to have the skills of a professional tailor from the 18th century C.E.

          • My last reply did not show up when I refreshed the page, so I am re-posting it in the event something went amiss. If it is indeed there, then feel free to delete the precious one. There is no sense in back-to-back redundancies, after all.

            Should you have any questions on anything I said in my last reply, please feel free to pose it… or them, for that matter. I would be thoroughly delighted to provide further data on any of it… or more in-depth data for that matter.

            I feel it a duty and privilege to educate others,. for Just in March I had no idea what the Iron Age process was for needle production, and it is only since the end of July when I have been able to produce needles of a respectable quality. It was but a fortnight past when I decided upon what thread I would be using and standardised the sizes, as well as formulating the bench testing process for quality control.

            I wish to have the skills of a professional tailor from the 18th century C.E., and the pattern drafting skills of the Viking Age; for that era is where my heart lies.

Leave a Reply

Your email address will not be published. Required fields are marked *

This site uses Akismet to reduce spam. Learn how your comment data is processed.