
What can I say that you don’t already know about making a pair of shorts from your jeans? Well, I think I can help with a few pointers and tips. Like how to cut so you remain covered, how to mimic jeans thread with regular thread, and how to stitch over those thick seams without breaking a sweat, or a needle.
Watch the video here, or read on
What Pants Make Good Shorts?
Obvious candidates are pants that you already own that are too short, have stains on the lower legs or have no knees left.
But sometimes we just want shorts but can’t find any we like. So buying a pair of pants you like, new or used, and making them into shorts is the way to go.
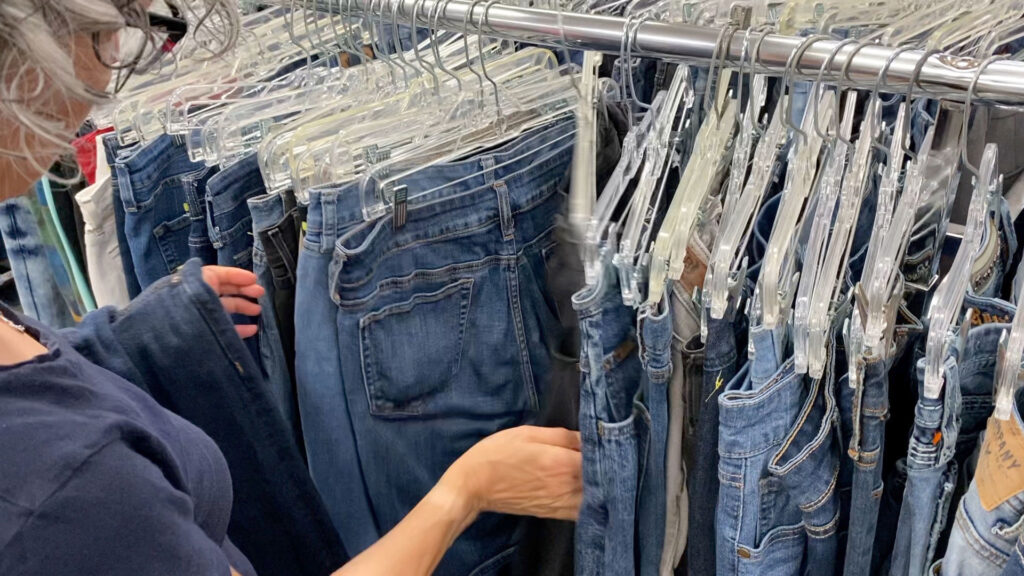
Tips For Thrifting a Pair of Jeans
Color – This is my first filter. There are colors we like, and colors we don’t. Start there if your used clothing store of choice doesn’t already separate by color. At the denim rack, I scan for my preferred rinse.
Quality fabric – Running your hand along the racks of used clothes can help you find what you like. Stretch denim feels different than pure cotton denim. Legging material (knits) feels different from chino material (twills). Your sense of touch is simply another tool to help find what you’re looking for faster.
Natural fibers like cotton or linen – If it’s warm enough to wear shorts stick with breathable and durable, natural fibers or high-tech athletic fabrics.
Labels – I look at the label not for status but for fit and quality. I know a few brands which fit me better than others so if I see that label it’s worth some more investigating. Also, I know some brands are made cheaply so I skip quickly over those. It’s a good filter.
Zipper – the length of the zipper will tell you right away the rise style. A 4″ zipper is low-rise, and a 9″ zipper is high-waisted.
Once you find a pair that might work, check that the zipper works and look them over for any stains and holes.
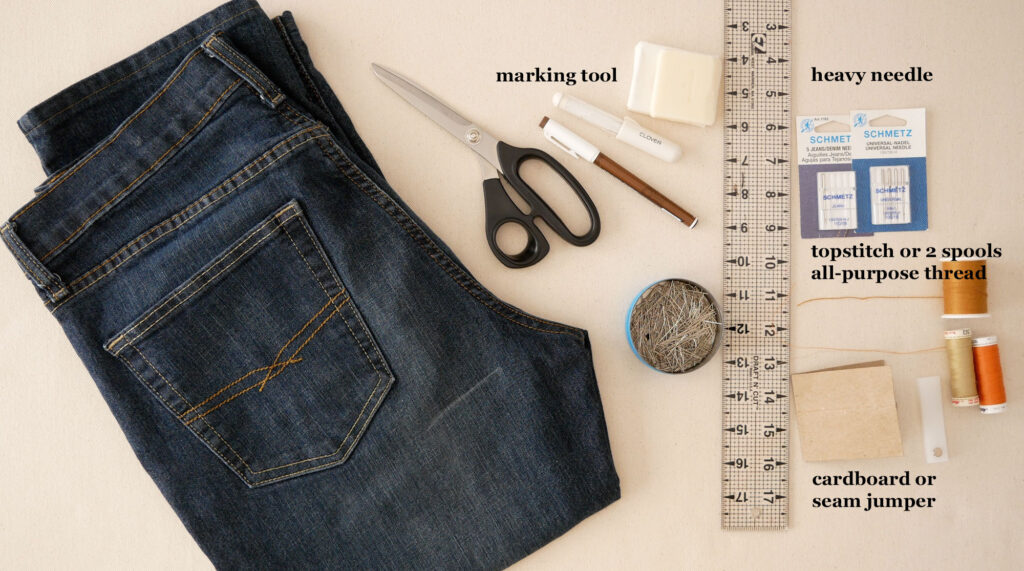
Supplies Needed
Before you start altering the pants wash them. If they are yours or used wash them to get them back to their true shape. Most pants relax when wearing them. This leads to bagginess in the seat and knees. If they’re new pants wash them to get all the shrinkage out before you alter them.
the links in the supply list are Amazon affiliate links
- The pants
- Scissors strong/sharp enough to cut thick fabric (My Favorite Scissors)
- Some way to mark your fabric. Soap, Frixion pen by Pilot (comes out with steam) Chacoliner pen, or even a pencil.
- A ruler
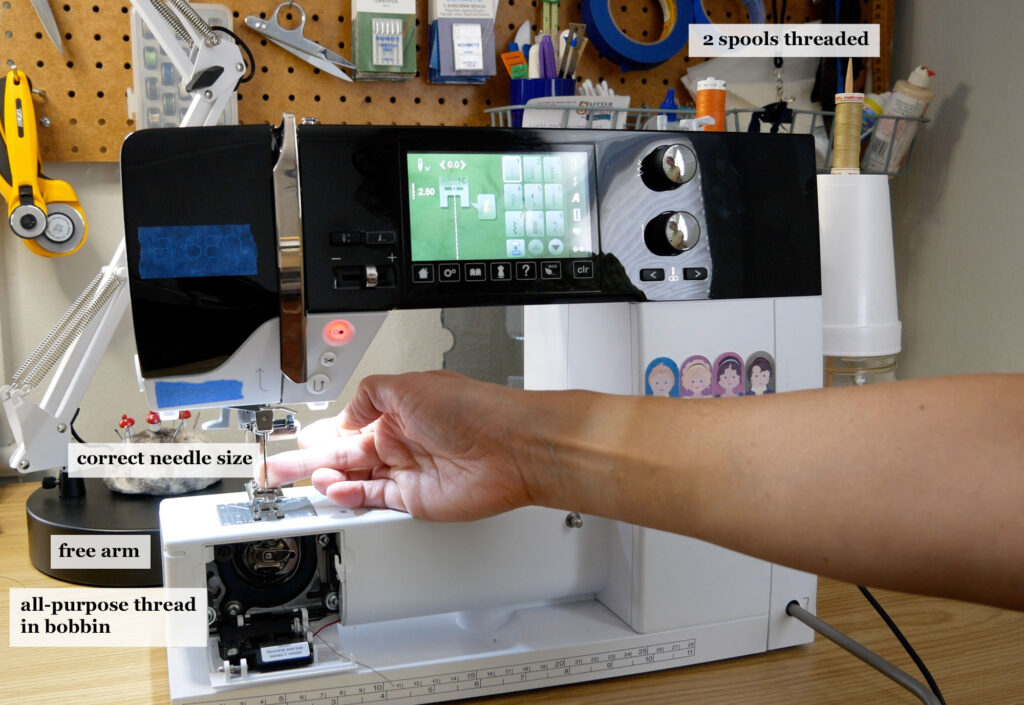
- Needles that suit your fabric. Denim needles come in sizes 130 to size 100 (bigger number bigger needle and for heavier fabric). You can also use a Universal needle in size 100. However, if you experience skipped stitches you need a different needle size
- Thread: Topstitch thread to match the existing stitching on the pants OR 2 spools of all-purpose thread that will visually blend together to look like your existing stitches.
- A Seam Jumper: A tool specifically for this OR a piece of cardboard OR the pant leg you are going to cut off.
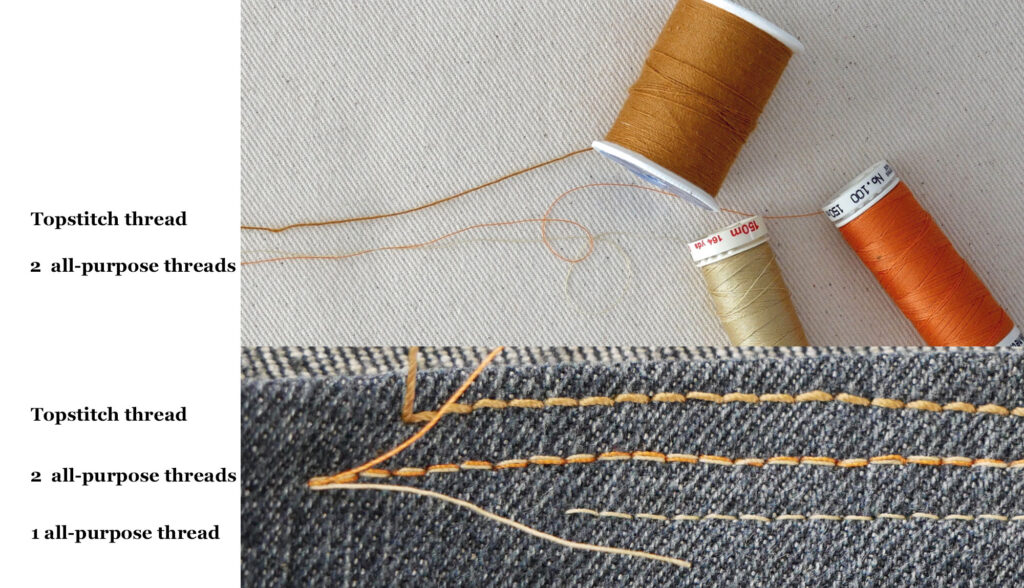
Up close you can see that a tan thread and an orange thread will visually blend to look like the typical jeans thread
Put on your chosen pants, step in front of a full-length mirror, and determine what you want the finished length to be. Mark this with a chalk pen, a sliver of soap, or even a pencil on the outer edge of the leg. You could use straight pins but be careful when you get out of the pants.
One leg is all you need to mark and it’s best not to cross your body to mark it. So if you’re right-handed, mark the right leg, and left-handed, mark the left pant leg. If you have one high hip, then you may want to mark both legs so they are the same distance from the floor.
Take the pants off and lay them flat on a work surface.
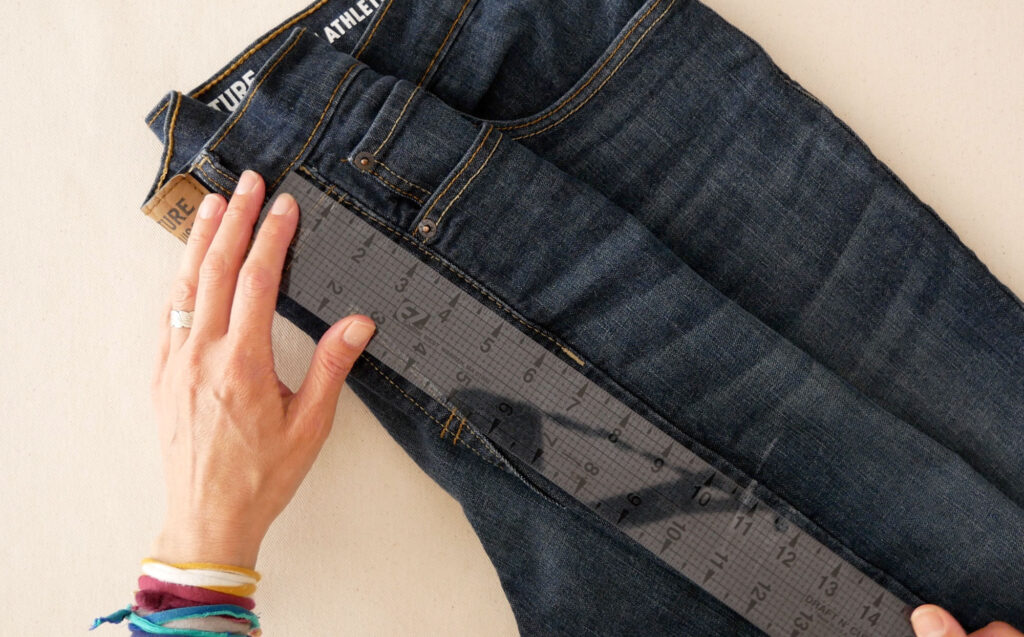
Measure down from the waist seam (where the waistband is sewn to the pants) to your mark. If your pants do not have a waistband measure down from the top of the pants. Note this distance.
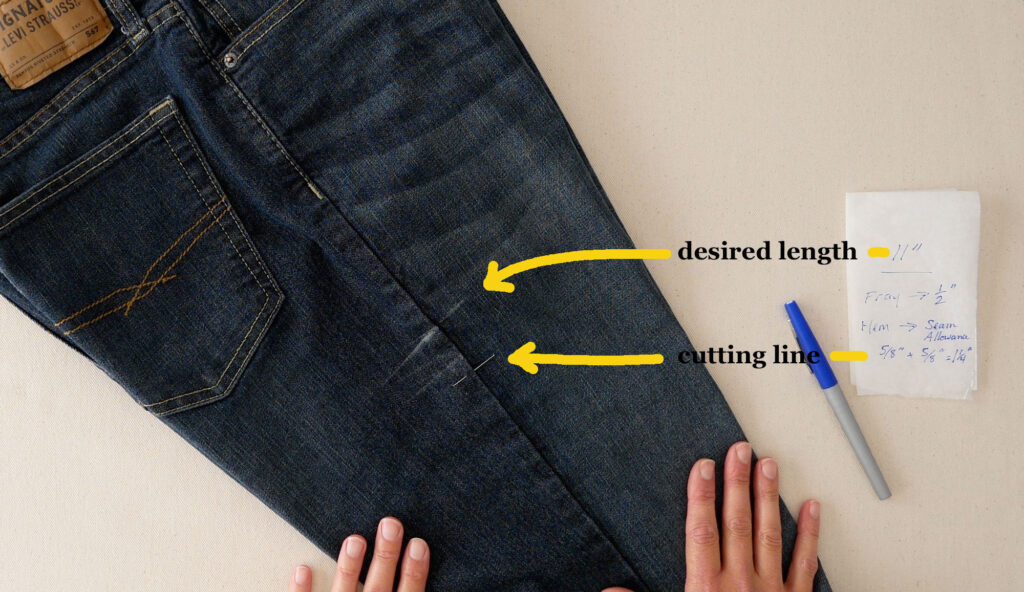
If you are hemming the shorts you need to add the hem allowance to your length. The allowance on jeans is typically ⅝” x2 or 1 ¼” total. Of course, you can make the hem as narrow or as wide as you want. Just add 2x the amount you want for the hem.
If you are going to let the shorts fray I strongly advise adding ½” to your length. Why? Because the raw edge will disintegrate and the shorts will become shorter than you cut them.
Grab the waistband at the center back belt loop and the button or snap to fold the pants and pull these two points away from each other so the pants sort of fold themselves with the outside seam laying on top. Place the pants on your work surface and get everything as flat as you can.
Note, the front piece of the leg is probably smaller than the back part of the pants leg. This is because most of us have upper legs that are larger in the back than the front. Some pants are cut for more athletic bodies and have a wider front piece to accommodate large quads.
Measure down again from the waistband along the outer side seam to your desired distance. PLUS your hem allowance if hemming or ½” if leaving a raw edge and mark this length on the pants at the sideseam.
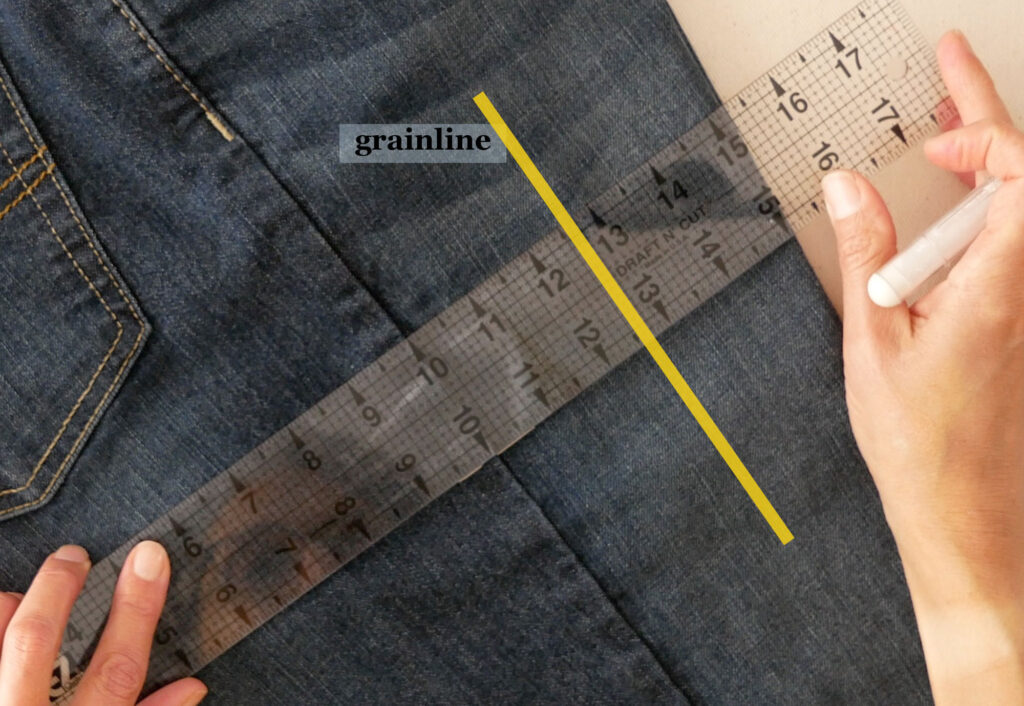
Use a ruler to carry this mark to the front fold. Watch the grainline of the fabric (if you can see it) and stay perpendicular to it. Mark this line with chalk or soap or ballpoint pen since this is the cutting line and won’t show later.
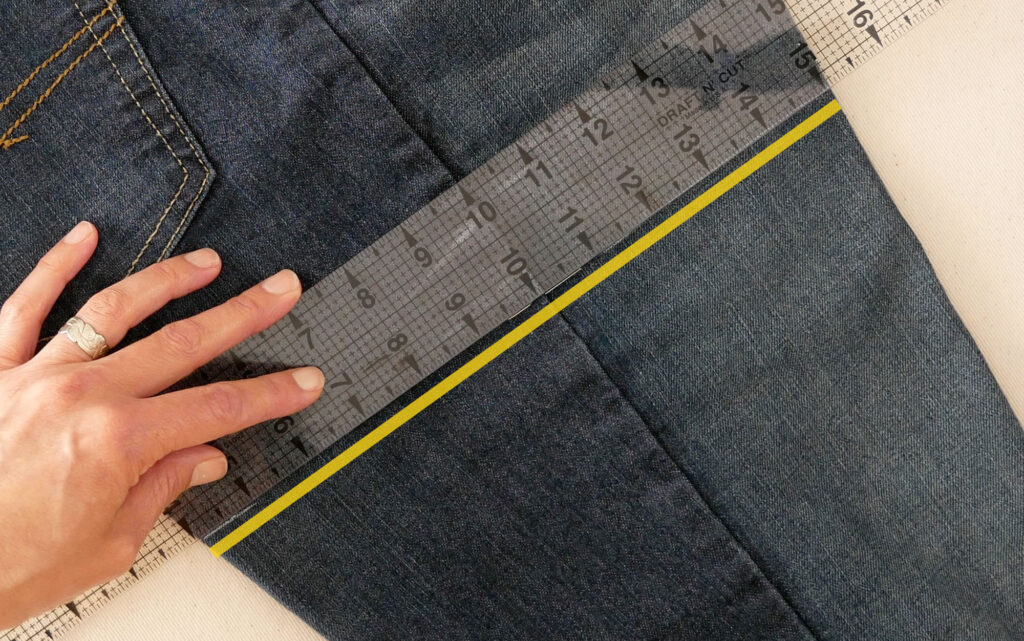
The back is a little trickier.
Many folks need a little extra length added to the back of shorts. So you can sit down and still keep all your assets covered
To give yourself a little extra length have your line dip down slightly. This is more important the shorter you make the shorts.

I do this by eye, taking note of the grainline going from the waist to the hem of the pants. A general guide is to dip down about ⅜” for 4” to 7” inseams, about ¼” for 8′ to 12″ inseams, and nothing for anything longer.
Mark your cutting line on the part of the leg you can see.
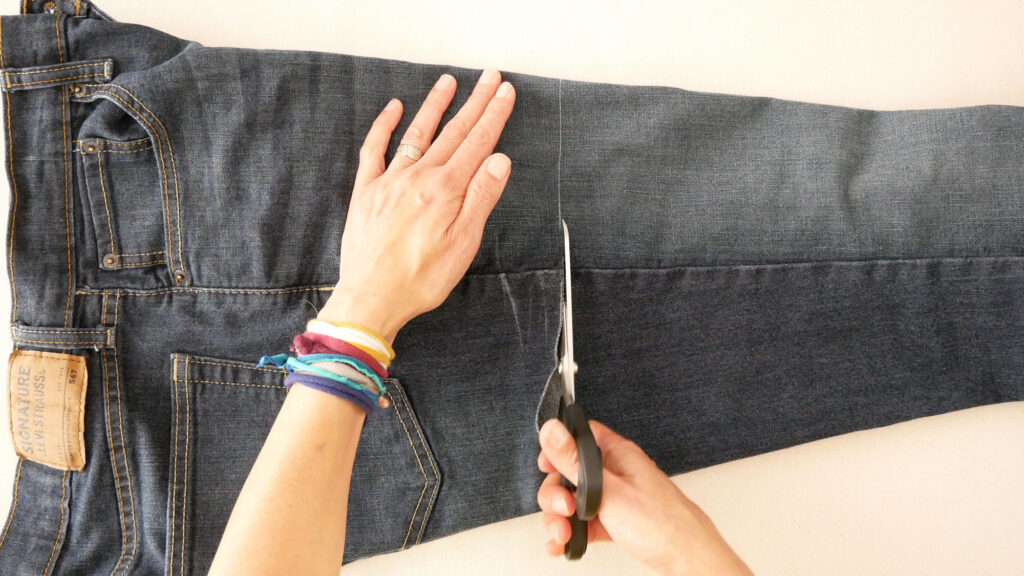
Before you cut double-check that your pants are lined up at the waist and that everything is lying smoothly before you cut. Use sharp scissors, especially for thick fabrics like denim. Cut the pants off in the round. (If you made a mistake and cut them too short you could sew the leg back on and that seamline would be the fold line of the hem.)
Use the top layer that you cut through as a guide for cutting the layer under it.
Repeat on the other pant leg. Or if you are sure that you have the pants lined up at the waist you can use the cut leg as a guide for where to cut on the other leg
Hemming
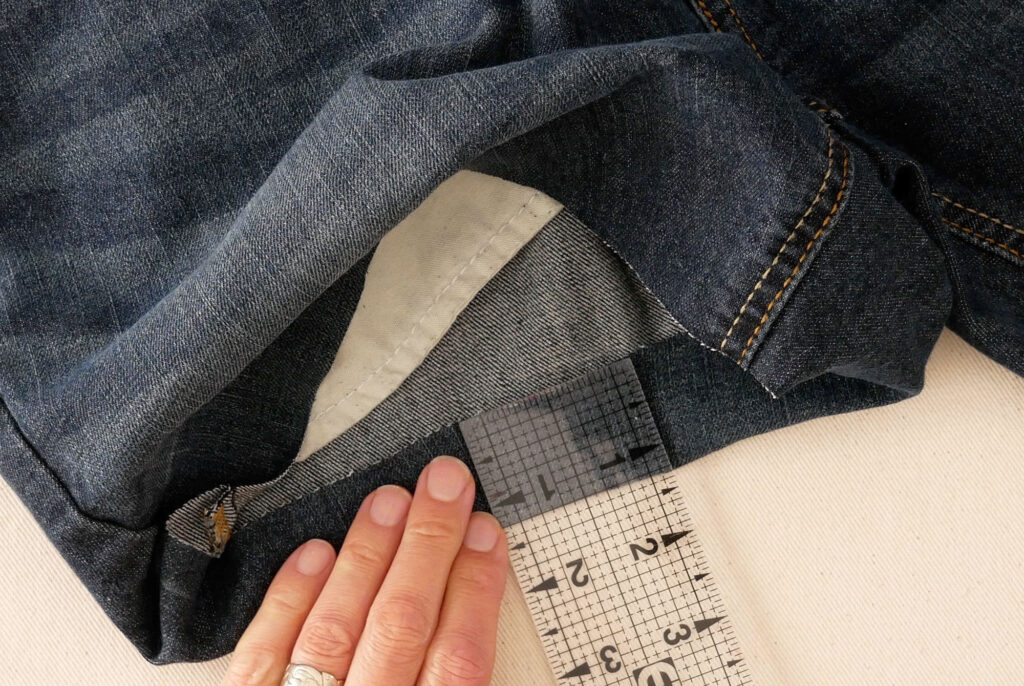
Measure up from the cut your edge the total hem allowance and fold on this line. Example. If I want a 5/8″ hem. I will fold up 1 1/4″; the total hem allowance. Press the fold with an iron to make a crease.
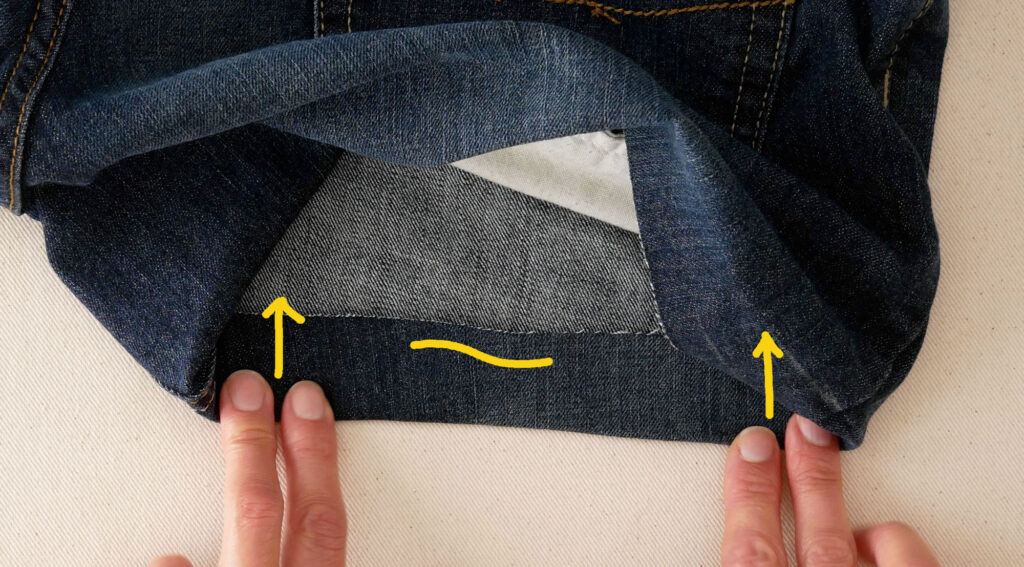
Start by folding the hem up at the seams, matching the stitch lines.
As you measure and fold you might notice a crooked cut edge. Don’t panic. It will be ok. Fold up the desired amount on each side of the crooked area and press. By folding up on both sides, the fabric in the middle of these folds (where the crooked cut line is) will fold itself in a natural line. Press the fold.
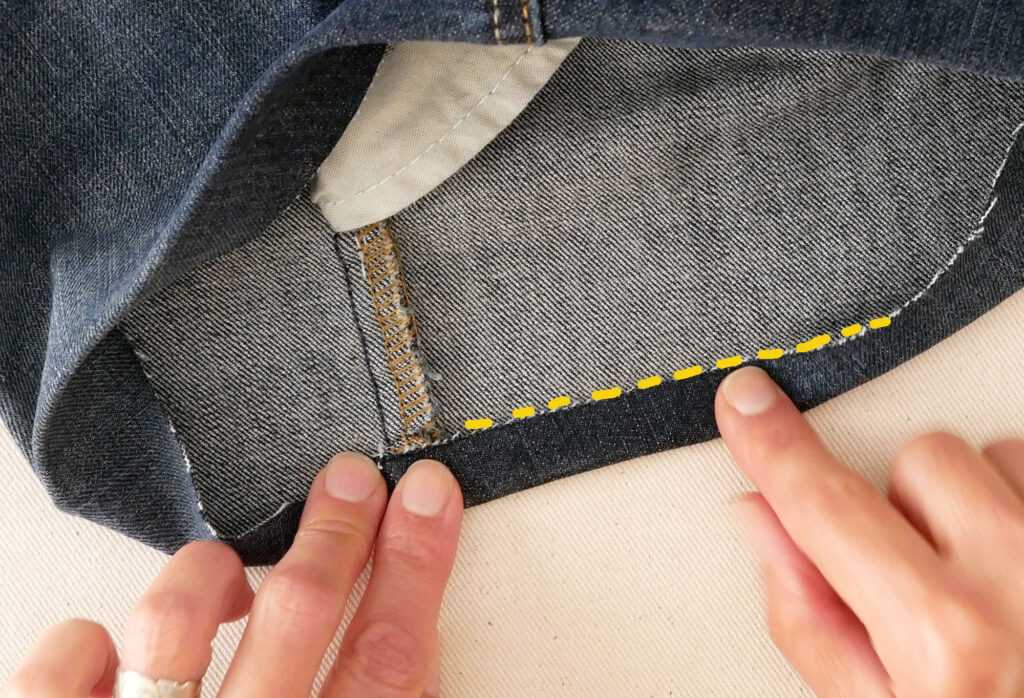
Unfold the hem and place the raw cut edge of the leg to meet the crease you just made. This won’t be perfect at the crooked point but it will work out lovely in the end. Promise.
Fold again on the first crease so the hem is double-folded on itself. You may want to pin as you go to hold it in place since the fabric is thick. Press the folded hem nice and flat before you sew.
Now We’re Ready to Sew
Set up your machine to sew with the top side of the pants leg facing you. Because you always have an all-purpose thread in the bobbin, sewing on the face side allows you to have topstitching thread, or 2 threads, in the needle.
The presser foot needs to stay level when sewing over anything thick like a side seam. There are gadgets specifically for this or your machine might have come with one (it looks like small plastic slabs that are joined at one end), or you can use a piece of cardboard, OR you can fold the cut-off pant leg enough times to equal the thickness of the seam.
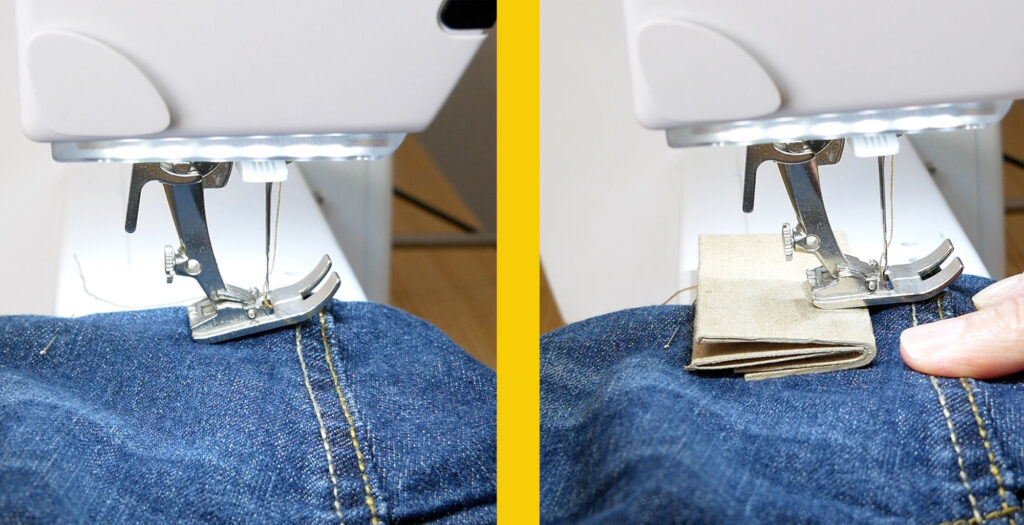
You place the object of choice behind the needle under the presser foot and start sewing. You might have to move the object back under the back of the presser foot as you sew over the seam.
Every time you need to get over a thick seam, get the presser foot level. It makes the sewing so much easier and your stitches even.
If your machine is having trouble, grinding, or going slow, use your hand wheel and slowly turn it toward you to help the needle make it through.
Start at the thick inside seam and stitch around until you meet back up with the beginning.
You can back tack here.
For more about Topstitching see my post “Tips for Perfect Topstitching”

When you’re done, trim your threads, give the hem a pressing, and wear your new shorts. Now I just need a lounge chair and a fan.
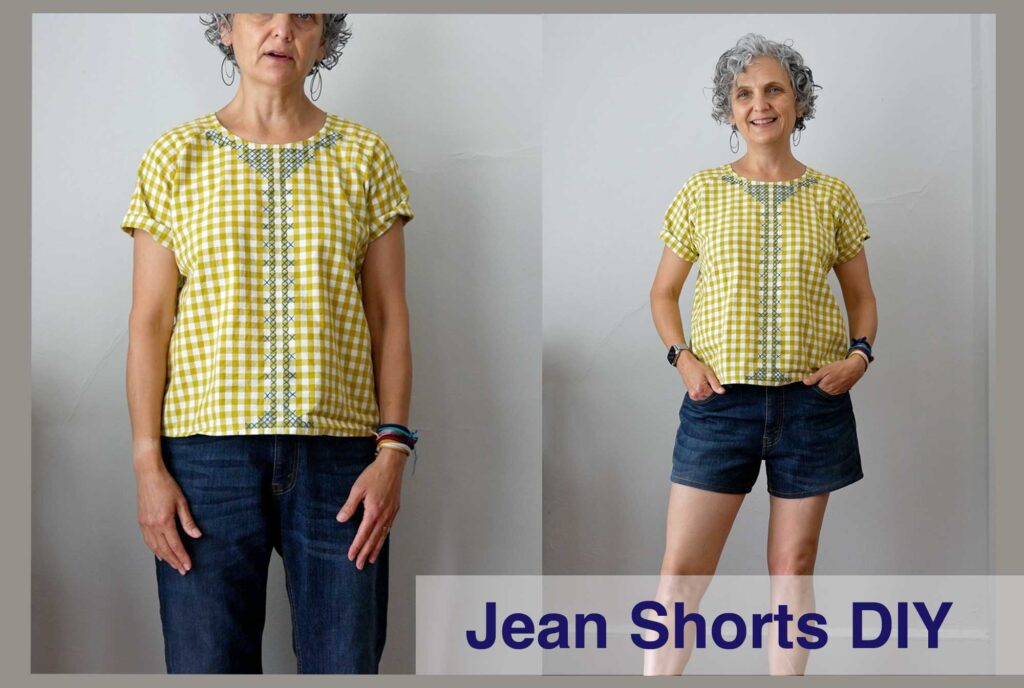
This top is The Remy Top by Sew House Seven. The cross-stitch design is my own and done by me.