

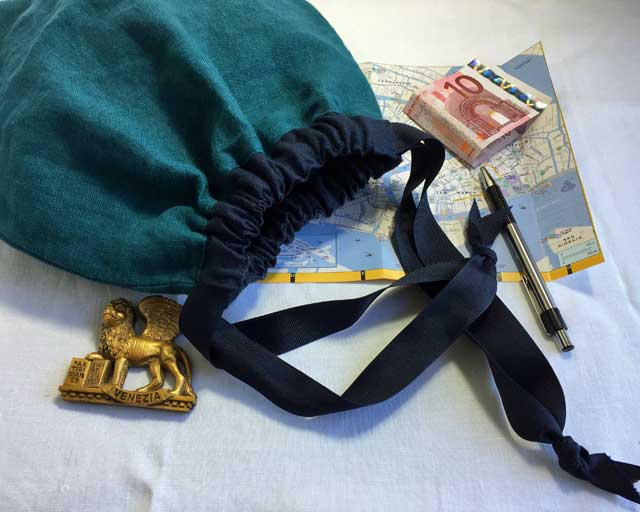
You don’t have to store your possessions in plastic shopping bags just because you’re living out of a suitcase. You can bring those nice little touches of home on the road with you, with no extra weight or bulk.
This simple linen drawstring bag is perfect for keeping your second pair of shoes away from your clothes or for your dirty laundry on the way back home. And before the dirty socks nest in it, you can use it as a small purse. Bonus: It’s machine washable when you get back.
Supplies Needed:
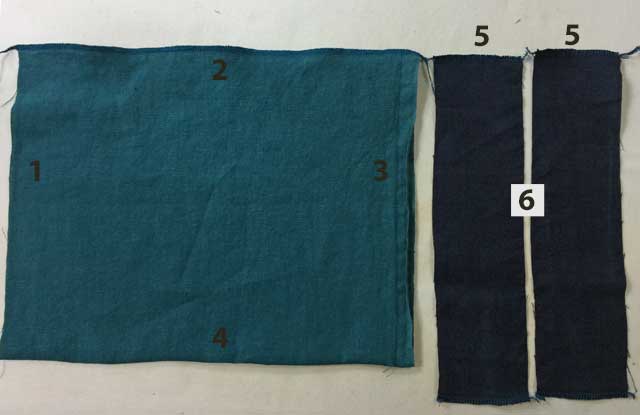
- For the bag body: one linen 15″ x 24″ rectangle. (For directional prints, the 15″ is the vertical dimension.)
- For the casings: two linen 12″ x 2″ rectangles (The casings will be slightly shorter than the width of the bag once it is sewn. This is on purpose. You could make them the same width by cutting your casing pieces 12 1/2″ x 2″)
- For the ties: two lengths of 3/4″ or 7/8″ wide grosgrain ribbon each 30″ to 33″ long. (my ribbon was 32″ long)
A serger makes this project super fast but you can make this bag with just a sewing machine. If you do not have a serger you will need a way to finish the raw edges along the top and the casing. In the directions below I will suggest ways to do this.
This bag can be easily be made in other sizes and fabrics. See my previous post A Very Easy to Make Drawstring Bag for smaller versions done in colorful cotton prints (it’s a great stash buster, gift bag, or even a gift)
After you cut out your pieces fold the bag piece in half so it is 15″ tall. Serge or sew across the bottom edge and the side edge.
Serge all of the short edges of the casing pieces.
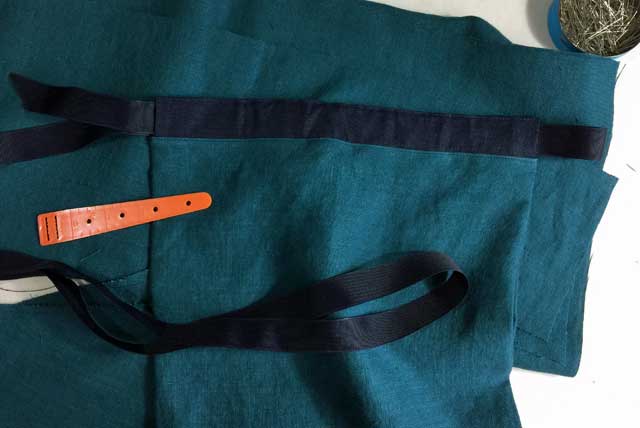
Here’s what you should have: (numbers correspond to numbers in photo)
- The top edge of the bag left raw and open.
- Side seam serged or sewn together
- The bottom edge, serged or sewn together. (I kept the selvage on the fabric and simply sewed it together)
- Folded edge. The other “side seam”
- Short edges of casings, with an overlock or zig-zag stitch to encase the raw edge. (You can fold the raw edge in twice as well, see below)
- Long edges of the casing left raw
Fold the short edges of the two casing pieces in a half inch or 1 cm and press. Stitch the edges down close to the fold.
If you did not serge or zig-zag the short ends, fold the ends in 1/4″ and again 1/4″ so the raw edge is covered by the fabric. Stitch the edges down securing all three layers.
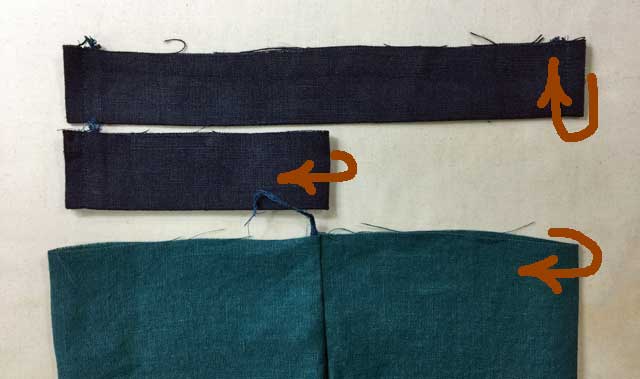
Fold the casing pieces in half lengthwise and press.
Fold the casing pieces in half to find the center. Press this fold with your finger to make a crease. If the fabric you’re working with does not hold a crease, place a pin to mark where the crease would be.
Lay the top of the bag flat on the work surface. Starting at the side seam and working toward the other side, smooth the top out. When you get to the end, what would be the other side seam, press, with your finger to make a crease. This crease marks the other “side seam”.
Fold the bag in half again this time lining up the side seam and the “side” crease you just made. Crease the folds to mark the center of the bag front and bag back.
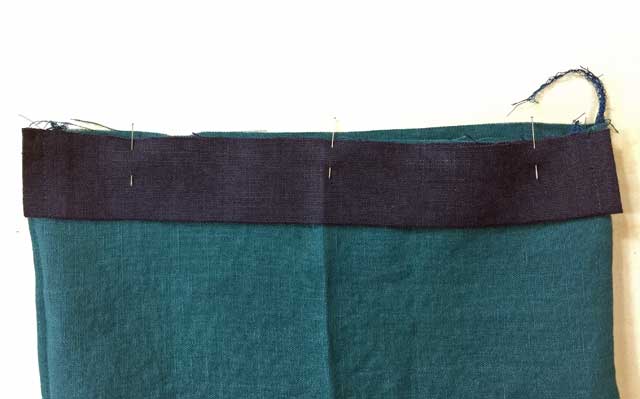
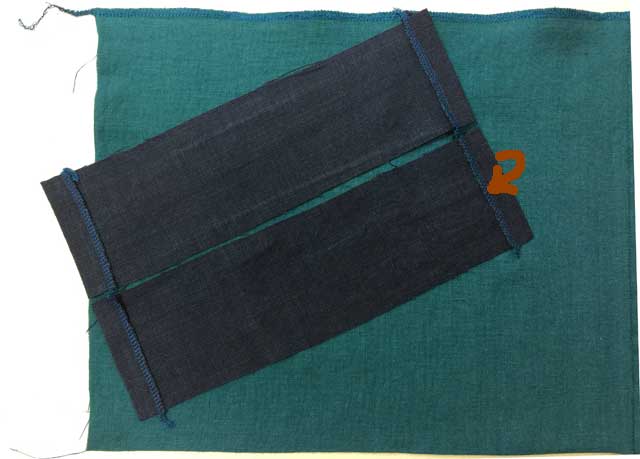
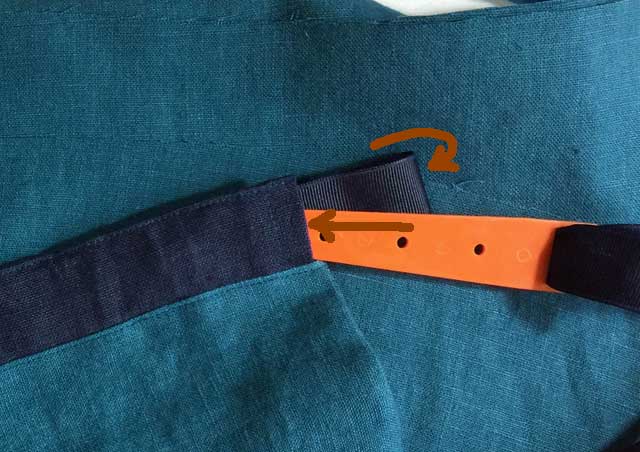
Lay one of the casings on top of the bag, right sides touching. The raw edge of the casing will lay on the raw, top edge of the bag.
Line up the center crease of the casing with the center crease of the bag and pin the casing in place. Repeat with the other casing piece on the other side of the bag.
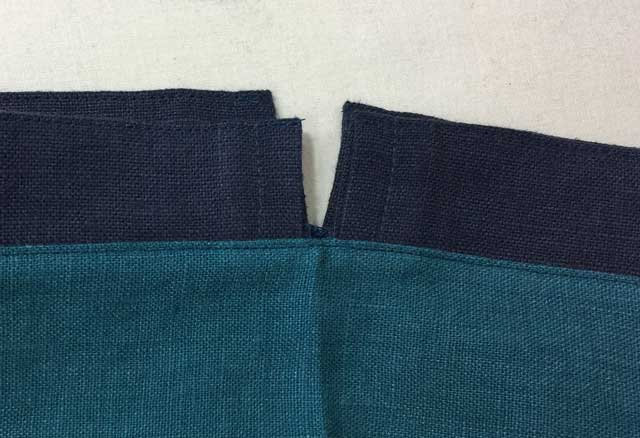
NOTE: the casing is not as long as the bag. It stops about 1/4″ or 5 mm before the side edges.
Serge the casings to the top of the bag. You will serge continuously around the edge, not stopping at the end of the casing but also serging the top edge of the bag in the small gaps between the casing pieces.
No serger? Sew the casings on, continuously sewing around the edge, not stopping at the end of the casing but also stitching on the bag in the small gaps between the casing pieces. Then run a zig-zag stitch around the raw edge again capturing the bag in the gap.
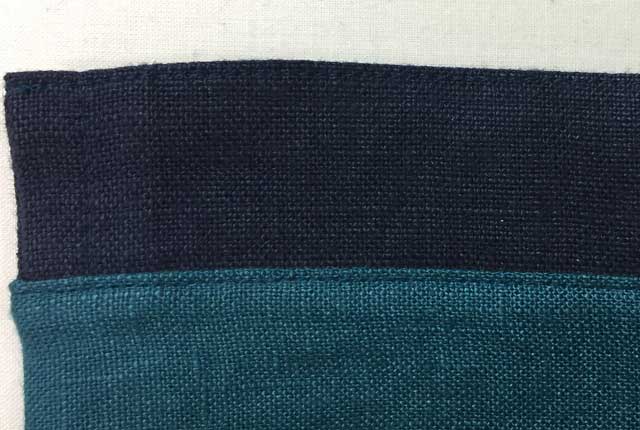
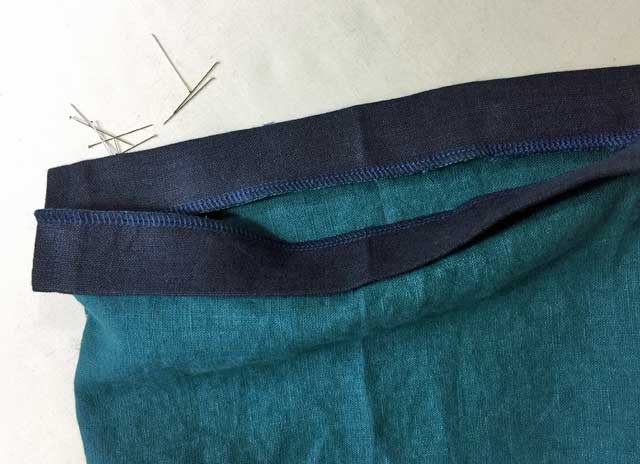
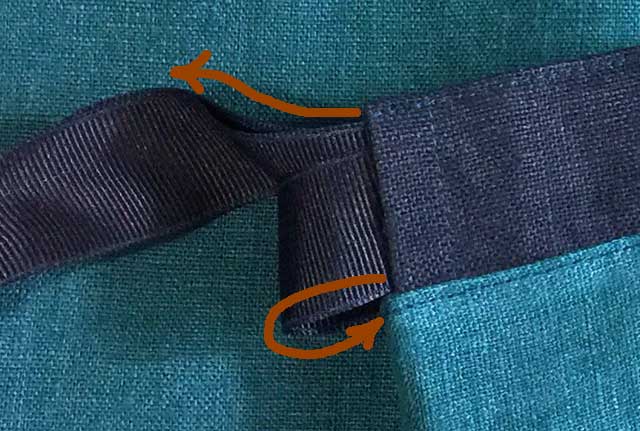
Press the casing pieces up and the seam allowances down into the bag. The edge of the bag between the casing pieces will also be pressed downward with the seam allowance.
Edge stitch the top edge of the casing.
On the top side of the bag, just below the seam as shown here or a 1/4″ below the seam, stitch the seam allowance down all the way around.
Press the stitching.
Using a bodkin, feed one ribbon through the casings. Start at either the right or left side of the bag and insert the bodkin into the casing laying on top.
The ribbon will come out of the top casing at the gap. When it does, simply inserted it into the casing laying on the bottom and continue going all the way around and out at the side it began as if there was no gap.
Feed the second ribbon into the casings the same way as the first but start on the opposite side.
At the edges, one ribbon will be under the other ribbon.
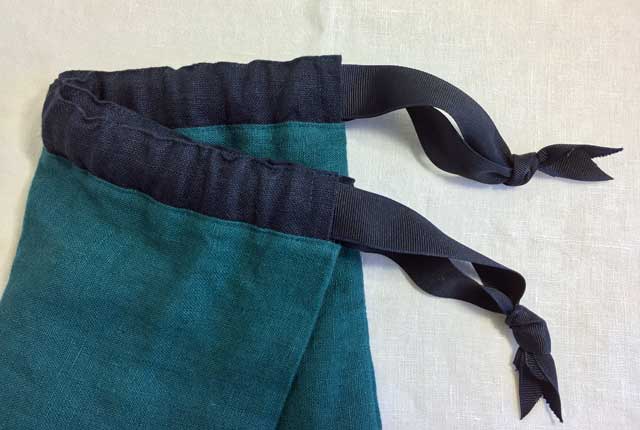
Tie a knot at the ends of the ribbons to have two separate loops of ribbon. Hold the two ends together and tie as if one piece. Tie the knot loosely where it is easy to tie and move the knot toward the end of the ribbon while tightening it.
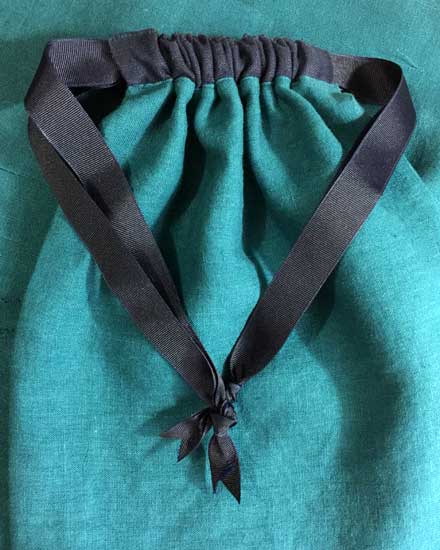
Trim the ends of the ribbon if necessary and apply Fray Check to stop them from unraveling.
To close the bag, pull on both ribbons
If the ribbon feeding is confusing you can see step by step pictures in my previous post A Very Easy to Make Drawstring Bag
The linen fabric to make this bag can be found on Fabrics-Store. Sphinx was used for the bag and Insignia Blue was used for the casing. The ribbon was upcycled. It was the packaging of a blanket I bought from Target.
Happy Travels, and Happy Sewing