
After seeing these pouches on Pinterest over and over again, and on a quest to use up the little cuts of fabric in my stash, I decided to try out Noodlehead’s Open Wide Zippered Pouch tutorial. (No, wait. Cut to reality – It wasn’t as organized and leisurely as that sounds. It was a last-minute project, one of those I need this yesterday projects, when I made the first pouch. But the point is….) Sure I could figure out how to sew a lined zippered pouch but why bother when someone, someone with a blog, a following and a book has already figured it out and is, for free, sharing this information? No need to reinvent the wheel just try the wheel out and maybe build on it.
There are a ton of zip pouch tutorials out there on blogs, which may or may not have books. The fact that you can find so many tutorials is great because I’m all about sharing information and encouraging some sewing time but Noodlehead’s zipper pouch stood out to me for a few of reasons.
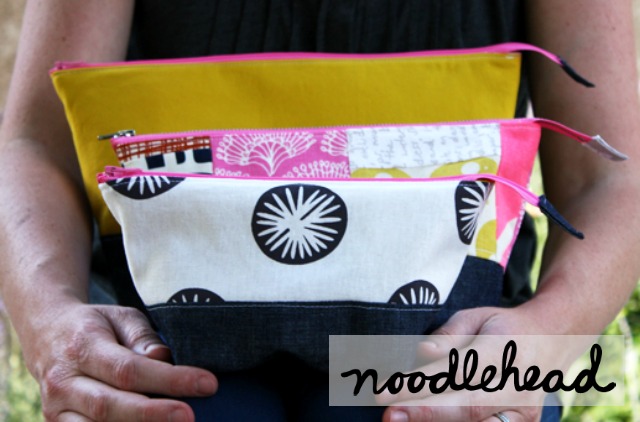
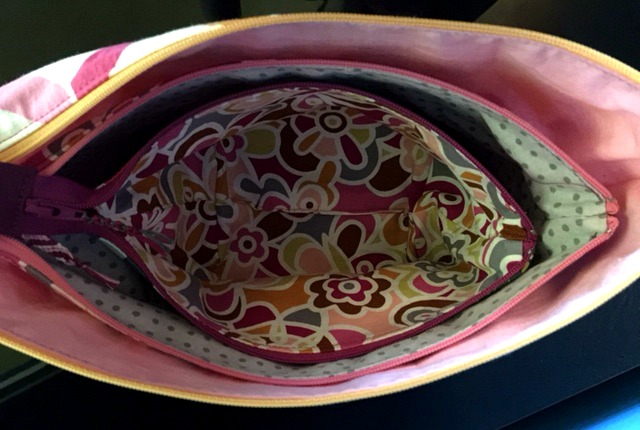
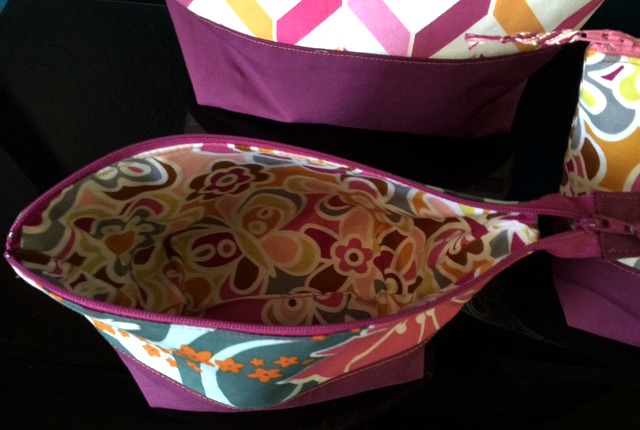
- The zipper is longer than the pouch’s top edge circumference so when you open the zipper all the way, the top of the pouch opens completely. No dark corners. This makes seeing, stowing and retrieving items easier.
- The bottom corners are boxed, which makes a nice base and fits items with any bulk much better than a flat pouch.
- Three pouch sizes are already figured out for you – sometimes, I just don’t want to do the math. “Please, someone, do it for me” and, voilá, Noodlehead did.
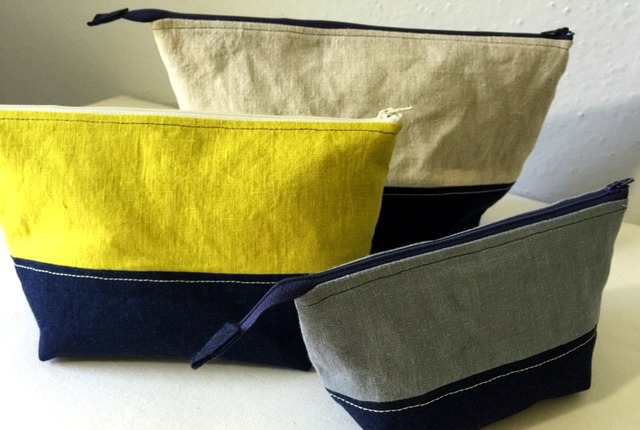
- There is an option to make the pouch with two panels of fabric, which is of course always an option, but the math is, once again, figured out already. yay! (My math thinking dad would not be so proud of this particular laziness of mine).
The first pouch I made was for my son. He was about to go on tour with a band he had just joined (he replaced a member just in time for their tour) and I thought, wouldn’t it be nice if he could keep his toothpaste, soap, and such in something other than his default; a ziploc baggie.
Since I wanted it done that day I didn’t want to spend the time to figure out how to engineer a toiletry bag. I remembered the Noodlehead pouch from all the Pinterest impressions and went right to the site for the tutorial. (Funny that I totally forgot about this boxy toiletry bag I made years ago.)
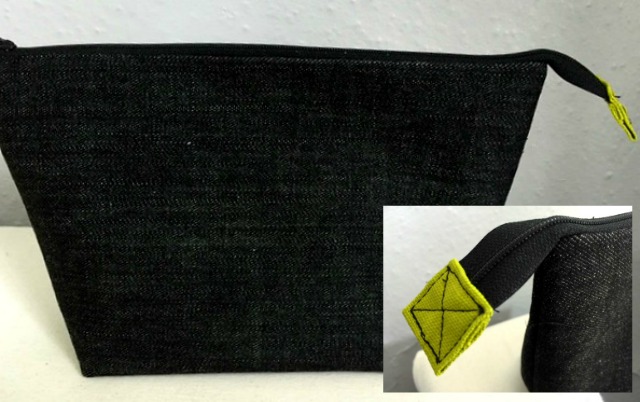
I chose a black denim for the outside and used unbleached muslin for the lining; a more masculine and rock and roll slant than the cute prints from my fabric stash. I try to always use a light color for lining in totes and purses. I think it helps to see what’s inside a little easier. Because the denim was heavy I did not use any interfacing (it’s optional. Just go by the weight of your fabric). The sewing of the pouch went fast and I was pretty pleased with it. (But, last weekend, on his way out the door for another out of town, overnight, gig, I spied that ziploc bag with the toothpaste in his hand.)
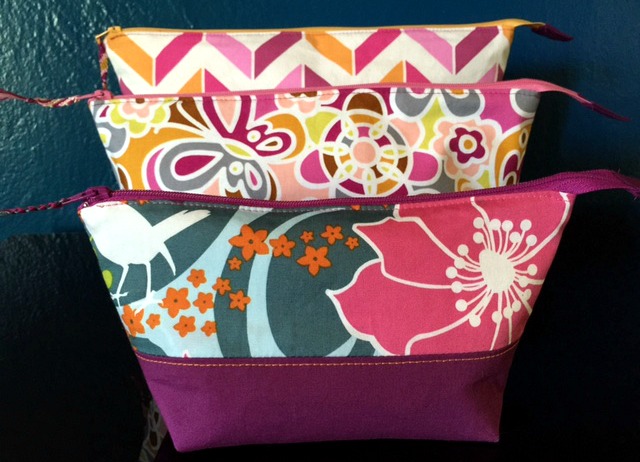
Now cut to the leisurely sewing day when I set out to make some more pouches as a gift and to use up some quilting cotton from my stash. This time I was going to enjoy the process (the first make being such a blur) and let you know how the tutorial is – Well, I guess this post is way out of the judge free zone. In fact it’s all judging.
And the verdict is: Yes, you should use this tutorial if this is something you want to make. Instructions are clear, lots of pictures, basic construction methods and a nice design. However, (there’s always a “however”, right?) I made a couple notes, if your interested, that may help your making of Noodlehead’s Open Wide Zippered Pouch even easier.
Note that the Noodlehead tutorial is one post on her site, and the cutting chart for the three sizes is a different post. (She does state that clearly and gives you links but sometimes the snake is right in front of you.)
Here’s my notes
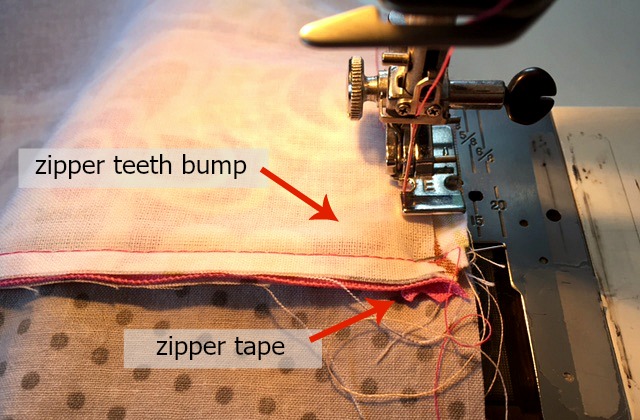
When you sew the lining to lining and outside to outside, use a zipper foot where you sew across the short ends of the zipper. There’s a lot of bulk here and it’s hard to sew close to the zipper, as the tutorial instructs, with a regular pressure foot.
UPDATE: If you place the zipper stop at the top of the zipper 7/8″ away from the edge you can use a regular pressure foot to sew all around the pouch’s exterior and lining. Or maybe your regular pressure foot is narrower than mine to begin with. The reason a regular pressure foot is desired over a zipper foot is that it places more surface on the fabric, which keeps the fabric steady.

Sew both ends of the zipper while you still have the zipper foot on your machine. Then switch to your regular pressure foot for a more steady feed. (see update above to avoid swapping the pressure feet in and out)
Clip the seam allowance where you’ve sewn across the zipper. When you go to top stitch on the outside around the top edge, you will not want all this extra bulk.

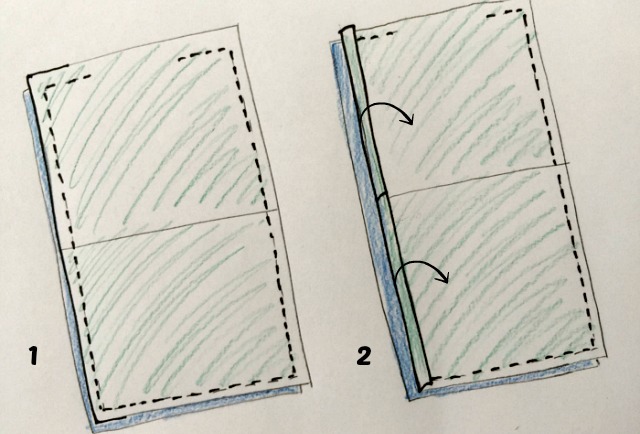
If you are making the outside of the pouch with the two panels line up that panel seam and don’t worry if the end doesn’t line up as long as you are in your seam allowance. No one will know if the bottom seam allowance isn’t equal but they will see if the contrasting fabric panel doesn’t line up with itself at the side seams.
Iron back the seam allowance of the opening left on the bottom of the lining. Then when you go to sew the opening closed you can just grab the two sides of the opening easily. No having to fold back the seam allowance in the air at your machine. You may also want to iron open the seam allowance of the pouch before you flip it right side out. I did to make the seam look sharper on the outside. (It’s a habit, pressing open my seams).
Because the pouch is sewn together, you cannot just open the seam to press the allowances flat as you normally would. The next pressing option would be to place the seam on a sleeve board or other hard object but the space was too tight to maneuver that. The last option was to just press open one side by folding the seam allowance back, which is what I did on all four sides.
UPDATE: I didn’t press open the seam allowance on a more recent set of pouches (except the opening) thinking it wasn’t worth the time. For me, for the look I want, for the seam allowances being open and not all on the same side around the top edge, it’s worth pressing the seam open.

Use a zipper foot to top stitch around the top edge of the pouch. Again, to get close to the edge I couldn’t use my regular pressure foot. In fact I couldn’t even get my zipper foot to go over the end where the zipper starts (see the stitching gap in the picture below next to the pink zipper pull). Next time I’m going to try top stitching further away from the edge. Actually, I suppose I was edge stitching, not top stitching.
UPDATE: I did move my stitching line away from the edge about 1/8″ more and that made all the difference. I used a regular pressure foot and was able to sew with it all the way around the edge.

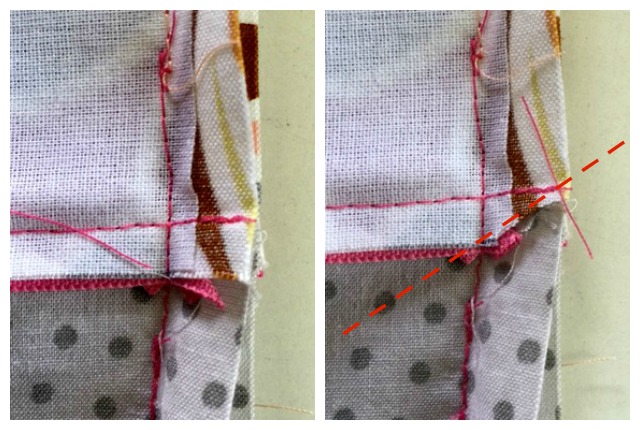
The zipper pull tab at the bottom of the zipper is folded in on itself and then over the end of the zipper. It slips around a bit when stitching it closed because it’s small and awkward to get a grip on while sewing and your sewing over the zipper teeth, an uneven surface. This slipping leaves an unaligned tab. Its folds eek out a bit here and there or the whole top edge shifts slightly to the left. It’s a little thing but it bothers me. Next attempt I’m going to try fusing the tab on before I sew it to reduce, if not eliminate, the shifting.
UPDATE: The fuse thing doesn’t work. Its too awkward to fuse it together, especially on the short zipper tail of the larger pouch. So I tried that double sided tape that you can fuse after the fabric is taped together. Well, once it’s taped together, which is as soon as you fold the tab over the zipper tail, there is no adjusting the fabric to align it perfectly. It’s aligned how it folded over which wasn’t always so great. I was better off I found folding the tab over the zipper, pining it in place, and making little tweaks at the machine as I sewed it; pushing a seam in or holding the top layer back with the awe. So the original instructions did prove to be the best method for me.
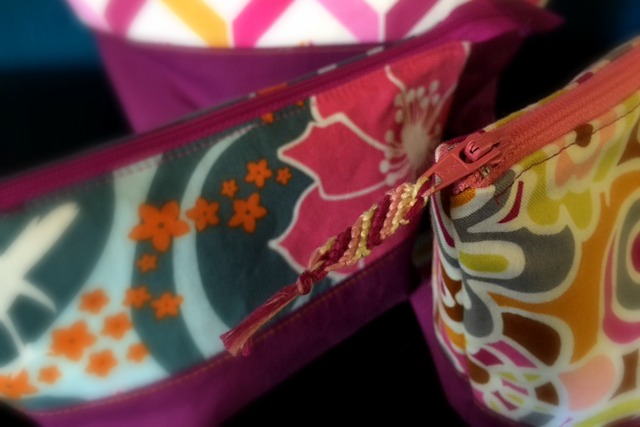
For the grand finale I broke out my kids’ abandoned Klutz Friendship Bracelet book and made some zipper pulls just for the fun. (The fun part kicked in after some frustration because I cut the floss too short. I had to relearn the fine art of making friendship bracelets).
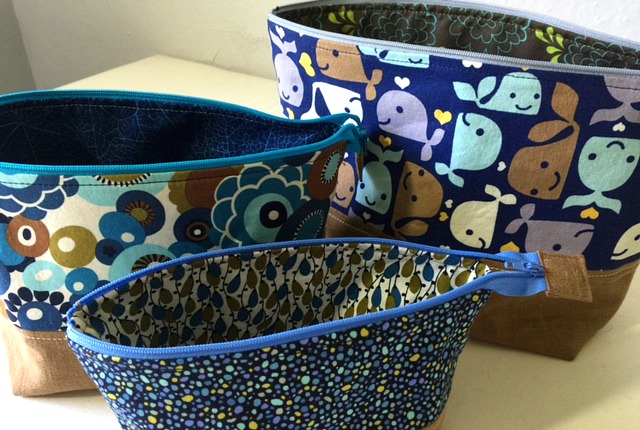
I made two more sets of these pouches as graduation gifts for some young ladies I know.
I know, I know, they would probably prefer a gift of cash but I’m stuck in my ways besides, I had fun putting together all my scraps and isn’t it all about the giver?
Thank you to Noodlehead for sharing this tutorial. It’s a keeper.
How do i print this? Why isnt it in pdf format?
Sorry, this isn’t my pattern so I don’t have a pdf version of it. You can go here for the original guide: https://noodle-head.com/2012/06/open-wide-zippered-pouch-tutorial-size.html
Since it’s all rectangles there is no pattern to print.
Hi. I have now made several in different sizes. I use zipper by the yard and cut to desired length and make the zipper pull tab at the beginning when I cut the zip to desired length. Much easier!
That’s a great idea! I haven’t tried the zipper by the yard yet. I was tempted last month to buy some and now I’m sold! thanks for the tip!