
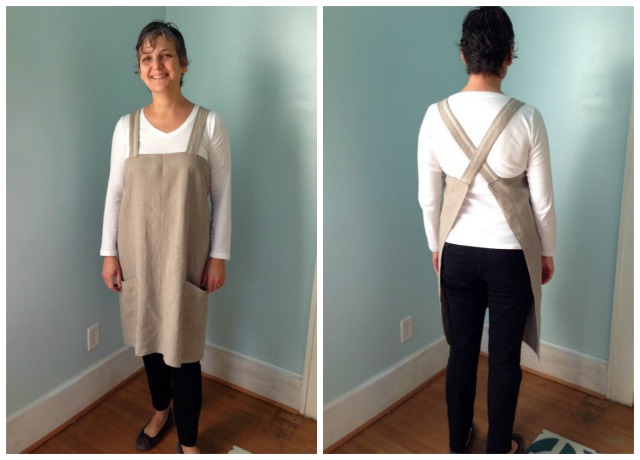
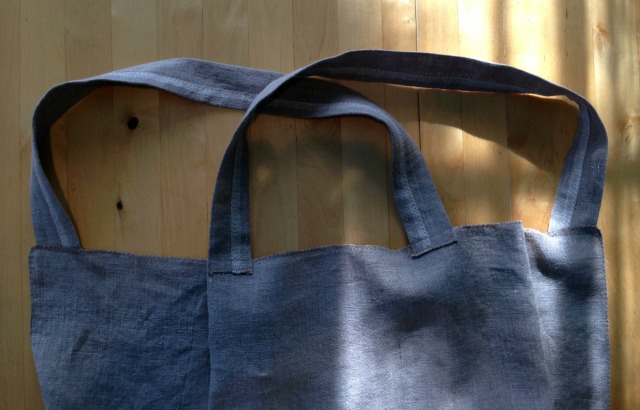
This version of my back cross apron is more what I was going for. (See my first version of the apron here: “Easy to Make, Back Cross Strap Apron“). It is made of linen but still only a yard of fabric. The drape is so much nicer than the quilting cotton. The basic construction is the same as the cotton back cross strap apron. The cutting layout is different since linen comes in a wider width and the selvedges were incorporated into the design (waste not, want not). I also abandoned hemming any part of this apron and instead finish everything with a simple zig zag stitch (much faster).
Other changes from the first version are the length of the apron, a wider placement of the straps in the front, how the straps are made and a small detail on the pockets. You can stick to the same construction as the first apron if you wish. If this tutorial seems to skip a step be sure to check out the more detailed “how to” post of the Easy to Make, Back Cross Strap Apron.
I happened to have a yard of rustic linen sitting on my work table. It was to be made into a Christmas gift so it was washed and ready to go. It was just too tempting and therefore I used it for this project.
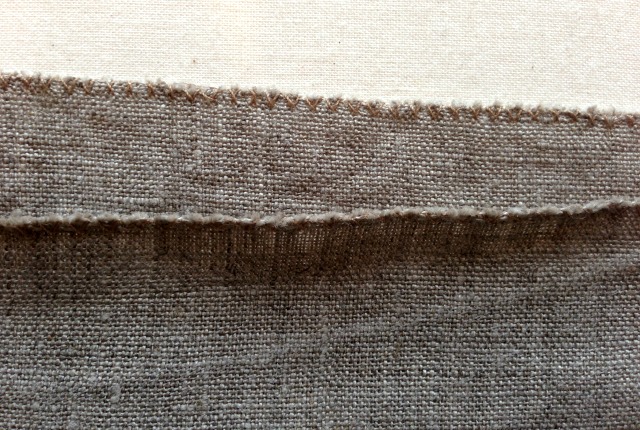
When I was ironing the linen I noticed that the zig zagged edges I had added pre-washing were charming on this rustic weave. (I loosely zig zag the raw edges of any fabric before washing to keep it from unraveling) That this simple zig zag finish fit the type of fabric and what the fabric would become was a little ah-ha moment for me. Why not play it up?
Normally I prefer a crisp tailored look with rows of contrasting topstitching. I imagined dark blue linen with heavier topstitching thread in light grey or the iconic golden Levi’s color. So going with the zig zag was a little change of vision. However, you could make a 1/2″ hem around the pockets and apron (with a beautiful, deep 2 1/2″ hem at the top and bottom) just be sure to add seam allowance when cutting as my layout has NO seam allowance.
Update
I made a three part video tutorial for this apron. Part 1 will guide you to Part 2 which will lead you to Part 3
Getting Started
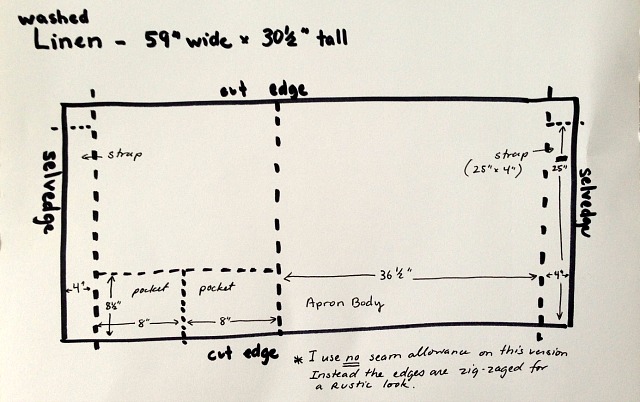
I did purchase a yard of linen but after washing and drying it shrunk to 30″. (Fabrics shrink more on the length grain and will continue to shrink in this direction which is why your jeans become floods after a year or so) Even with just 30 1/2″ of linen (it is 58″wide) you can make this apron.
Some notes about cutting out this apron:
- The selvedges are incorporated into the design of the strap so don’t remove them from the fabric.
- There is no seam allowance because I do not hem any of the pieces. They are finished with a zig zag stitch instead.
- Linen loves to move which throws off your cutting. Pull threads to stay on grain. (Pulling threads is explained below).
- Straps are cut 4″ x 25″
- Pockets are 8″ x 8 1/2″
- Apron body is 36 1/2″ wide. I used the whole length after squaring up the top and bottom; about 29 1/2″.
The order of construction goes: pockets, straps, apron body, attaching straps, attaching pockets. If you need more detailed instructions than you read here, please read Easy to Make, Back Cross Strap Apron. Once you cut everything out this project will take two hours or less. Let’s go.
The Pockets
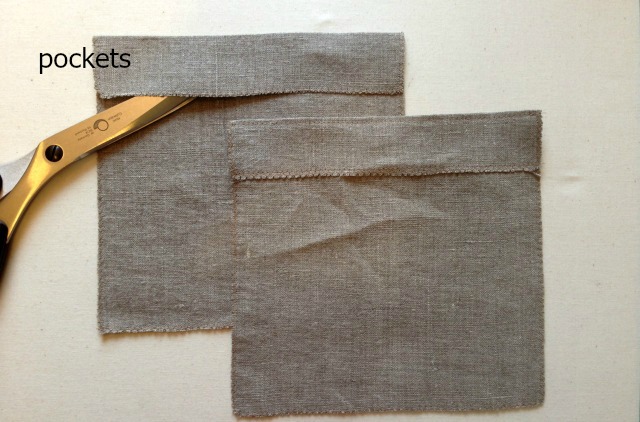 Run a medium width, medium length, zig zag stitch around all four sides of both pocket pieces. Fold over the top about an inch to the right side. Press.
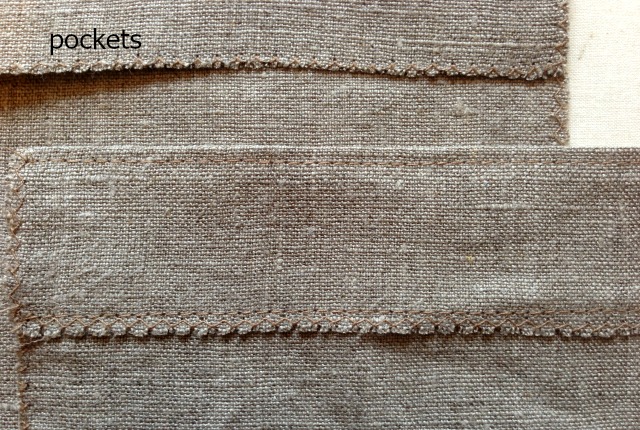
Use a running stitch and sew down the top to the front of the pocket. Edge stitch the folded edge also with a running stitch. Press and set pockets aside.
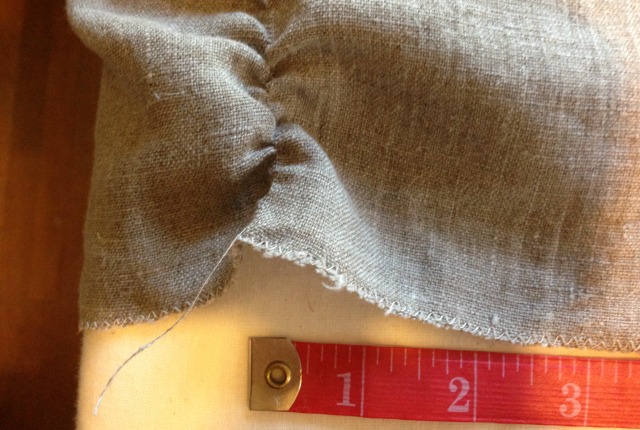
The Straps
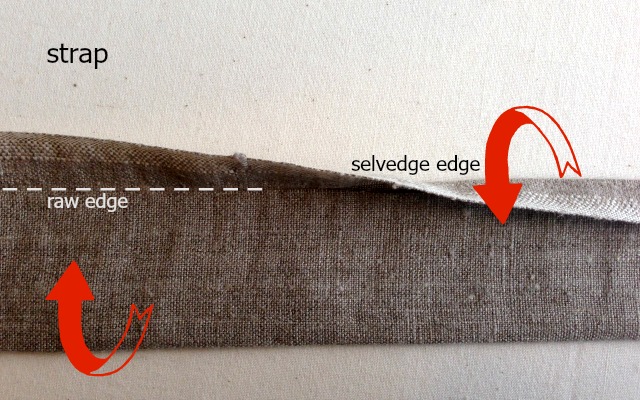
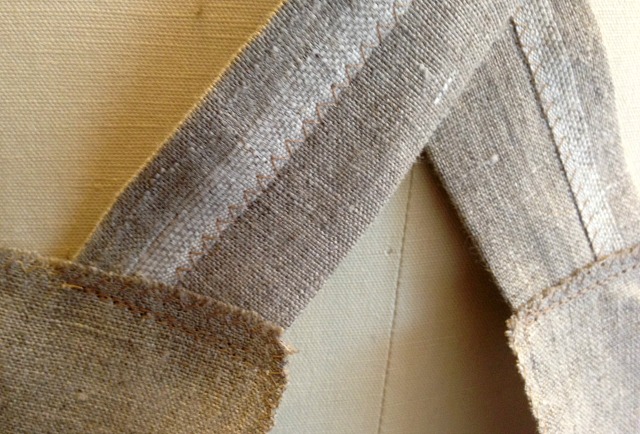
Fold the raw edge up to the inside edge of the selvedge. There are usually little holes in the fabric here from being on the loom. The line of holes is what I lined up the raw edge to. Press. Fold the selvedge over the raw edge. Press.
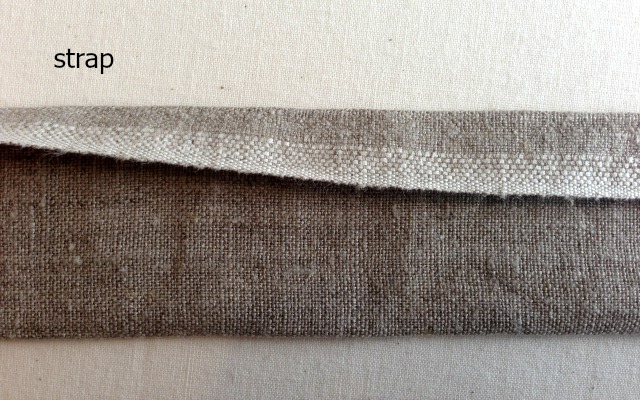 The strap will be close to 2″ wide.
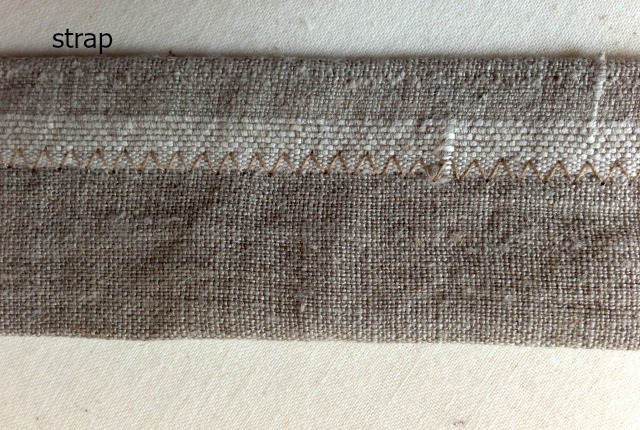
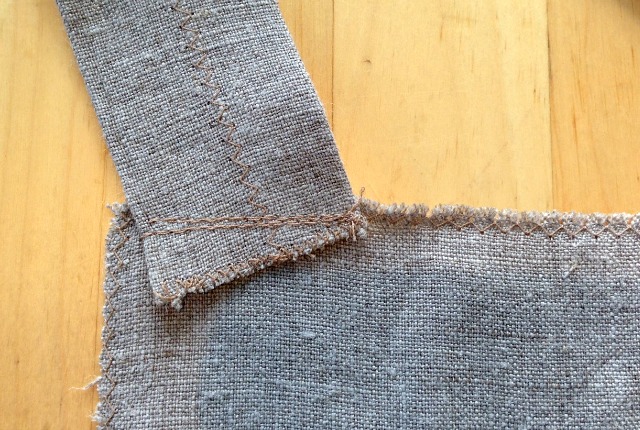
Use the same zig zag stitch setting you used on the pockets (or not; you’re the designer here) and stitch the selvedge down through all layers of the strap. Zig zag across both short ends of the strap, catching the edge. Press and put the straps aside. There are no tubes to turn here. This is your finished strap. (Yay! that saved 30 minutes right there!)
Putting It Together
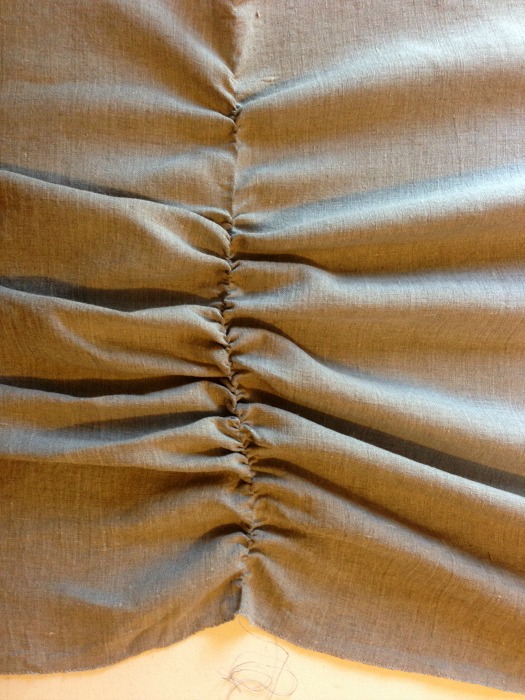
After running a zig zag stitch around all four sides of the apron body fold apron in half, side to side, not bottom to top. Press the fold with your iron to make a crease. This crease marks the center front of the apron.
Open up the apron body. At the top measure out to both the right and left of center front 3 1/2″ to 4″ (I did 3 1/2″ if you have a wider frame you may want to measure out 4″). At these marks you will place the inside edge of the straps.
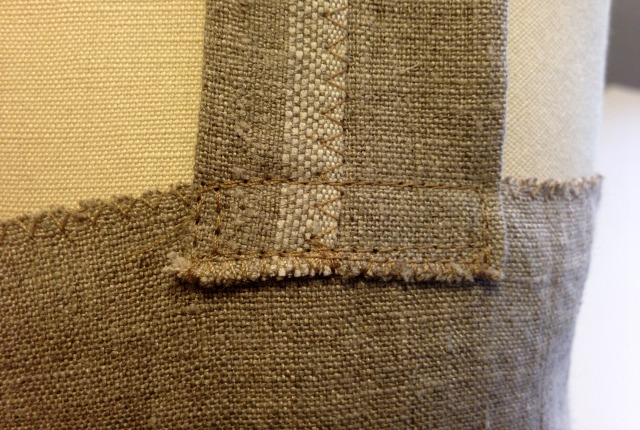
Overlap the strap and the top of the apron about 5/8″. Pin strap down and sew to the apron with a few rows of stitches. I sew a rectangle and go over it once.
Lay the apron facing you on the table. The strap on your right will be joined to the left corner and the strap on your left will be joined to the right corner.
When you join the strap to the back you will set it at a slant. The strap’s outer edge will overlap with the apron 7/8″ ( measuring from top of apron to bottom of strap) and the inner edge of the strap (edge closest to center front) will overlap only 1/4″. Pin in place and sew down securely. I sewed the straps to the inside of the apron in the back and to the outside of the apron in the front.
Pockets should be placed for your arm length. Read how to place pockets in the Easy to Make, Back Cross Strap Apron post. My pockets are placed 5″ out from center front on each side and about 4 1/2″ up from the bottom of the apron.
This is just a very basic pattern. You could customize it by adding hems and top stitching or trim, or embroidery on the pockets, or a contrasting or printed band of fabric at the top or bottom. You could use leather for the straps or make one large centered pocket instead of two, or make it up in white eyelet. This could be anything you want it to be.
UPDATE: I made this smock apron again using different measurements and it turned out a little closer to what I had wanted. Read Japanese Style Smock Apron to see the difference.
Resources: I purchased my rustic linen for this apron through Fabrics-Store.com. They have good prices and if you sign up for their emails you’ll know which color is discounted that day.
Pulling Threads
When fabric is fluid it moves like crazy when you cut it. Using a rotary cutter and pattern weights is a great way to cut out fluid fabrics. However with a loose weave like linen and boxy pieces like this apron is made up of it’s easier to pull threads.
What is that? It’s literally pulling a thread out of the fabric to mark where you cut. This ensures you are cutting on the grain which leads to even draping.
Step 1: Measure to where you need to cut. Loosen a thread from the cut edge or pull one up from the fabric with a pin. Start, gently pulling the thread out of the fabric.
Step 2: Pull thread all the way out if you are cutting across the entire piece of fabric. If the thread breaks you can use a pin to fish it out of the fabric further down and start pulling again.
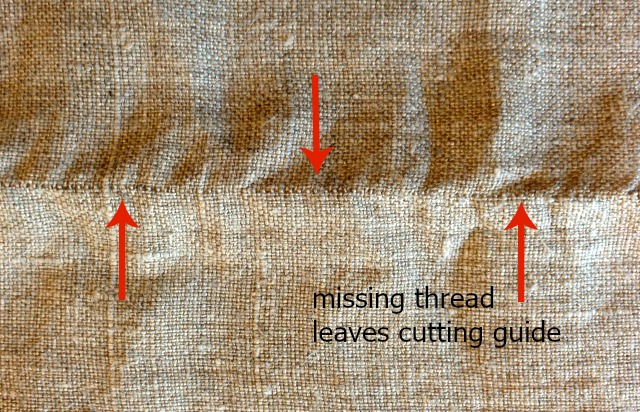
Step 3: The pulled out thread will leave a void. This is your cutting line. Your fabric is truly squared, well at least on this side it is.

Found your page from a link you posted on fabrics-store dotcom. I want to thank you for making this webpage easy to print out the entire thing. YEAH and KUDOS to you for that. My computer is a long way from my Sewing Room…and that makes it so much easier. This page is very well done and very easy to understand.
Thank you. I’m sorry the videos aren’t printable – maybe I should provide transcripts.