
No one is symmetrical but some of us are more asymmetrical which is fine except clothing doesn’t always fit comfortably or drapes correctly.
A high hip adjustment is an easy adjustment. It only requires a little extra length be added to the garment, but not at the hem as you may first think. To keep the grainline true to the garment design the extra length will be added between the waist and the hip.
This method works for both pants and skirts.
This post explains how to do a flat pattern alteration before a muslin or fit garment is made. A fit garment is always recommended until you have perfected the pattern.
High Hip Alteration Tips:
- Some styles like full skirts that sit at your natural waist, may not need any adjustment to fit a high hip. (more style suggestions to come soon)
- Do not overfit the lower hip side. You are going for a balanced look and a comfortable garment.
- Avoid plaids and stripes as they will accentuate the changes made to the garment
- Diagonal wrinkles from higher hip to opposite knee are a sign of a needed adjustment to the hip.
Determine the Difference in Your Hip Height
How much difference between your hip height is the first step to adjusting your pattern.
Place a narrow belt or tie a length or narrow elastic at your waist. Your natural waist which is the narrowest part of your torso
With your shoes off and a tape measure, measure from the floor
To get an accurate measure from the floor to waist you could have someone else measure this distance OR you could devise a little tab, attached to the 0 end of the tape measure which you step on to hold the tape measure in place and straight. Here’s how:
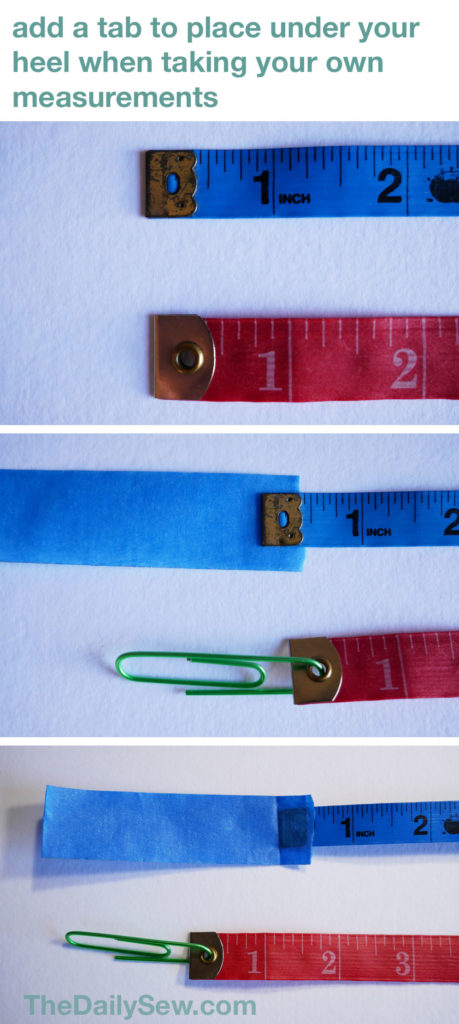
If your tape measure has a hole in the end you can place a large paper clip or safety pin through the hole. Then stand on the pin or clip and measure up to the waist.
If your tape measure does not have a hole you can make a tap with painters or masking tape. Add a piece of tape, about 8 inches long that will double back on itself, both ends attached to the end of the tape measure. Fold and crease the tape tab where it comes off the tape measure. Then stand on the tab and measure up to the waist along the side of your leg
Note the difference. This is the amount you will have to adjust the high side of your pattern

Since you only make the adjustment for one side of your body you will need a right and left side pattern piece for the front and the back.
Trace off your pattern (or reprint certain pieces if it’s a pdf pattern) so you have a right and left front and a right and left back (remember this means flipping your pattern to trace it so you have mirror images of each piece. You may need to flip one upside down to get the mirror image. If so, Label it, “wrong side” and/or “this side up”)
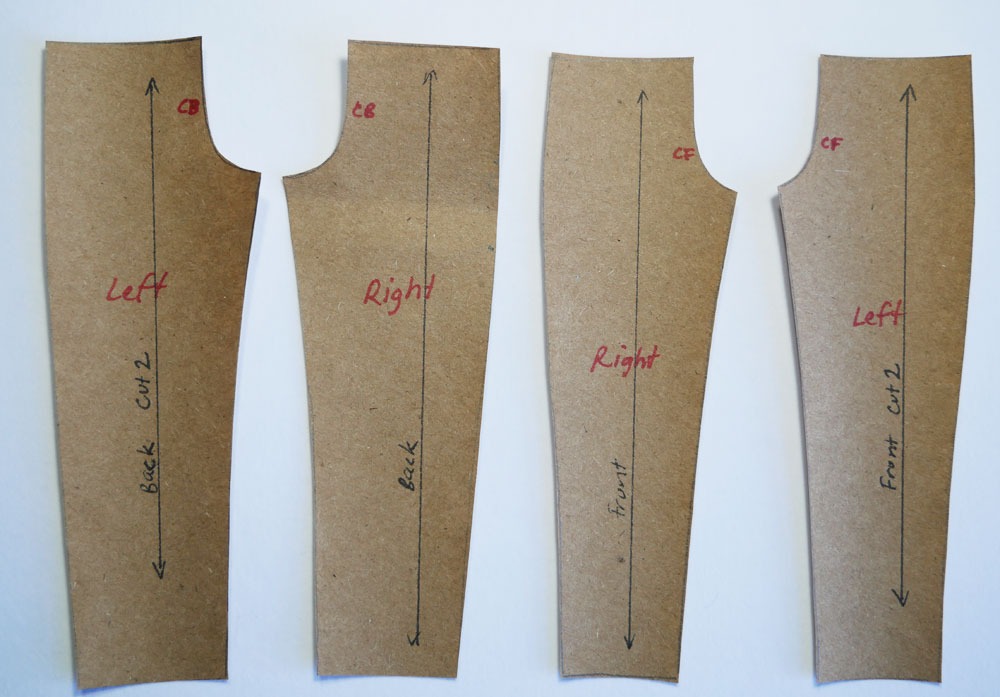
Label your patterns Right Front, Left Front, Right Back, and Left Back.

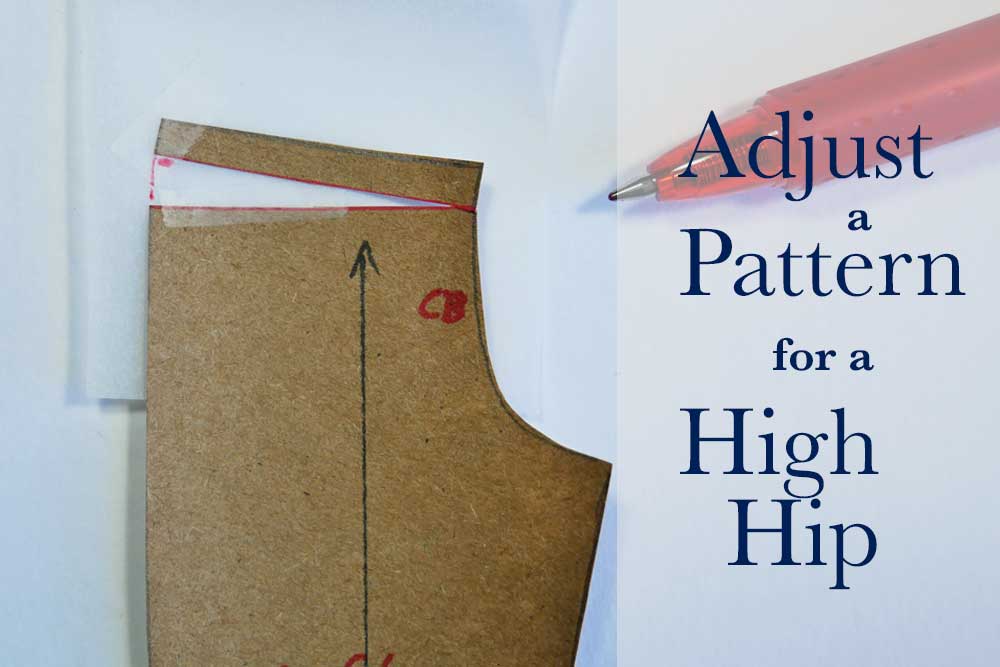
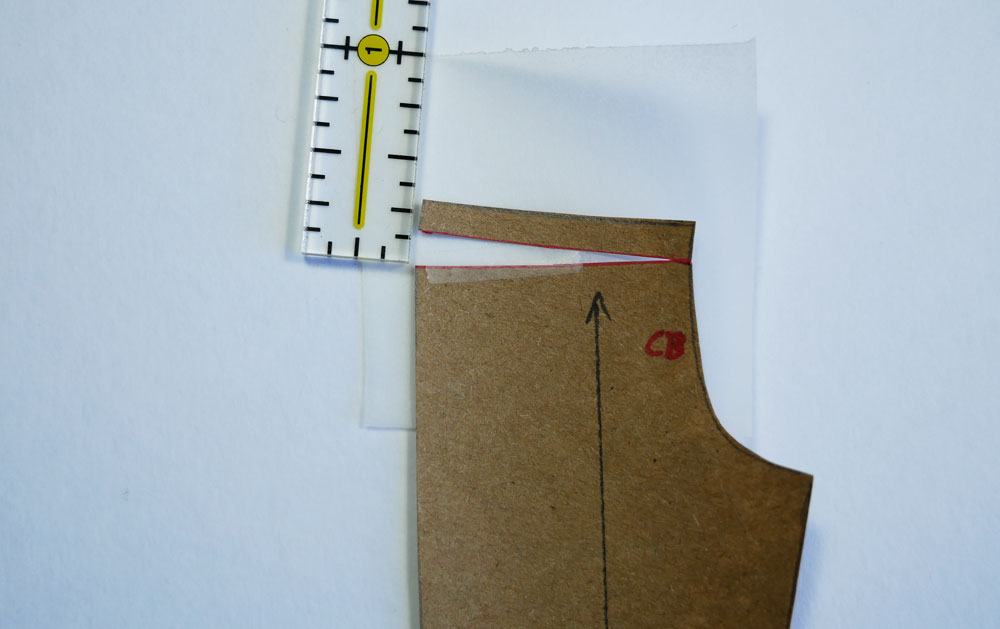
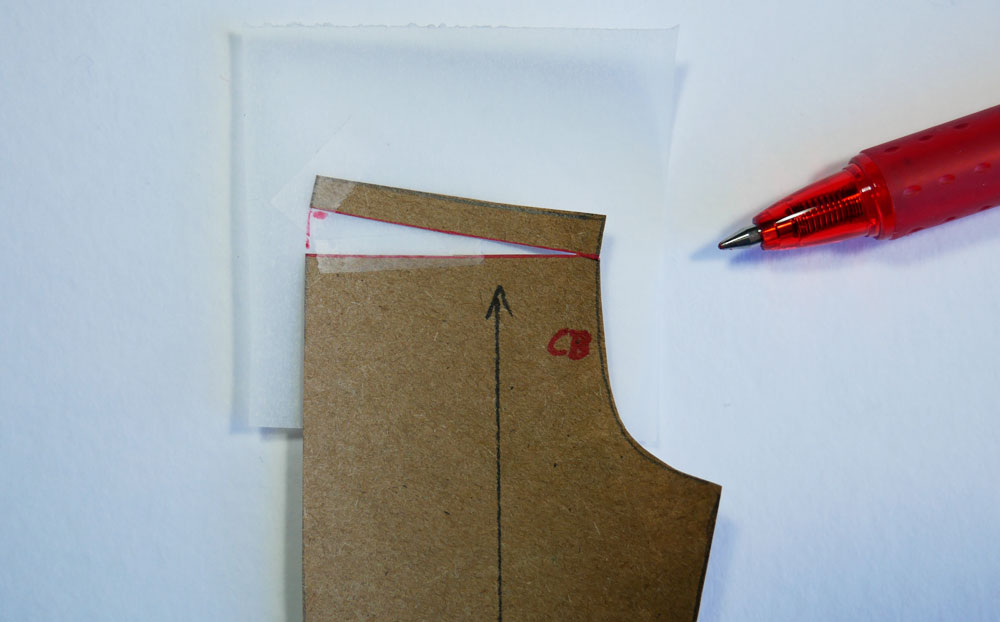
On the pattern pieces for your high side draw a horizontal line across the pattern from center front (center back for the back piece) to the side seam about 1″ down from the waistline – so 1″ plus seam allowance if your pattern includes seam allowance, and most do.
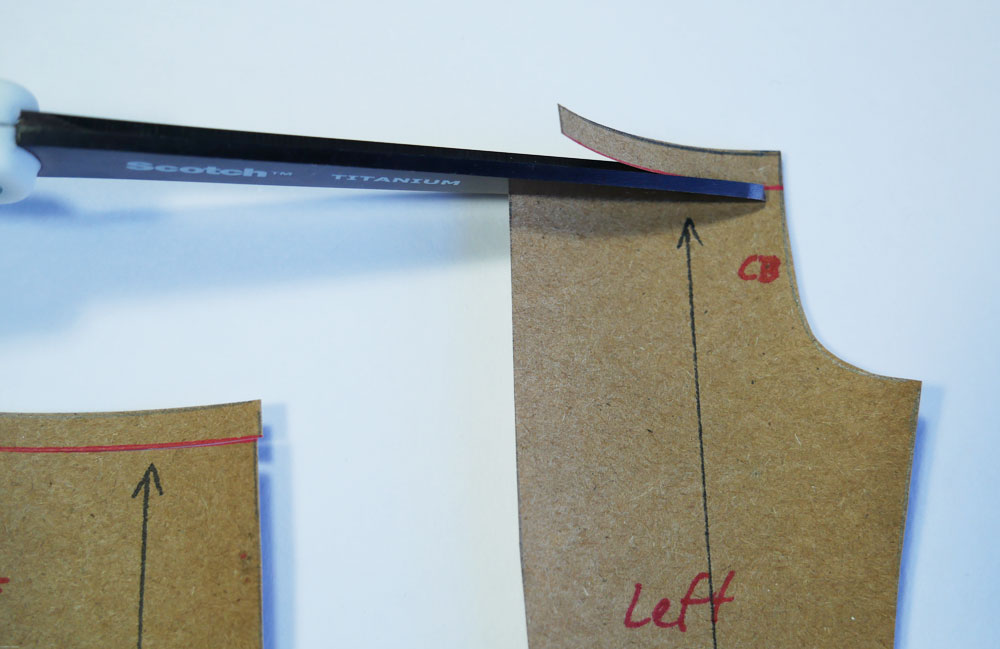
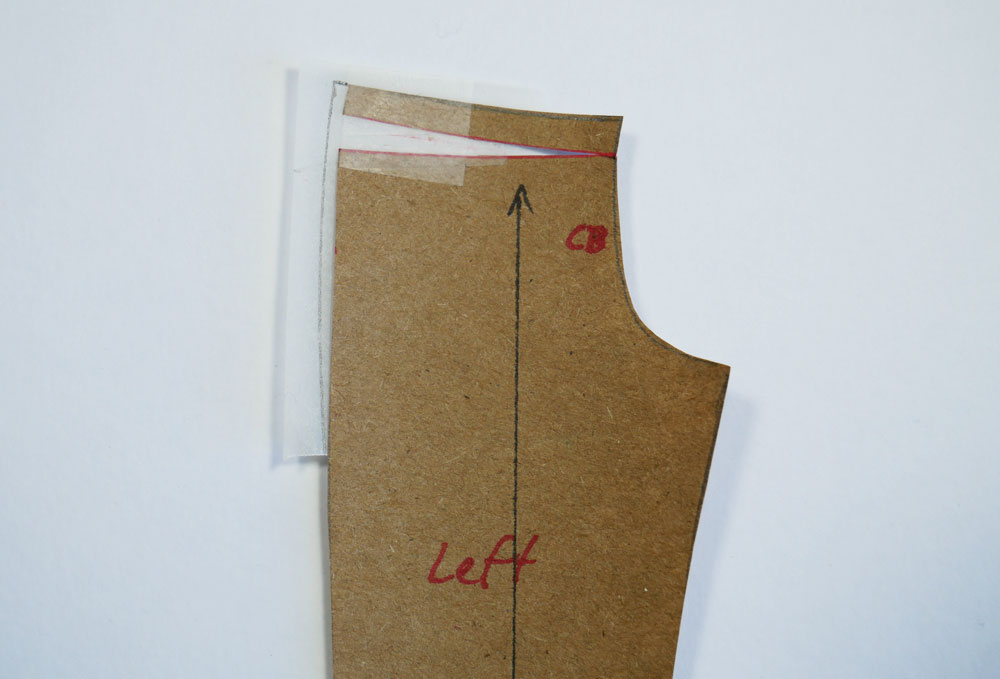
Starting at the side, cut the pattern along this line stopping 1/2″ away from center front (or center back)
Lay some paper under this slit. Tape down the lower part of the pattern piece to the paper
If your high hip is also full you may want to add some extra width to the side seam. Curve it up and taper it to fit into the existing side seam line below the hip.
Please make a muslin or test garment. This alteration may not be the best method for hips with a considerable difference. Watch your grain line when doing any alterations to see if this way will work for you. You want the grain line to be as the pattern specified.
You may be interested in these earlier post about altering a pattern for scoliosis and styles that are good if you have scoliosis
Note: this alteration method came from Sandra Betzina’s, now out of print, Fast Fit: Easy Pattern Alterations For Every Figure (which you may be able to find used). I’ve explained her method more clearly (I believe) and added my own photos and tips. I also consulted three other fitting books and they all had a very similar way to adjust for a high hip. Betzina’s was the clearest method.