
My daughter doesn’t sew, she’s not even interested. She knits, something I have given up on, and she’s really good at it. A couple of years ago she had seen a bag at the yarn shop for holding knitting projects. What made it different, and the object of her desire was it had a grommet in the side of it for the yarn to pass through. The ball could stay in the pouch while you knitted with it.
How clever. We had seen the ceramic bowls with a hook made in the side so the yarn ball stayed in the bowl as you tugged the end thread through the hook, and onto your knitting needle. But the bowl wasn’t as portable as the bag.
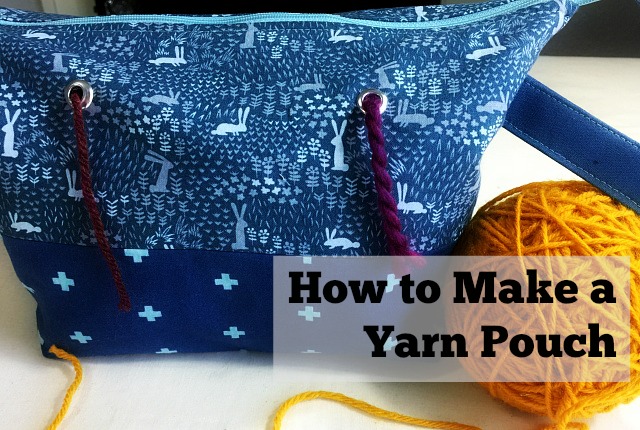
This year I decided to make her a yarn bag for her birthday. I started where all of us probably start, with a search for that type of bag online. I needed to see it myself in order to figure out how to make it. There are all sorts of bags out there to hold yarn and your knitting, bucket bags, long short rectangle bags with clear pockets and dozens of features, and bags as simple as a tote but the most common variation seemed to be a basic zippered pouch.
Did you say zippered pouch? Well, now, that’s something I can work with. And I did. And here’s how.

This is a Simple Hack. A Simple Hack of a Simple Pouch
I started with Noodlehead’s Open Wide Zipper Pouch pattern. A pattern I’m familiar with and recommend – plus it’s free.
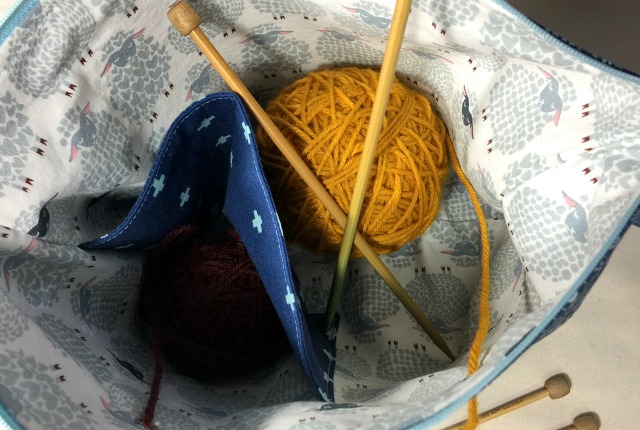
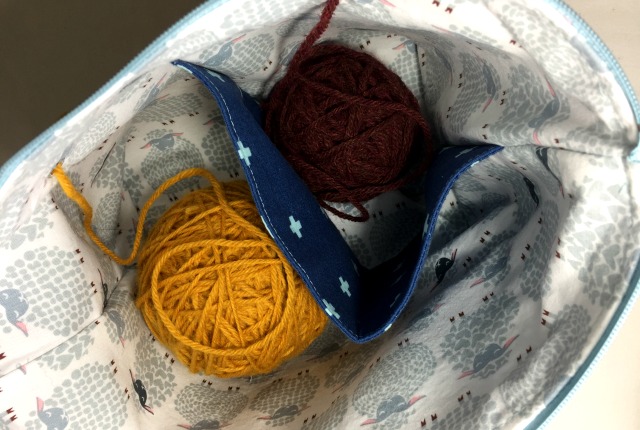
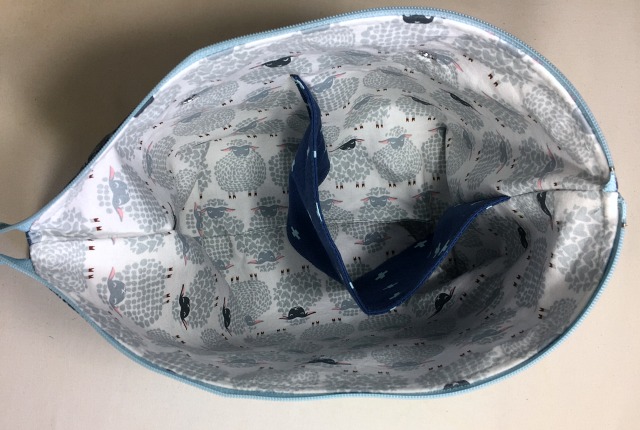
To make it a yarn pouch we’ll add grommets, of course, but also a “pocket” on the inside so you can have two balls of yarn in the pouch and they won’t bump up against each other, possibly becoming tangled. We’ll also add a handle so you can grab the pouch and go – the portable part.
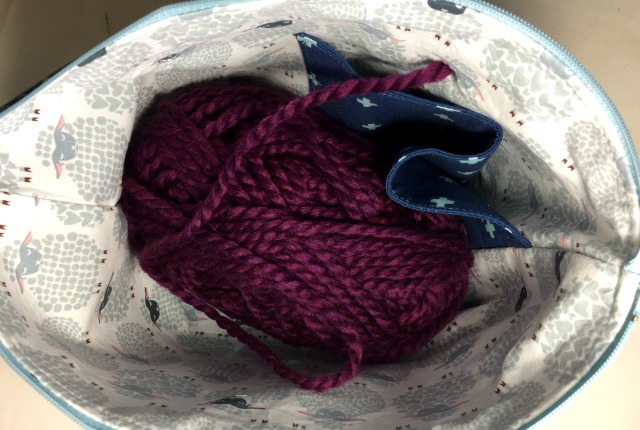
In my mock ups, I could not get a pocket to turn out how I wanted. The solution is a divider instead. The divider is like a bottomless pocket. It can be flattened up against the side and out of the way if you want to carry one large ball of yarn.
The Set Up:
You will be following the Noodlehead Tutorial for the construction of the bag and this post for the changes needed to make it a yarn pouch. I will lay out the directions and be clear when you will need to look at the Noodlehead tutorial. Any changes to Noodlehead’s instructions will be bold.
Here’s a link to the original tutorial. It will open in a new tab so you can keep both posts open as you sew.
Choose what size to make your yarn pouch. I made the largest size. Here is Noodlehead’s size guide
The Prep:
Cut out all the pieces you need according to the Noodlehead Open Wide Zipper Pouch Tutorial plus a 2″ x 3″ piece to cover the end of the zipper (this gets mentioned at the end of the Noodlehead tutorial but if you want to get all your cutting done with now, go ahead and do it)
For the yarn pouch part you will also cut:
- two handle pieces, one in fabric one in interfacing, 15″ wide by 4″ tall
- two divider pieces both from fabric, 10 1/2″ wide by 6″ tall (for the large size bag)
if making a bag in a different size the formula for the divider size is:
Width= half the width of the bag piece (unsewn) + 2 inches + 1/2 inch seam allowance
Height = The height of the bag piece – (minus) half of the boxed corner seam*** – (minus) 2 to 3 inches (how far you want it down from the top of the bag) + 1″ seam allowance.
***What does “half of the boxed corner seam” mean? On the Noodlehead size chart, it tells you how many inches you will sew across the corner in order to make the box shape. HALF of that distance is what I mean.
(Add another pocket if you want to hold a knitting pattern. See the bottom of the post for my daughter’s suggestions for the next yarn pouch I make.)
For the yarn pouch part you will also need:
- two grommets (I used 1/4″ size about 5mm) OR you can make buttonholes in place of the grommets. Some sewing machines make eyelets. You’ll want a fairly large eyelet for bulky yarns.
If you are making a two-panel bag, like I did (the bag is two different fabrics pieced together) make your front and back but fuse or attach the interfacing to the lining pieces, not the front and back pieces as stated in the Noodlehead tutorial.
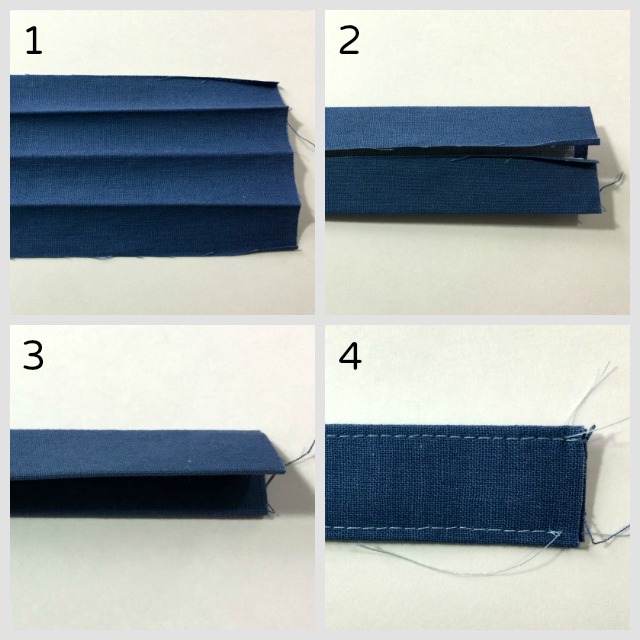
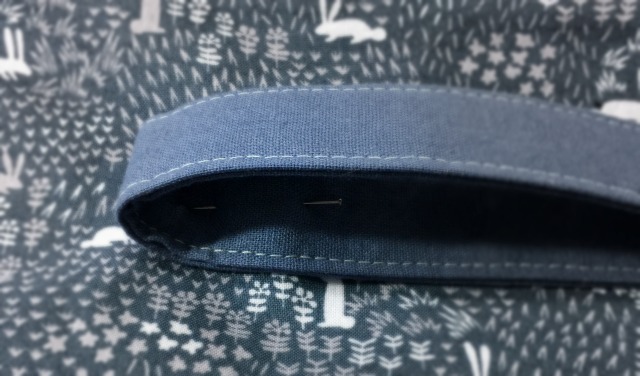
Fuse or attach interfacing to the wrong side of the handle piece. Fold the handle in half lengthwise and press to make a crease. Open up the handle and fold each long edge in to meet the center crease. Press. Refold on the center crease. Press the folded handle. Topstitch down the two long edges leaving the short ends unfinished, and press.
Fold the handle in half lining up the two unfinished ends. Baste the ends together.

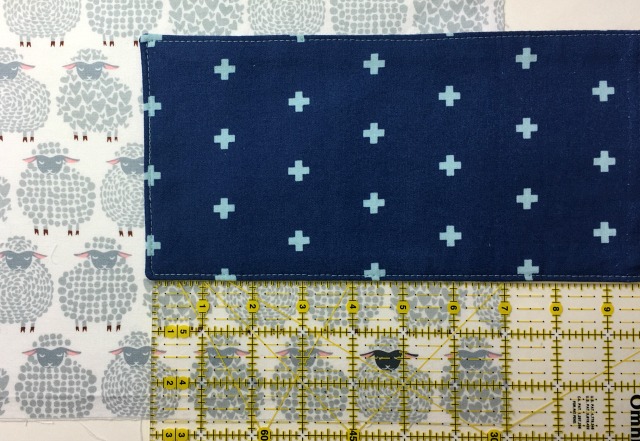
Sew the two divider pieces, right sides together, leave one short end open. Press. Clip the seam allowance away from corners to reduce bulk and turn right side out. Press.
Topstitch the two long ends of the divider piece. (I topstitched the finished short end too but this is optional. If you, like me, find it quicker to just turn the corner and keep sewing, topstitch the short end)
Checklist:
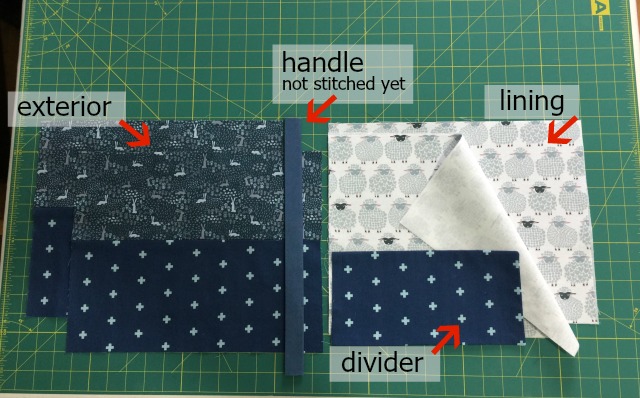
- Two lining pieces with interfacing attached
- Two exterior bag pieces (if making a paneled bag the panels should be attached, seams pressed open)
- A handle, topstitched along the long edges, folded in half and basted together on the short end side
- A divider, topstitched, one short end open
- A 2″ x 3″ scrap to sew over the zipper end
Adding the Divider:
The pouch has a boxed bottom, that’s when the bottom of the bag is not a separate piece of fabric but is cut with the bag front and back piece as are the sides of the bag. Half of the bottom and side are included in the front piece and the other half is included in the back piece. You form the bottom and sides of the bag by sewing across the bottom corners of the front and back pieces once they are sewn together.
If a pocket or divider is sewn into the side, bottom seam of the bag it will also get its corner sewn across. The yarn divider has to be placed high enough, out of any seam that was part of the boxed corner. This is key for the placement of the divider.
For the placement, fold one lining piece in half, side to side to determine the center of the lining. Press with your fingers or lightly with the iron. Line up the divider’s finished short edge on the center crease you just made.
Place the bottom edge of the divider up from the bottom edge of the lining a distance which equals 1/2″ / 1cm (the seam allowance) plus half of the boxed corner seam.
The large bag is going to be sewn 4 1/2″ / 11cm across the corner according to Noodlehead’s chart. One-half of the boxed corner seam will be 2 1/4″/ 5.5cm. For the large size bag, the divider will be placed 1/2″ + 2 1/4″ or 2 3/4″ above the bottom edge. (1cm + 5.5cm or 6.5cm)

After placing the divider onto the lining sew the finished edge down to the lining (this is why topstitching on this end is optional. It will be covered when you stitch the divider to the lining). Baste the raw edge of the divider down to the lining in the side seam allowance. Leave the bottom open.
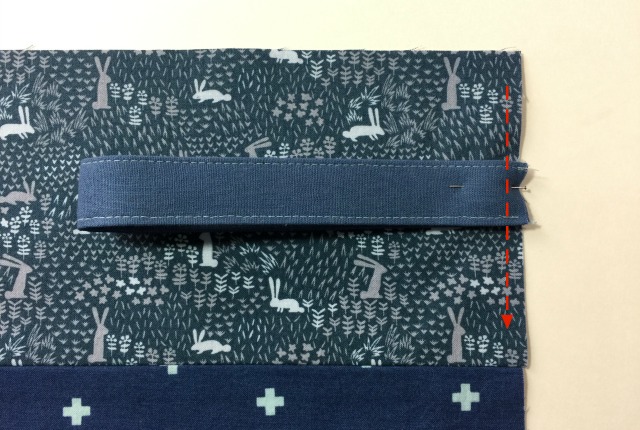
Attach The Handle:
On either exterior bag piece, baste the unfinished edge of the handle to the side about 2″ down from the top. Later, I also pinned the handle down to the bag near its fold, just to keep it out of my way.
Sew the Pouch:
Now all of your pieces are ready to follow the instructions in the Noodlehead Tutorial. Go to the original tutorial and:
- Attach the zipper. (see the suggestion at the end of this post for what might be a better zipper placement than the original tutorial recommends)
- Sew the bag to the bag and the lining to the lining
- Box the corners (feel with your fingers and make sure the divider is out of the way when sewing the corner near the divider)
- Sew the opening in the lining closed
- Topstitch around the edge
- Add the zipper tab
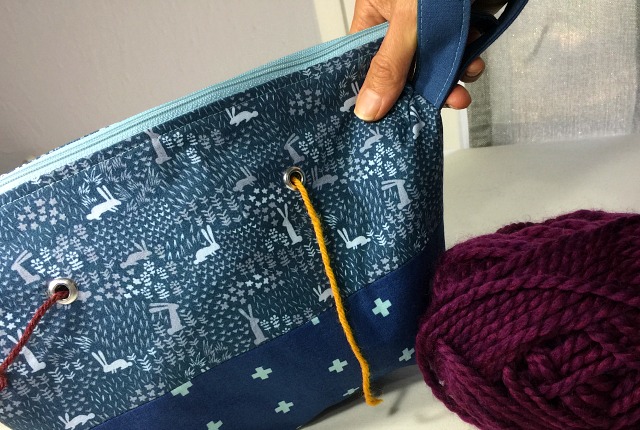
Adding the Grommets:
I added two grommets but you could put in just one or put in three. The grommets need to be large enough for a slightly bulky yarn. I used 1/4″ or 5mm size but you could certainly put in larger grommets.
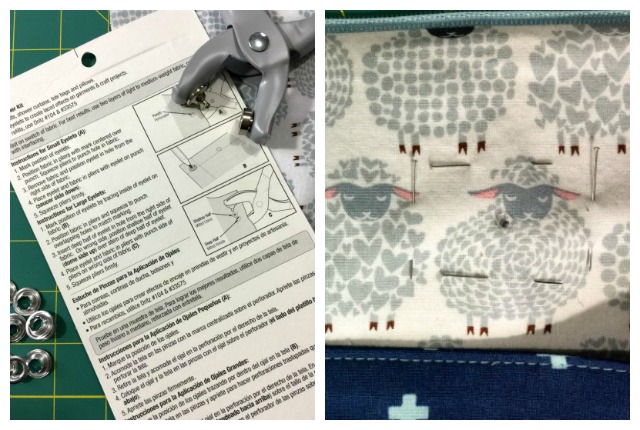
The grommets will be on one side of the bag and go through both the exterior and the lining. To be sure the layers stayed lined up when I punched the hole I pinned around the spot where the grommet would be placed.
For the placement, measure in from each side an equal distance and down from the zipper 2″. Mark these spots with a pencil and punch a hole with an eyelet maker or awl. Then follow the instructions on the grommet packaging to adhere them in place.
Over zealous hammering will lead to misshapen grommets, just a warning. This was my problem even though the grommets seemed pretty loose to me before I had to pound it one more time. You could sacrifice a few grommets to practice with if you are new to grommet installation OR if you really mess up the grommet when hammering it in, you can remove it with little pliers. Ask me how I know.
True Confession:
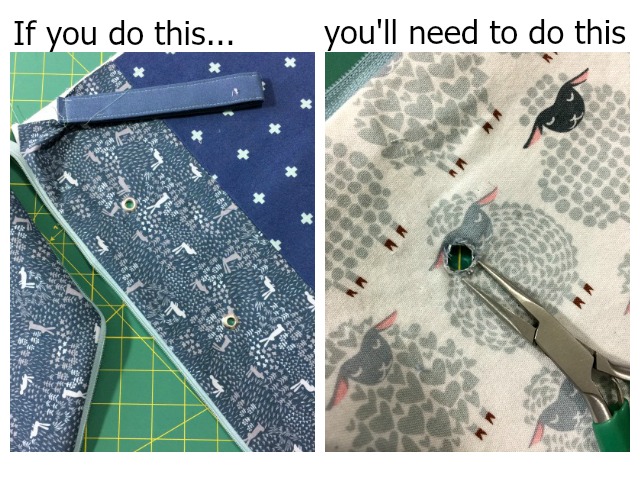 I installed the grommets to the bag earlier in the construction, after attaching the zipper. I figured measuring and installation would be easier with the bag pieces flat. And it was pretty easy BUT with the grommets in place that soon in the process, the lining and the exterior piece were stuck together so there was no way to sew the bag together, exterior to exterior and lining to lining.
I had to take the grommets out. And this is how I know little pliers work for grommet removal.
What To Do Next Time, That You Could Do This Time:
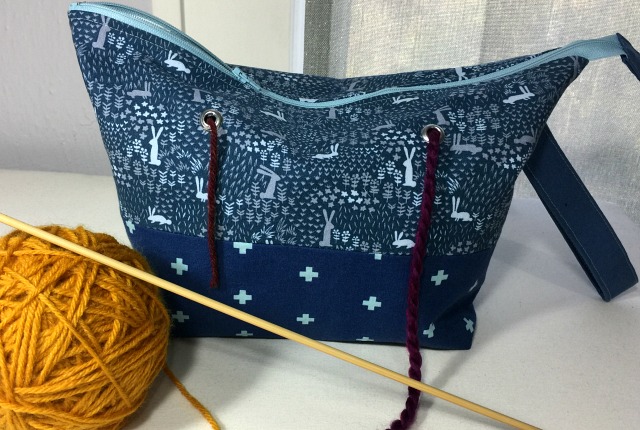
My daughter has had this yarn pouch for a couple weeks now. She takes it to work to knit during her break (and during some meetings). She has it when we watch TV. She even takes it to her boyfriend’s. I’m super pleased she finds it useful but I had to ask how could I improve the design if I sewed it again?
1. Add a large flat pocket inside the bag, (the side the divider is not sewn to) to hold a pattern if she was using one. “Or a tape measure?”, I suggested. No, she said, there was plenty room for a tape measure down with the yarn.
2. When in the middle of a knitting project, the needles, and the knitted yarn on them, go into the bag. The yarn on the needles now forms a loop; off the ball, out through the grommet and back into the bag, through the top, with the needles.
The looped yarn got caught in the zipper. To avoid this she’s now careful not to zip the zipper completely shut. But once it was so not completely shut that a knitting needle slipped out of the opening when she grabbed the handle by the bag, which tilted the bag and the contents in a way to make slipping out a problem.
I have two possible solutions for this: place the zipper a tad further away from the edge when sewing it to the bag pieces. Now it can be zipped completely and leave a little extra room for the yarn to come back into the bag. AND/OR put the handle on the opposite side of the bag so when it tilts, it tilts toward the bottom of the zipper.
Chalk it up to experience. We’ll call this a prototype.
The Noodlehead pouch is a practical little bag and proved to be a great jumping off point for the yarn pouch. I’m very Thankful to Anna Graham for sharing her sewing skills and making her zippered pouch pattern/tutorial available for free.
I bought her Maker’s Tote pattern and sewed that for my daughter as well. (The yarn pouch was made to go inside the larger Maker’s Tote). It’s a great pattern too if you’re wondering.
I hope you find this hack useful, for your knitting or as a for a knitting friend. Let me know if you made any tweaks to it and how they turned out.
The Fabric you see here was recently bought so if you like it, it may still be available. I purchased it from Fabric.com
- The bottom panel of the bag and divider are by Joel Dewberry and called Wander Cross in midnight
- The Top panel of the bag is by Dear Stella and called Midnight Bounce in navy
- The lining is by Kanvas and called Wool Ewe Be Mine
- And the handle is Kaufman’s Essex Linen Blend in cadet blue
You should sell these (for those of us who don’t have the patience to sew). I would be your first order! 🙂
I like your confidence in me 😉 This is an easy beg to sew though – you don’t need much patience (I have very little myself)