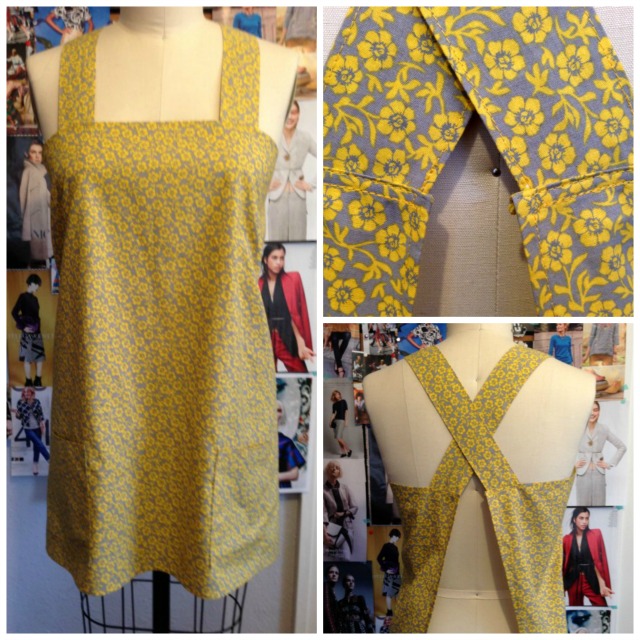
The Inspiration
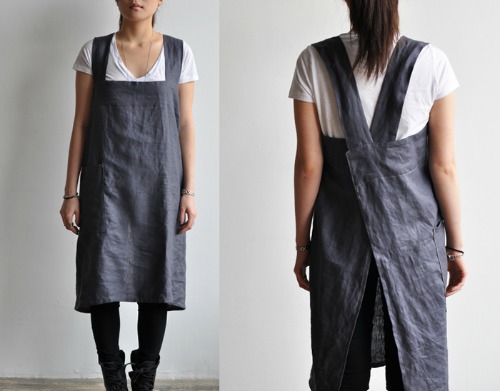
I kept seeing different versions of this simple apron but never a pattern. I’m not sure why I want this so much. I like the old world craftsman look it has and I think it will be a good solution to keeping my phone with me while I move about the house. I also like that it does not have ties which can catch up and hike up shirt hems.
Of course, I like the simplicity of this design and, being a simple design I thought I could figure out how to make it. But actually, I hoped to come across a pattern before I had to put my brain to work figuring it out. The search went on in vain and I realized I was just procrastinating on challenging myself. I shut down the google and bit the bullet.
Below is the “how to” for the first version I figured out. It’s made from one yard of quilting cotton and sews up quickly. I also made a longer linen apron more like the inspiration photo (See: “Easy to Make Linen Apron“).
Update
I’ve made a 3 part video tutorial for this apron – actually for the apron in the inspiration photo (same as this one but longer)
Part 1 will guide you to Part 2 which will lead you to Part 3
Cutting It Out
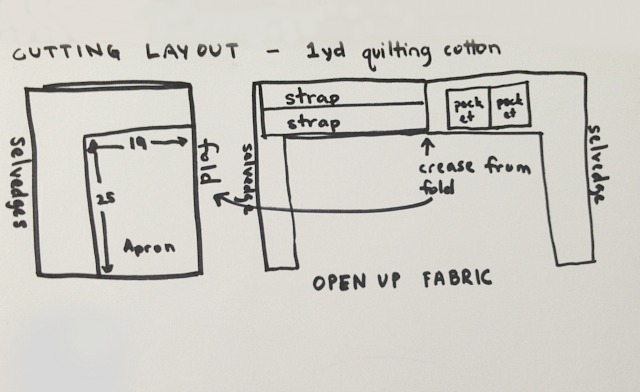
The cutting layout above is for 1 yard of 45″ wide cotton quilting fabric.
For my “muslin” I used a large scrap of linen, thinking I could sew it up for a real wearable apron. No, that is no longer an option. So on my second attempt, and in case I messed it up beyond up-cycling, I grabbed a one yard cut of quilting fabric from my stash. If this works, I thought, I’m a genius, because I will have a use for those impulsively purchased, one yard cuts.
After you’ve washed, dried and ironed your fabric fold it so the selvedges meet. Cut the body of the apron out first on the fold. Open up the fabric which is left to cut out the straps (each 4″ x 21″) and the pockets (each 7″ x 8″)
NOTE ABOUT SIZE: This is sized for me. I am Medium to Large. My Target T-shirts are mediums. In sewing patterns I sew up a 14 with a small bust adjustment. I’m almost 5′ 8″ and the apron falls to the top of my thighs. The straps can be sewn to be shorter or cut longer if needed. The apron is a rectangle shape and can be made wider or shorter or longer (but you’ll need more than a yard if making longer). This is not a fitted garment in any way so my measurements may just work for you.
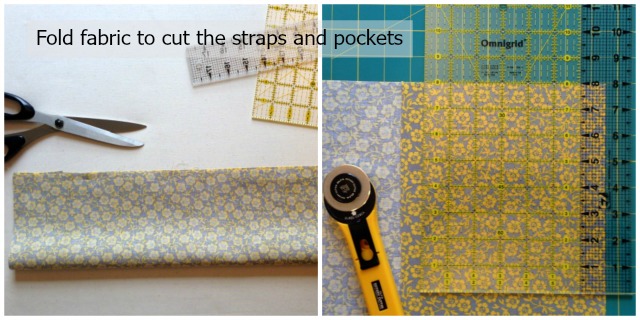
After cutting out the body of the apron on the fold, I cut the remaining fabric in half to have two pieces each approximately 22″ wide. One piece I folded across the width and cut the strap on the double (meaning cutting one time from a double layer of cloth to have two pieces). The other piece was folded on the length to cut out the pocket on the double.
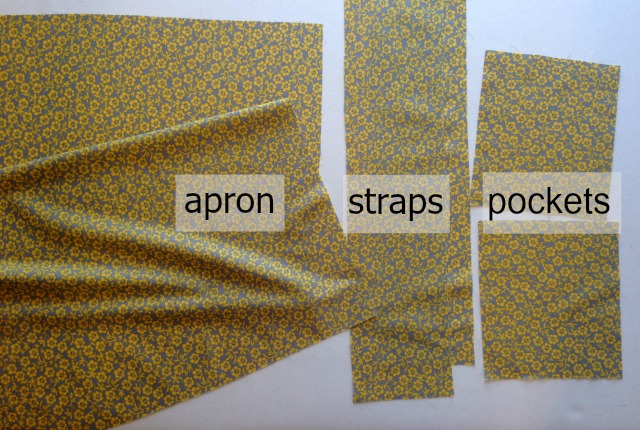
You should have 1 apron body, 2 straps and 2 pockets.
The Pockets
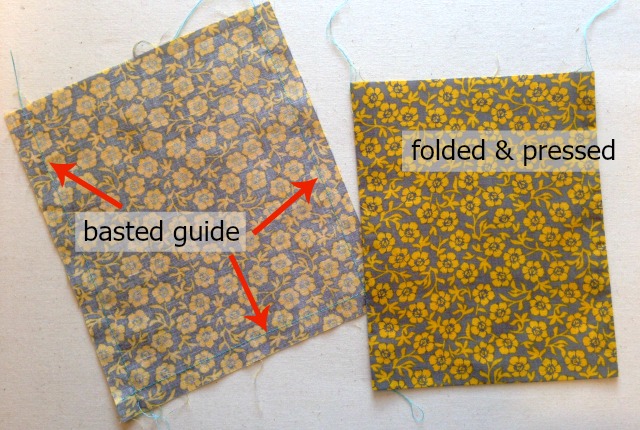
Nothing fancy here, just a basic patch pocket. Machine baste 1/2 inch around the two long sides and one short side (the bottom). This is a folding guide. You can skip basting the guide and just fold 1/2 inch under on three sides but I find the stitched guide so easy to do and helpful when at the ironing board. Either way you do it you want to end up with the sides and bottom of both pockets folded under 1/2 inch and pressed.
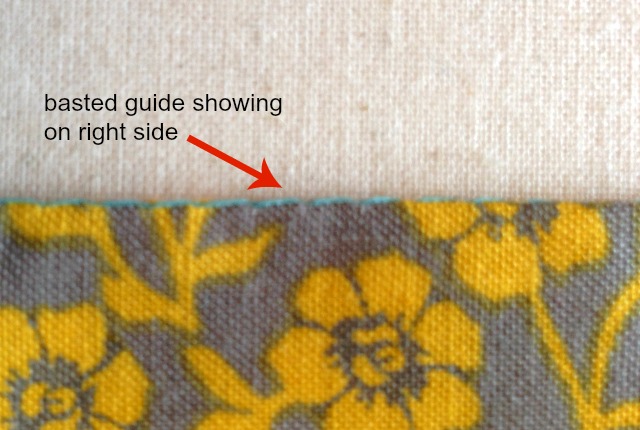
I used a light blue thread as my guide to show up in the pictures. I recommend and usually use a thread that blends into the fabric better because sometimes you see the guide on the right side and you most certainly will see it if it’s in a contrasting color. If the above happens to you, just remove the thread.
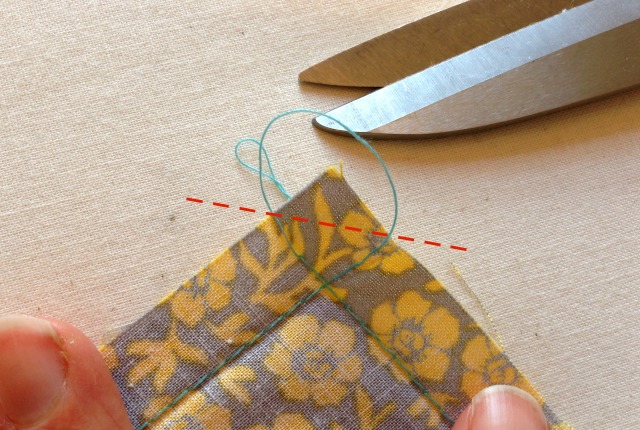
Open the folds and trim the tips off the bottom corners to reduce bulk when you sew the pockets down. Snip at a 45degree angle to the sides from crease to crease.
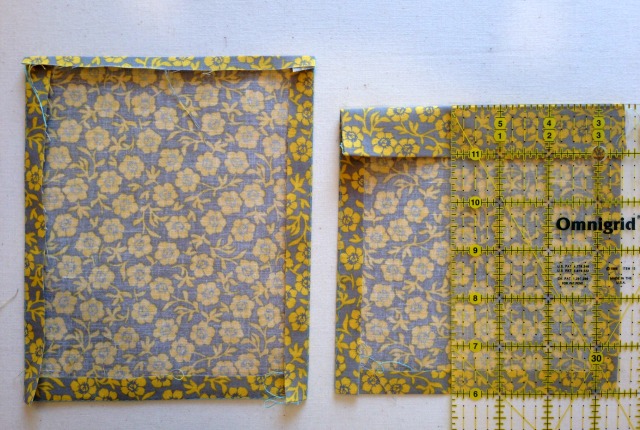
Fold the top’s raw edge over 1/4 inch and press. Fold over the top again 3/4 to 1 inch and press.
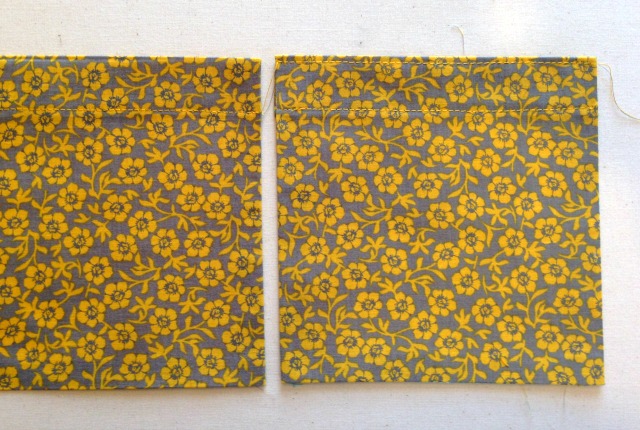
Sew the flap down to the inside (currently the wrong side) of the pocket (shown on the pocket on the left, above). Press. Edge stitch across the top of the pocket and press (pocket on the right, above). Put the pockets aside.
The Straps
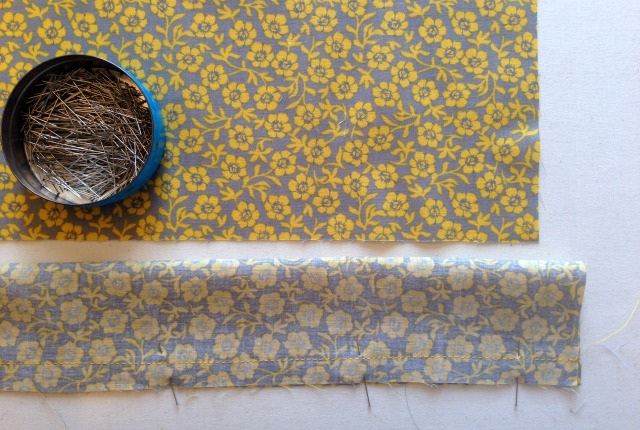
Fold both strap pieces length wise. Pin and sew the long edge 1/2″ in from edge.

Centering the seam by eye, press the seam open.
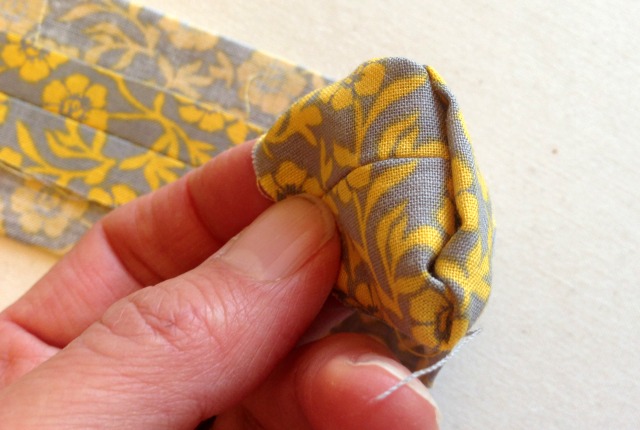
Turn the strap (which is now a tube of fabric) right side out by feeding it into itself. Being wide enough and short enough and the fabric not too stiff, you will discover that turning the tube is not so hard. If you are using a stiff upholstery like fabric follow this tip.
Press the tubes flat.

Edge stitch around the strap. Use a close zig zag stitch to cover the raw, short ends of the straps. (not like short edge in photo above. I had a case of, “A better way came to me while writing up this post”)
Press the straps and put aside.
The Apron Body
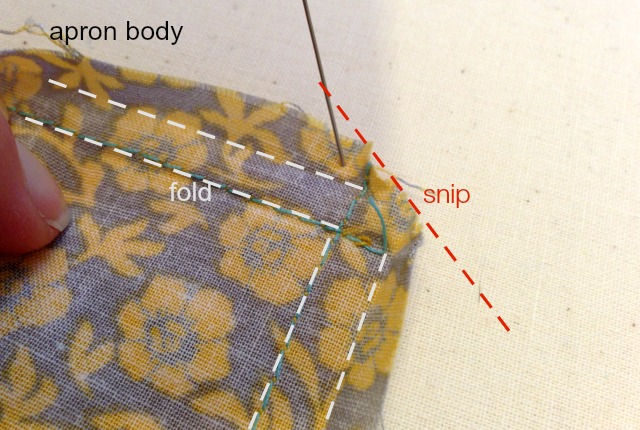
As with the pockets above, you will be folding all sides of the apron piece over 1/4″ twice for a total of 1/2″. You will need to trim the tip off of the corners.
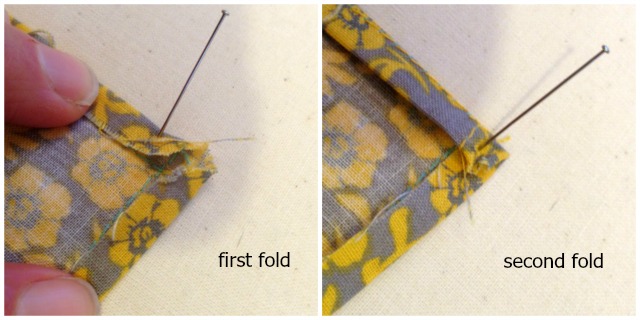
The first fold, as labeled in the picture, is 1/4″ and the second fold is another 1/4″. I realize I do this step backward from the picture. I baste the guide line for the total fold amount (in this case 1/2″) . I then fold and press on the guide line, open up the fold and tuck the raw edge up to the crease, refold on the crease, pin down and press again.
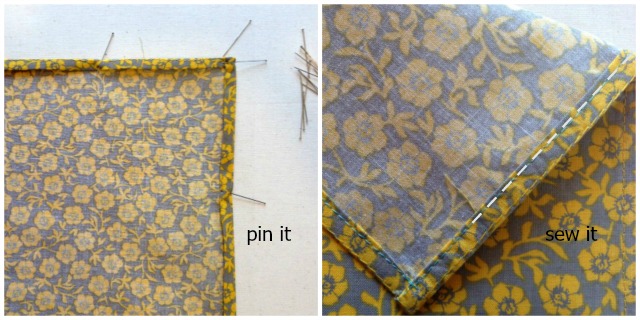
Sew around all edges at 3/8″ in from folded edge. You want to catch the hem (the folded under fabric) but be close to the inside edge of it and you want to do your stitching on the top of the apron because the stitch from the needle is always better looking then the stitch from the bobbin (ok, my machine is 24 years old so I speak from my experience. Newer machines may have fixed this).
Press all the side seams when you’re done stitching.
Putting the Apron Together
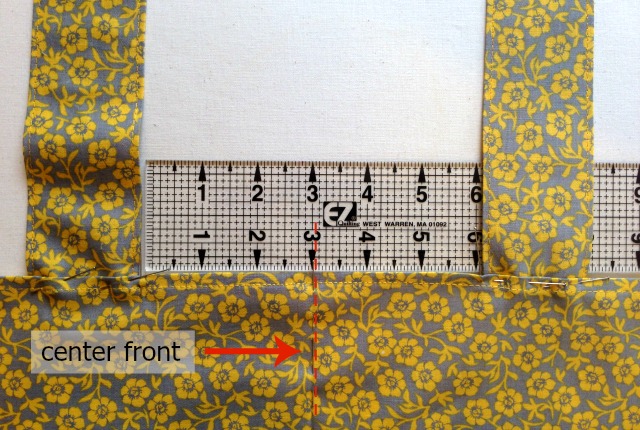
Fold the apron body in half side to side, not top to bottom and press to make a crease. This crease is your center front. Measure out 3″ from center front in each direction to place the straps. Have the short end of the strap under the apron. The overlap will be a 1/2″. Pin the straps in place.
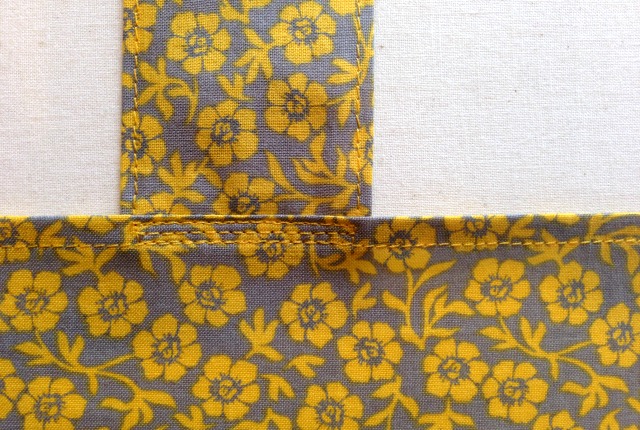
Sew a few times across the apron where the strap lies underneath to securely attach the strap to the apron. Repeat with second strap.
I overlapped my strap and apron very little. I would have liked to overlap the straps and apron more for a sturdier looking attachment but I cut my straps too short. I have given you a longer measurement than I cut for mine.
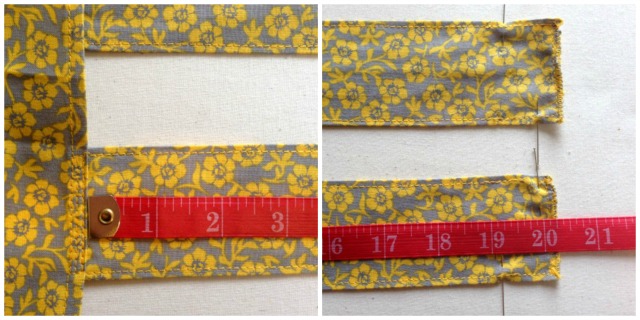
A little tricky measuring and marking here because the straps need to attach on a slant to the back of the apron. The outside edge (the edge further away from center front) of each strap will be shorter than the inside edge (the edge closest to center front). In this version the difference is 3/4″ in version 2 (See: “Easy to Make Linen Apron“) the difference is 5/8″. Either will work as it’s just an eighth of an inch different.
Start measuring from where the strap emerges from the top of the apron (see picture). Mark on the outside edge of each strap at 19 1/4″. On the inside edges mark at 20”.
Because the quilting cotton does not drape as beautifully as linen I made the straps on the short side for this apron. Too long and the apron swings forward on the body making what resemble pup tents hanging from each breast. (not the look I’m going for). This may not happen on a flat chested person. The linen apron has longer straps with no tent problems.
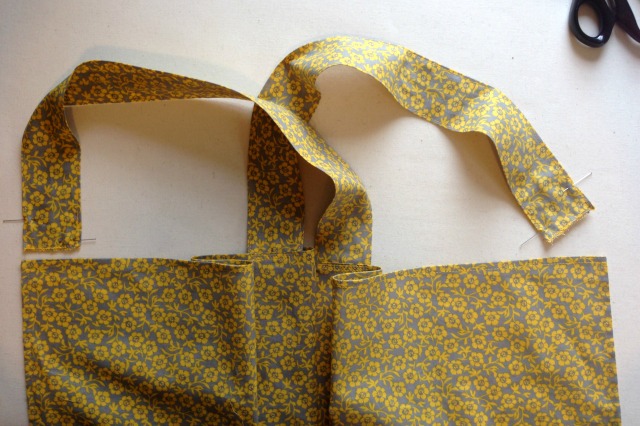
Lay the apron down flat in front of you, right side up. The strap on your left will attach to the apron’s right corner and the strap on your right will attach to the apron’s left corner. It does not matter which strap goes in front but it does matter that you do not twist the straps.
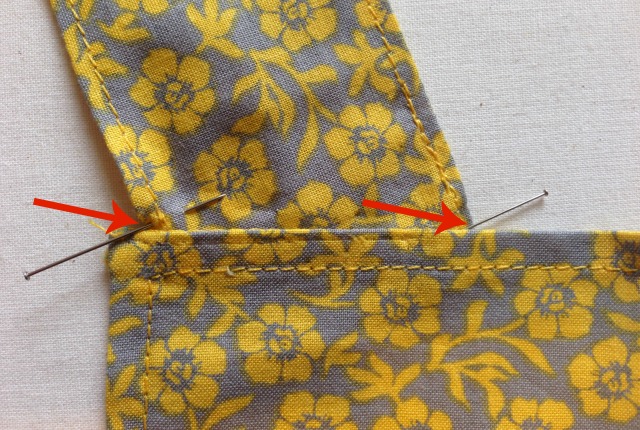
Line up the marks to the top edge of the apron body.
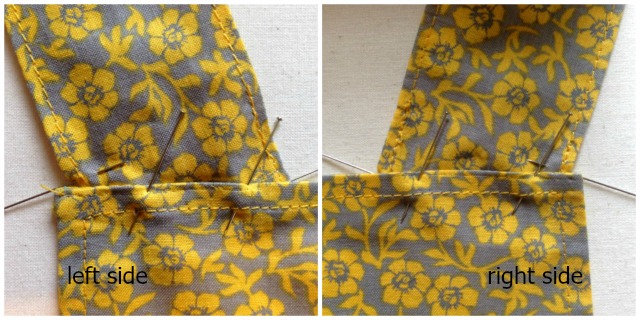
Pin and sew to attach the straps to the apron.
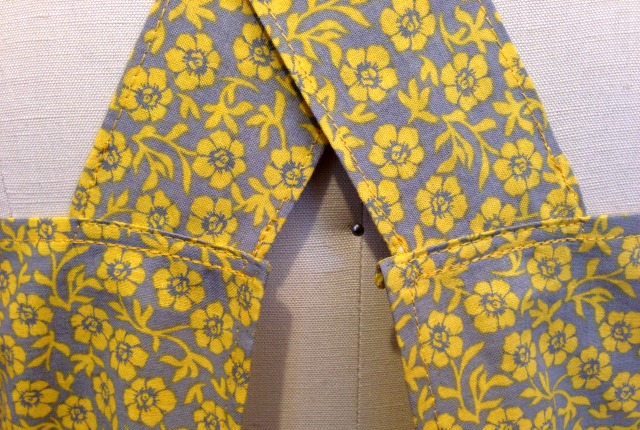
Use a few rows of stitching to attach securely. Press the stitching when done.
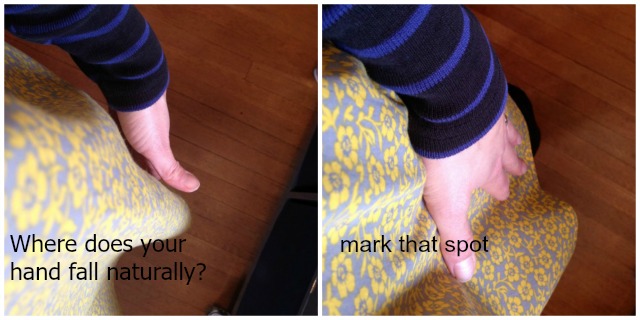
For pocket placement slip the apron on over your head. (Straps cross in the back). Place your non-dominant hand by your side naturally to see where your pocket should go. Lay that hand flat, place a pocket over it and hold with dominant hand then bring up non dominant hand and slap that pocket down. Pin in one or two places to hold the pocket in place and take apron off.
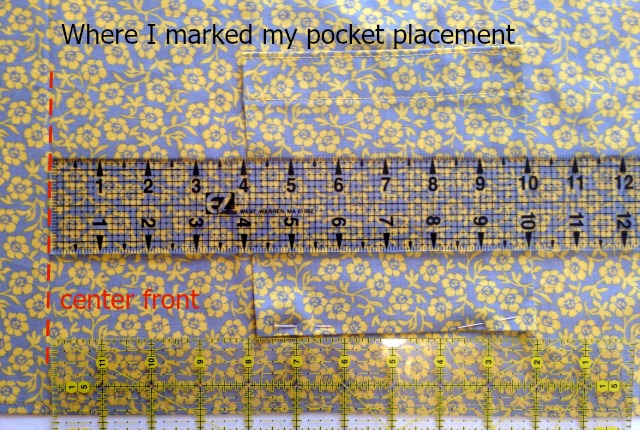
This method will give you a crooked placement but it puts your pocket in the best place for you. Naturally, you’re going to straighten it.
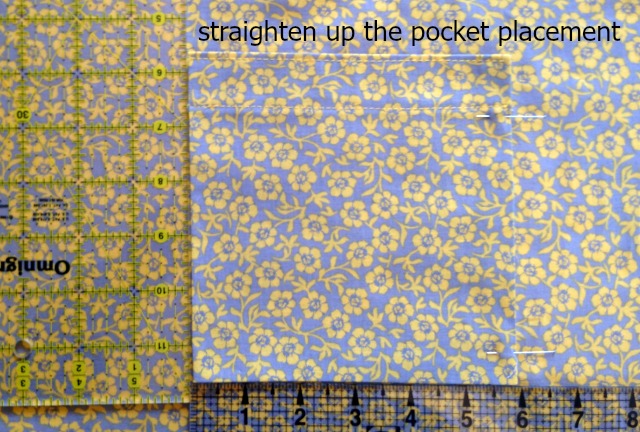
Using the hem of the apron and the crease in center front as references straighten the pocket. Note how far from the hem and center front your pocket is. Use these same measurements to place the pocket on the other side. For example my left pocket was placed 4″ out from center front and 2″ up from the hem so I’ll place the right pocket 4″ to the right of center front and 2″ up from the hem.
Pin the pockets down to the apron.
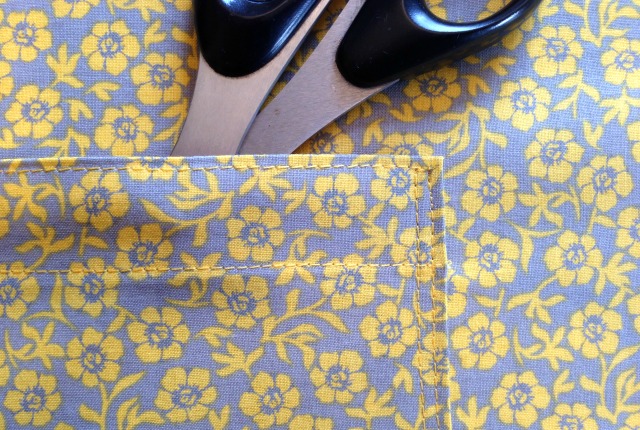
Sew the pockets to the apron on the sides and bottom at a 1/4″ in. Repeat using an edge stitch. Two rows of stitching make for a more secure pocket. Press the pockets.
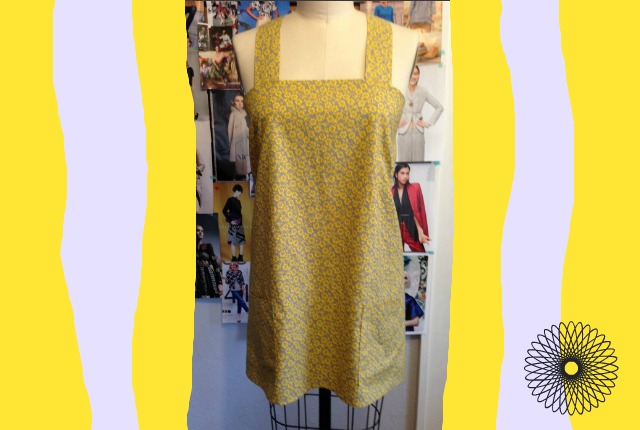
You did it! It wasn’t so hard either. You can make a few up for gifts and if you have larger scraps left over than me, you could make a matching potholder to go with it.
Do you want an apron more like the one in the inspirational picture? Then check out “Easy to Make Linen Apron” WAIT! Check out the latest update where the apron gets even closer to the inspiration photo: Japanese Style Smock Apron To Sew


Oh my goodness! I also have been wanting this apron forever!!!!!!!!! Can’t wait to see the longer version ~ that’s the one I’m going to make for me! Hooray!!
Thank you!
~ Doreen
Hi Mary, on a closer look on ‘zoom’, it does appear that the apron body is wider than your example and the straps are sewn in, rather than cut as one piece with the body. By the time it wraps around the slender model, the back edge of the body seems to fall more on the bias (look at the front weave through the legs as a comparison). It also seems like the straps are placed very close to the shoulders’ beginning, too. Do you think there is a side seam? That would suggest the front is cut on the straight of grain while the two back pieces might be cut at a slight angle. Any other ideas? I might try it sometime later in the month.
Kathy
I didn’t actually see the apron. But I think your right, cutting the straps on the bias would be a waste of fabric and this apron was for sale. No manufacture would want to waste that much fabric. They are always looking for ways to reduce cost. I don’t believe there are side seams but I’m going to start hunting for more examples of this type of apron. Maybe it isn’t a true rectangle. If I come up with anything I’ll be sure to let you know.
Kathy,
Check out this photo of the same apron I used as my inspiration. It has a pattern drafted on it! (It’s also now pinned to The Daily Sew Pinterest board “patterns” http://moldesedicasmoda.blogspot.pt/search/label/AVENTAL%20PARA%20ATEL%C3%8DER
Yay!! Also an Etsy store sells the aprons ready made – just google “Japanese style smock apron”
Great, Mary, now to calculate cm to inches! Thanks so much for following up. I see this as my next Christmas gift project. I am also ‘inspired’.
Kathy Jones
I googled “cm to inches” and there’s a conversion tool.
I’m thinking their measurements are for the finished strap and finished body. My apron is about 12″ narrower (side to side) then theirs but almost the same in height – about 1 1/2″ shorter. My straps are actually longer by almost 5″.
I just washed some more linen and I’m going to make the apron again using these new sizes. I’ll update the post when I’m done. – Fingers are crossed.
Can’t wait to see it and hear how it worked out.
Kathy
This is the most comrtable apron i have (and i have 4), and definately the prettiest. I keep thinking I will wear it to work (over leggings and a T) and say its a “smock top”. Love the deep pockets! Thank you Mary.
Aprons are great for holding keys and cell phones and treasures that preschoolers trust you to guard while they go on the monkey bars. Glad you like yours.
Wonderful! I pinned this exact apron into my sewing folder, but I had yet to find a pattern as well. Thanks for sharing!
Thanks. I really tried to figure this out and you’ll see I tried three times all with slightly different results. You’ll find this project easy. Have fun with it.
Thank you! Trying to find the pattern was frustrating.
I had a similar feeling trying to find the pattern. You may be interested in the two other post about this apron. I changed the pattern a bit to make it longer in this one http://www.thedailysew.com/2014/12/easy-to-make-linen-apron/ and in this post I changed it again to be more like the inspirational photo http://www.thedailysew.com/2015/02/japanese-style-smock-apron-to-sew/
Mom always told me to share
Thank you for your post. I’ve been looking for patterns for a few days and yours is just what I needed. Thank you. I am going to attempt this today.
I hope it went well. You can see I did this apron three times to get it how I originally envisioned it. Since I now have three aprons one stays in the sewing room. I wear it over sweaters to protect them from getting snagged by my pins. It also keeps me from being covered in threads when I leave the sewing.
I love this apron. I saved a similar pattern –
https://www.purlsoho.com/create/2015/11/20/cross-back-apron/
Happy you like it. I find this style apron more comfortable than the style with a strap across the neck.
I made this over the weekend using the video tutorial; I widened the straps and used my new overlocker (new toy!!) to neaten up the side and pocket hems but otherwise followed the tutorial; and as someone with a large bust I wondered if it would work. It’s perfect. Thank you so much. Already planning a second one.
Yay! I love a success story 😉 An overlocker is very handy on this project if you have one. You could even just overlock the edges of the pockets and the apron and be done with them, not folding them over and sewing down. Depends on the look you’re going after.
Love this tutorial and your style of teaching!
Thank you, very much! I really like this apron and it’s a project I use to teach beginners how to sew so, I will confess, I have some experience teaching this 😉
Thank you for the 3 video tutorial! I made this apron in the last 2 days, with the body made of black thick cotton like canvas, and the pockets and straps made of a brighter patterned thick cotton (`Pomegranates by Emma Bridgwater) and it worked well, I’m really pleased with it, the instructions and videos were excellent. One suggestion I have for turning the awkward strap ‘tubes’ inside out, when using thick fabric, is to fasten a fabric clip on the open end, and then once it’s pushed inside the tube, get a long pair of scissors, push them in until they are up against the clip and then pull the inside-out fabric towards you, over the closed blade of the scissors – the scissors hold the clip where it is, and it is quick and easy, rather than having to slowly work the clip through 🙂
Thanks for the tip! It’s really helpful to hear what other people have figured out. I have a top I’m planning to make soon that has straps that I need to turn inside out – I’m going to try this.