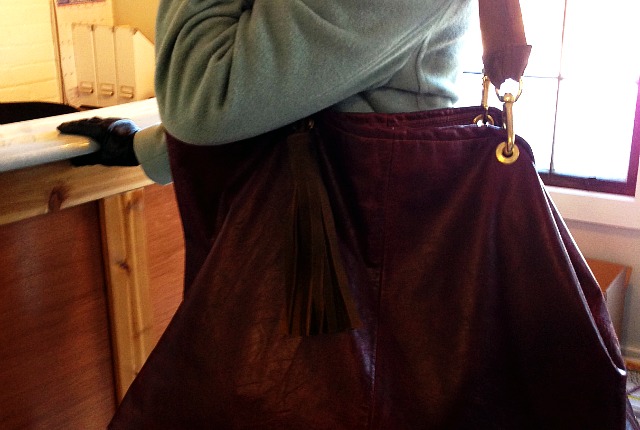
My friend, Sheila, always looks great and when complimented her on her clothing she’ll tell you which thrift or consignment store it came from. She has the best of luck at such places but she says it’s not luck; it’s just being there too often. Apparently this must be true because her sisters threw her a birthday party last year and the theme was “Thrift Store” and included a choreographed dance to Macklemore‘s hit about poppin’ tags.
Recently Sheila came into the office (we work together) and had a new purse she wanted me to see. It was a stylish, simple, over-sized, leather bag. Yeah, that’s nice. Where did you get it? (I don’t know why I ask.) This time it was a different answer than I had ever heard; she made it. Whaa’ ?
Don’t get me wrong. I think Sheila is super creative and I know she has a great eye for proportion and line of clothes but she’s not a sewer. She explained, “It’s an old skirt!” Whaa’ ?
While cleaning out her closet she came across a leather skirt that she had only worn once in her many years of ownership. You know the voice we all hear in this situation,” Don’t get rid of this it’s valuable and it’s in great shape and surely you could use it.” Sheila heard that voice too and the idea hit her. To please both her logical side (get rid of things you don’t wear) and her pleasure side (it’s beautiful and special; you got to have it) she would make that skirt into a purse. Whaa’ ?
Here’s how I think she did it and how you can also give your never worn leather skirt a new purpose:
Cutting out the bag: Lay the skirt out flat. Eyeball how tall you desire your new purse to be (the width of the skirt will determine what height looks right) and make a mark on the skirt one inch above your desired finished height. So if I want a 16 inch tall bag I will measure 17 inches up from the hem of the skirt and make a small mark. Ballpoint pen works okay for marking leather but remember it won’t come off so mark in what will be the seam allowance.
Measure the same distance at a few places across the skirt. Connect your markings and cut on this new line. Leather can be thick and or stiff so I suggest cutting just a single layer of it at a time. Once you cut off the top layer you can use this new cut as a guide for cutting off the bottom layer. Be sure to cut the skirt’s lining as well. It will become your bag’s lining. If needed, tape the lining to the skirt to keep the slippery lining in the right place (perhaps loops of masking tape sandwiched between the lining & skirt?).
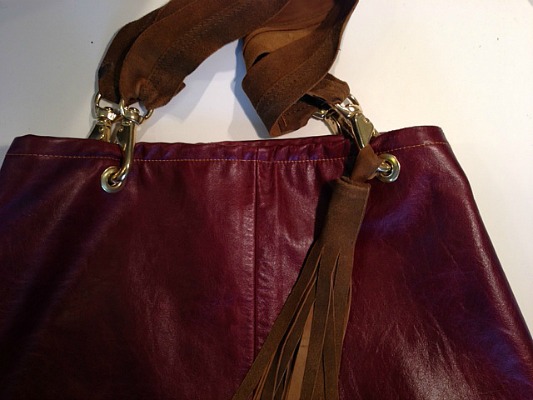
Finish the top edge: Leather doesn’t fray so you will only need to fold over the top edge once. Fold it over a half inch (your seam allowance for the top edge) all the way around. Place the top edge of the lining in between this fold. This way the leather will incase the raw edge of the lining. Sew the leather seam allowance down in place all the way around the top edge using a machine needle made for leather (very important). In one step your top edge is finished and your lining is attached to the purse.
Close up the bottom opening: Line up the bottom edges, right sides facing each other and sew shut. I told you to measure and cut for a half inch seam allowance on the bottom but work around the skirt’s original hem. If you can, catch the skirt lining too as you sew the bottom of the old skirt/new purse close. If your lining is too short to catch into the bottom seam, or for a cleaner finish, sew the lining bottom separately. After sewing the bottom seam of the leather together, turn right side out and pull the lining out. It should be hemmed already from its previous life. Line up the bottom edges wrongs sides facing each other, pin in several places perpendicular to the edge and sew together as close to the edge as possible. If not hemmed then give the edges a narrow hem first (or serge shut).
Make the straps: Sheila used suede from some suede pants she had owned but never wore for her bag’s straps. Straps could be made from the leftover skirt. To make the straps cut two pieces of strap material two inches wide, or desired width, by as long as you want them plus an extra two inches. (Usually the bigger the bag the wider or sturdier the straps should be. This isn’t about practicality, it’s about proportion.) There is no seam allowance (if using leather or suede) so cut the straps to the desired finished width. The extra inch on each end of the strap gives you enough extra to place the strap through and around the fasteners (a fastener at each end) and sew or glue the end down onto itself without losing the desired length of the finished strap.
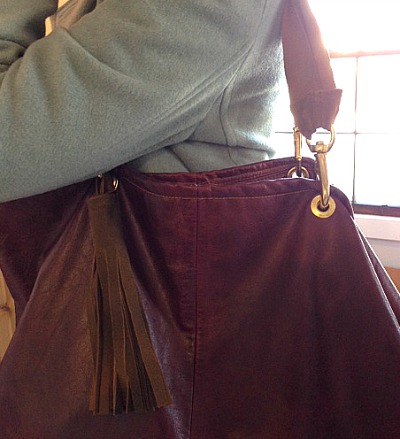
Hardware: Sheila bought the fasteners and grommets for the straps at the local hardware store (Lowes). The grommets are placed through one layer of leather and the lining attached to that layer. This means four grommets; one on front left, front right, back left and back right. Note: You need a grommet setting tool which can also be bought at the hardware store.
The Tassel: The tassel is like the lipstick for the purse. It’s not necessary but it’s fun and adds interest. Sheila made it from the same suede pants that she made the straps from. Sheila googled how to make the tassel but with suede it involves a rectangle, placed horizontally and then sliced or cut vertically up from bottom to about ¾ inch from the top. Then glued together along the top, uncut edge as it is rolled onto itself horizontally
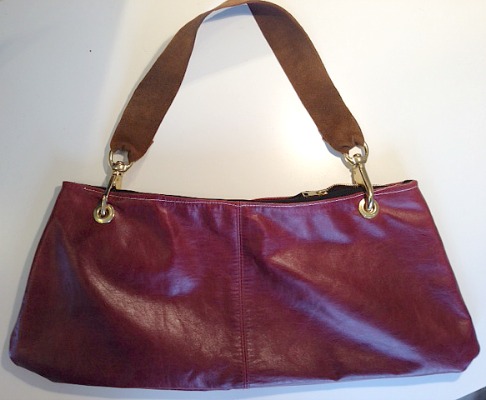
Done, except that Sheila knew she was on to something because she kept on going. The top of the skirt was also turned into a purse, just smaller, and she added a zipper closure to the top, her very first attempt at sewing in a zipper. The skirt’s back seam zipper was left intact but if you wanted to you could remove the zipper from the skirt and sew the back seam up shut.
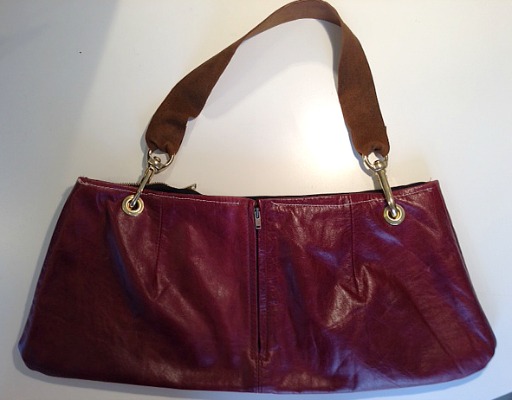
She also made a purse from the suede pants and for the straps used a similar shade, buttery leather that at one time was a blazer (which, of course, she found in a thrift store). She made a lining for this purse out of cotton.
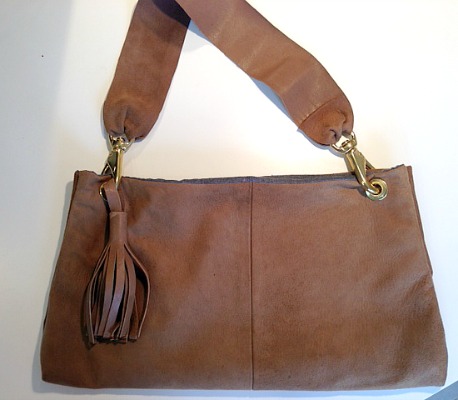
Although she says she was swearing like a sailor as she sewed the purses she had the courage and boldness to push through and make her crazy/clever idea come to be. That’s inspiring. And bonus; she now has three “new” purses and is soaking up the compliments on both the bags and her genius idea. Way to go, Sheila.

This is genius! Love what Sheila has done. AND! I LOVE this blog. xooxox
It is genius. Do you have a skirt that you’re transforming now? If you do, you gotta’ show me when you’re done.
And double thanks for the love! -Mary