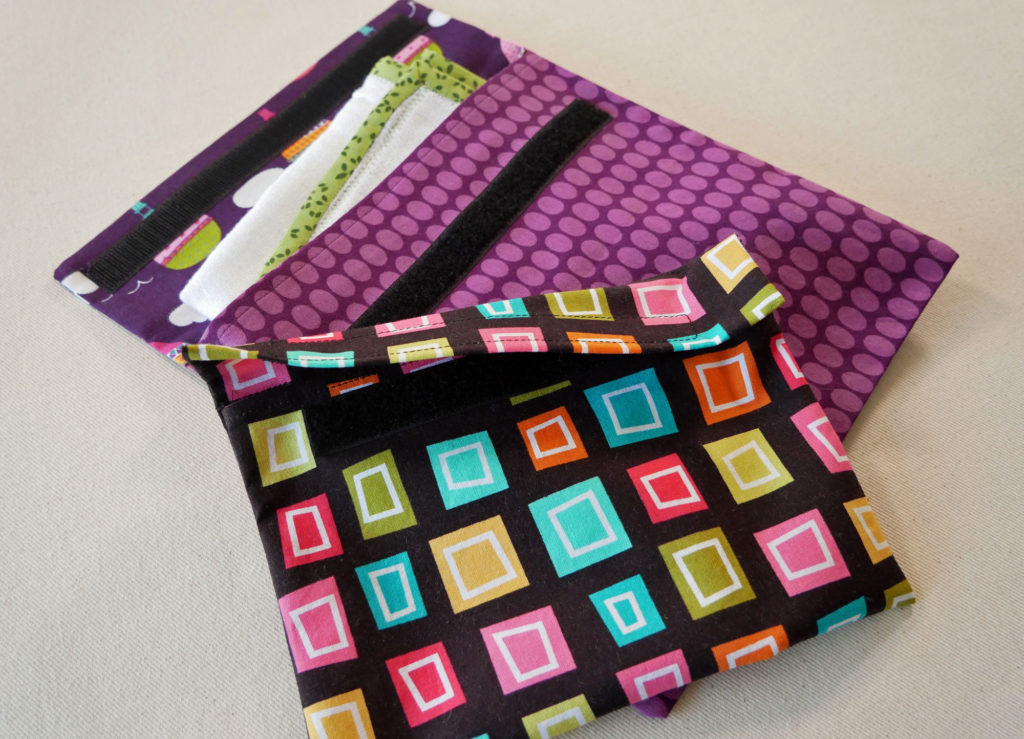
Deep within the diaper bag chaos has been banished. Instead, there is a simple cloth pouch stuffed with a change of clothes, a second one has toys at the ready, a third pouch holds snacks, and a fourth carries those miscellaneous baby things you might need but usually don’t. And on the longer days, there’s a fifth pouch for any adult extras.
These simple pouches might be ordinary, perhaps even lowly, and therefore not necessarily the gift but they are useful far beyond their first impression, and prettier than a Ziploc bag (which you know is what people use to keep things sorted) and therefore deserve to be a gift or a part of a gift.
They are so easy and quick to sew up that you’ll have ten done before you notice. So make a few to give away and a few for your own tote bag, carry on, beach bag, gym bag, backpack, and glove box.
Let’s Get Started
The Basics
- The pouch is made from one long rectangle of fabric. It’s a perfect project to use up some large scraps.
- The flap can easily be made in a second fabric by piecing two fabrics together (or as many fabrics as you want) to make one long rectangle.
- The pouch size is up to you.
- The pouch is closed with sew-on Velcro (hook and loop tape). Velcro lets one open the pouch with one hand when needed.
- Fabric and velcro are the only supplies you need. (What size you make the pouch will determine how much fabric and how much Velcro you will need.)
Cutting Out
Start by determining what size to make your pouch. Or do what I do and check what size scraps you have and let that decide what size the pouch will be.
Think of a quart-size Ziploc bag for a useful size but you could also make these pouches large enough for a file folder and small enough for a passport.
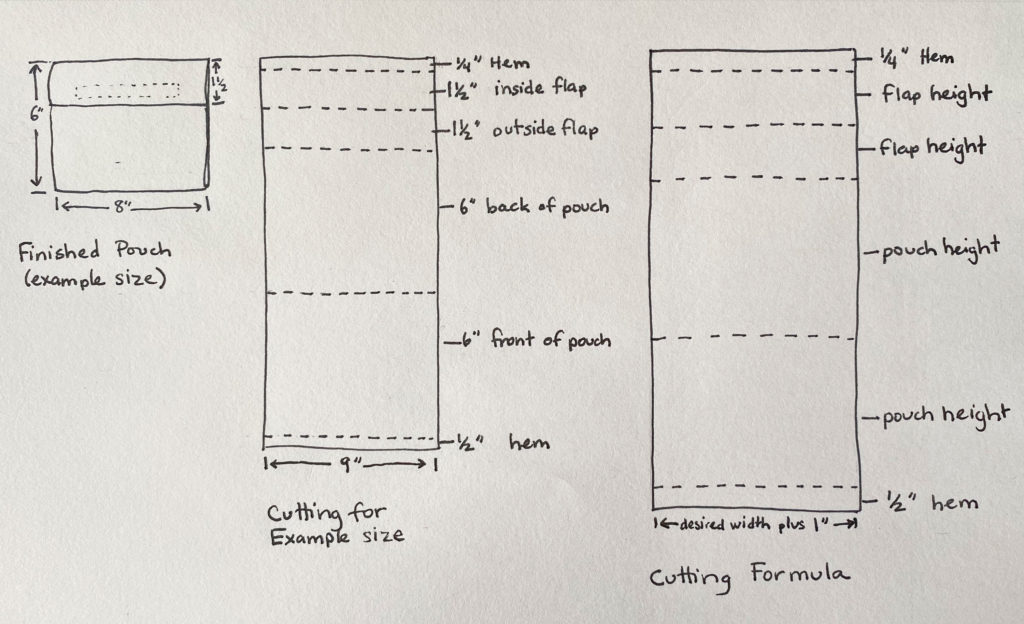
The fabric rectangle you cut for the pouch will be 1″ wider than the desired width of the finished pouch. The length will be double the desired pouch height + double the desired flap height + 3/4″ hem allowance. Please see the drawing above.
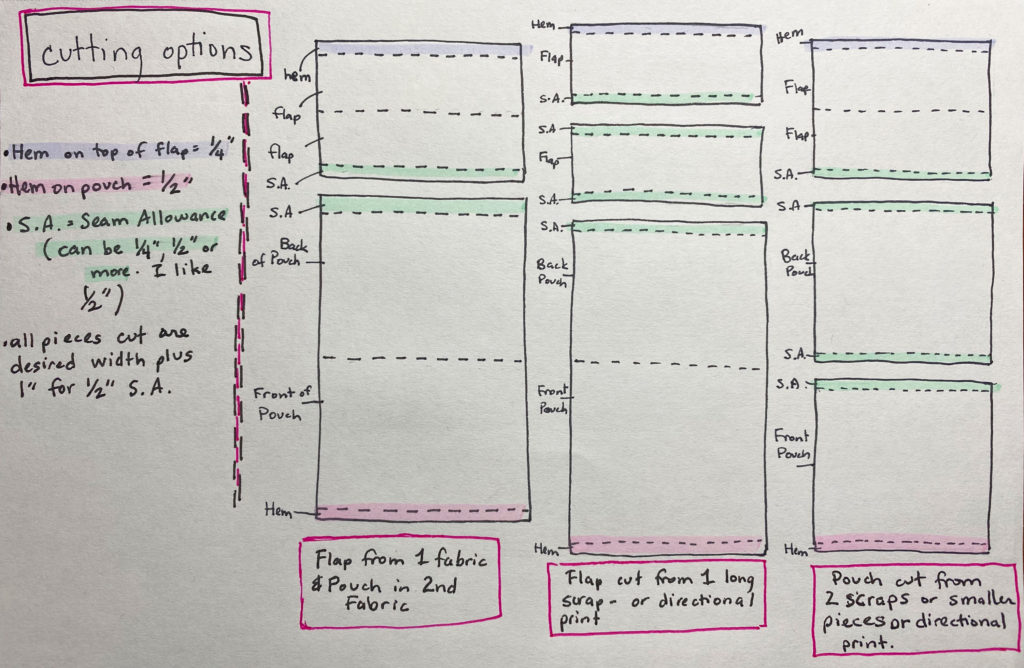
You can, of course, make the flap from a second fabric either for fun or because you’re using what you have and your fabric isn’t big enough to cut it all from one piece. The above drawing shows different ways to cut the fabric for the pouch.
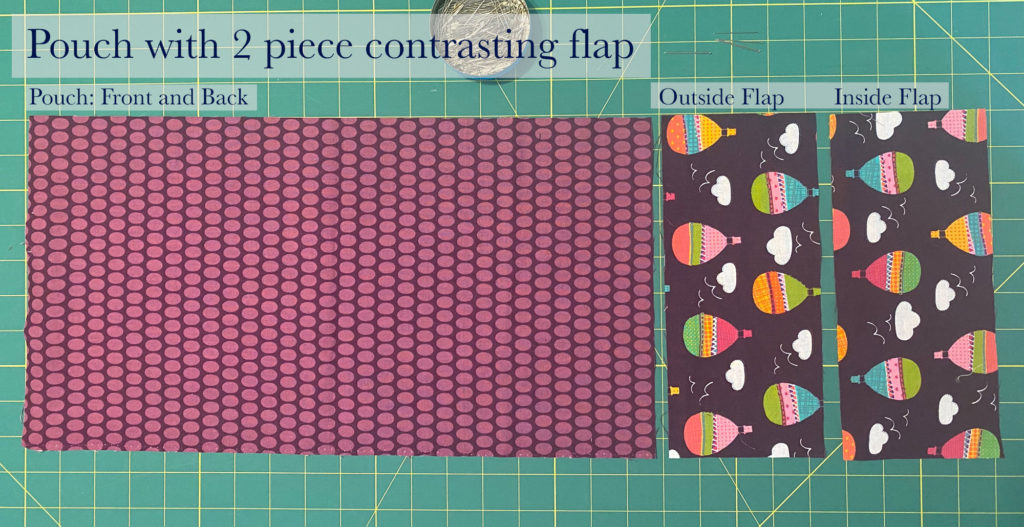
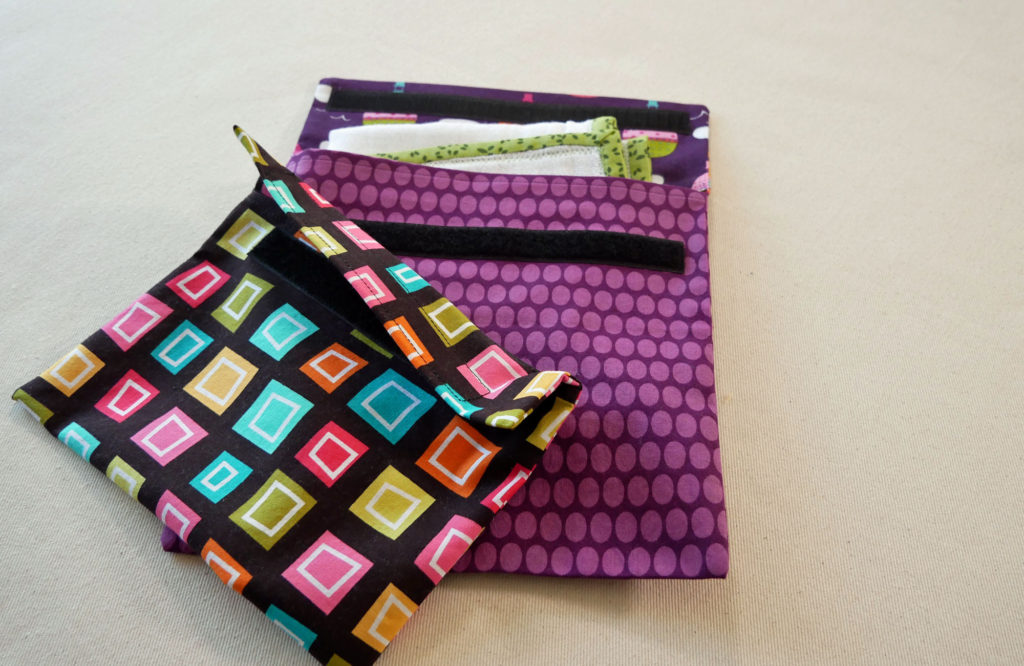
Here is a pouch made with two fabrics. The flap was made from two pieces because the balloon fabric I had wasn’t tall enough to cut the flap as one piece. However, it was long enough to get two flap pieces side by side.
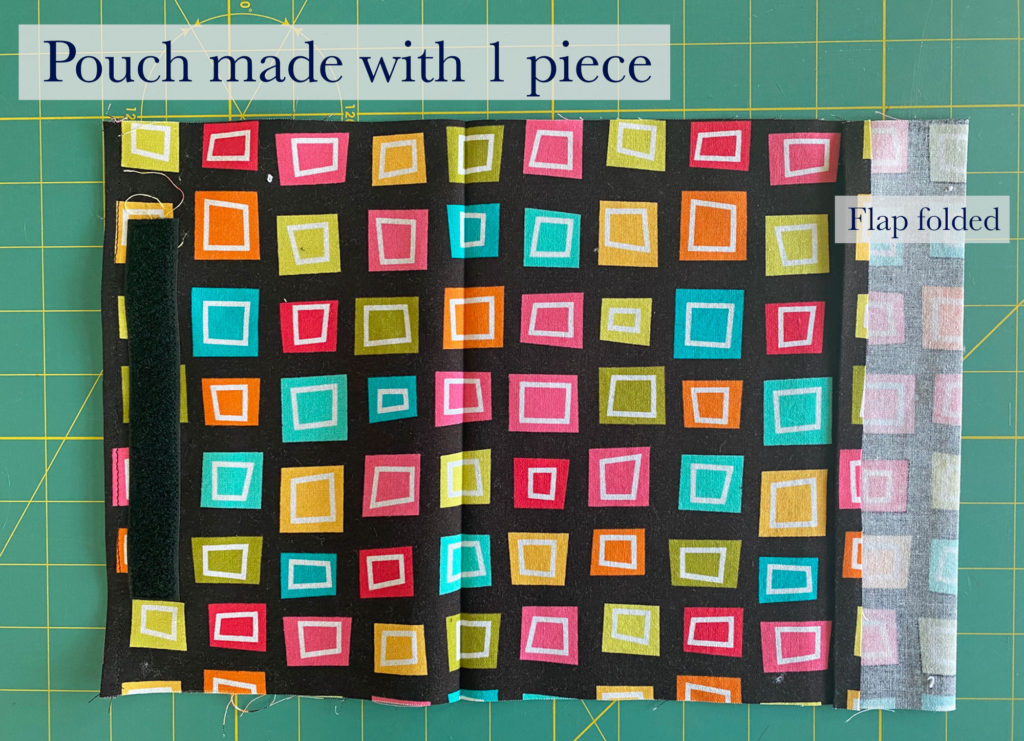
The second pouch was made from one piece of fabric.
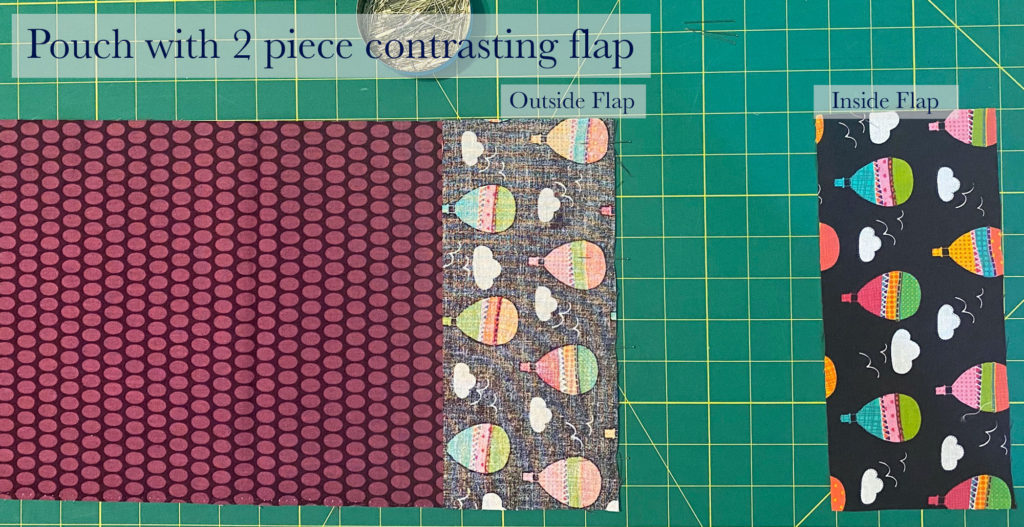
If you have a flap cut from a different fabric the first step will be to attach the pieces together to make one long rectangle (as in the first drawing above).
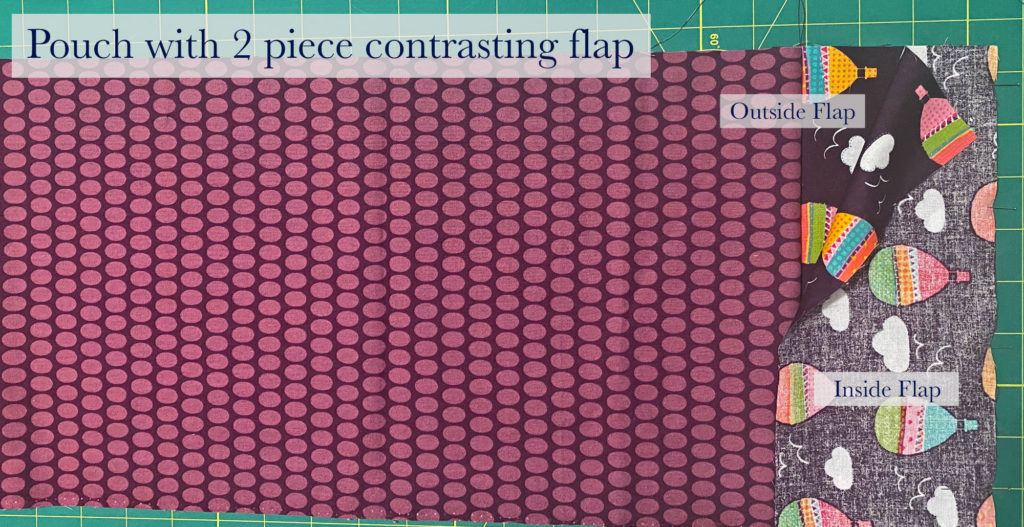
Sew the fabrics right sides together, lining up the raw edges. Until all the pieces are attached.
Sew the Pouch
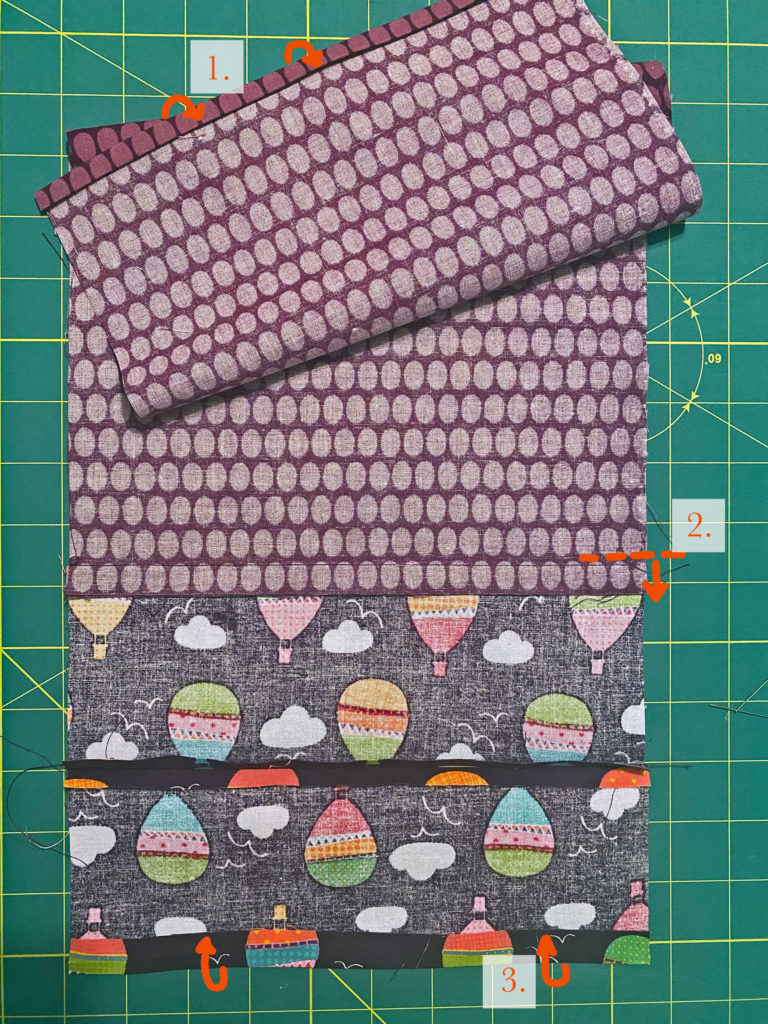
When you have one long rectangle:
- Fold the raw short edge of the pouch 1/4″ (half of your hem allowance) on to the back of the fabric. Now fold this fold over again onto itself so you can no longer see the raw edge. Press this fold with a hot iron.
- If you have an attached flap piece, press the seam allowance toward the flap end of the fabric.
- Fold the raw short edge of the flap 1/4″ toward the back of the fabric. Press this too. You will only fold this edge once.
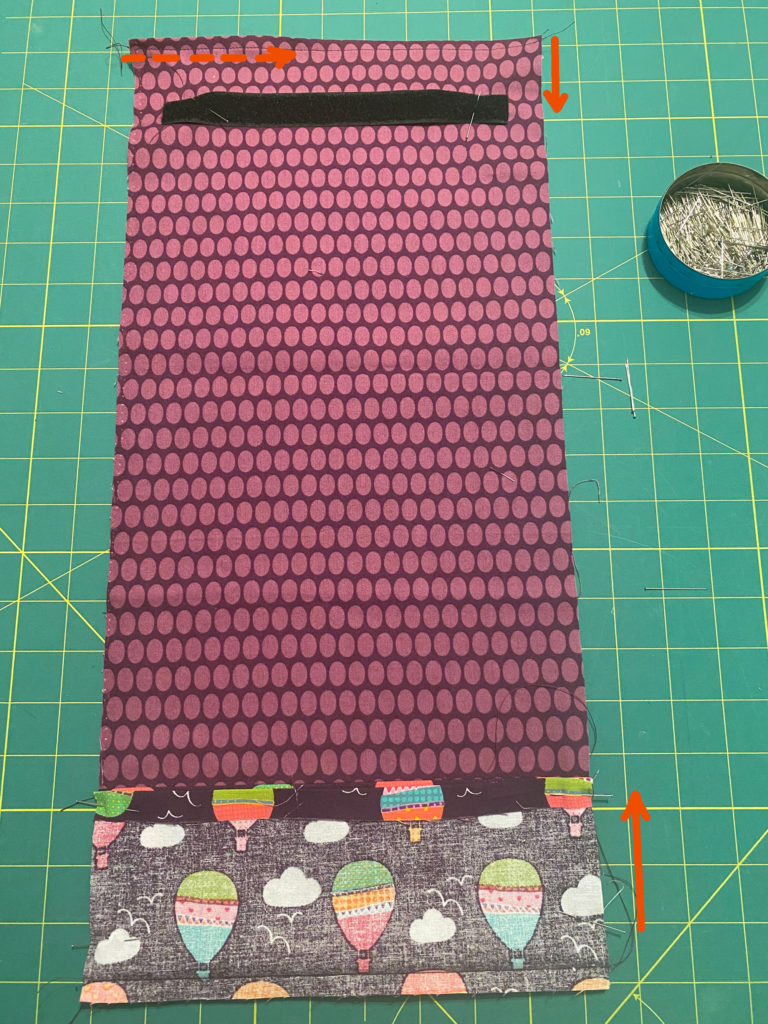
Sew across the folded, short end of the pouch, capturing all three layers.
Fold the flap end of your fabric the amount you want the flap to be. The right sides of the fabric will be together. If you have a 2″ deep flap you will fold down 2″. Press this fold with an iron.
Measure down from the pouch’s short end to see where to place the velcro at the opposite end of the rectangle (the pouch end).
You want to place the velcro somewhere inside the area the flap conceals. Close to the depth of the flap but shorter. For example; the flap is 2″ deep. Place the velcro so the lower edge of it is between 1″ to 1 1/2″ away from the top edge of the pouch. This allows you to secure the pouch even if something bulky is inside it.
NOTE: You don’t want a strip of velcro all the way across the pouch if you are using heavy-duty velcro. It’s too much and takes two hands and arms to open the pouch. If you only have heavy-duty velcro use a piece half the width of the pouch or two smaller pieces spaced apart.
Sew the velcro down all around the edge of it. I sewed the loop side down to the pouch and later, the hook side to the flap. I’m not sure it matters.
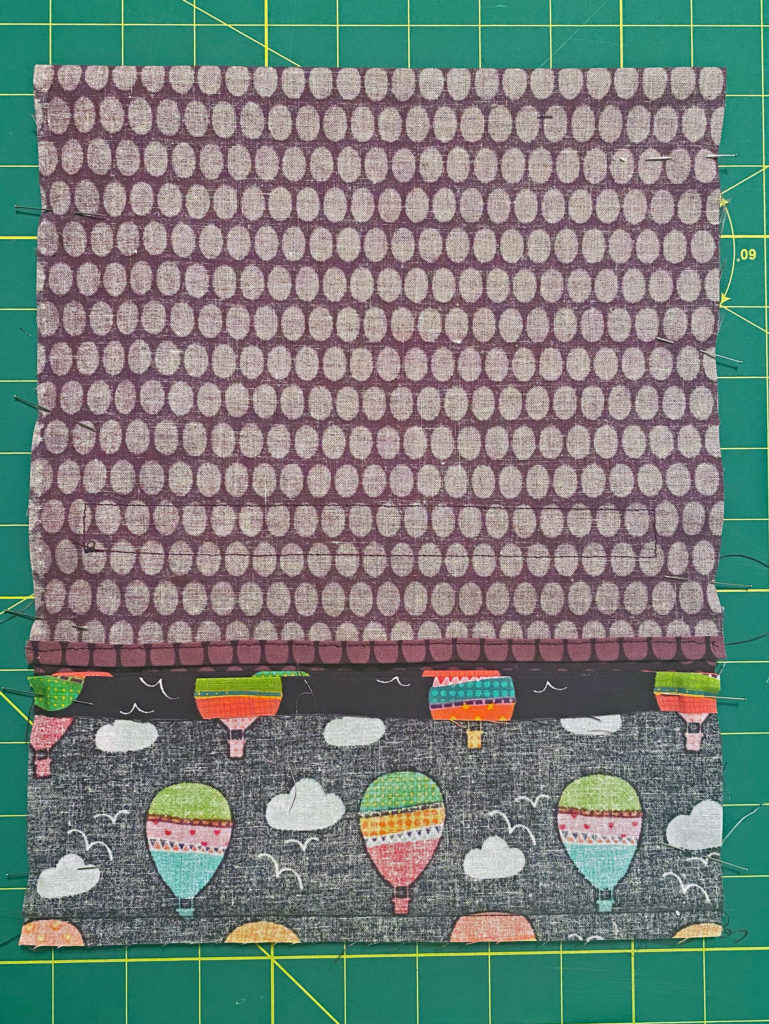
Fold the pouch end up, right sides of the fabric together until it almost touches the edge of the flap. Line up the raw edges on the sides.
Pin the sides all the way down, pouch and flap.
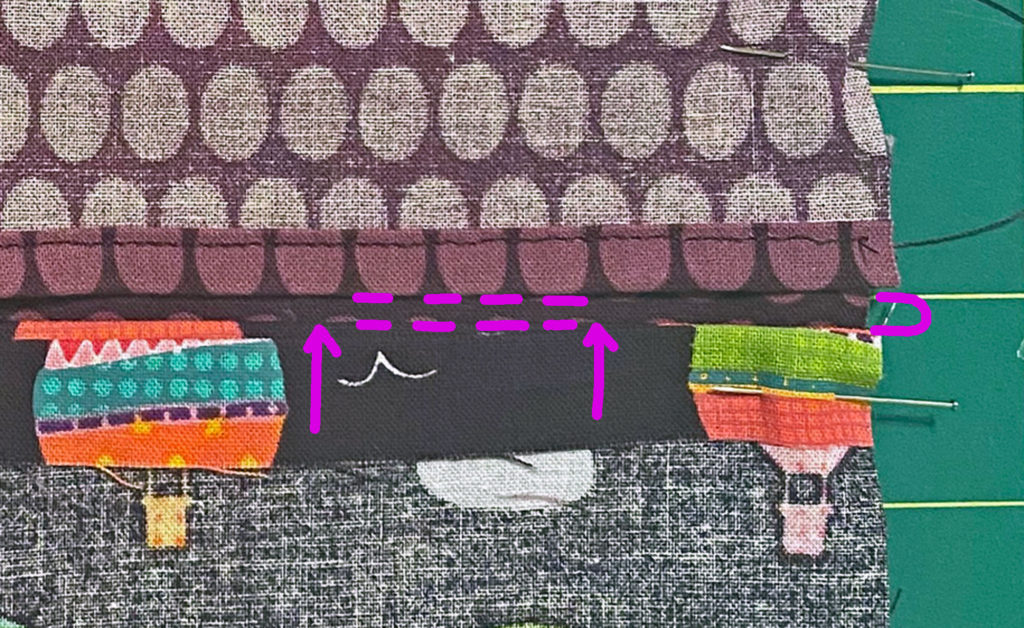
Leave a little gap between the pouch edge and the flap edge.
Sew down the edges using a 1/2″ seam allowance. This is one straight seam and flows from pouch to flap or flap to pouch without stopping. (see next photo)
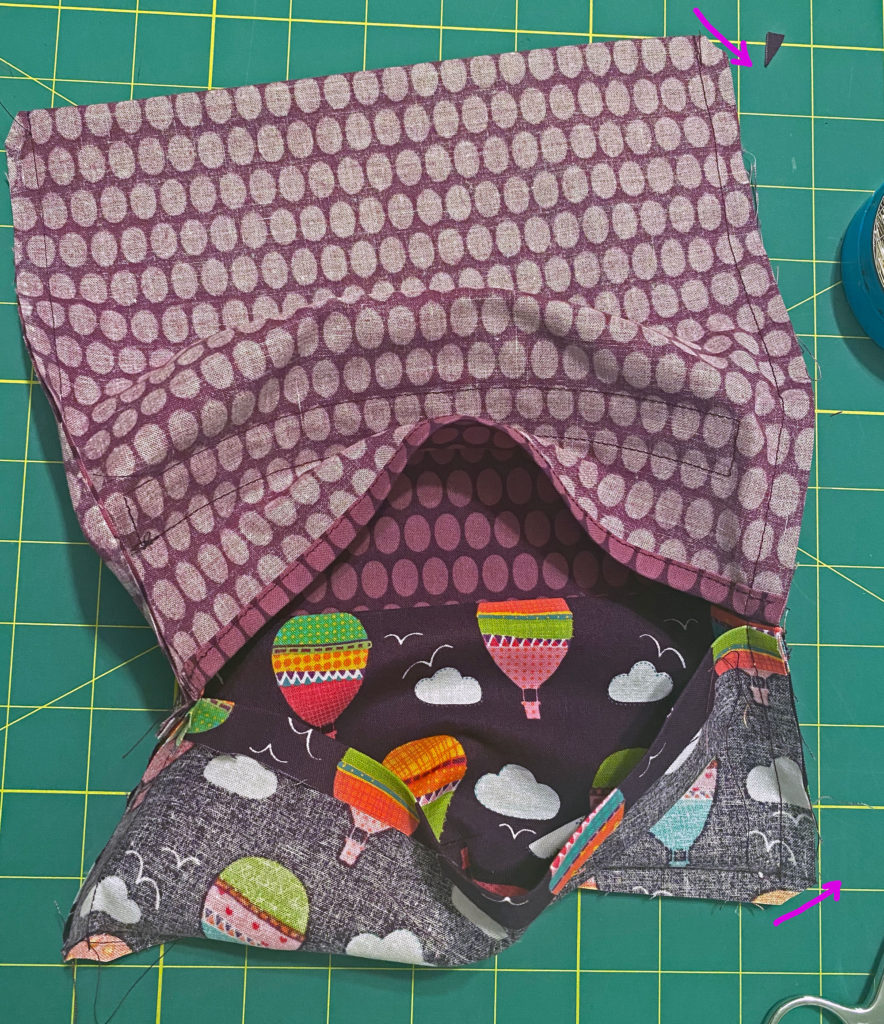
Clip the corners and turn right side out.
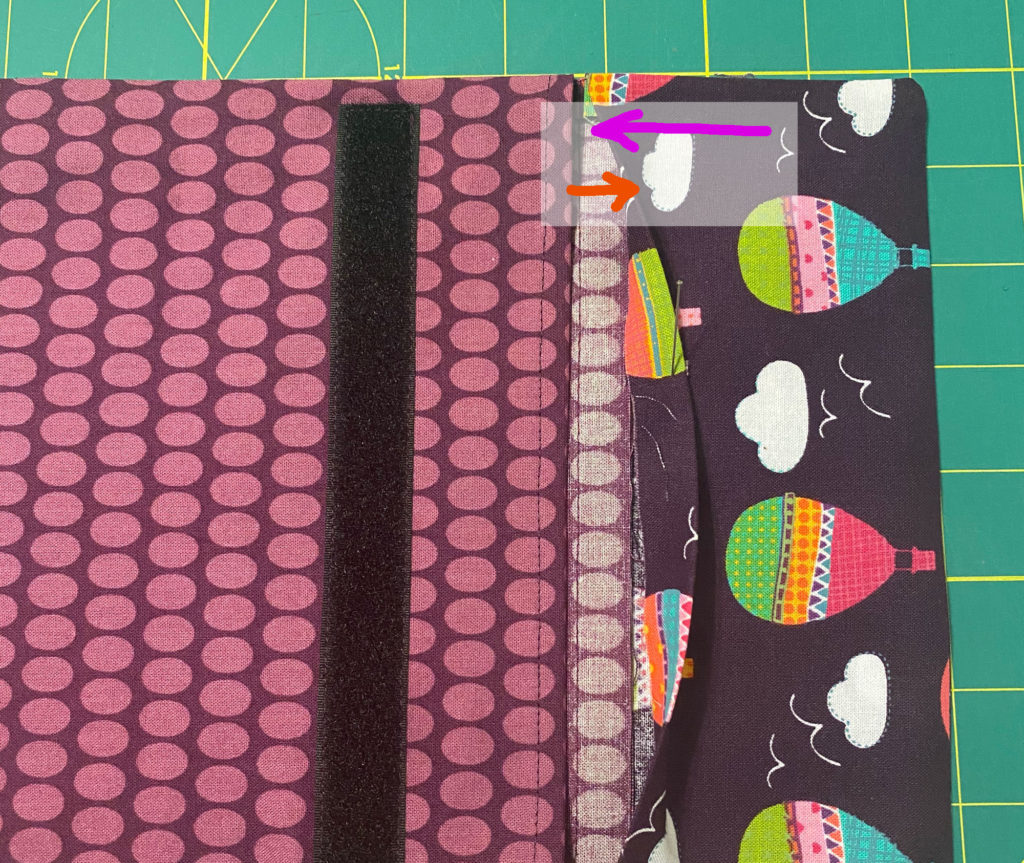
If you have any seam allowance here make sure it is going under the flap and that the edge of the flap is going over the seam allowance
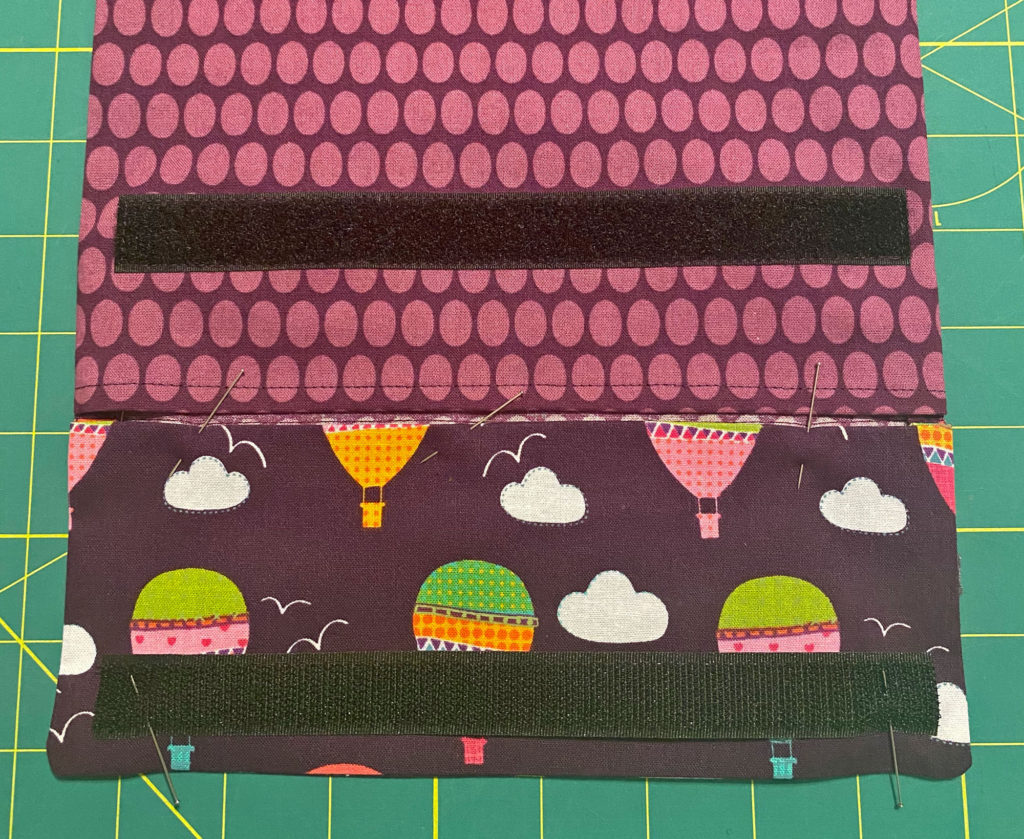
Pin the open edge of the flap closed.
Fold the flap down on the pouch to see where to place the other half of the velcro. Remember, you want the flap to be a little loose when nothing is inside the pouch to allow for when things are inside the pouch. If it helps to find the right spot put something inside the pouch while you figure out the placement.
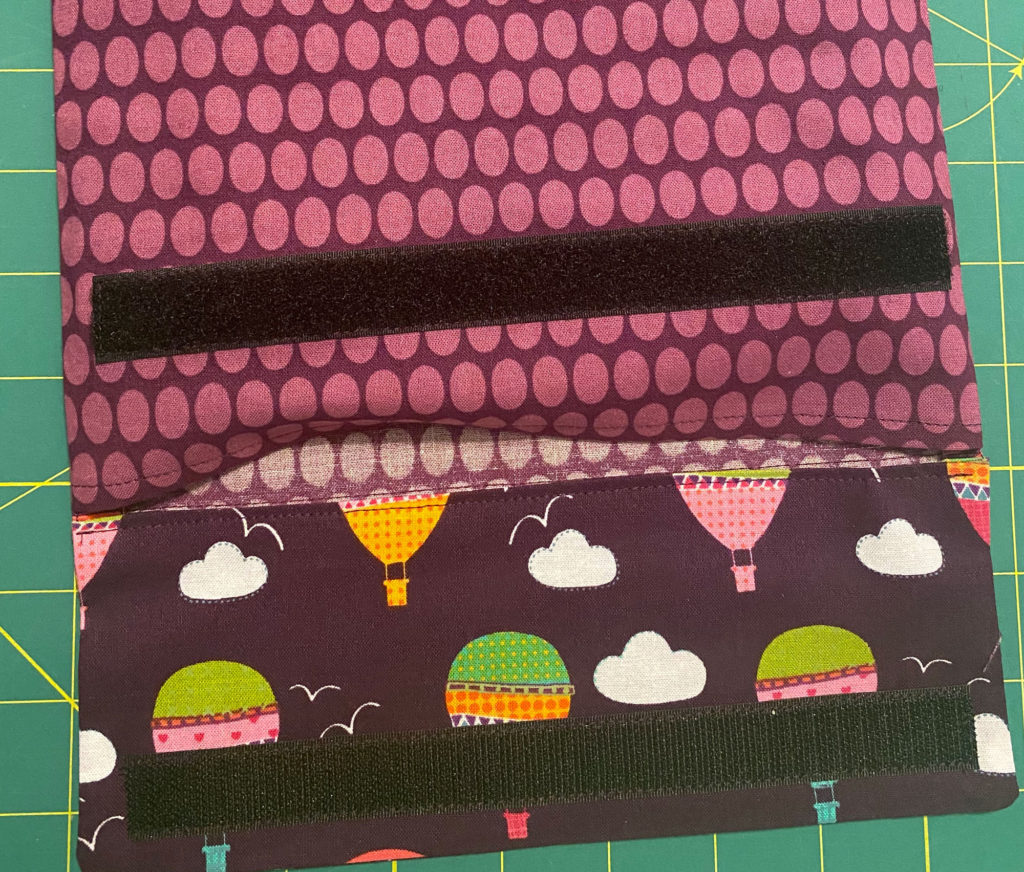
Sew the flap closed and velcro in place.
That’s it. You’re done and you barely even got started. This is quite a fast project and has so many possibilities. Make it in waxed fabric for snacks, make it padded for tablets, add pockets to the outside, laminated it for toiletries, make them for reusable gift wrap (especially if you give a lot of books), and on and on.
Thank you for reading. I hope you enjoyed making this project.
