I have a girlfriend who ordered some pants that were just too long. She asked me if I knew a good alterations place. “Uh, no, but I know me.”
Here’s how I go about hemming ready to wear pants, no double stick tape necessary.
Have the pants owner put them on. Fold up the extra length and pin it up in place. Have the owner approve of the new length before taking them off. Then exit the owner of the pants as the rest of this project happens behind the curtain.
I always take note of the style of the pants; dressy, casual? Is the current hem top stitched? Is the thread dyed to match or contrasting? How many rows of stitching around the hem and how far apart are the rows? How deep is the current hem? Write it all down, or at least the current depth, and the distance between the bottom of the leg and the row of stitching if top stitched and how far to the second or third row if applicable?
Now, you are the designer, always, and if you want to change the look of the pants you can. In my situation my friend bought the pants because she liked the way they looked, as most of us do, they were just too long, so I want to mimic the exact hem the pants came with.
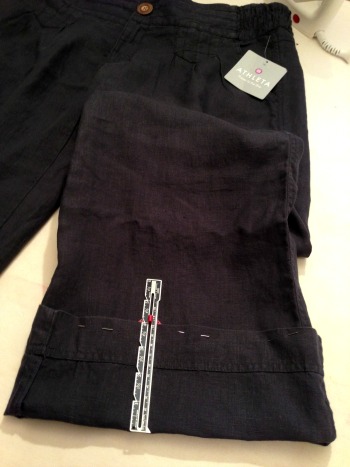
Back to the pants. When folding the pant leg up on anybody the depth of the fold isn’t necessarily even and equal all the way around so measure the depth you pinned up in several spots and figure out the average depth. No writing down figures or even using a calculator, just a general average. Write that number down as you could get distracted between now and soon. Take out the pins. Turn the pants inside out.
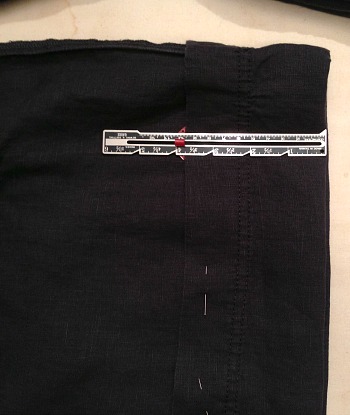
Fold up the hem to the inside of the pant leg (now on the outside) the average depth you came up with all the way around the pant leg repinning as you go. Press with your iron on the new fold. After pressing remove the pins.
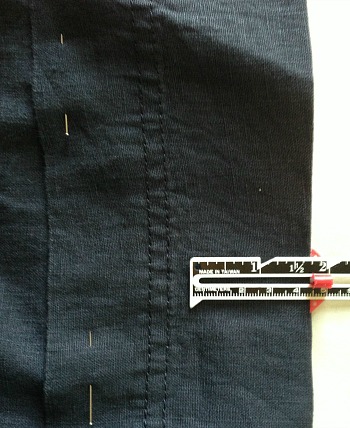
Next I need to measure up from the new bottom of the leg (the fold you just pressed) the depth of the new hem. I am copying the original so that’s 1 3/4″ which is a deep hem. But wait! I need to add to that seam allowance – I use 1/2″ so I measure up from the bottom of the leg 1 3/4″ plus 1/2″ for a total of 2 1/4″ to see where I am going to be cutting off the excess fabric.
Criminy! the hem the pants came with is in the way so I need to take out the top stitching that is holding it in place. Two rows of perfectly matching thread, good thing I have a lot of seam ripping practice.
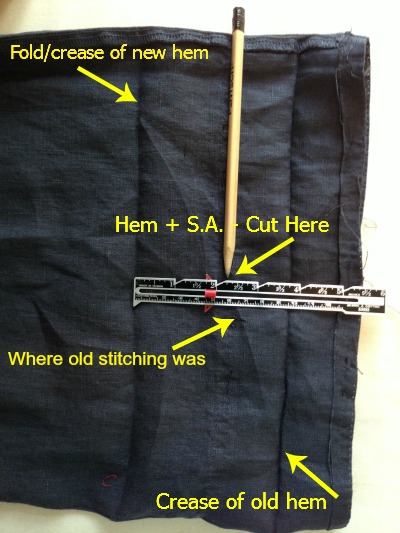
I measure and mark my new hem plus seam allowance from the new hem fold/crease all the way around and notice, lucky me, that the old stitch line, now just some perforations, is close enough to where my marks would be if I measured and marked 2 1/4″ all the way around. So close that I use the perforations as my guide for where to cut off the excess fabric. Normally though it’s measure and mark all the way around and then cut on your marks.
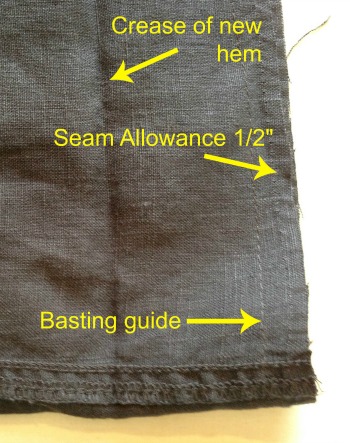
Press the cut line so all is squared up before measuring in the seam allowance. From the cut, measure your seam allowance. I measure not with a ruler but with a sewing machine. I run a basting stitch all the way around a 1/2″ in (a half inch is my seam allowance). This is fast and the stitching helps you fold it in, Try it, you will believe me.
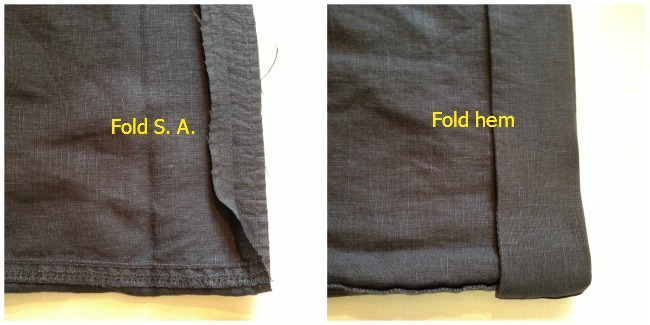
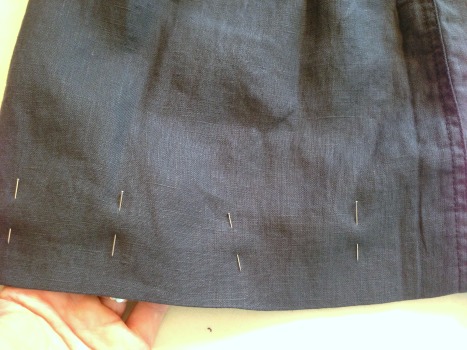
Fold your seam allowance inward and press. Turn the pants right side out and pin the hem in place. Now the pins are on the outside, the hem is flat, lined up at the side seams, and it’s stitching time. Stitch however many rows of top stitching you want and then press your stitching.
You’re done. You’re pants look great.

