
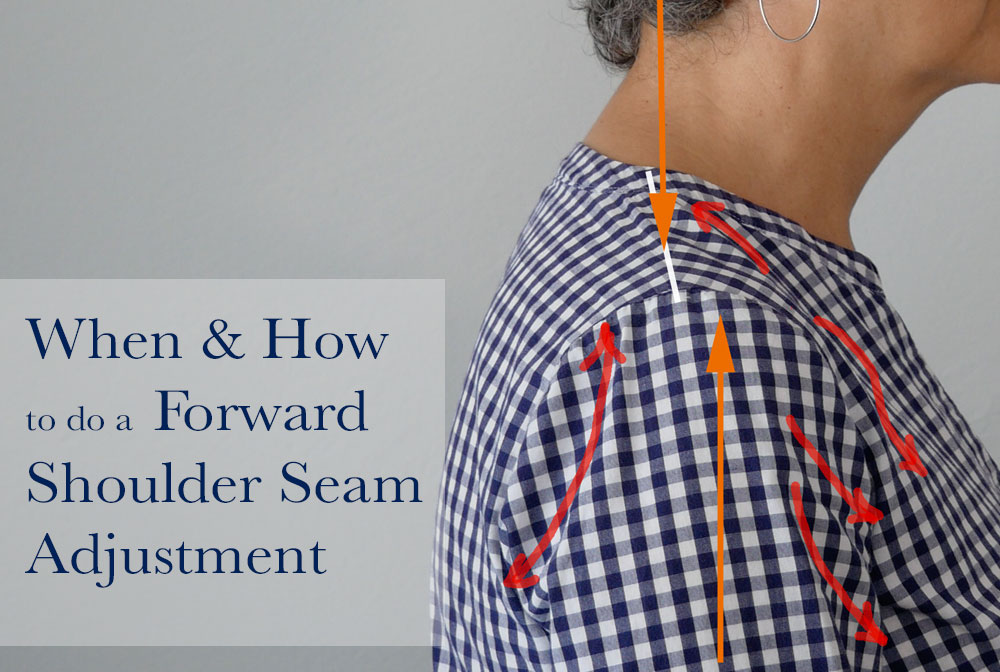
This post is all about how to move the shoulder seam forward because when a shoulder seam is too far back, even just a little, it’s uncomfortable and creates draglines that nobody wants.
Moving the seam line forward to match your shoulder is going to give you a better and more comfortable fit.
This video will show you how it’s done but so will this post so read on 😀
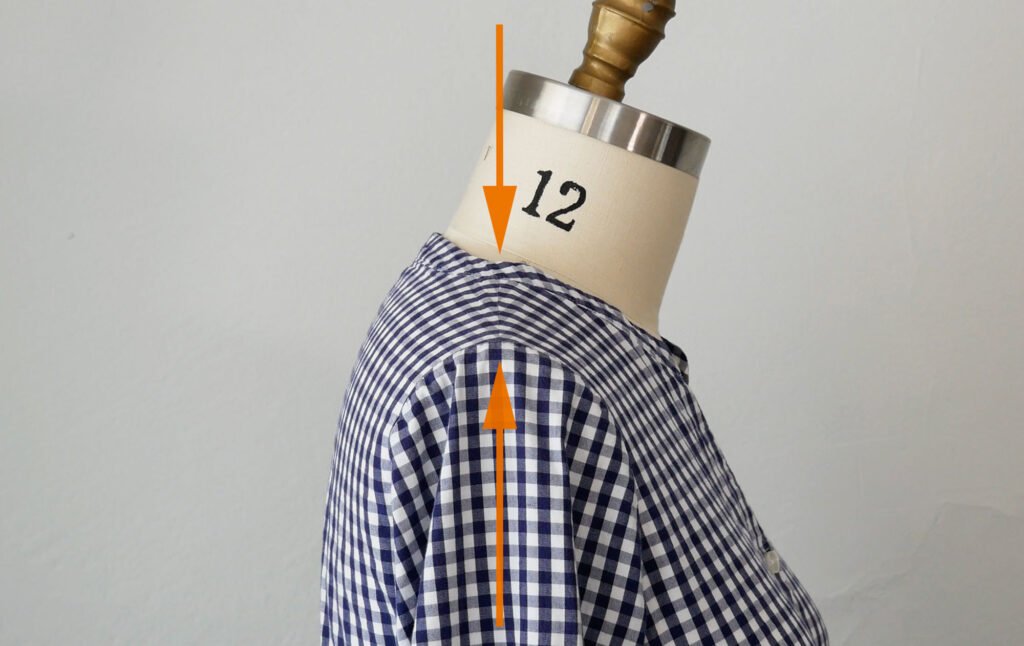
Many patterns are drafted for a body with stick-straight posture, like a dress mannequin, when in reality, our shoulders curve slightly forward. This naturally happens with age, but it can also be caused by sitting at a desk all day.
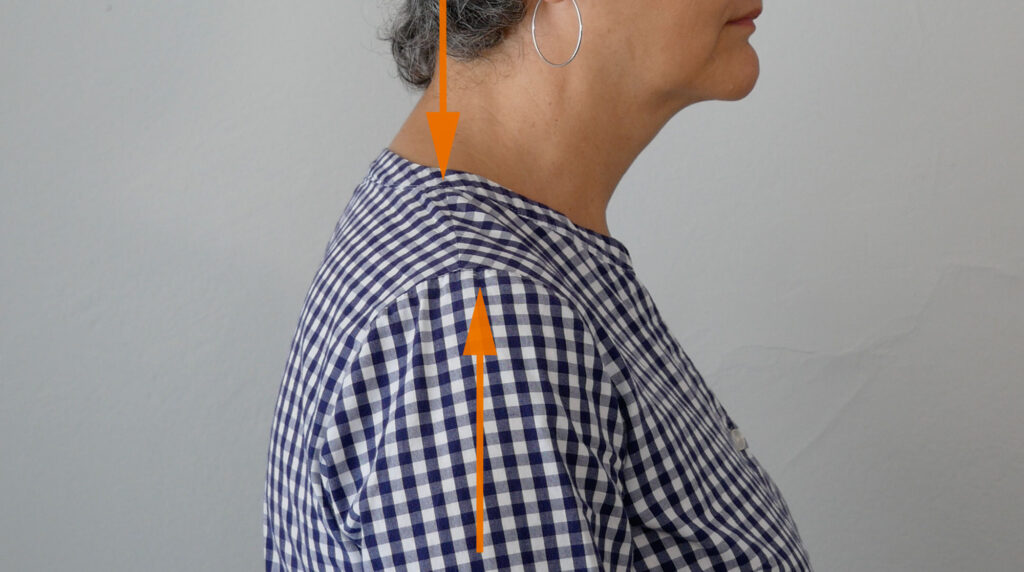
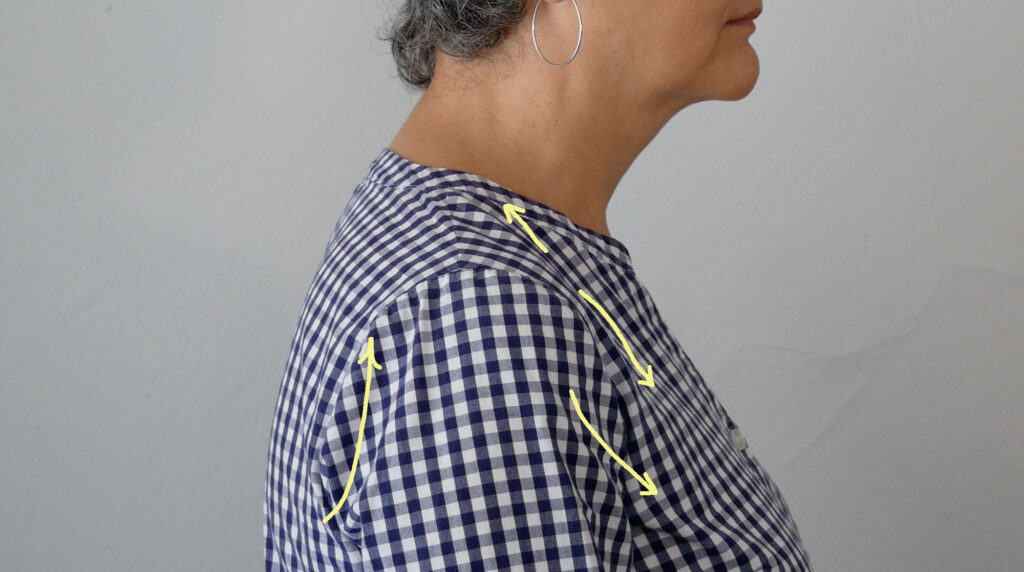
If you notice the shoulder seam on your garment pulls to the back and that there are wrinkles in the fabric at the neckline and back armhole, or the set-in sleeve is making wrinkles and may feel uncomfortable, the shoulder seam is too far back and needs to be moved forward.
Unfortunately, you don’t know you need this adjustment until after you’ve sewn a test garment or the final garment. But once you know you need it, you can make this adjustment on any future pattern from that same company before you cut out the fabric.
If every company drafted for the same skeletal alignment, then you could make this adjustment for every pattern you sew. But until you are familiar with how the pattern company drafts, test first.
The forward shoulder adjustment in this post is for typical adjustments of ⅜” or 1 cm or less. That doesn’t sound like enough of an adjustment to bother with, right? But if you need that ¼” adjustment and do it, your garment is going to fit so much better. This is what tailor-made clothing is all about – a custom fit.
Real life: On some patterns, I need the shoulder seam to come forward ½“, but I only move it forward the maximum, ⅜“. It still works! The shirt is more comfortable, and the drag lines disappear.
To find out how much you need to move the shoulder seam forward, you have either already sewn the garment or the test garment OR you haven’t but you suspect, from previous sewing you need to move the shoulder seam forward.

Situation 1: You have the garment/test garment sewn
The shoulder seam on a well-fitting garment* will go from the neck, in a straight line, to the middle of your upper arm. (*now, some garments have style lines, seams and/or a back yoke that comes over the shoulder about an inch or so to the front. This is on purpose and doesn’t mean it isn’t well-fitting)
Put the garment on. Mark, with tailor‘s chalk, where the top and middle of your upper arm is
The difference between the seam and your mark is how far forward to move the seam line OR no more than 3/8″, 1 cm.
Situation 2: You haven’t made a test garment yet, but you suspect you need to move the shoulder seam forward.
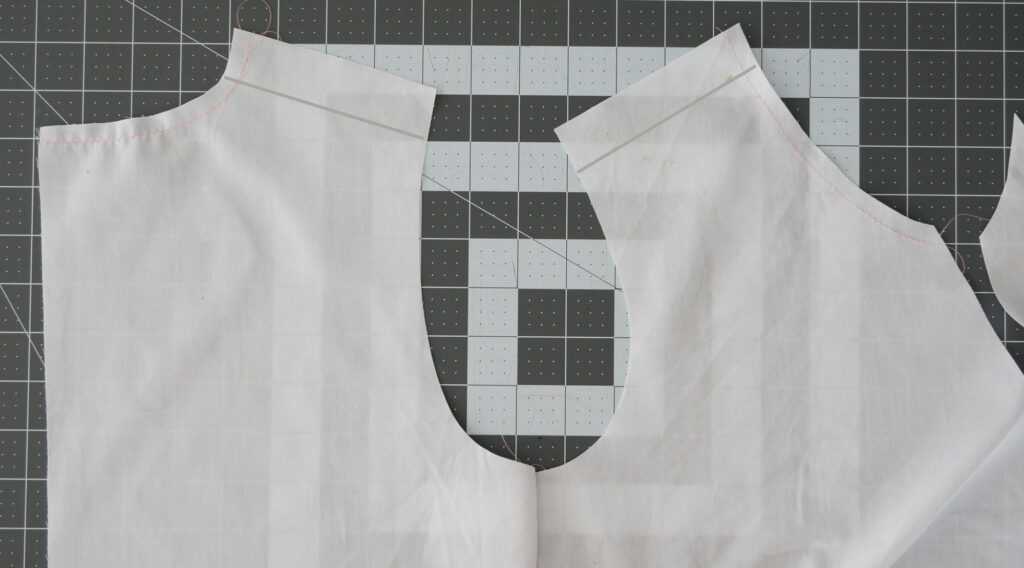
Cut out your front and back bodice pieces from muslin, cheap non-woven interfacing, or Swedish Tracing Paper, but with a 1” seam allowance at the shoulder seams. Also, draw in the shoulder seam line on your test fabrication.
If using fabric, be sure to stay stitch the necklines so they don’t stretch out during the fitting. Sew the front and back together at the side seam only. Leave the shoulder seam unattached.
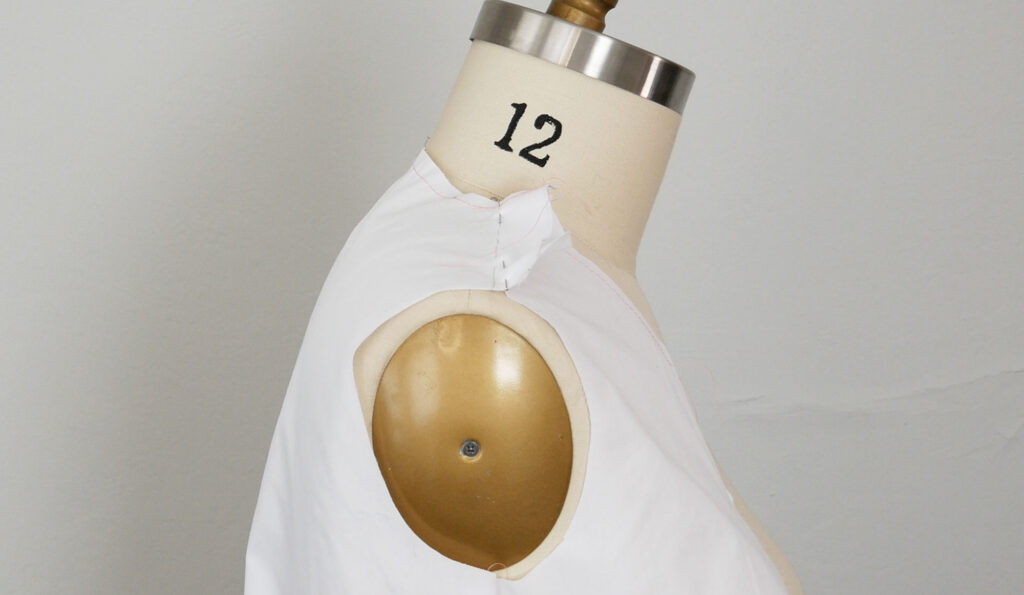
Put the bodice on and pin the shoulder closed. Start at the neckline on the original seam line. Pin the shoulder closed following an imaginary line that goes from your neck to the middle of your upper arm.
The pins will go in as if they are sewing the seam, but the seam allowance is on the outside. The pins are showing you the new seamline. Mark the pins’ placement before you remove them.
Transfer the adjustment to your pattern
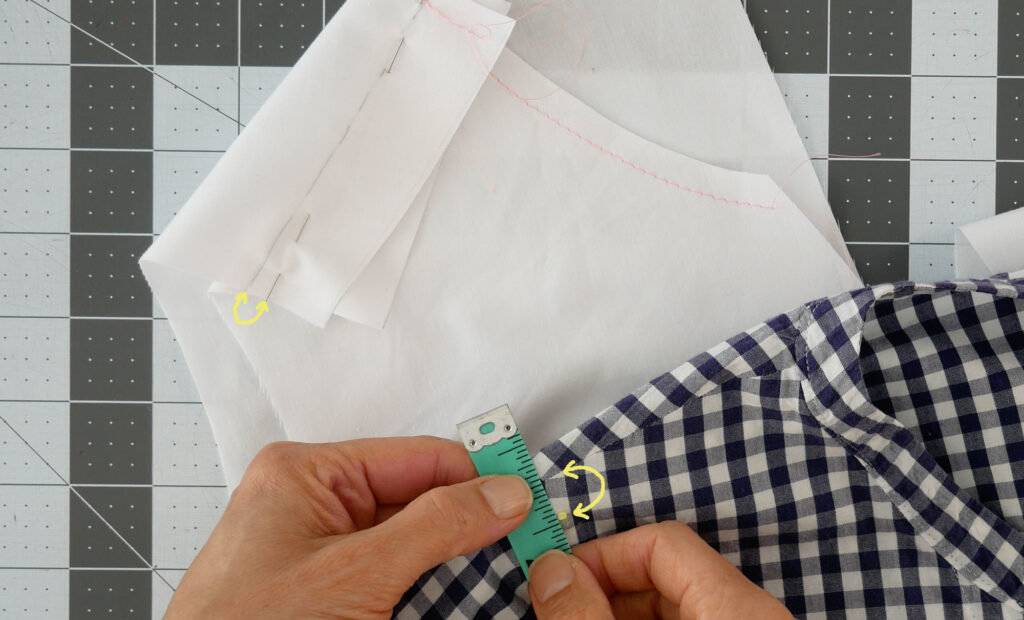
Measure the distance between the original seam line and the tailor’s chalk mark, or from the original marked seam line to where you pinned.
That amount will be added to the back and taken away from the front.
If you need a little more than 3/8″ (1/2″ to 5/8″) try on a test garment moving the seam only 3/8″ forward and see if that helps. If you need to move the seam more than 5/8″ this is not the tutorial for your adjustment. And this has to do with the sleeve needing to fit into the armhole. (But, I might try it out on a test garment. One never knows until one tries, right?)
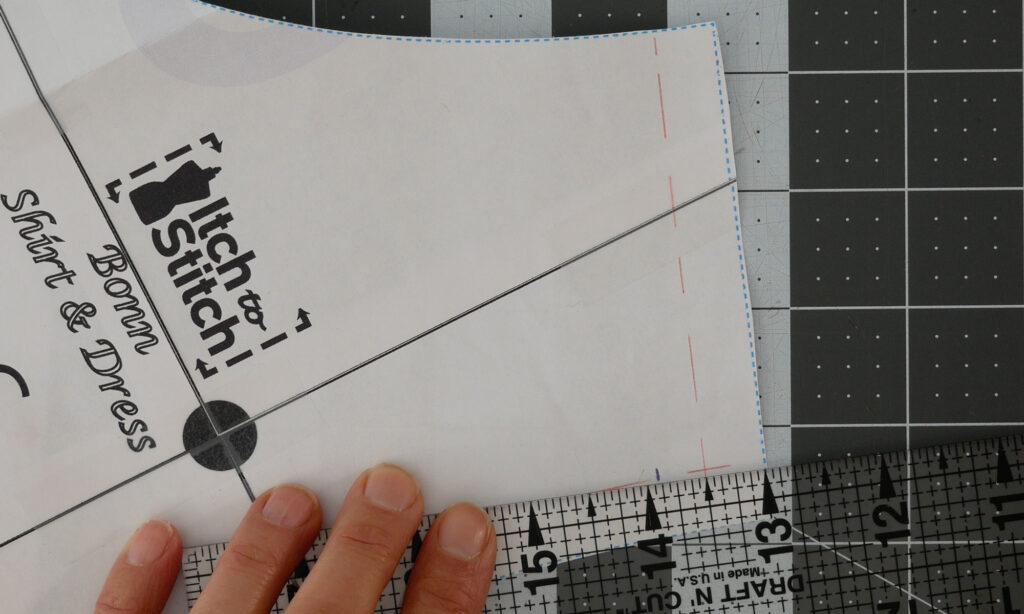
Start with the front piece. Draw in your seam allowance at the shoulder.
Measure down from the shoulder seam on the front bodice pattern at the armhole the amount you are bringing the seam forward. Make a mark.

Start on the original seam line at the neck and redraw the shoulder seam from the neck to your mark at the armhole.
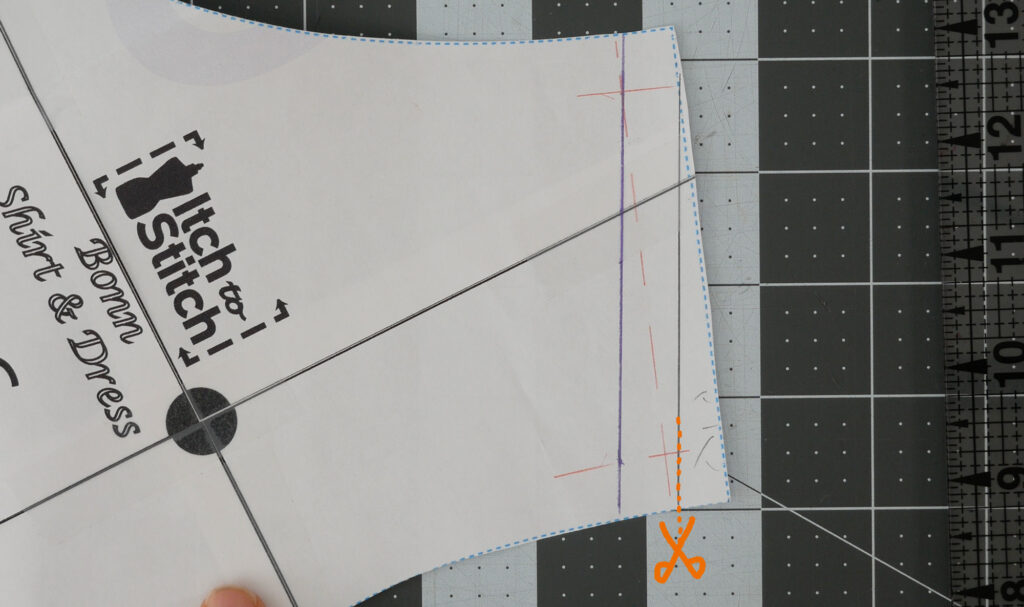
Transfer the shoulder seam notch if your pattern has one. Cut off any excess paper
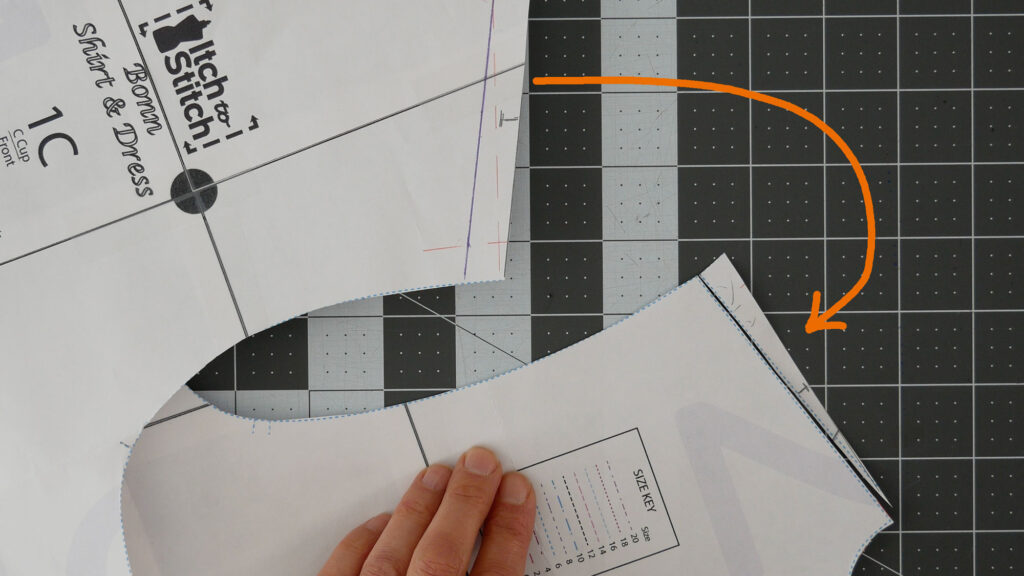
You could, literally, take that cut off slip of paper, butt it up to the back pattern piece at the shoulder, and tape it down. You just added to the back, what you took off the front.
But, let me explain how to do the adjustment by-the-book.

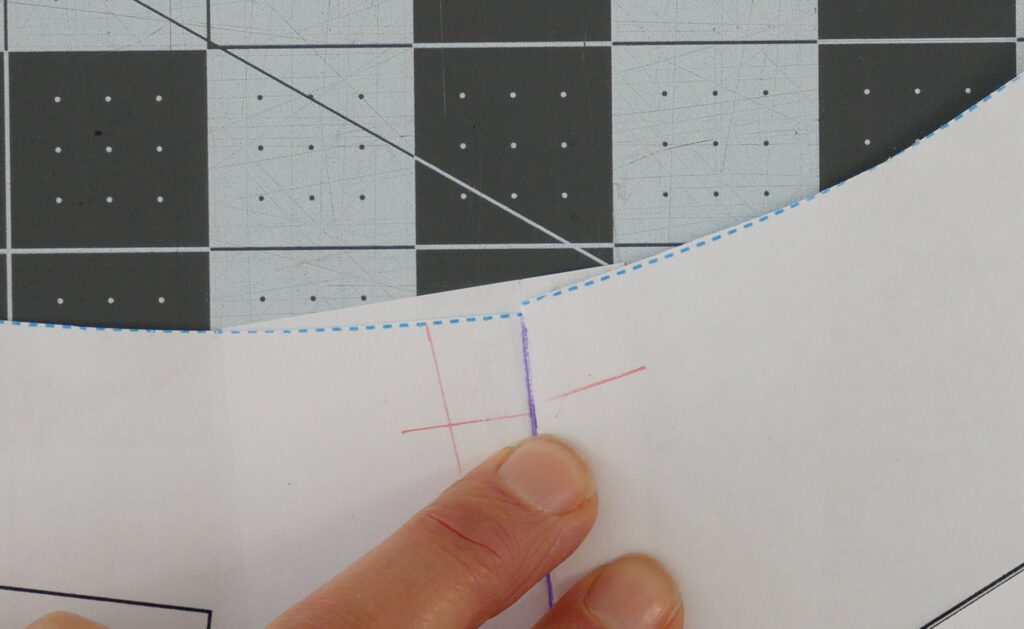
Add paper to the back bodice pattern at the shoulder. Mark in your seam allowance. Above the seam line, at the armhole, measure and mark the amount you are bringing the seam forward.
Redraw the shoulder seam so it starts on the original seam line at the neck and joins your mark above the armhole.
If the pattern has a shoulder seam notch, be sure to transfer it.
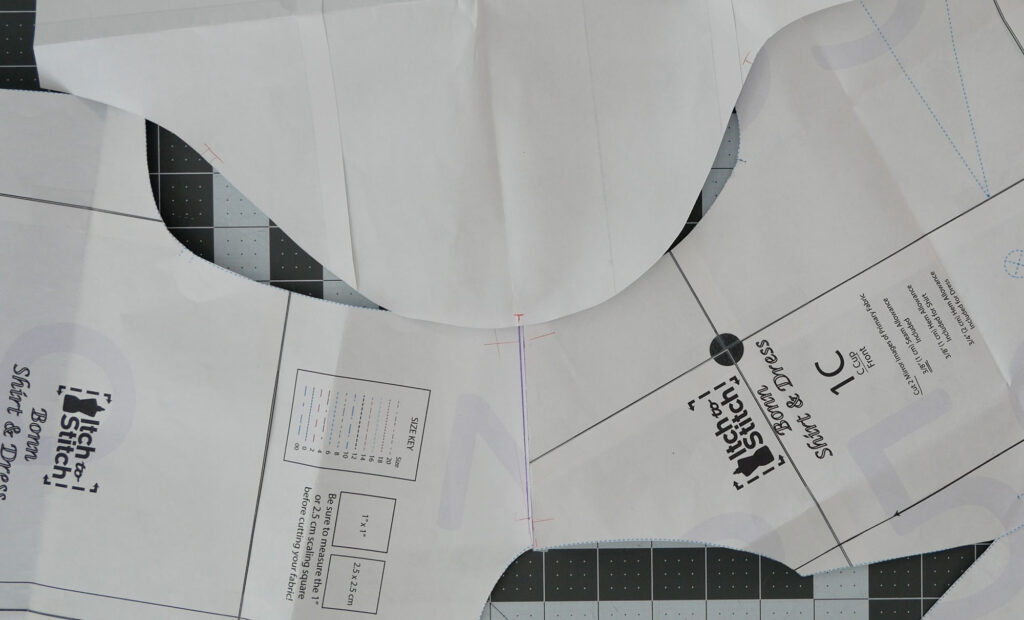
True the pattern, making sure they are the same width. Start by lining up the notch if there is one, or start at the neckline and walk the pattern toward the armhole.
If one piece is longer than the other, split the difference. Add that split to the narrower piece and take it away from the wider piece. You can see my post, “How to True a Pattern“ for more details on truing.
What About the Sleeve?
As you know, most patterns with a set-in sleeve have you line up the top of the sleeve cap to the shoulder seam.
Well, you moved your seam forward – do you move the sleeve cap notch or dot forward too?
No, you leave your notch or dot where it is
You line the sleeve cap notch or dot to the new shoulder seam, and that moves the sleeve forward, which is what you need.
If your shoulder is forward, your arm is forward to, right? (The arm-bone’s connected to the shoulder bone – or however that diddy goes). So you just fixed all of that with one little adjustment.
I call that a power move!
Look at us, taking care of business –
That article and video very informative..i loved it..but here is my problem..my shoulders one is more thrusted than the other..i did a muslin and it did not show in the muslin..did a top in broadcloth and its so uncomfortable i cannot wear it..one shoulder hangs lower than the other..i have tried the rounded back but it makes the collar to high..and one side seems like its more than an inch fall to the back..its so annoying😭
Yes, this get’s tricky when more than one thing is going on in the same area – and yet this is what most of us are dealing with. Is it your shoulders that have different heights or the shirts? In men’s suit coats, when the man has one dropped shoulder they will pad up the lower shoulder. I know shoulder pads are out of fashion, but adding a small one to the lower shoulder will adjust the fit without having to alter the pattern 😉 There is a lot going on in the shoulder area, sometimes it’s the shoulder slope or no slope, or the forwardness of the shoulder or the depth of one’s shoulder joint, or the length of the collar bone in relation to the width of out upper rib cage. Basically, it’s complicated, and really requires persistence. I wish I had a good answer.