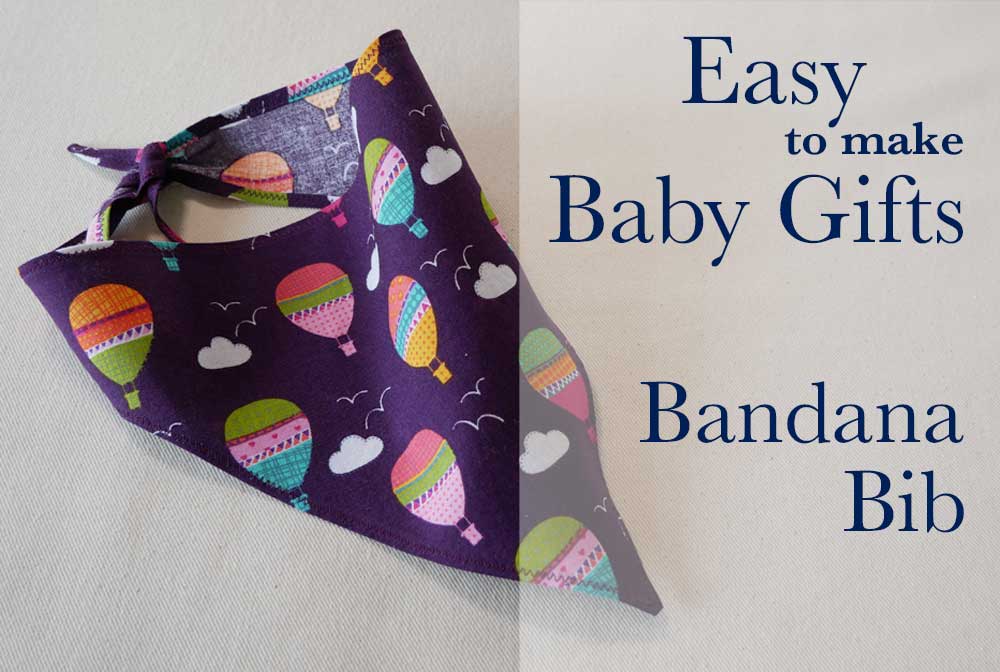
It’s not pretty but it is normal; some kids drool when they’re teething. And some dogs drool all the time. So for those toddlers’ and pups’ parents, why not sew up a few of these super easy bandana bibs?
Or if you could sew one for yourself and your wardrobe.
Supplies Needed:
*A Fabric Marking Tool like chalk, a Ruler, and Scissors
*Fabric and Thread
- 1/3 yd cut from 45″ wide fabric will do. You need a short (10″) but wide (27″) piece of fabric. (Check your scrap pile)
- Use a fiber that is both absorbent and stands up to washing like cotton or linen.
- Use a medium to lightweight fabric. Thick fabric like corduroy or canvas is difficult to sew a narrow hem on.
Let’s Make This Thing
The instructions really are; cut it out and hem the edges all around. But I’m going to show and tell all the nuances.
Cutting Out
There is no pattern but rather a few simple measurements and then connecting the dots.
Place the folded edge of the fabric to your right to follow along with the pictures.
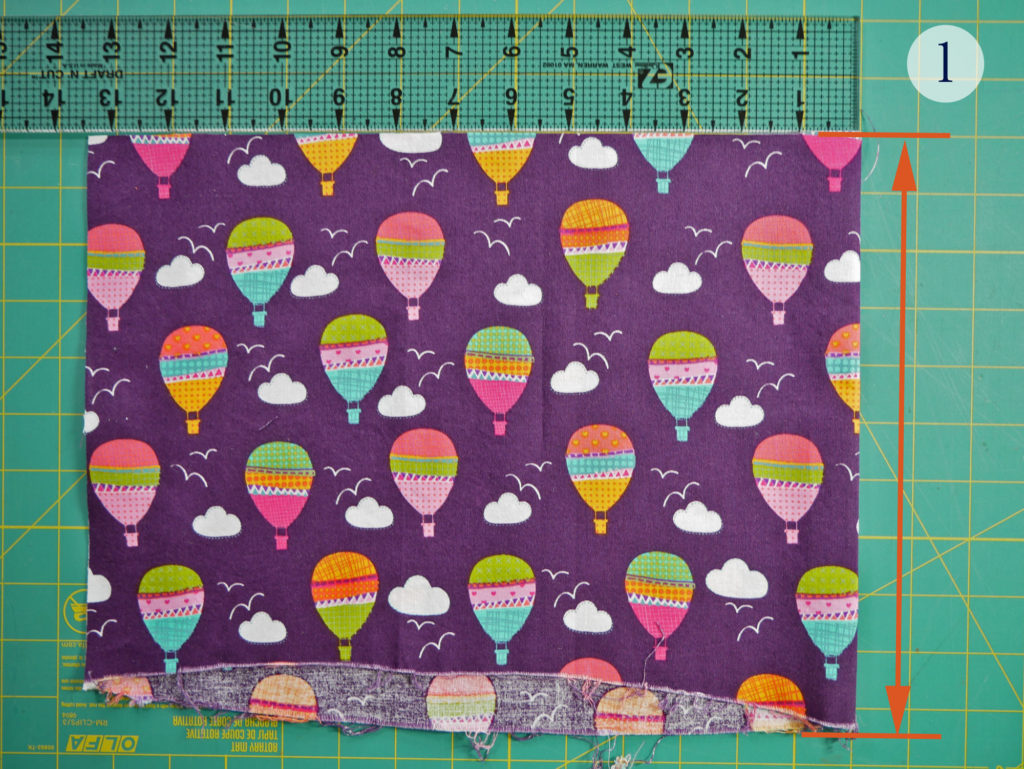
After washing and ironing your fabric fold it in half horizontally so it is 10″ tall and 13 1/2″ wide.
The folded edge is the center of the bib and therefore the only part of the bib that needs to be 10″ tall. If you have an uneven scrap like mine it may work just fine.
The top edge of the fabric is the top edge of your bib so get that straight and lined up, with scissors if you have to, before marking anything. (Exact precision is not required)
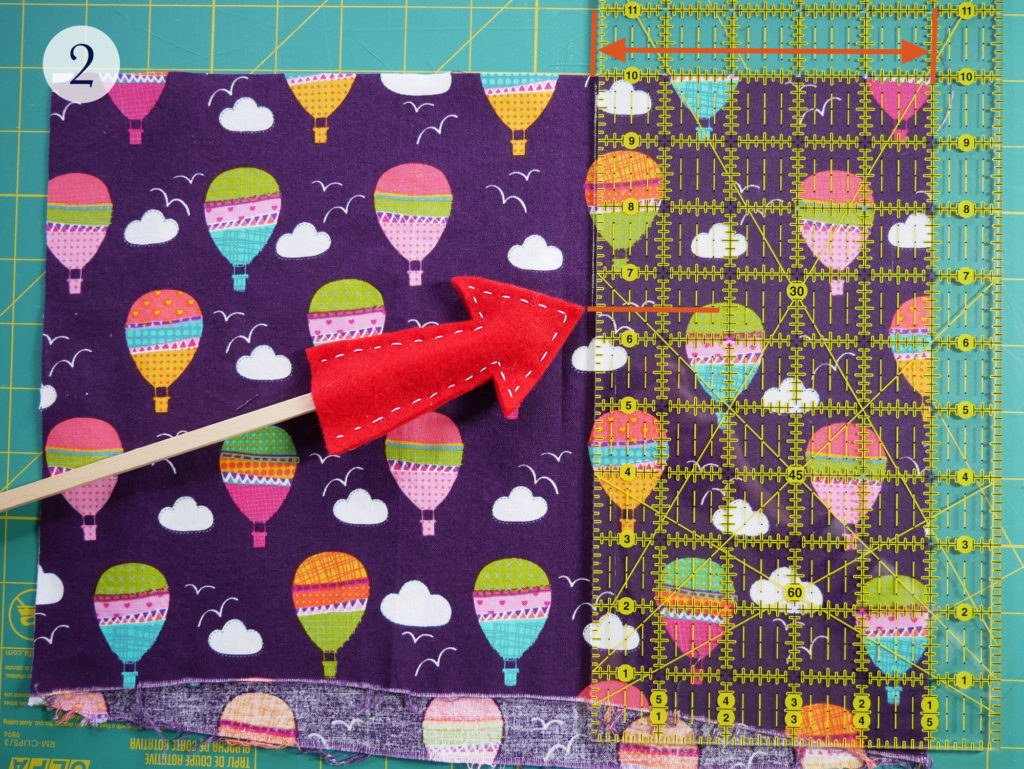
Measure over 5″ to the left from the folded edge (aka: center front).
From the top edge measure down 3 1/2″. Make a mark (5″ over and 3 1/2 ” down).
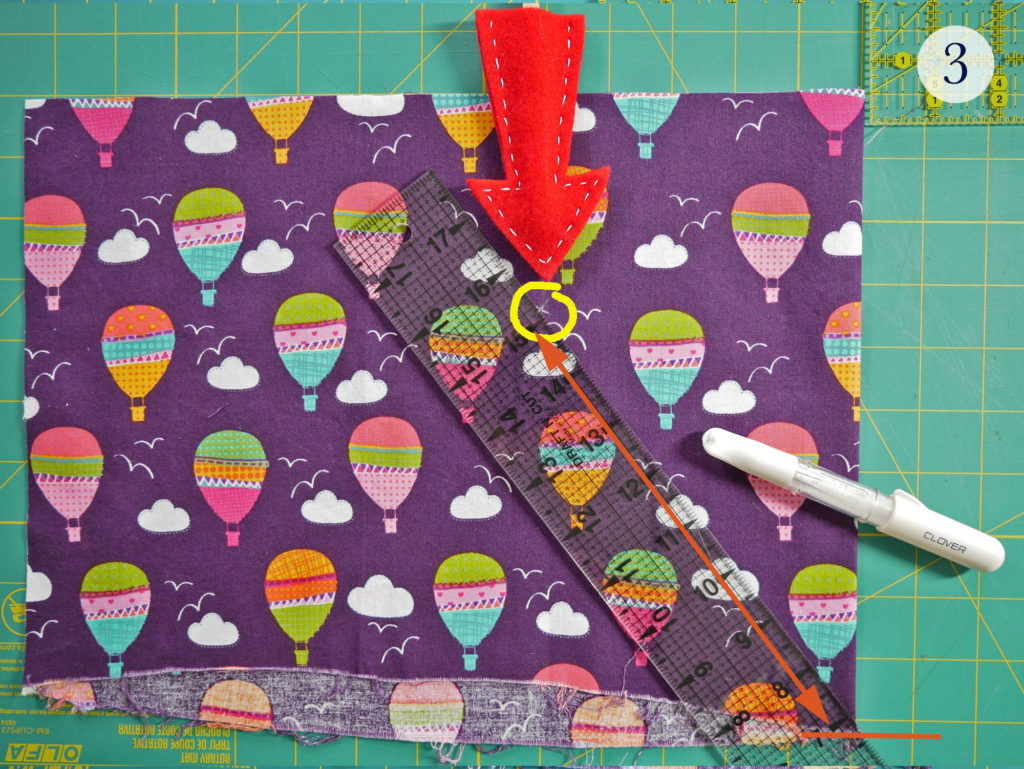
Align a ruler from the bottom of the fold (10″ down from the top edge) to the point you just marked. Draw this line.
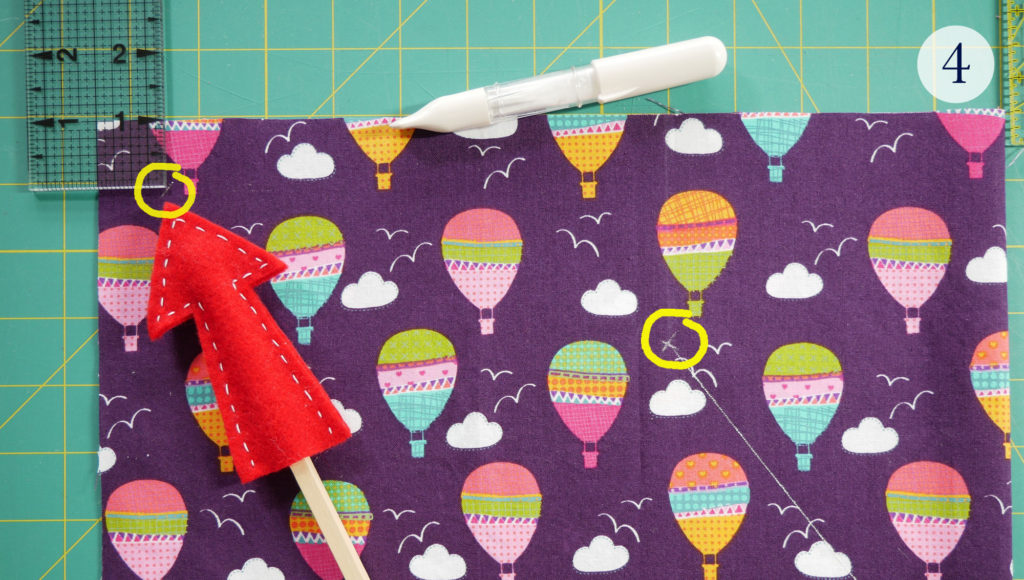
At the upper left corner, measure over and down 1″ and mark this point.
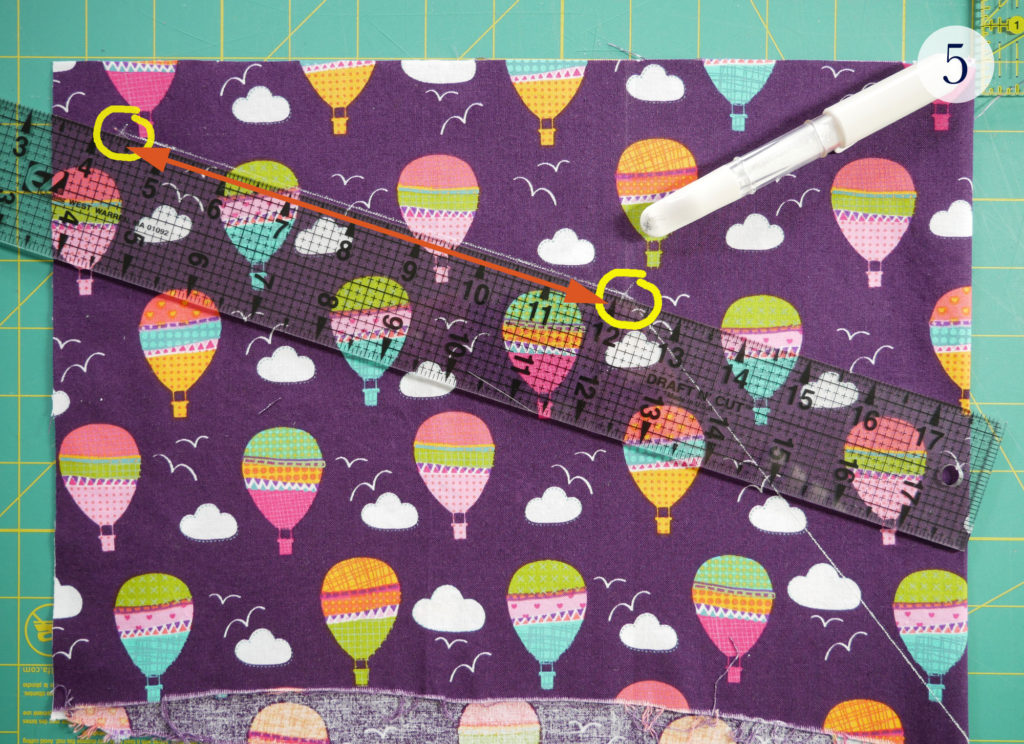
Align a ruler from the first point you marked to the point you just marked and draw this line.
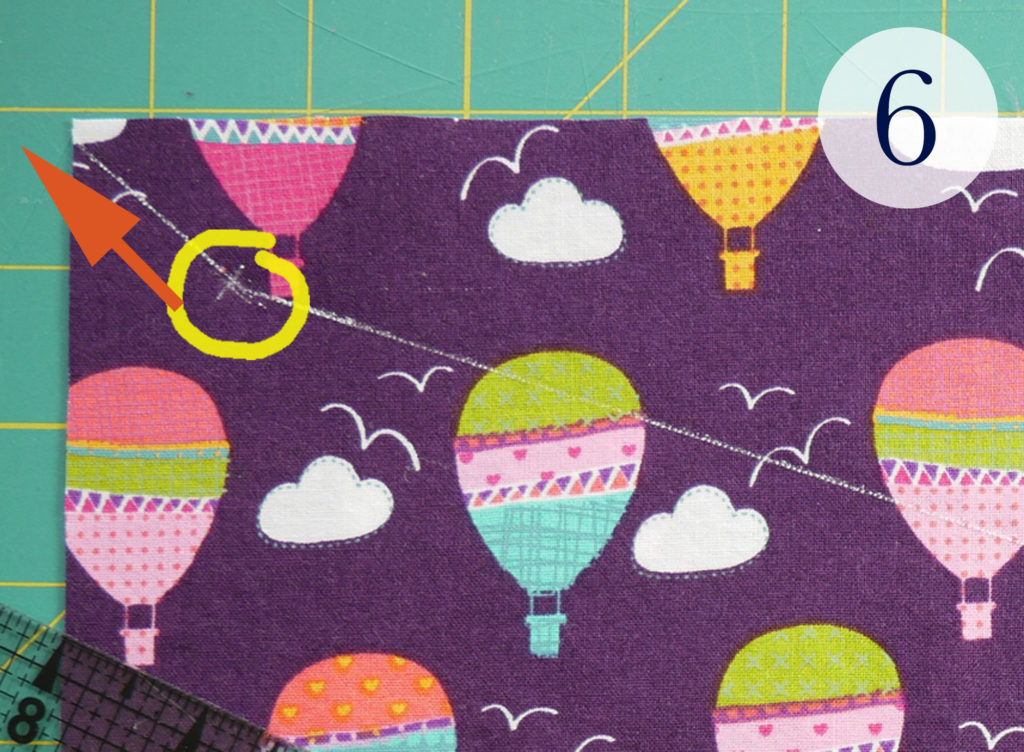
Adjust the ruler and extend the line you just drew to the upper left corner of the fabric. (It will make a 45-degree diagonal line for that last inch.)
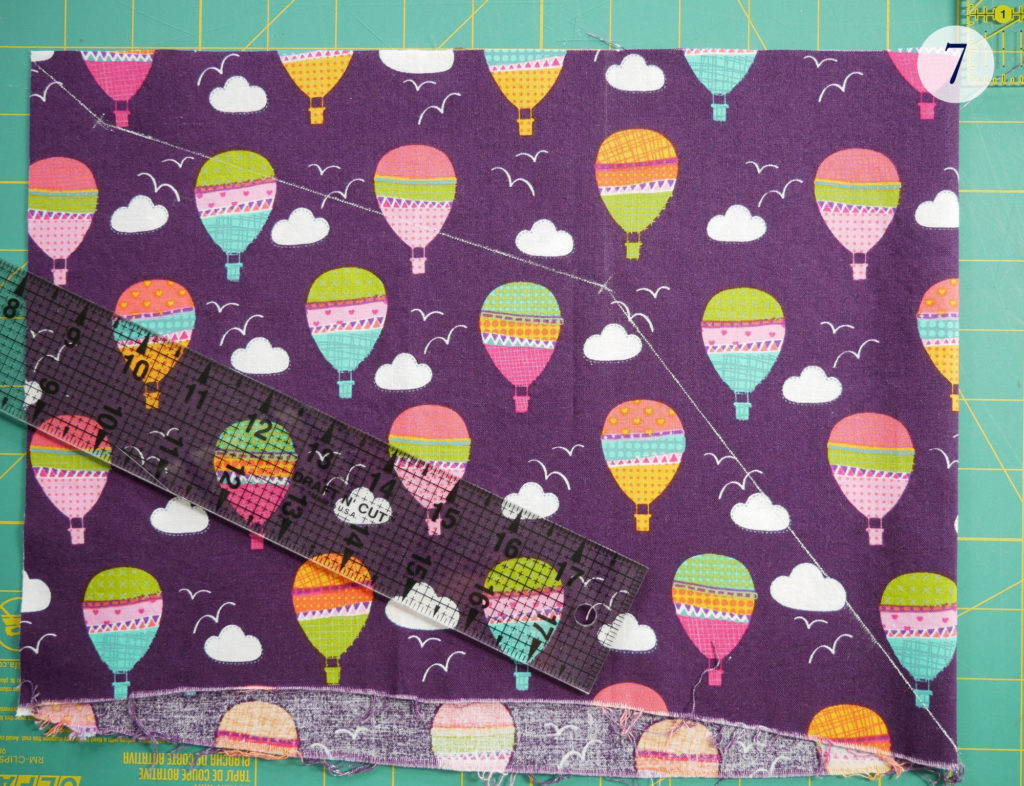
Cut out the bandana on the lines.
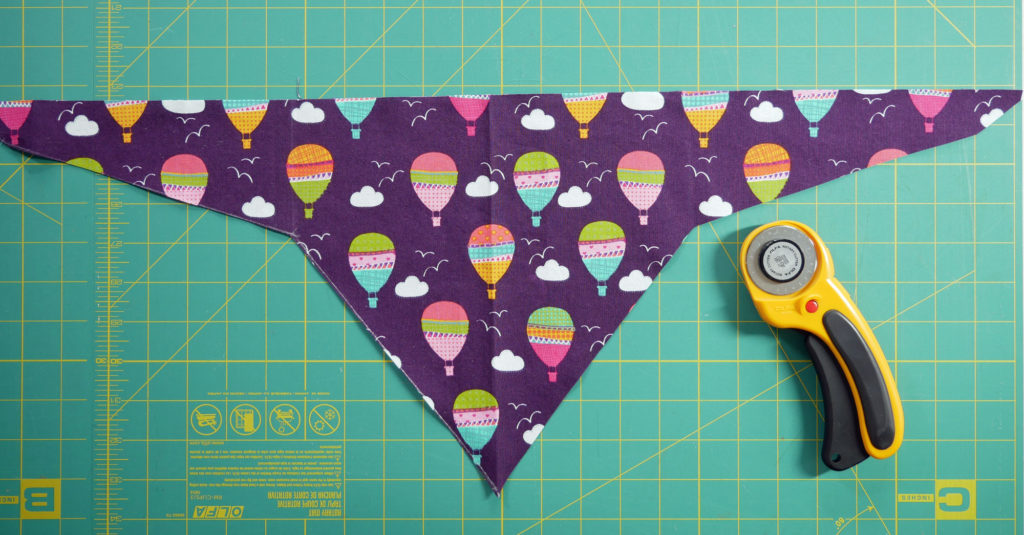
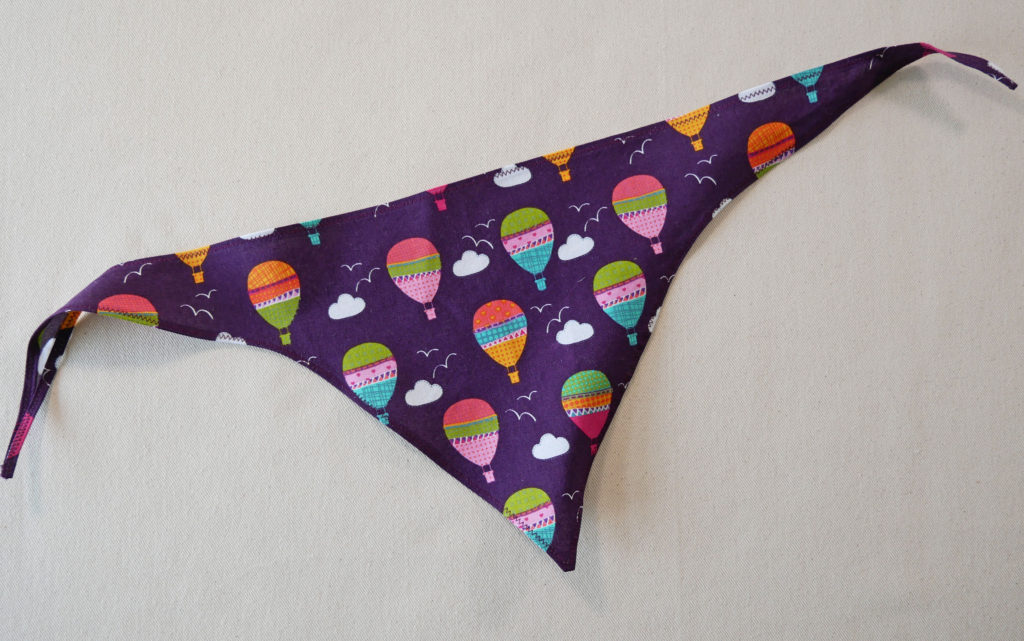
The zig-zaggy shape (as opposed to just a straight line from the bottom center to the upper left) provides nice full bib coverage and skinny enough ends for easy tying.
Sew It Up
Now it’s just a matter of hemming all the edges. Really that’s all.
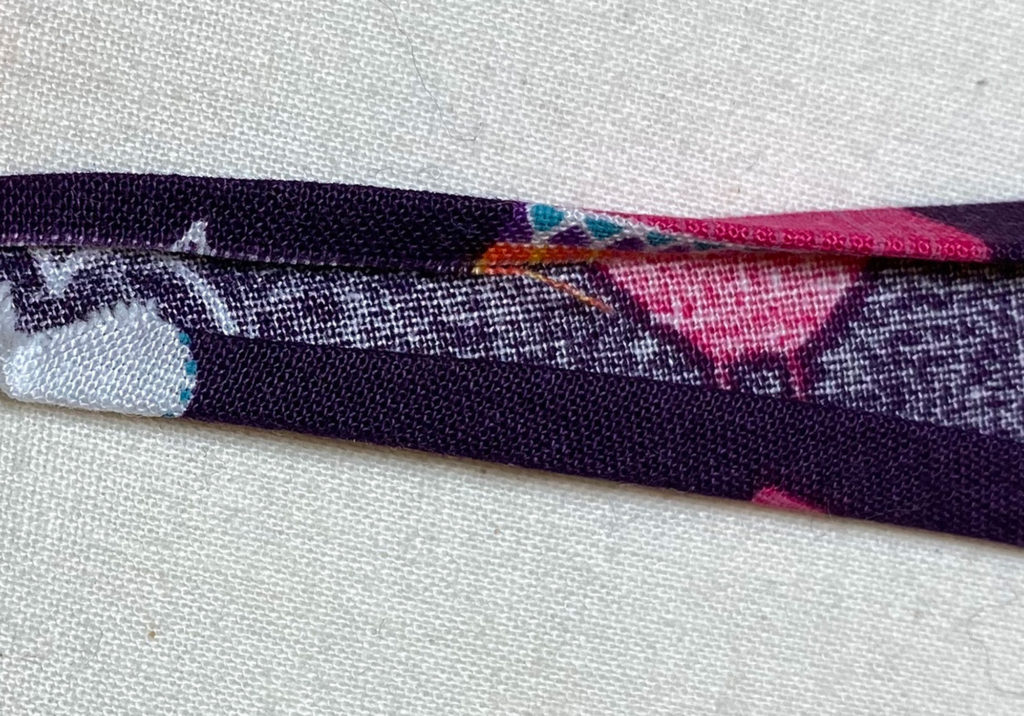
This bib allows for a 1/2 inch hem or seam allowance.
To hem the edge you will fold over the raw edge 1/4 inch and then again a 1/4 inch. This double fold encases the raw edges.
To measure the fold you could use a ruler OR measure in 1/2 inch on one side of a piece of paper or cardstock, mark a long line with a permanent marker to see that 1/2 inch, lay the paper on the backside of the bandana, fold the fabric up and over the paper so the raw edge touches the line you drew. Press the fabric down over the paper. Then open the fold and fold the raw edge in to meet the 1/2 fold crease, fold the fabric again on the 1/2 inch crease and press again.
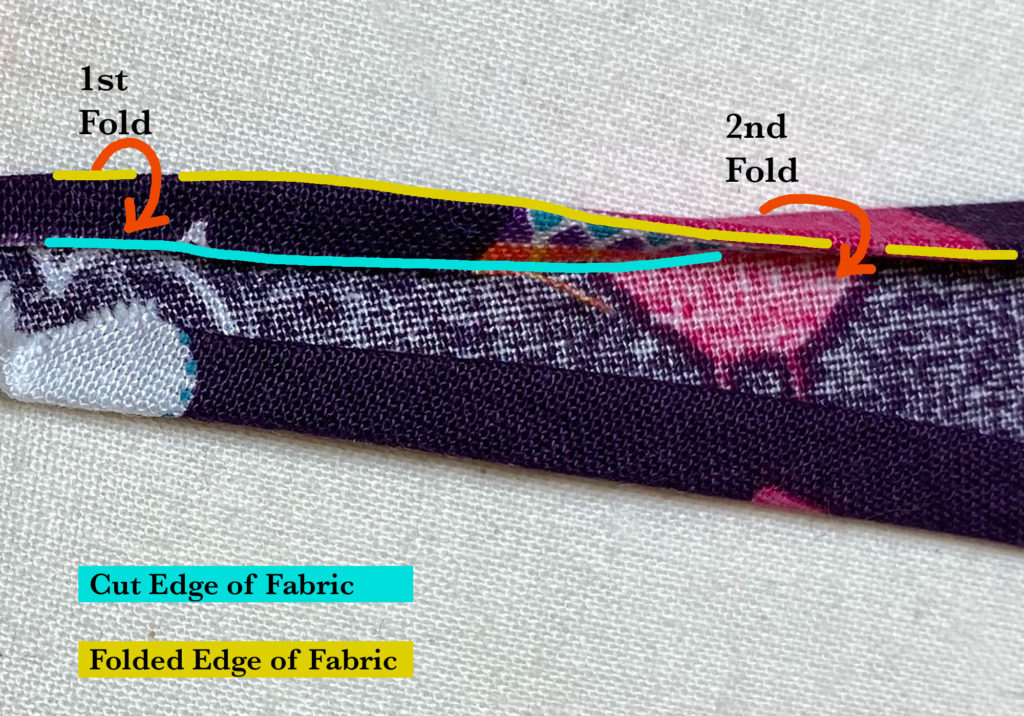
Press the folds to keep them in place and then take it over to your sewing machine and sew the folds down using either a straight stitch or a zig-zag stitch.
(I used a zig-zag stitch to be sure to catch at least some of the narrow hem. With a straight stitch, you may stitch a tiny bit off the fold if you aren’t paying attention. So pay attention or go fast with a zig-zag or both 😉
Other hemming possibilities:
- Sew a short zig-zag stitch over the edge to prevent the raw edge from unraveling. (no folding needed)
- Overcast the edges with a serger. Some home sewing machines also have an overcast stitch. Check your manual to see if yours does. The overcast stitches can be left as the finished edge or you could fold them over to the backside once instead of twice and stitch down.
- Cut the bandana out with pinking shears (those scissors with the zig-zag teeth) and be done. No sewing. This is great for bandanas that you need right now.
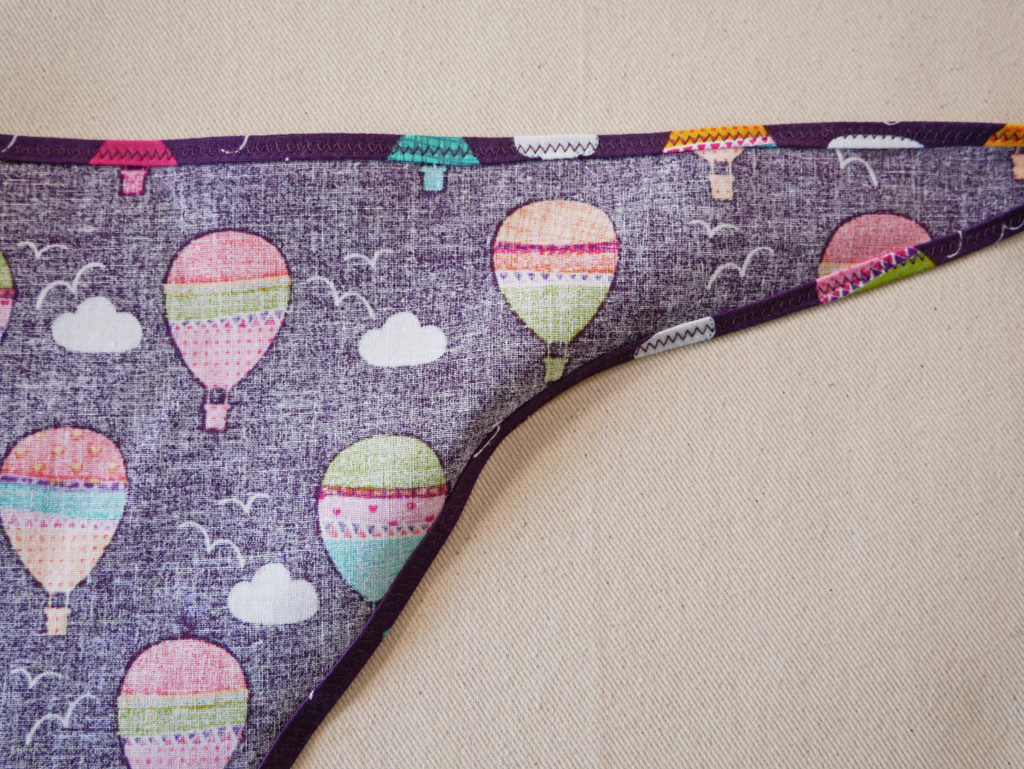
Tips For Hemming the Points
Hemming the points at the center front and the tie ends is a little tricky. The tricky part is in folding all those ends in so it still makes a point. Keep in mind that this is a bandana – meaning – don’t sweat the small stuff. A little imperfection does not render the bandana useless.
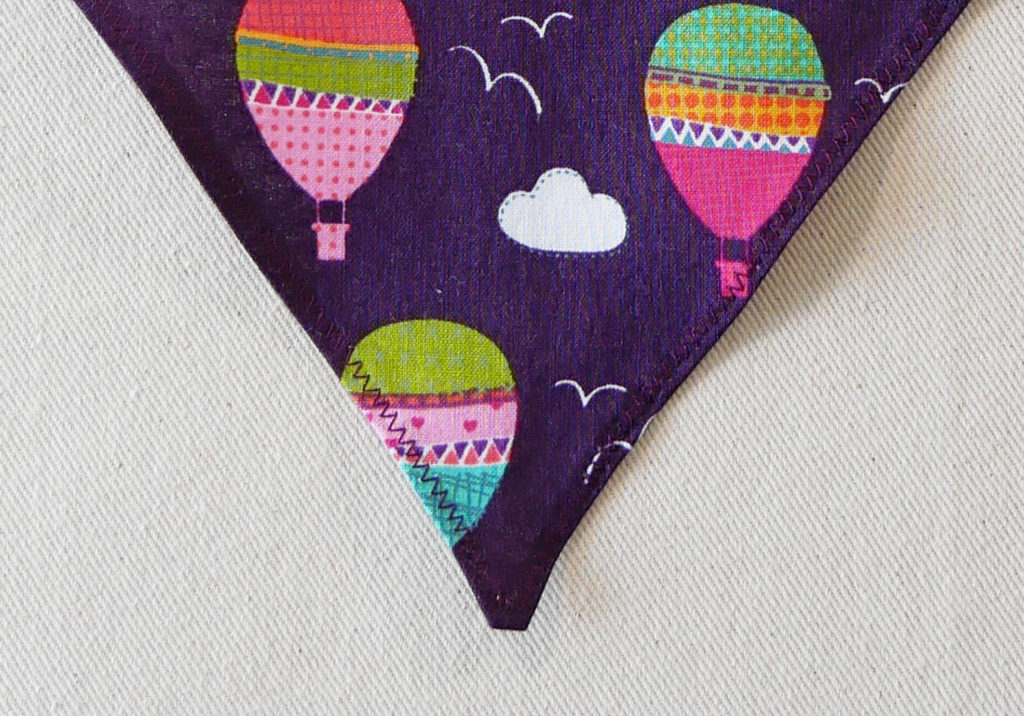
Center Front Point
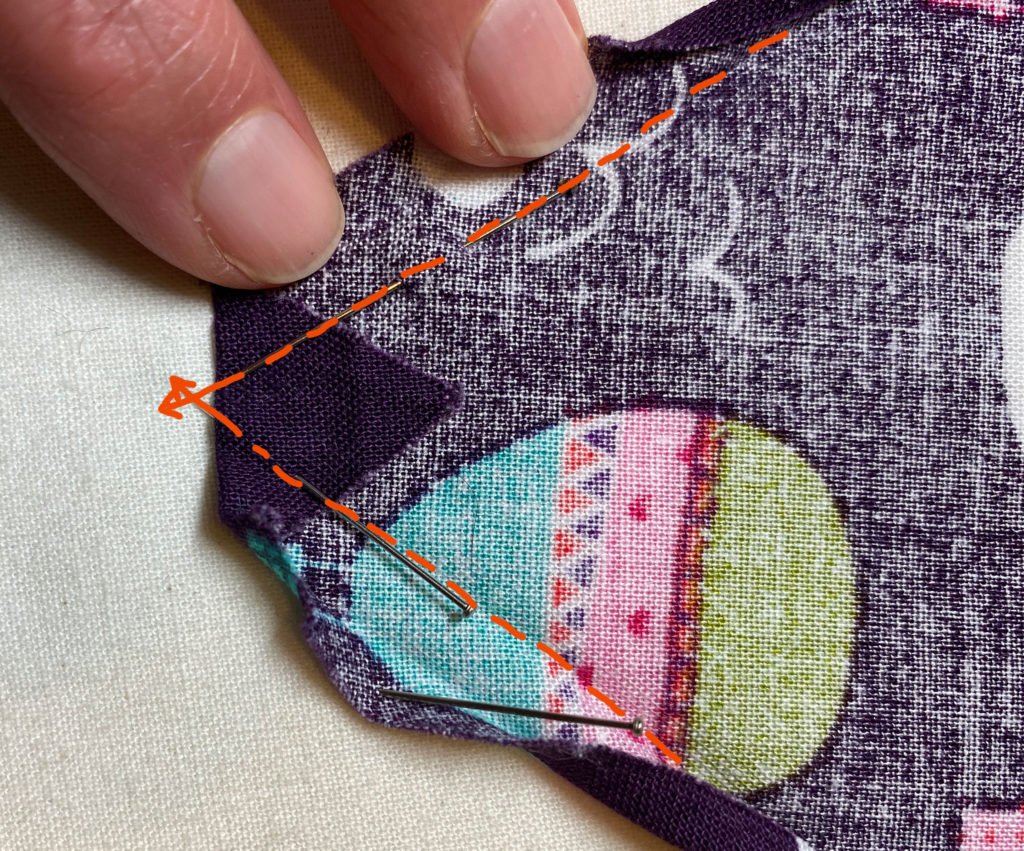
Fold in each edge, one at a time, twice as you did for the section before the point and press. Open the folds.
Where the 1/2″ fold line intersects is where you fold the point up to the backside.
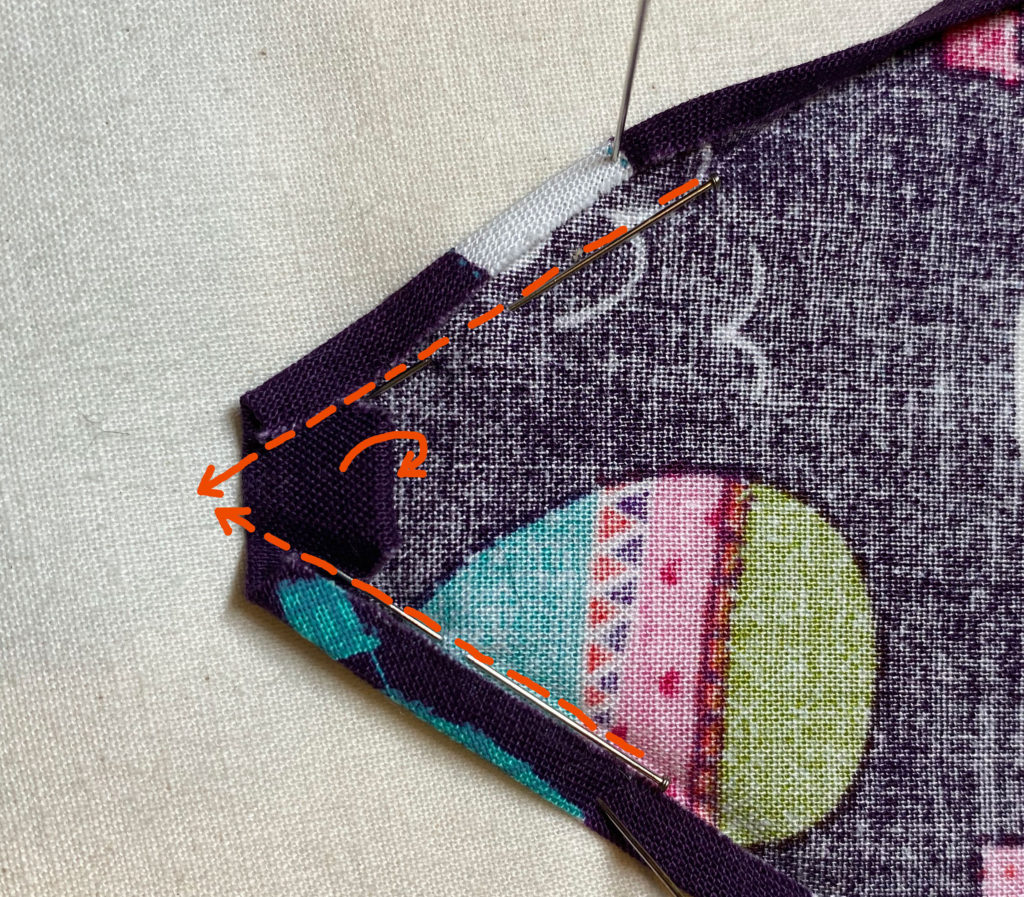
Tuck the tip of the point under. Fold the raw edges back over 1/4″.
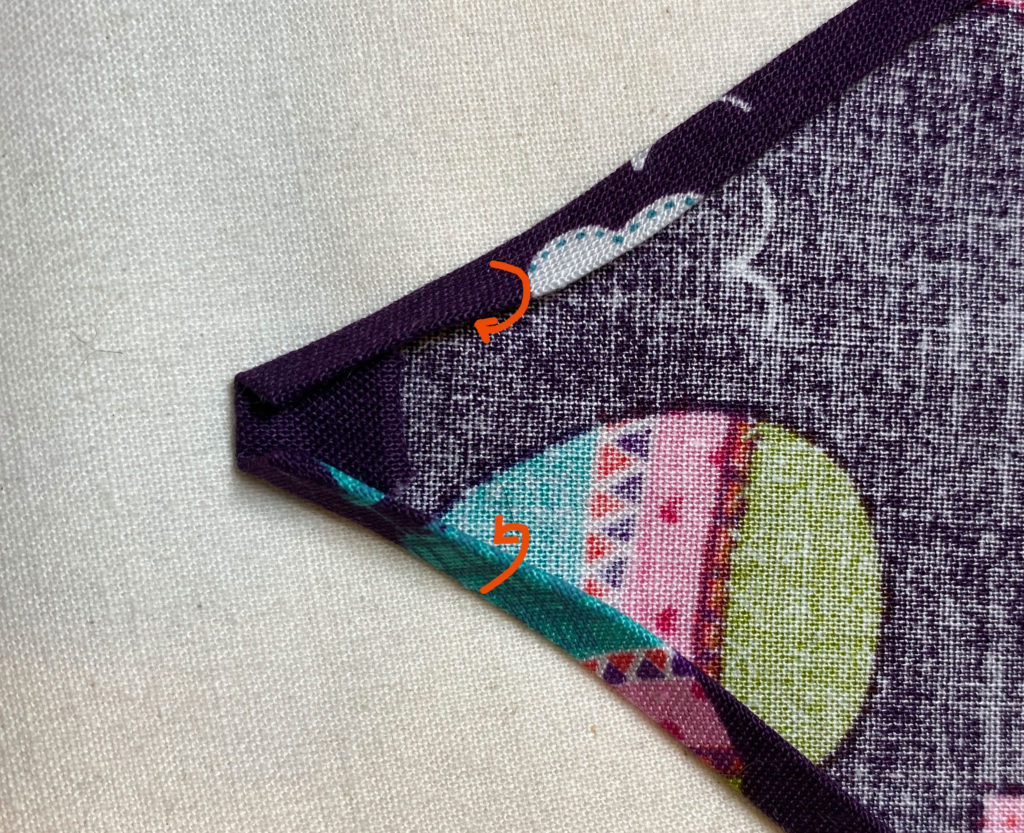
And again the second 1/4″.
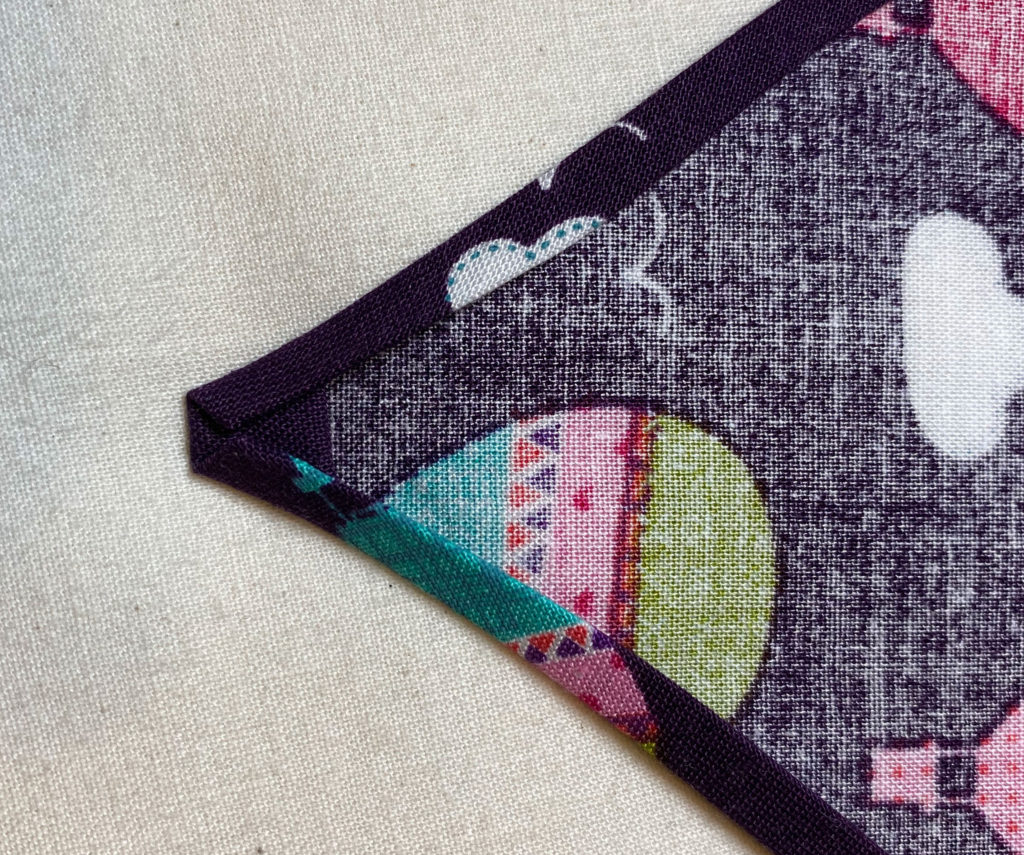
Press everything down in place.
Tie End Points
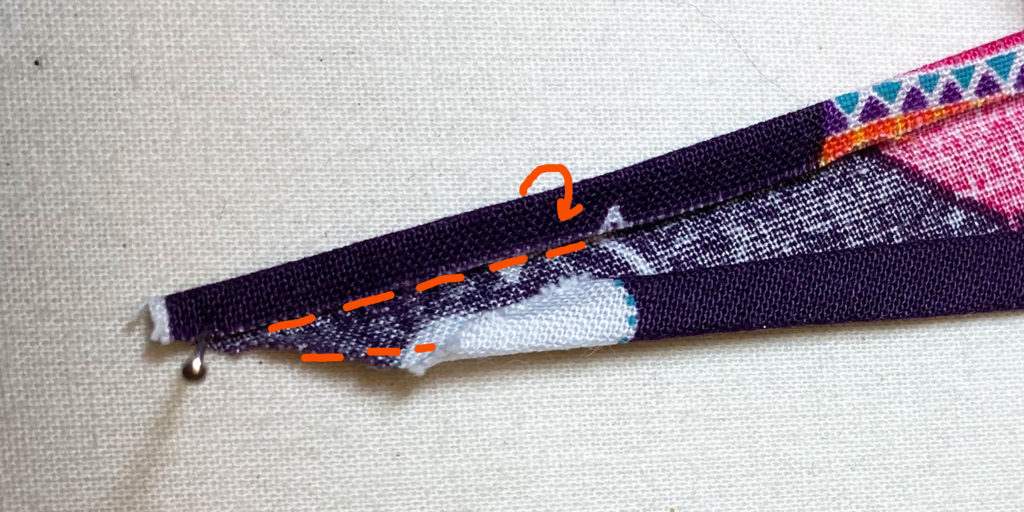
Fold and press the top edge and the bottom edge 1/4″ in then over again.
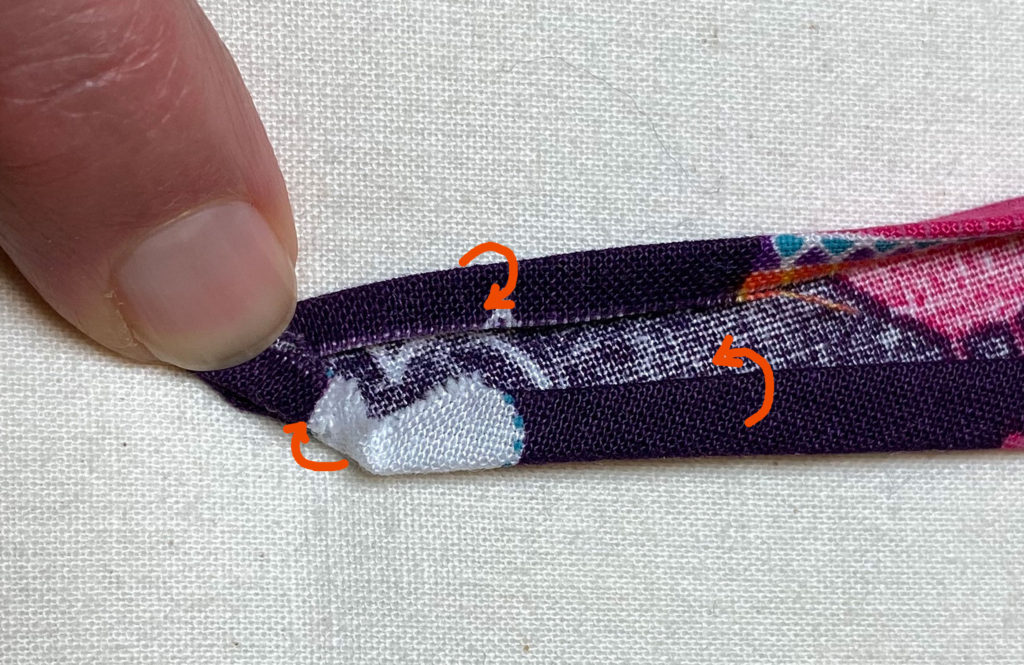
Unfold the second fold and tuck the raw edge of the 1″ long diagonal side in about a 1/4″. Don’t worry about precision here. It gets tricky and tight at this narrow point.
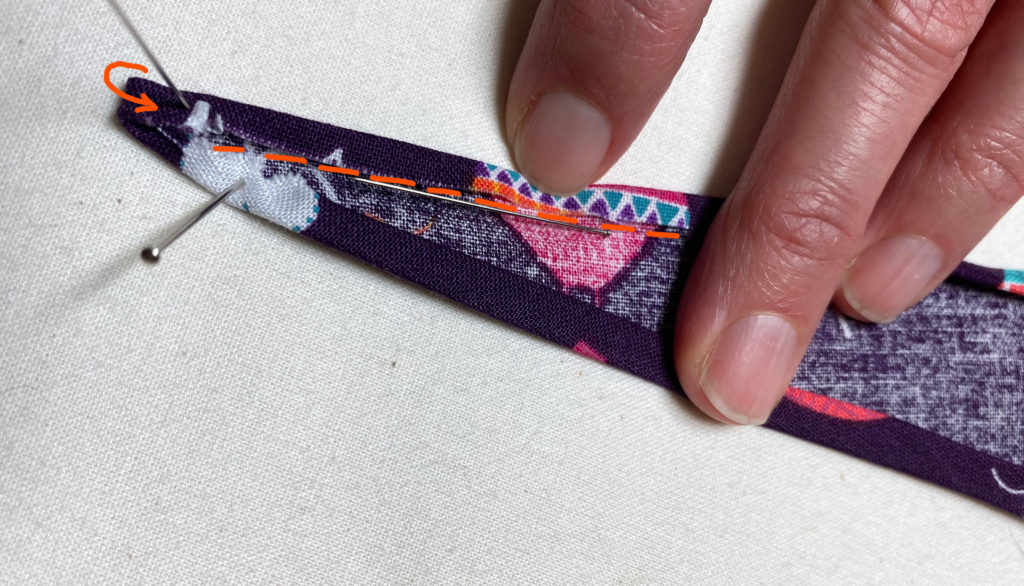
Fold the bottom edge down the second time, so now it has been folded a 1/2″ altogether. The new fold will lay on top of the diagonal edge you just folded in.
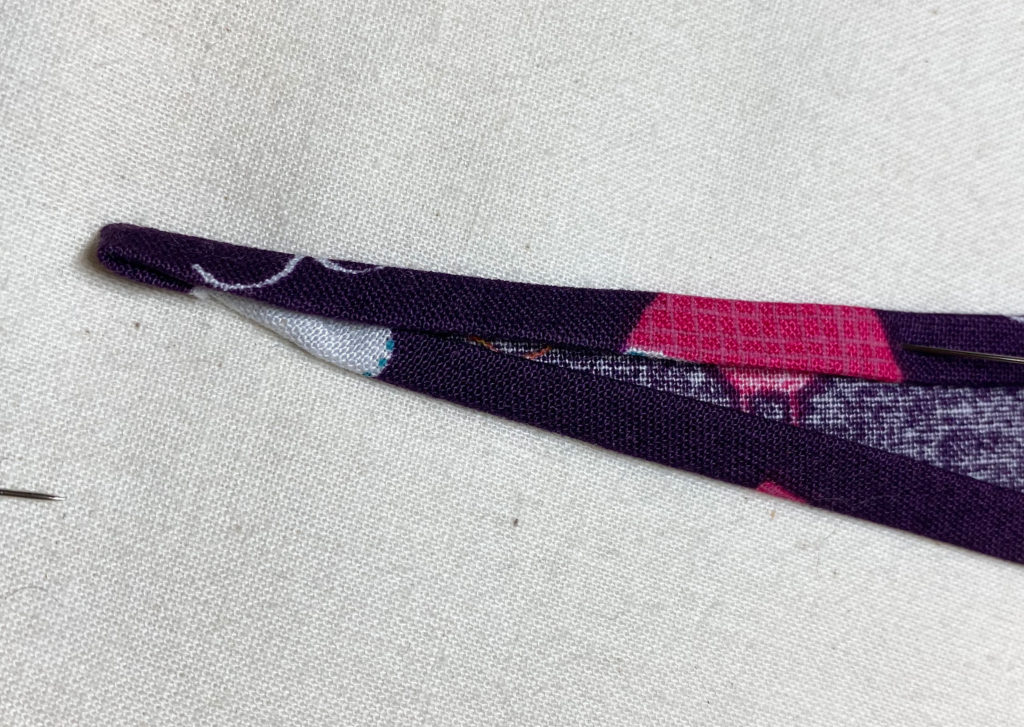
Now fold the top edge down for its second fold. If all the raw edges are covered go ahead and press to keep the folds in place. If a piece of a raw edge is peeking out just poke it back in with a pin or other tool.
I find that wetting my fingers or the cloth slightly with a spray bottle can help you manipulate the fabric easier.
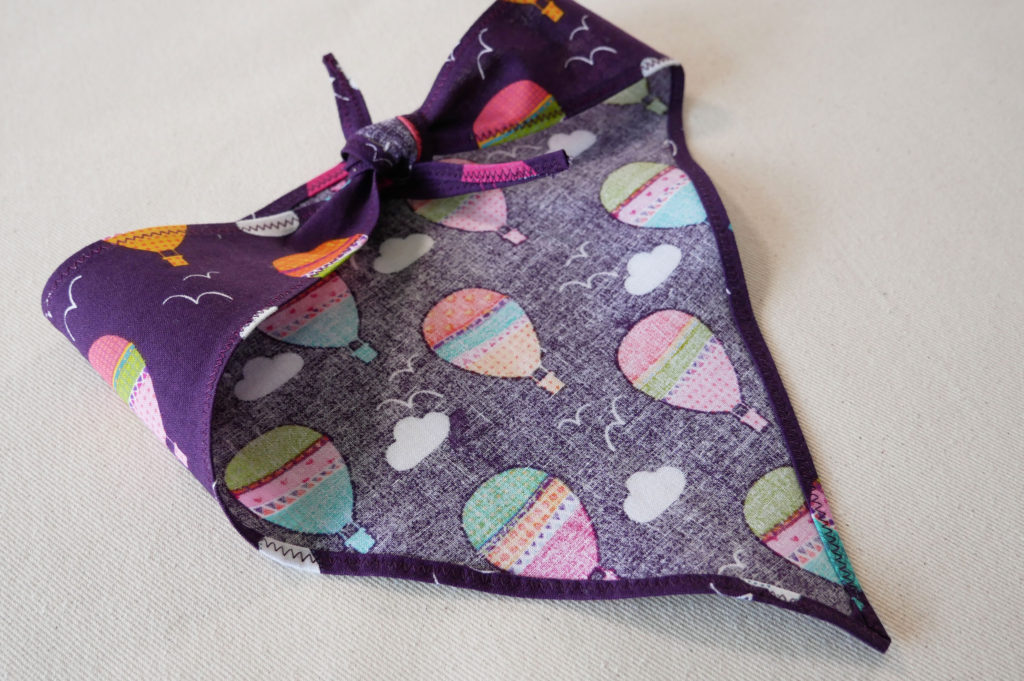
Now sew the folds down, all the way around. SPress your stitches and you’re done. Nice work.
