Wool is one of my favorite fabrics to sew. It’s so easy and pliable, and as a finished garment, holds up well. Wool comes in all different weights and weaves and blends. My coat fabric is wool and alpaca. It has a pile and is heavy and thick enough for a coat. (This is why I’m making a coat out of it).
Prepping:
To prep the wool before cutting I could take it to the dry cleaner and have them shrink it or, I can stay at home and steam it. Steam only, the iron can’t touch the pile fabric, especially the right side of the wool. When steaming piled fabric set the iron to the proper fabric setting and with a full water reservoir, hold iron so the iron plate hovers over the surface, spewing steam down into the fibers.
Ironing wool on the face or right side can give it a shine if you’re not careful and ironing piled fabric directly can permanently mash the pile. If you have to iron it, and don’t own a bristle pressing board (really, who does?) press on the wrong side of the fabric and have the face of the fabric on a thick terry cloth towel or a scrap of itself. Steam well.
Cutting:
For best cutting results wool coating has to be cut a in a single layer. It’s thickness, and in this case the pile, will make getting a good cut through two layers, at the same time, nearly impossible, or possible with more frustration to deal with than I am wired for. Unfold that fabric.
Pinning the pattern down or pattern weights:
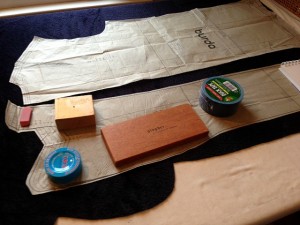 I’m a pin person and always pin my patterns into place. Is this because I really like my Isis straight pins or because I don’t own pattern weights? It wasn’t very long ago that I just purchased an extra-large cutting mat and could use a rotary cutter to cut out patterns but I didn’t want to try that with this project. I need more behind the wheel time with the rotary cutter. I was opting for the pins and trying hard to pin the back piece down but it kept moving and shifting on that pile my wool has. The pattern tissue seamed to float on top and when I would try to pin a corner the pile under it would move the entire pattern knocking it off grain. Frustrating. Enter the husband. Since he’s not a sewer he didn’t even know there is such a thing as pattern weights so he immediately grabbed a book off my shelf and placed it on the center of the pattern. Then we worked other objects onto the corners and edges of the pattern. I cut with the scissors and wow, that was easy.
Since I’m not leaving the pattern tissue pinned to the fabric pieces I needed to mark the cut pieces in a way to quickly identify them AND because I was cutting one piece at a time (single layer, remember) I needed to not forget to cut the second back piece or the second side front.
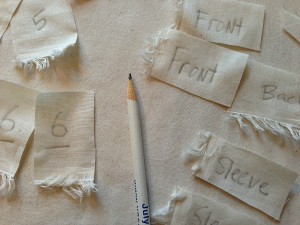 The solution was a scrap of muslin from my trash can. I cut it into little rectangles and with a pencil wrote on the muslin the various pattern pieces. For example I wrote “back” on two scraps. I wrote “front” on two scraps. After the basic, one word pieces I wrote numbers (the number that corresponded to the number on the pattern tissue). “Upper Collar” too long, so I put the number 6 on the scrap because that is the number of that particular piece. After you cut out a piece, pin a label on it. In the end if you have a “back” label left then maybe that’s a sign that you still need to cut out another back piece.
It is very important, when cutting a single layer that you remember to flip over the tissue on the second cut. You need a left front piece and a right front piece. You need a left sleeve and a right sleeve. When you cut your fabric doubled this automatically happens. When you cut your fabric single you need to make it happen.
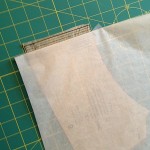
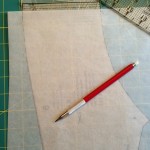
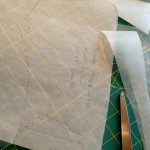
For pieces cut on the fold like the collar and the collar stand I had to draft the other half of the pattern. It’s easy with tracing paper.
- Draw a center back line on the tracing paper.
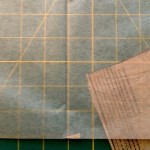
step 1 - Tape the pattern piece to your work surface. Use Scotch Magic tape and use sparingly. It’s magic tape but not crazy magic tape.
- Fold the tissue paper on the line you drew.
- Place the tissue paper on top of the pattern piece lining up the fold with the “place on fold” line.
- Tape down the tissue paper to your work surface
- Trace the pattern. Be sure to trace notches or other markings.
- Detach the tissue paper from the work surface and cut
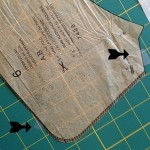
step 2 out your tracing while the tissue paper is still folded.
- Vola! Open up and label your full pattern piece with the Pattern maker, the pattern number, the view from the envelope, how many to cut, the piece name and the size. I labeled mine, “Burda 7423 view A & B, Upper collar, cut 1, size 42” I also labeled the way the piece lays on a napped fabric.
Summary:
- Cut thick fabric in a single layer of fabric. Always.
- Cut out a right and a left piece for sleeves, backs, fronts, sides. Do this by turning over the tissue pattern the second time you cut it out. Pieces like patch pockets are usually identical, no left or right.
- If the pattern maker only gives you one half of a pattern, draft the other half.
Got it? Great. Please comment if anything seams confusing or missing. I want to help, not confuse.
