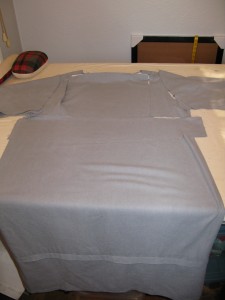
Recently my mom was cleaning out her closet and thought I might like a dress she had made in 1982. Maybe I could put it in a consignment store she suggested. It was a simple, straight sheath dress made in a silvery grey raw silk with a boat neck and an interesting detail of a wide, horizontal tuck about 8 inches above the hem.
I remembered this dress and always liked it but I wasn’t going to wear it. However I fell in love with the grey silk so I wasn’t going to consign it either. It was an obvious decision; I’ll cut off the top half and make a skirt.
A dress turns into a skirt
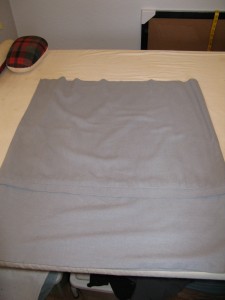
Measure on your body how long you want the finished skirt to be. The dress is already hemmed so just measure up from the hem to the length you want. Mark with a pin or a fabric pencil. But wait don’t cut yet. Add inches for the elastic casing. I like 5/8 or ¾ inch wide elastic for a waist seam so I add double the width of my elastic plus ¼ inch for ease, plus ¼ inch for finishing the raw edge. If using ¾ inch wide elastic you would add 2 inches (3/4 x 2, ¼ ease, ¼ to finish raw edge) Mark your cutting line and cut.
Turn the now disconnected bottom half of your dress inside out. Start by finishing the newly cut raw edge by folding over ¼”(toward the inside of the skirt when it will be on your body) or zigzag stitch on the edge. Whether you fold or stitch the raw edge, iron it on the correct heat setting for the fabric.
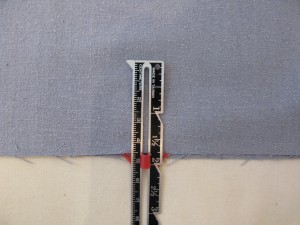
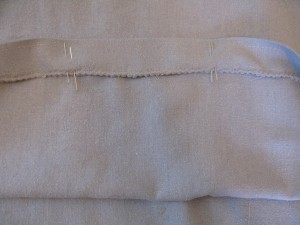
To make the casing, fold over the finished, top edge of the skirt (same direction as you did the raw edge). You will fold it over the width of your elastic plus 1/8 inch. I find it easier to measure and mark on the skirt where the top is going to lie on the skirt. Then I just fold the top down so it touches my marked line. If Measured and marked the elastic width plus ease my marks would be the fold line.
Check your measurements all the way around so your casing is the same width all the way around the top of the skirt, pinning the lower edge in place as you go. Note: Pins usually work best if they are place perpendicular to the seam or to the edge of a pattern. Iron the fold.
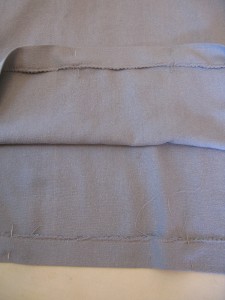
Leave the pins in or add more if needed to prevent fabric from creeping as you sew the casing down in place. Start at the back of the skirt and sew close to the lower edge of your casing. Stop sewing about 3” before you reach your starting point. You want that 3” opening in the back to thread the elastic through.
What size elastic? Cut a length of elastic an inch or two longer than the measurement around your body where you want the skirt to sit. (skirts don’t sit, I know) so if the place on my body where I want the skirt to be is 30” then I’ll cut my elastic to 32” but if all I have is 31” of elastic, I’ll make it work. (I’ve also been known to attach two shorter pieces of elastic together to make one long enough piece).
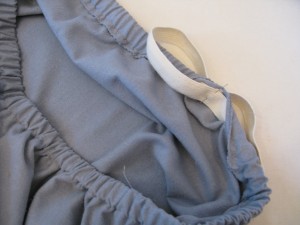
If you have a bodkin, now is the time to use it, well, if your elastic fits through it that is. If not, place a large safety pin in one end of the elastic (this gives you a “handle” to feel through the casing while working it through). Feed your safety pin, head first, or bodkin, into one opening of the casing. Keep working it through the casing because the object is to come out the other end. Be extra careful to keep elastic flat and not let it twist upon itself. If your casing is too wide it may twist and if it’s too small you can’t get the elastic through so measure carefully to leave enough room (consider your fabric’s thickness) but not too much room.
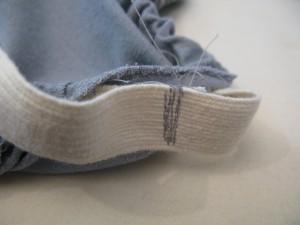
Once you have both ends of your elastic, overlap the ends of the elastic and pin together with that safety pin. Try on. Adjust elastic if needed. Too loose and your skirt could slip off too tight is always uncomfortable and not pretty so take an extra five minutes and try it on to get the fit just right.
Sew the elastic together by laying one end over the other and stitching back and forth a few times with a regular straight stitch. Be sure you are using a universal needle so as not to cut the elastic.
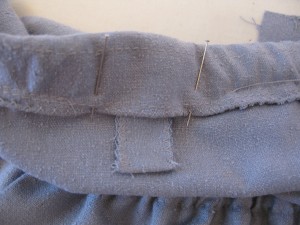
Stitch the opening of the casing closed. I slipped in a scarp of fabric (folded in half and zigzagged around the edges) so I can easily tell what is the back of the skirt since this dress had no center back seam or anything else to distinguish it apart from the front.
Now you are done. Really, you’re done. That was easy wasn’t it? For me, it was far easier than going shopping.
Be sure to check out part 2: Patch Pockets Tutorial to place some super useful pockets onto your new skirt.
