
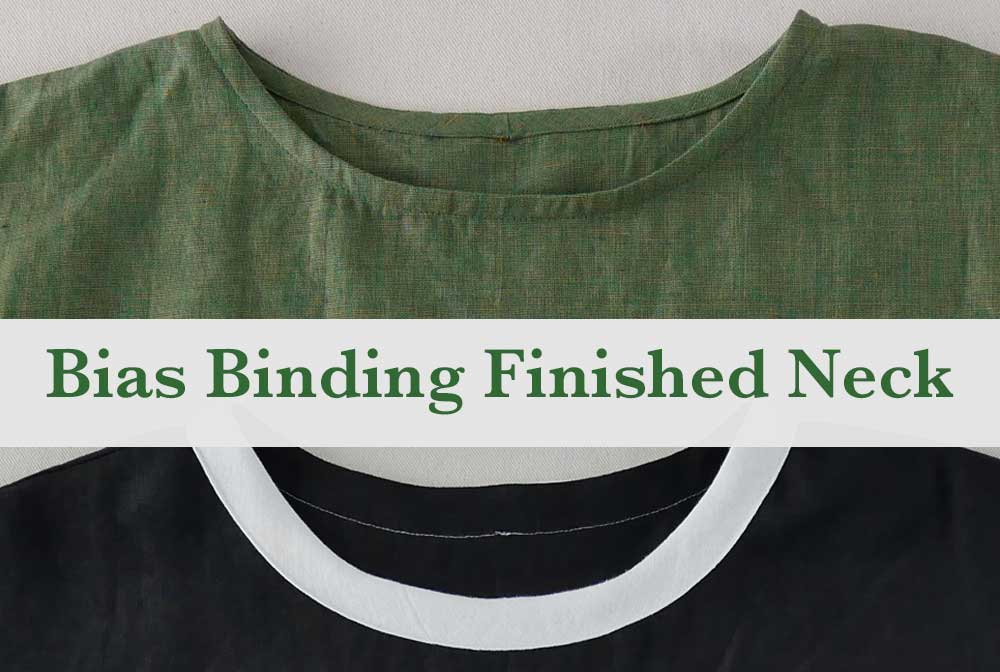
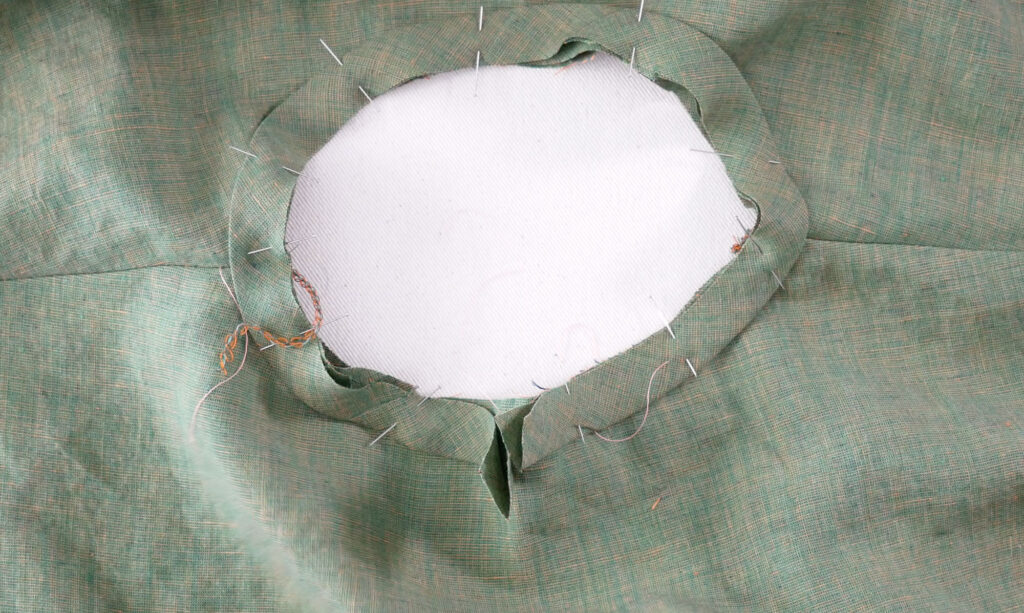
The neck opening of a shirt can be finished with a collar stand, a collar, a facing, a lining, or a bias binding. While the collars and collar stands are for style, the facings, linings, and bias strips are for function.
Linings are usually sewn to a facing, but not always, and function to line the garment. The facing and the bias strip are more similar and are sometimes interchangeable. Both finish the raw edge and sit on the inside of the garment, unseen.
There was a time when all home patterns included a facing. A facing is wider than a binding and can be shaped to include armholes or other features. A facing uses more fabric but offers more structure. It can also be fairly invisible, as it often does not require machine stitching on the outside of the garment to hold it in place.
A binding strip is a narrow strip of fabric sewn to the raw edge, flipped to the inside of the garment, and sewn down in place. The stitching that holds it down is visible on the outside. The strip is cut on the bias (45-degree angle to the fabric grainline), unlike a quilt binding strip. The bias allows for some stretch, and the stretch allows the strip to go around the curve of the opening smoothly with no puckering.
Why finish a neckline with a bias binding?
- It’s easy
- It’s a clean, minimal style that might fit the aesthetic of the garment
- Its minimal size when sewn is an ideal finish for sheer fabrics
- The style of the top is casual; the topstitching will add to/reinforce the sporty style.
Why not finish a neckline with a bias binding?
- The design requires structure, but the fabric is a little too drapey
- The garment is sewn in a fabric prone to fraying (easier to catch and cover all the seam allowance with a wide facing than a narrow bias band)
- You don’t want any topstitching
Binding Pattern Piece?
Bias binding strips are, as the name clearly states, cut on the bias. To cut a strip on the bias, you need a piece of fabric that is as wide and tall as the strip’s length. A 17” long strip requires a 17” square of fabric. That’s a lot of fabric for a 1” wide strip, right?
If it’s possible to place other pieces of the pattern around the strip, great. But when you can’t, or when you don’t have that much fabric, or if you don’t want to have big, oddly shaped scraps left over, you can cut multiple, shorter, bias strips and piece them together.
Some patterns will include a pattern piece for the bias strip. I usually use this more as a place holder when laying my pattern pieces out on the fabric for cutting. Then I can see which pieces will fit around it and if I have enough fabric to cut the strip whole.
To cut the strip, I usually measure and mark it directly onto the fabric with fabric chalk. This is what you’ll do when patterns don’t include a drafted bias binding piece, or if you want to piece smaller strips to make the length you need.
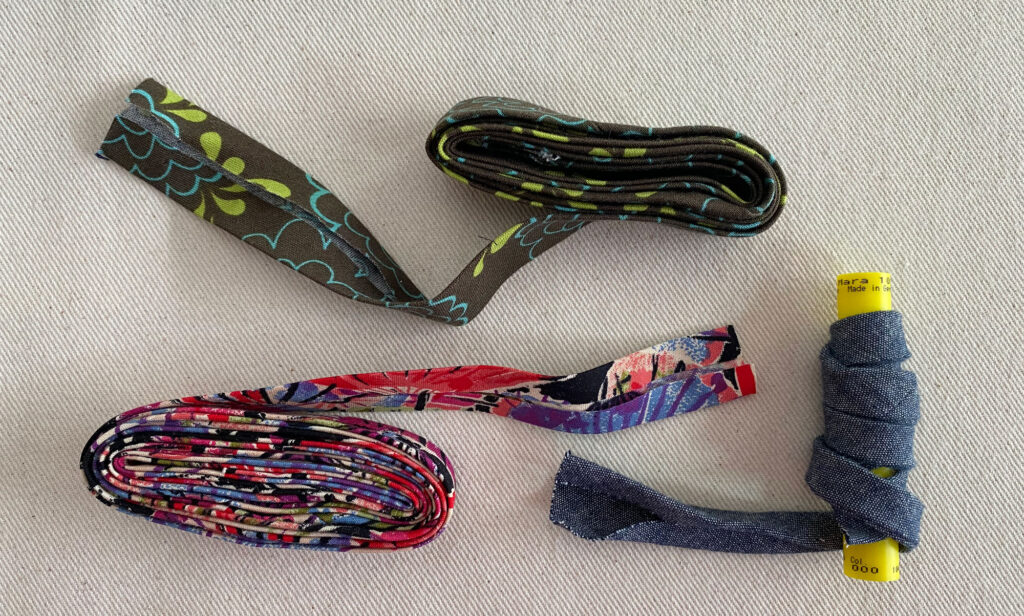
And remember, the bias binding doesn’t have to be cut from the fashion fabric. Because it’s not seen when sewn into the garment, you could use up scraps, or cut bias strips from a lighter-weight fabric to reduce bulk, especially if binding a wide-wale corduroy or denim.

How to Cut and/or Piece Bias Strips Together
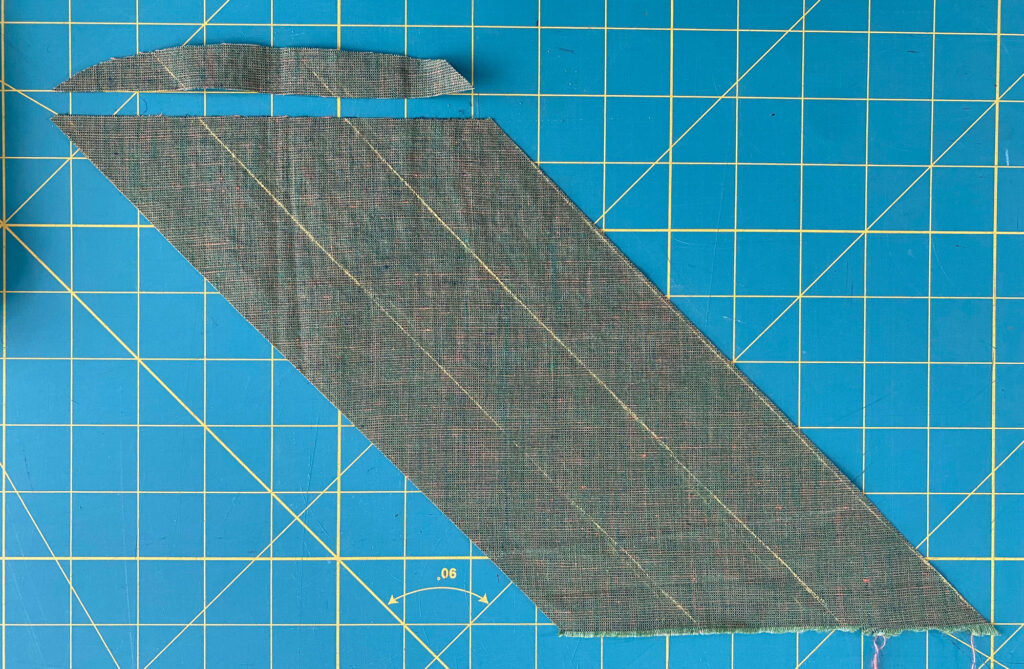
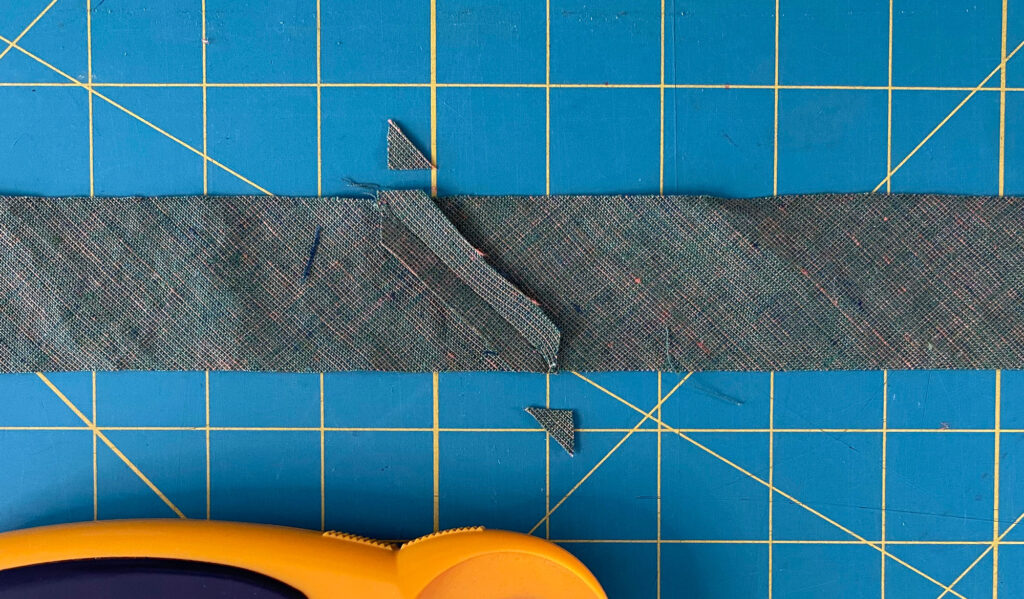
Lay the wrinkle-free fabric out flat on your work surface. Look at the weave of the fabric. Place a ruler so the long edge is at a 45-degree angle to the weave. Clear quilting rulers will have a line labeled 45 degrees. If you have that line on your ruler, place it on the fabric’s straight grain, and the long edge of the ruler will be at a 45-degree angle. Draw along the ruler’s edge with fabric chalk to mark your first cutting line. Or cut along the edge with your rotary cutter.
Move the ruler over however wide you need the strip to be and mark your second cutting line. Repeat this until you’ve marked enough strips to make the length you need.
To piece the strips together, keep two things in mind:
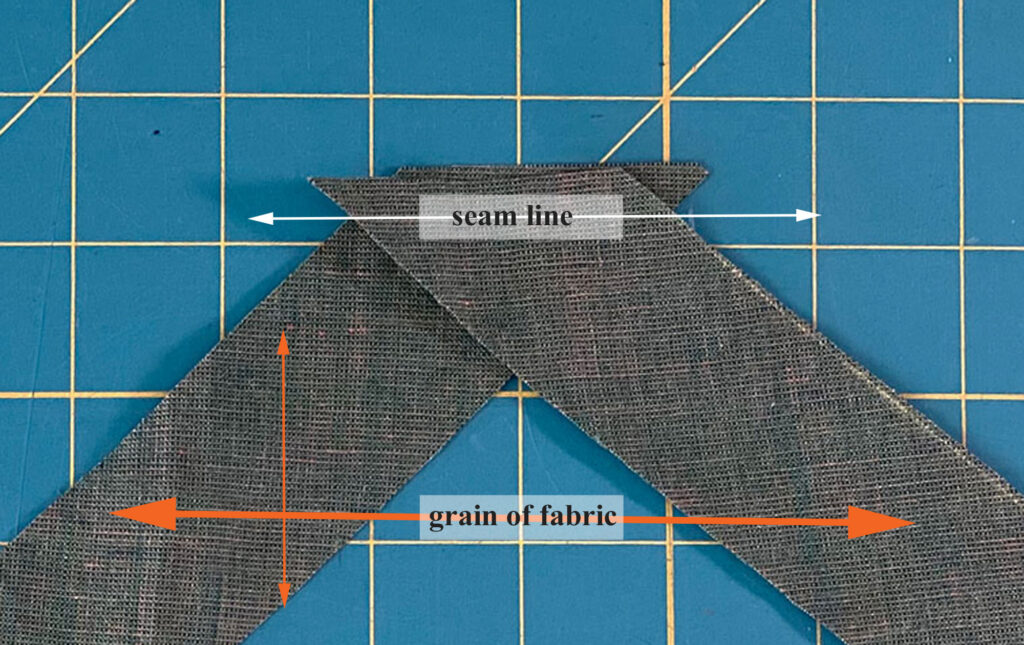
- The seams will be diagonal on the finished strip (this distributes the bulk of the seam allowances along the strip when it’s been folded)
- You need all the seam allowances on the same side of the strip. I know that seems obvious, but I often get turned around when sewing the strips, especially if there is no obvious right and wrong side to the fabric, and if I don’t make a concerted effort, I will have at least one strip sewn backward.

I find it easiest when I lay all the strips how they need to be sewn on a flat surface first. Then I start sewing them together.
When sewing, lay one end of a strip on top of another, right sides together, so they are lying opposite of each other. If the ends are cut at an angle to the grain (like those in the picture above), set the top strip so the amount that hangs off the end equals the seam allowance. (see picture below).
If the ends of my strips were squared off, the two strips overlap and would form a corner; one strip horizontal and the other vertical. You would sew across the tip of the corner.
Sew the strips together.
Check that all your seams are on the same side and that your strips open up to be one long strip.
Trim the piecing seam allowances to ¼” and press the seams open
While multiple, shorter strips save fabric, consider that piecing the strips means more seams and more bulk in the binding when done. This is why I prefer making bindings from light to medium-weight fabrics. Nothing heavier than a quilting cotton. In fact, when I have scraps of fun fabric, I will turn them into bias binding strips, ready to be used on whatever project turns up.
Remember, you will lose some length from your cut strips when piecing them, and that your strip needs to be slightly longer than the edge it’s finishing, so the short ends can be sewn together where they meet up or folded under at an opening edge.
How to Sew the Binding to the Neckline
On a Pull-Over Style Neckline
Sew the shoulder seams so the neckline is closed; one complete circle.

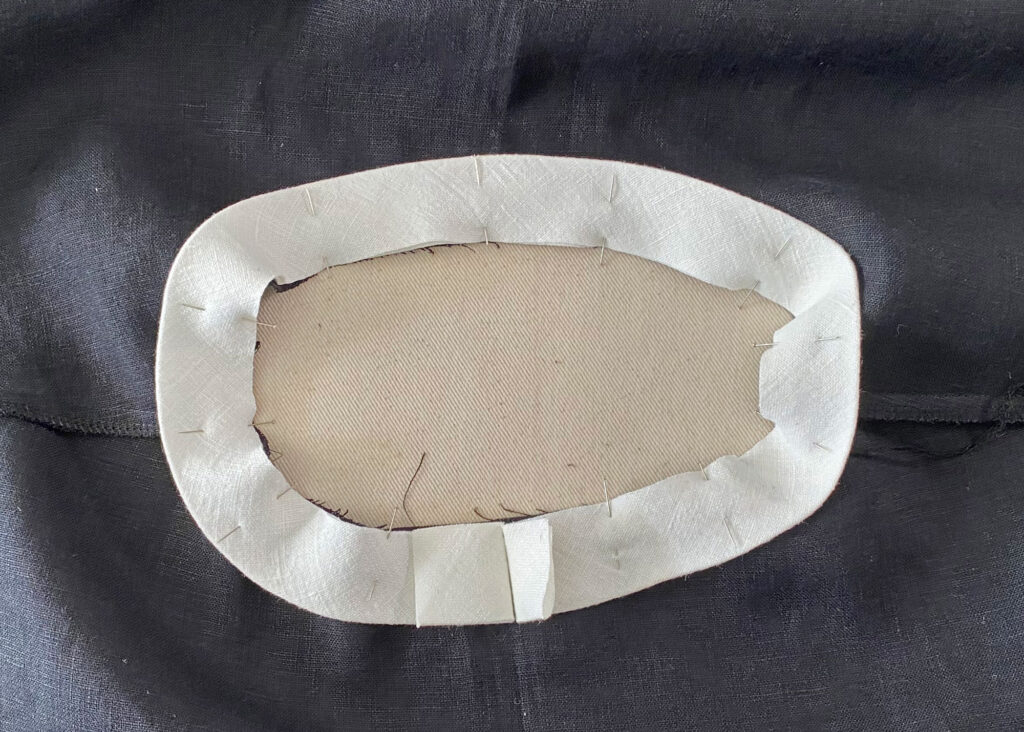
Fold the bias strip in half lengthwise, wrong sides together, and press it. It’s very important not to stretch the strip as you iron it. It will stretch very easily, and you might think you’re not stretching it, but take caution that it is not being stretched. If it gets stretched, it will not be as wide as it needs to be to encase the seam allowance at the neckline.

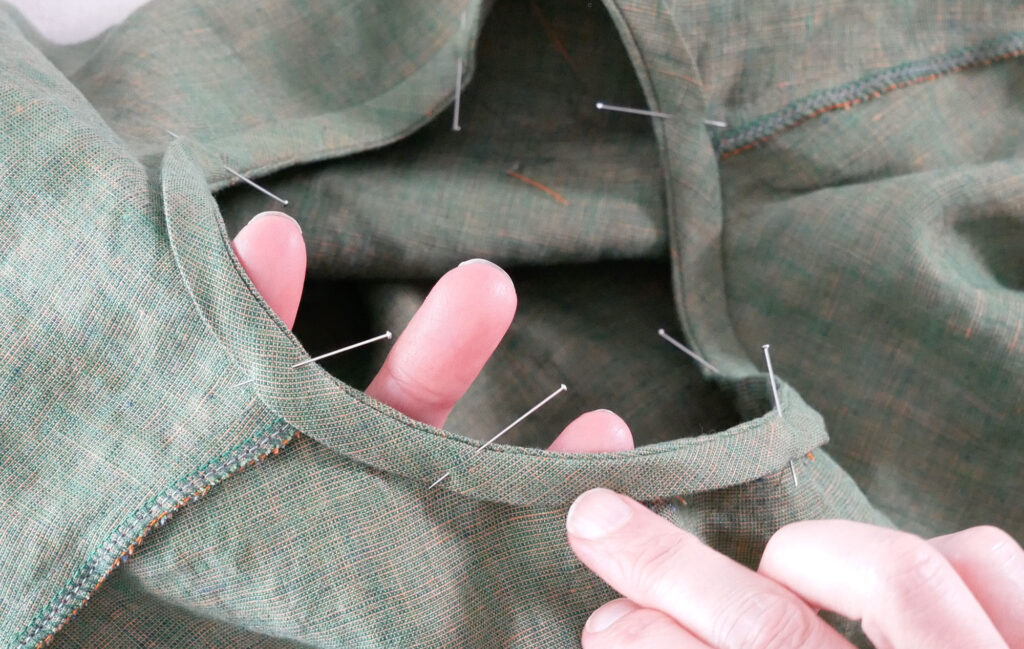
Pin the middle of the folded binding (bring the short ends together and fold to find the middle) to the center front of the neckline, right sides together, so the long raw edges of the binding line up with the raw edge of the neckline. Continue pinning the binding to the neckline on both sides of the first pin until you get close to the center back. The band should be smoothly lying against the surface, not stretched and not loose
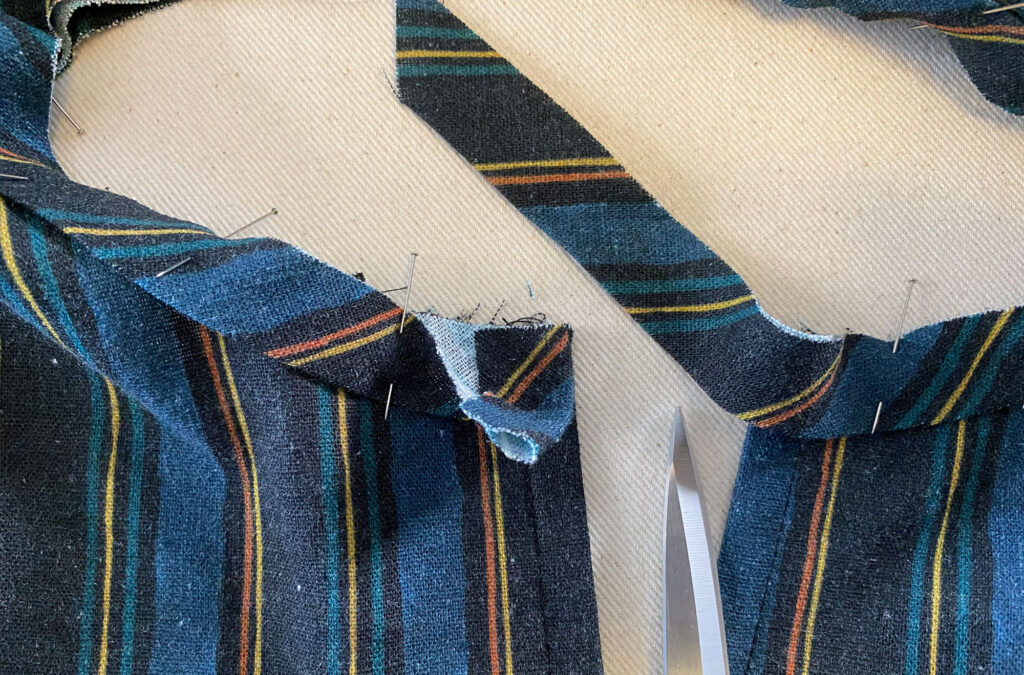
When you get close to the center back, stop pinning the binding down, but continue to lay it down as if pinning. Bring the two ends of the strip together at the center back. Butt them up to each other and fold over the excess to form a crease. The creases mark where you will stitch the two strips together.
When finding this point to sew the binding together, you can keep the binding folded in half or open it up flat to mark the crease more easily.
When sewing the bias strip ends together, have the strip unfolded. Sew across the strips on the crease you just made. Trim the seam allowance and finger-press it open.
Refold the strip in half. Continue to pin it down to the neckline.
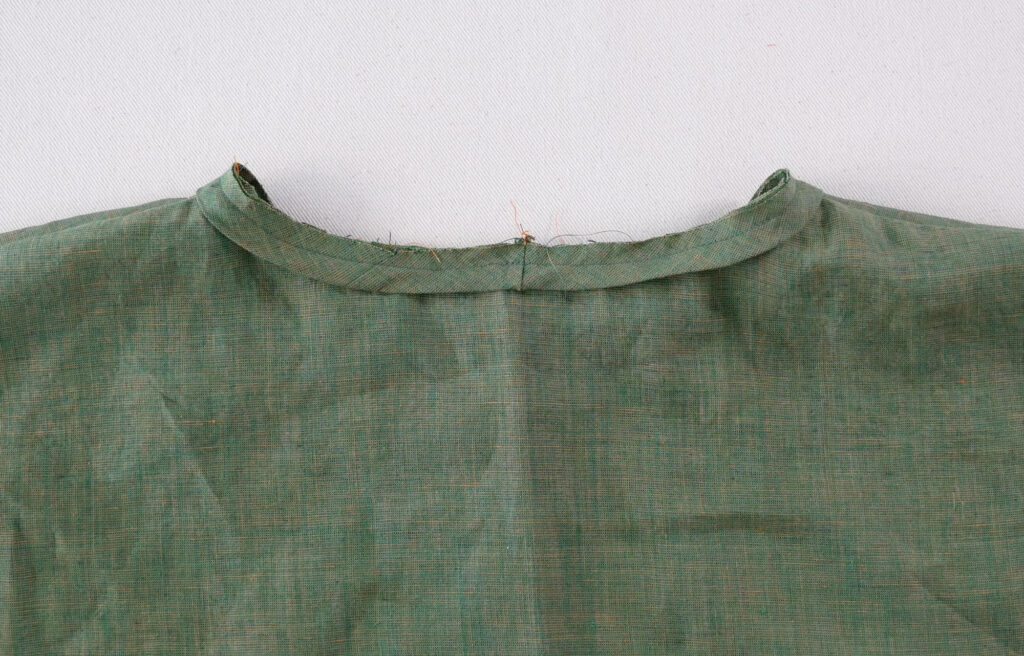
Sew the binding down to the shirt. The seam allowance is usually ¼” at the neck (sometimes I see 1 cm or ⅜”). If you are following a pattern, use the seam allowance indicated at the neckline (or trim it down to ¼” and sew the binding to the neck at ¼”).
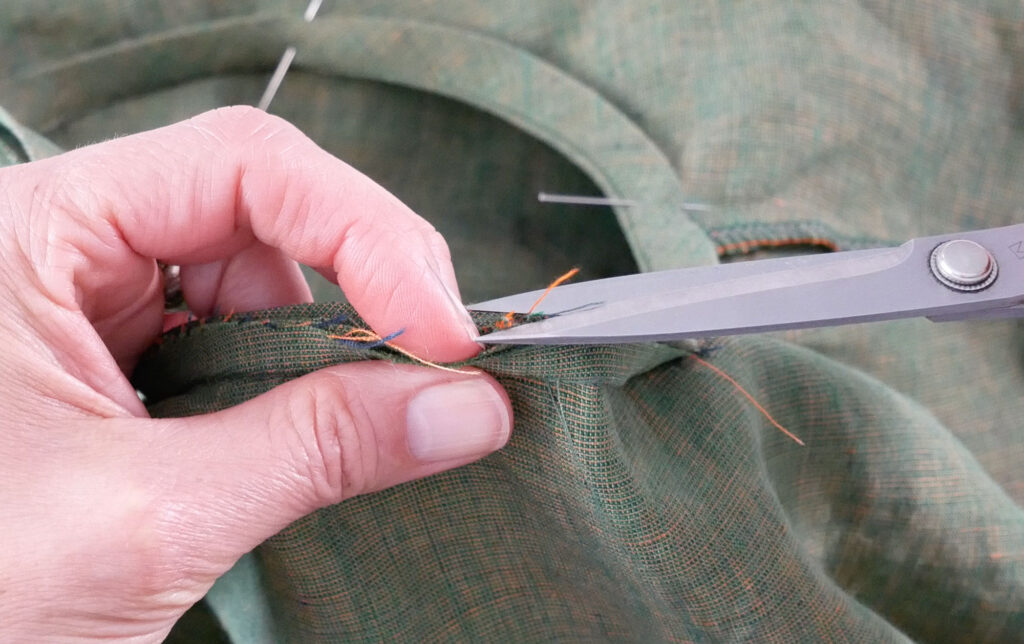
After sewing the binding to the neckline, you may need to clip into the tighter areas of the curves. Clip the binding seam allowance separately from the neckline seam allowance so the clips aren’t stacked on top of each other.
Nerd Alert: It’s best to clip fabric at a 45-degree angle. Take a look at the weave before snipping. The 45-degree angle helps prevent fraying.
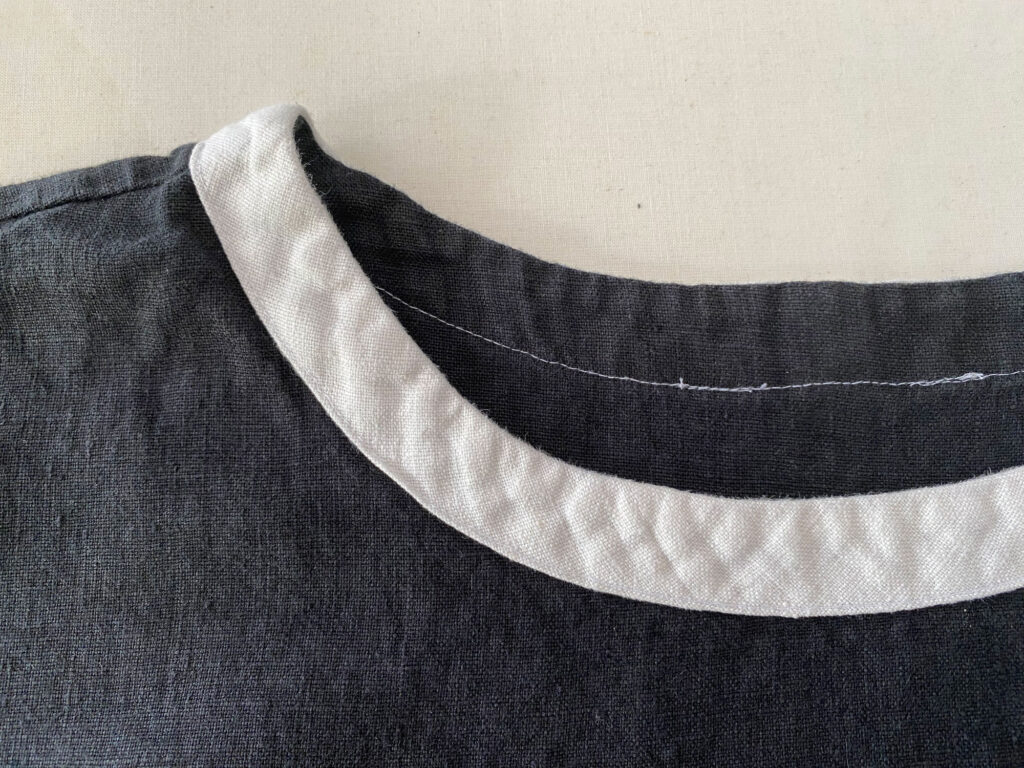
Press the binding up, away from the shirt.
Fold the binding to the inside of the neckline so that the neck seam line is just to the inside. You don’t want to see the seam on the outside.
Pin the binding down (The binding is now inside the top). This encloses the seam allowances. The folded edge of the binding is ”finished” by the fold and needs no treatment.
If your seam allowance is peeping out under the folded edge of the bias binding, unfold that section and trim the seam allowance so it fits under the binding.
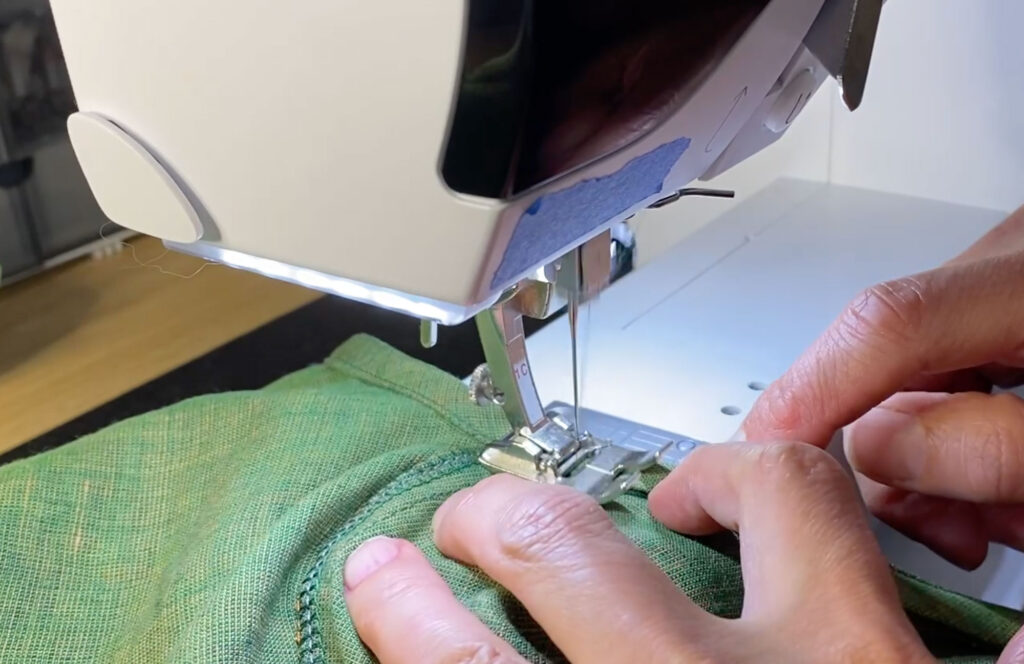
Sew the binding down close to the folded edge, around the neck by machine. This can be sewn from the inside so you can see the folded edge, or sewn from the right side. If you miss a bit of the bias strip when sewing from the right side, you can catch the missed part with hand stitches.
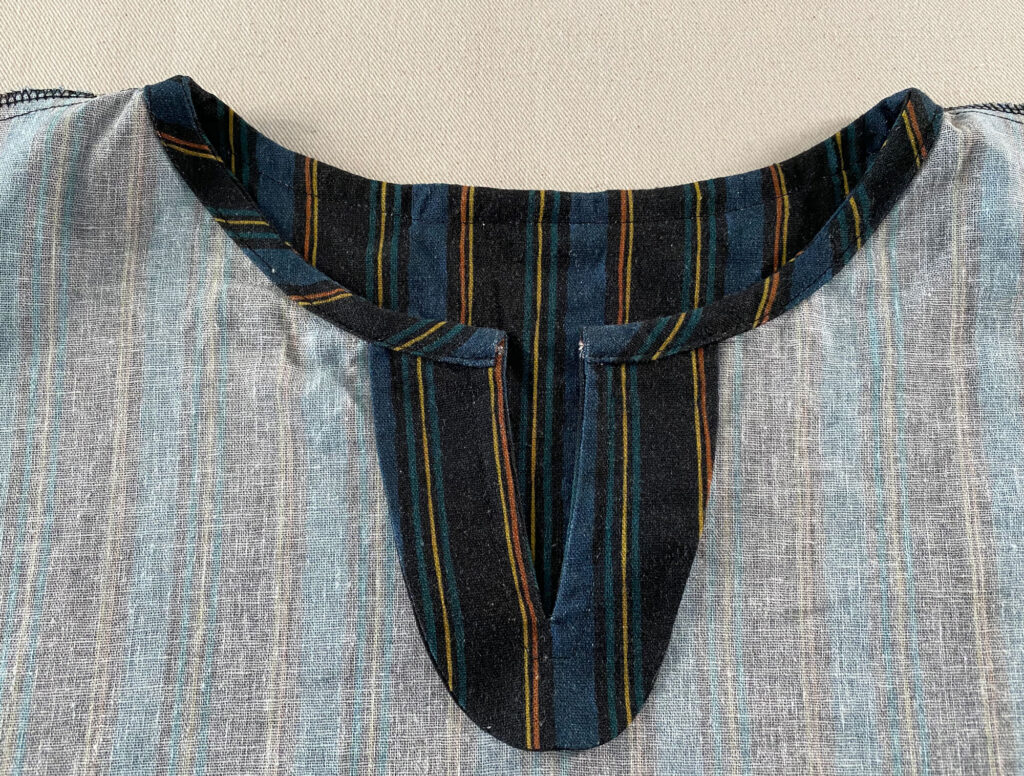
On a Neckline That Opens
Make your bias strip at least 2” longer than the neckline opening.
Sew the shoulder seams of the garment first.
Fold the bias strip in half lengthwise, wrong sides together, and press. It is important that you don’t stretch the strip as you iron it. It will stretch very easily, and you might think you’re not stretching it, but take caution that it is indeed not being stretched. If it gets stretched, it will not be as wide as it needs to be to finish the neckline.
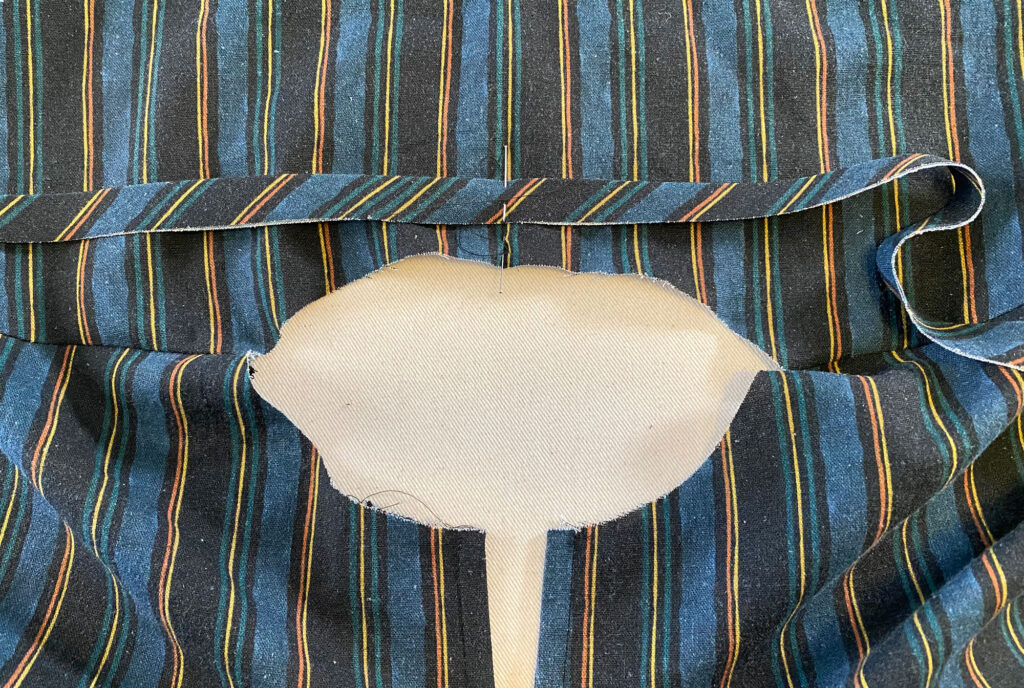
Starting about an inch in from one end of the bias strip, pin the binding at the edge of the neck opening. Or, starting in the middle of the binding strip, pin it to the neckline, at either center back or center front, whichever is opposite the opening at the neckline.
The binding is placed on top of the garment with the long raw edges of the strip lined up with the raw edge of the neckline. An inch or so of the bias strip will hang off the neckline into the opening. This extra length is for finishing the binding cleanly.
Pin the bias strip to the neckline all the way around. You want the binding to be too long and hang over the start and end of the neckline about an extra ½” (or more if you prefer). Trim the binding if it’s longer than you want to fold under. I like a ½” extra to fold under.
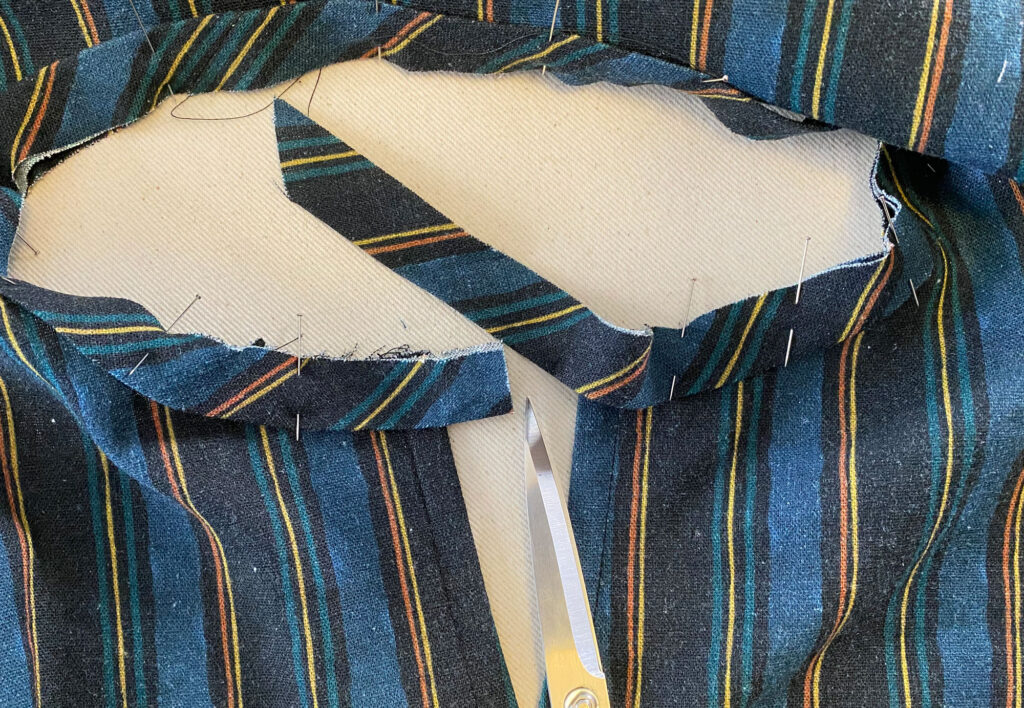
NOTE: This tutorial assumes the edges of the opening are already finished – as in a keyhole opening, a front notch, or a cuff slit (sleeves can be finished with bias strips too). Clean finishing the short ends of the bias strip would not be necessary if the edges of the opening are finished after the neckline is finished.
Unfold the short ends of the strip and unpin enough of the ends to work. Fold the short end of the binding back onto itself until the binding matches the length of the neck perfectly. Refold the strip in half, with the end folded in, and pin it down to the neckline.
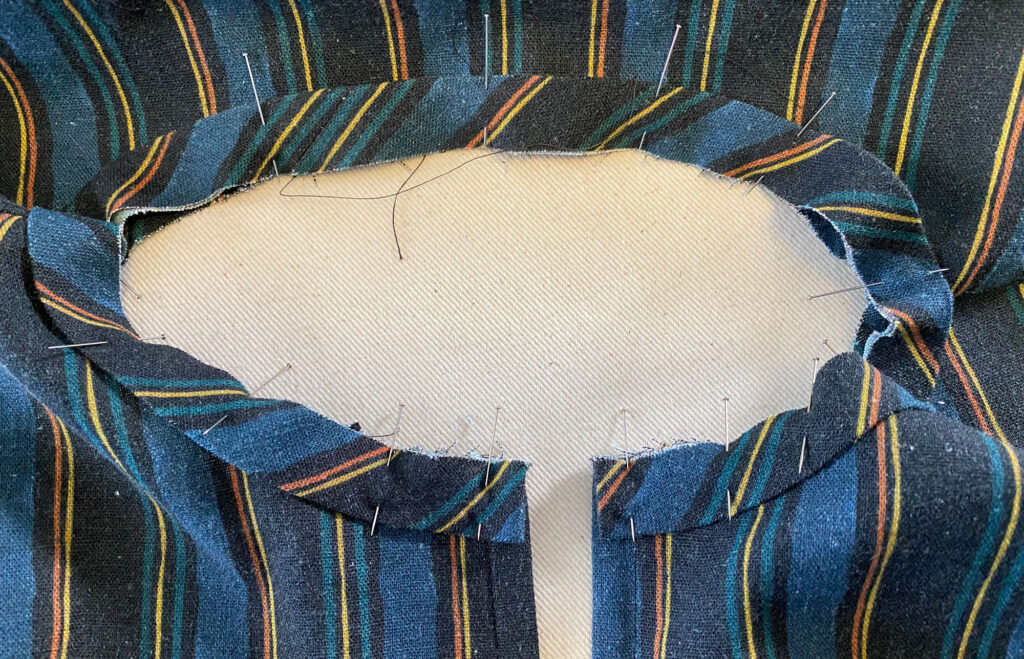
Sew the binding strip down to the top around the neckline. A ¼” seam allowance on curved seams, such as a neckline, is ideal, but if you are following a pattern, use the seam allowance indicated (or trim it down to ¼” and sew the binding to the neck at ¼”).
After sewing the binding to the neckline, you may need to clip into the tighter areas of the curves. Clip the binding seam allowance separately from the neckline seam allowance so the clips aren’t stacked on top of each other.
Nerd Alert: It’s best to clip fabric at a 45-degree angle so look at the weave. The 45-degree angle helps prevent fraying.
Press the binding up, away from the shirt.
Fold the binding to the inside of the neckline so that the seam line is just to the inside. You don’t want to see the seam on the outside. Pin the binding down (The binding is now on the inside). This encloses the seam allowances. The folded edge of the binding is “finished” and needs no other treatment.
If any seam allowance is peeping out under the folded edge of the binding, unfold that section and trim the seam allowance.
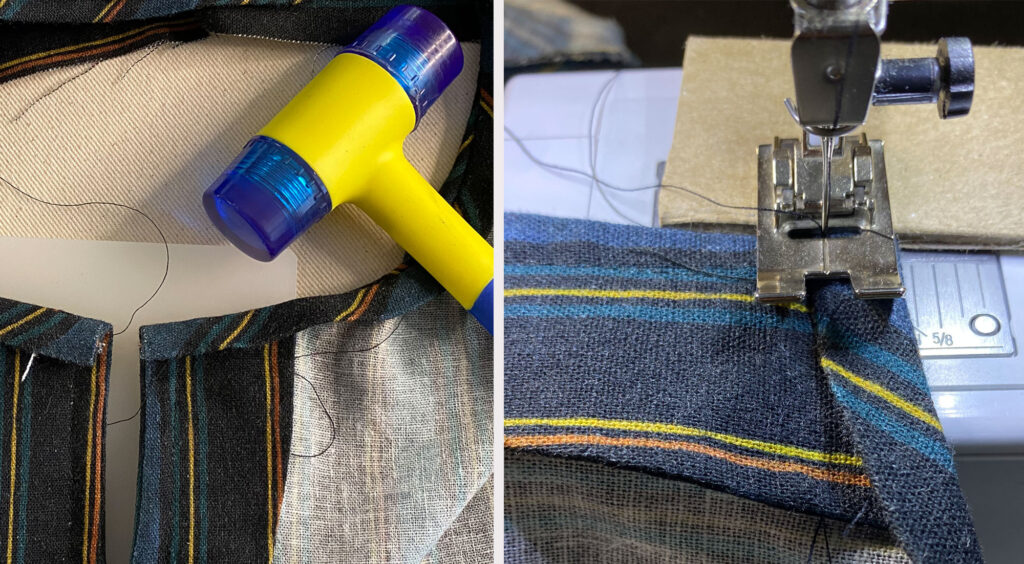
The opening ends can become bulky. It might be helpful to pound them with a mallet. To prevent your machine from getting “stuck” when sewing over the bulk, use a piece of folded cardboard, folded fabric, a jean jig, whatever you have that can be slipped behind the fabric to keep the presser foot even (parallel to the stitch plate) as it sews over the bulky section.
Sew the binding down close to the folded edge, around the neck by machine. This can be sewn from the inside so you can see the fold, or the outside if your bobbin stitches are not well-formed. If you miss a bit of the bias strip when sewing from the outside, you can catch the missed part with hand stitches.
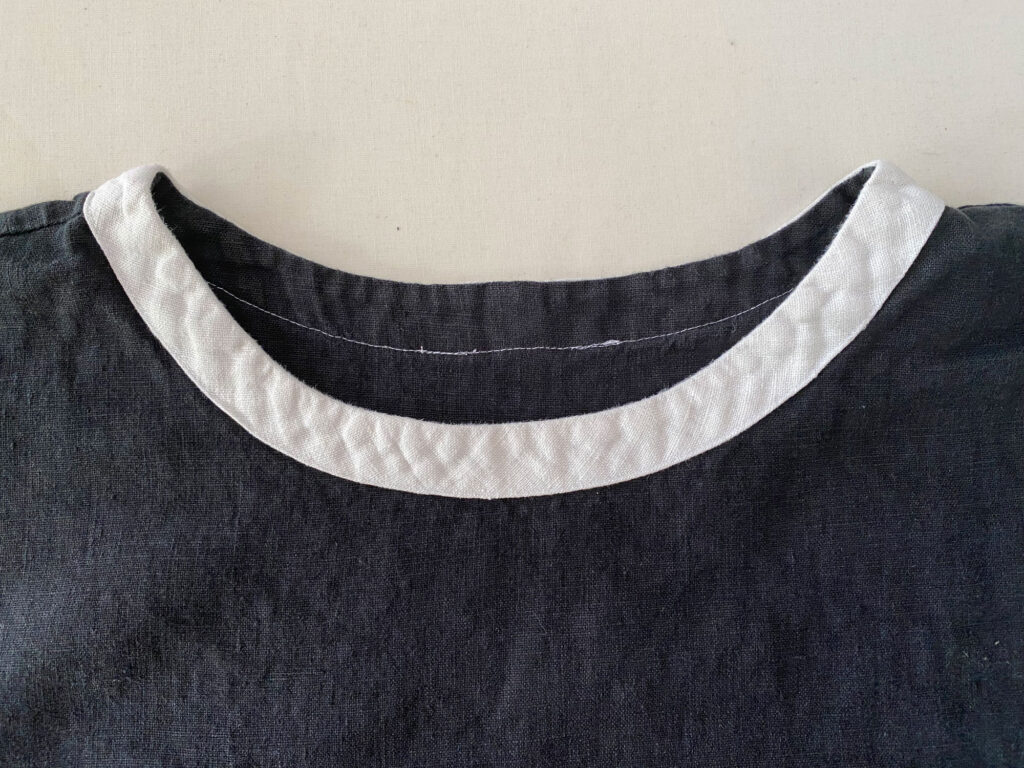
How to Sew Decorative Binding to the Neckline
You can also sew the binding so it shows on the outside of the garment. This is usually done in a different color or print from the main fabric.
To be able to see the binding after it is sewn, it has to be sewn opposite to the binding that is not seen after it is sewn.
The instructions are the same except that the binding is pinned and sewn to the wrong side of the neckline first. Then it is flipped to the outside of the neckline and sewn down.
You could also widen a decorative binding strip for more emphasis.
Typically, bias binding to finish a neckline is cut 1” wide (when using a ¼” seam allowance), or 1 ½” wide (when using a centimeter or ⅜” seam allowance). These widths allow for a double-folded strip, the seam allowance, and the width needed to cover the seam allowance when folded over.
A decorative binding can be cut as wide as 2 ½” for a ¾” wide finished strip. However, making the binding much wider will make it difficult for it to lie flat around the curve, especially the tighter parts of the curve at the shoulder seams. But you can always sew a partial sample to check.
Another option for a wide decorative band at the neck is to draft a neck facing as wide as you want. Add ¼” seam allowance to finish the outer raw edge and whatever amount of seam allowance for the neckline seam. Then, sew the facing to the inside of the neckline so it can be flipped to the outside and sewn down.