

This post is about how to relocate a bust dart, but this method works to relocate a waist dart as well.
Darts on patterns are all too often not placed where you need them. And when this happens the fabric bubbles, and puddles, and strains, and well, just makes a mess.
It’s not you, it’s not your sewing, and it’s not personal. It’s just where the pattern drafter guessed they would be needed. But it’s super easy to move a dart and when you do you’ll have a better fitting and better looking garment
Here is the video and it’s is part of a series on getting a better fit. But if you rather, read on!
Darts 101
The purpose of any dart is to add dimension and shape to the flat fabric. The dart allows fabric to go over curves and mounds smoothly. When the dart’s position is not aligned with the body’s fullness, the garment fabric will not lie smoothly.
Darts point to the fullest part of the curve (as in a waist dart) or mound (as in a bust dart), and right away you probably understand why most darts need to be moved.
That’s right. A pattern can only guess where your fullness is but we all know breasts, bums and bellies all come in infinite shapes as well as sizes. The fullness might be high, or low, or dead center or slightly left or far right or any combination.
Darts should stop one to two inches away from the apex (the fullest point is called the apex). Larger curves and mounds and looser styles require the dart to be further away from the apex, about 2”. Smaller curves and mounds and a more fitted style require the dart to end closer to the apex, about an inch.
So sometimes the dart is not only not pointing to your fullness, but it also stops too close or too far away from your apex.
There’s a lot that can be off, but the 3-step fix is super easy and makes a huge difference in the final fit and appearance of the garment.
- Step 1: locate your apex
- Step 2: compare your apex location to the pattern’s
- Step 3: move the dart
Find Your Bust Apex
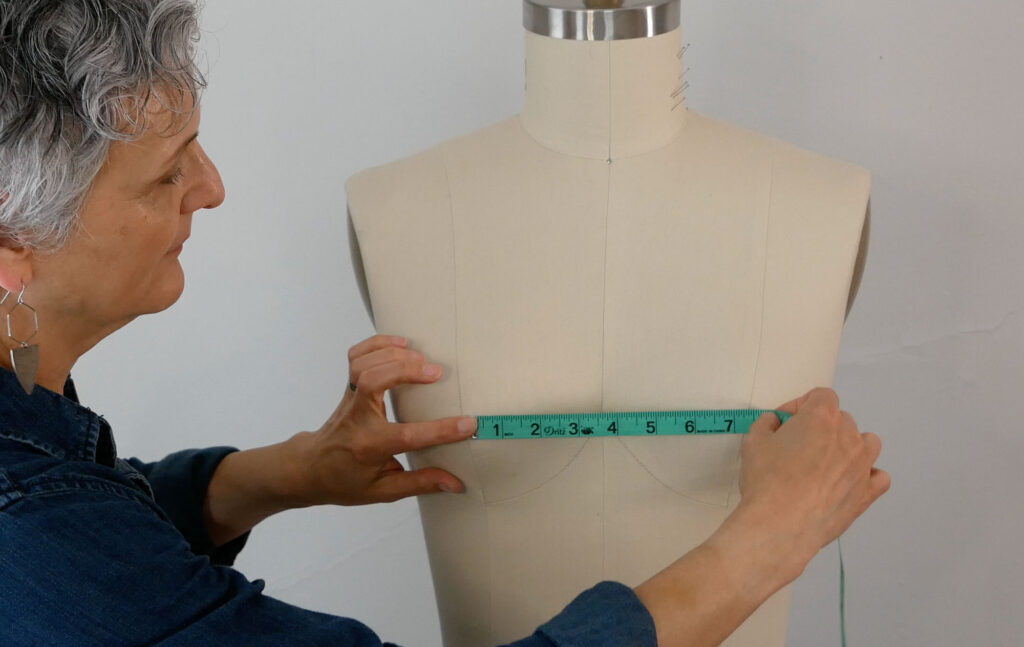
Wearing your everyday bra or the bra you plan to wear with this particular garment, measure yourself across from apex to apex and from mid shoulder down to apex.

OR if you have a tissue paper pattern, hold the pattern piece up to your body as if it’s the garment (be mindful of where Cf and the seam lines are) and mark on the pattern where your apex is.
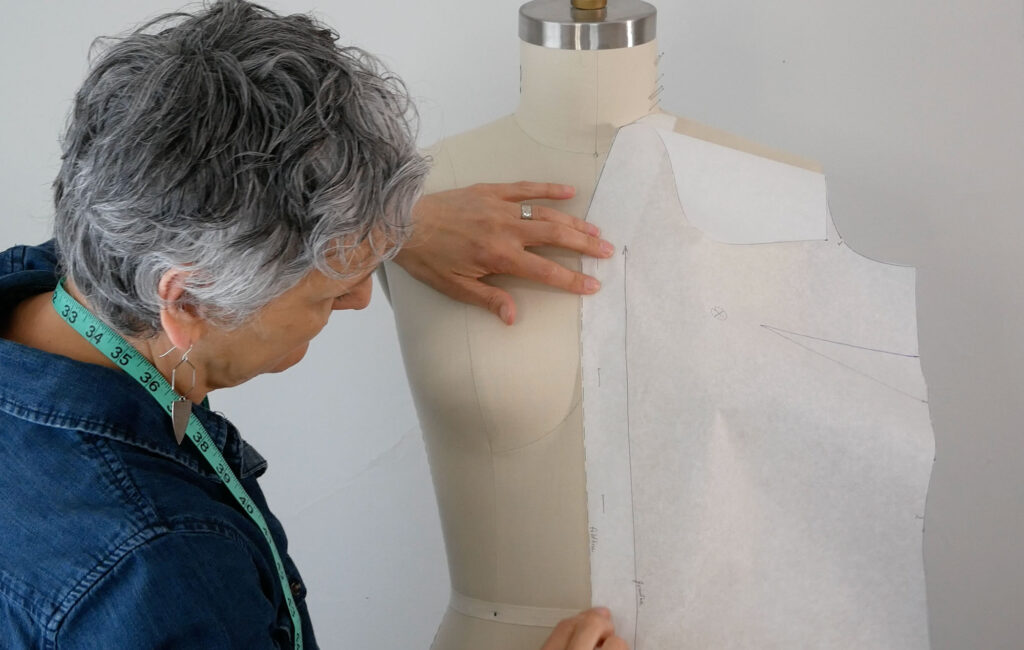
Mark your apex on the pattern by measuring down from the mid shoulder and mark the distance you got from the shoulder to the apex.
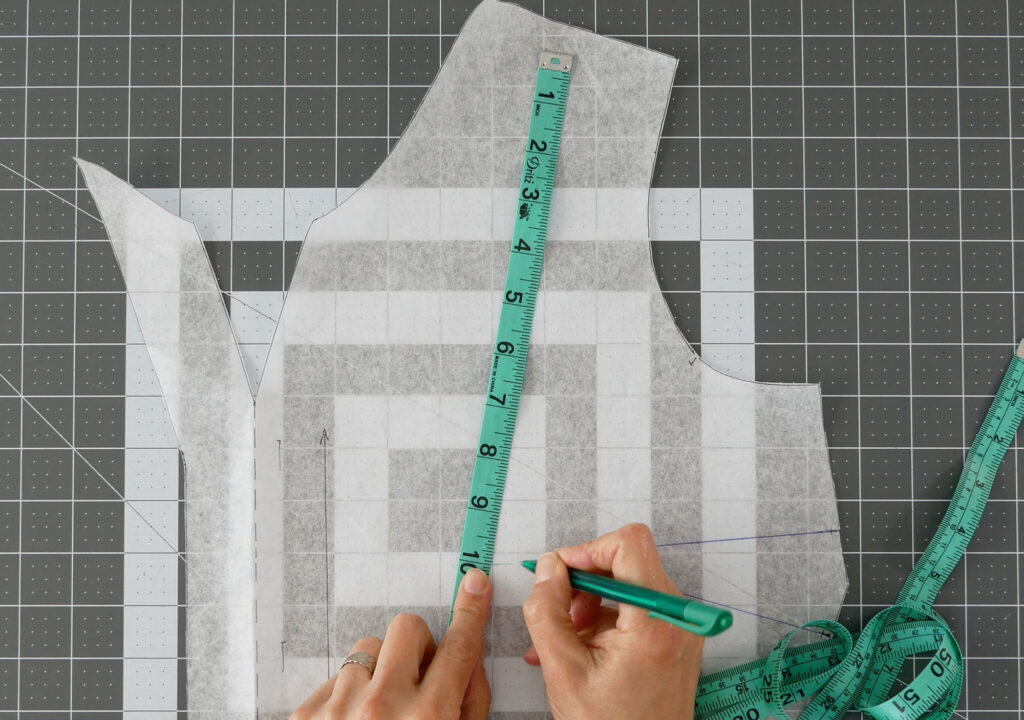
Remember the seam allowance.
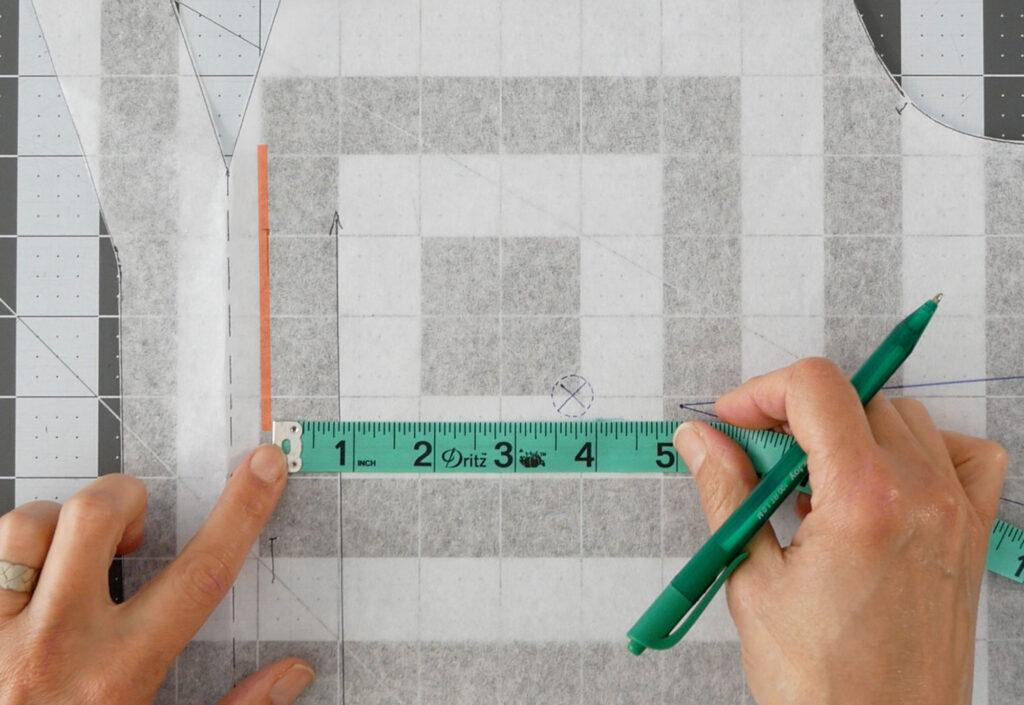
Then measure over half the of your apex to apex distance from center front – not the edge of the facing, or anything extending beyond center front. (Tip: Vertical buttonholes are placed on CF)
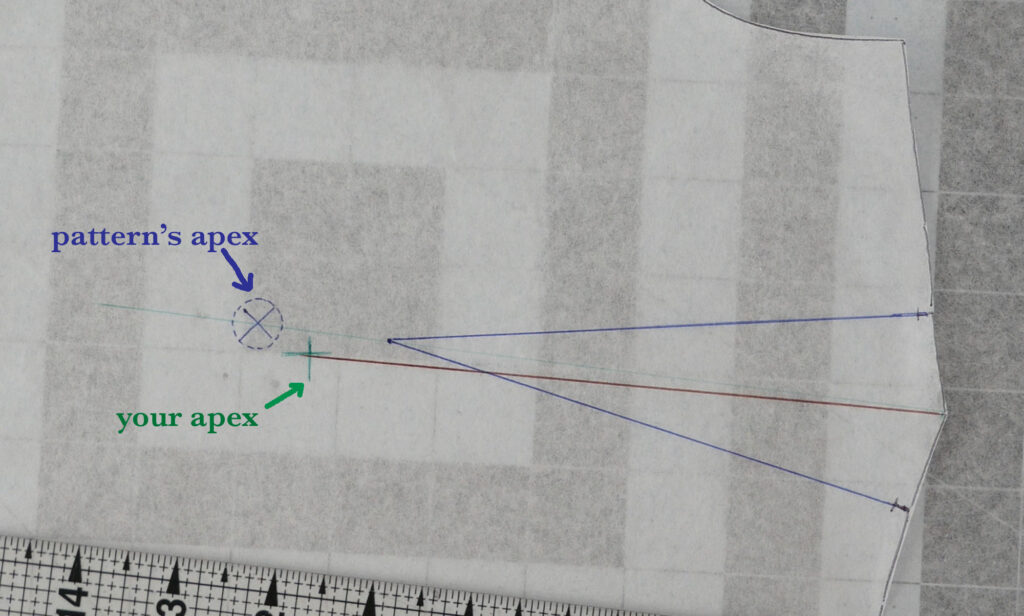
Measure in a straight line at the same level of where the shoulder to apex measurement was marked. Where the two measurements collide is where your bust apex is.
If your apex is less than ½” away from the pattern’s apex, you don’t need to relocate it. If it’s ½” or more, you do.

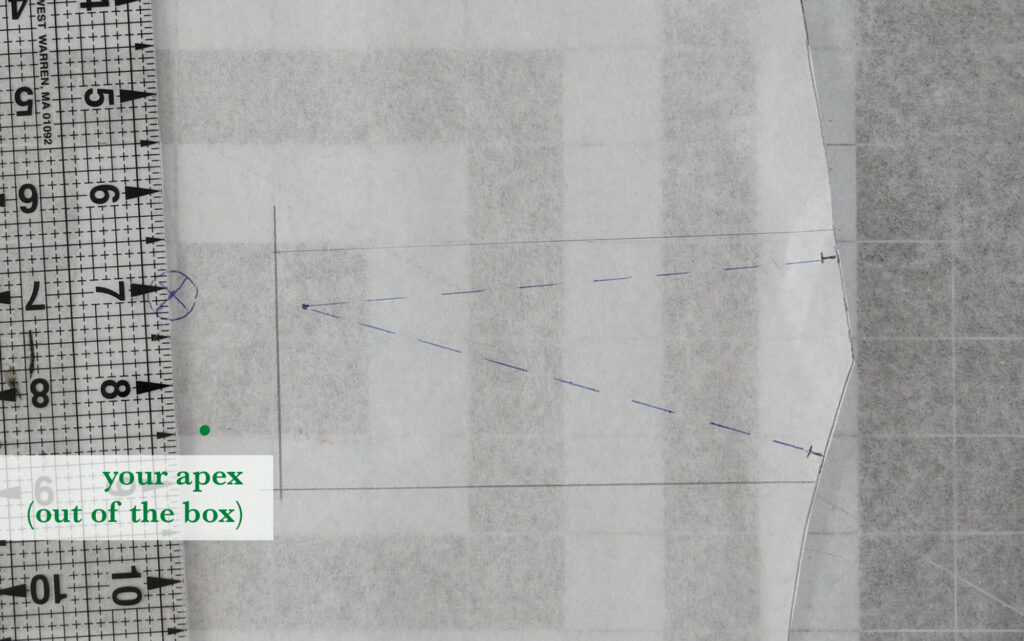
The apex is shown on the pattern with a cross inside a circle. If your pattern has not indicated where the apex is you can get a rough idea by drawing a line starting in the center of the dart base, straight through the dart point and stopping at 1 to 2 inches beyond the dart point.
This is the apex for how the pattern was drafted – not the same as where your apex is.
For waist darts in pants and skirts, measure as best you can where you are fullest. Waist darts can be eliminated if you need the extra room (extend your waistband pattern piece) or moved out toward the side seam to allow more room for fullness.
Remember, the rule of dart placement is that it points toward the fullest part of the body. Where the dart starts doesn’t matter. Therefore, you can change the direction of the dart by simply redrawing it, or you can keep the original dart angle and move it.
Let’s assume, for now, the dart length, how long it is, is fine. The length of the dart has more to do with cup sizes, or more accurately, the difference between your high bust and full bust measurements. And that’s all covered in my videos: How to do a Full Bust and small Bust Adjustments
Let’s Start With the Easiest Way to Relocate the Dart: Redraw the Dart
This method will change the angle of the dart, so check first that this won’t change the garment’s style lines. It’s the method you want to use if you only need to move the dart tip slightly, a ½” or so. It saves so much time, and such a little shift won’t change the design of the bodice.
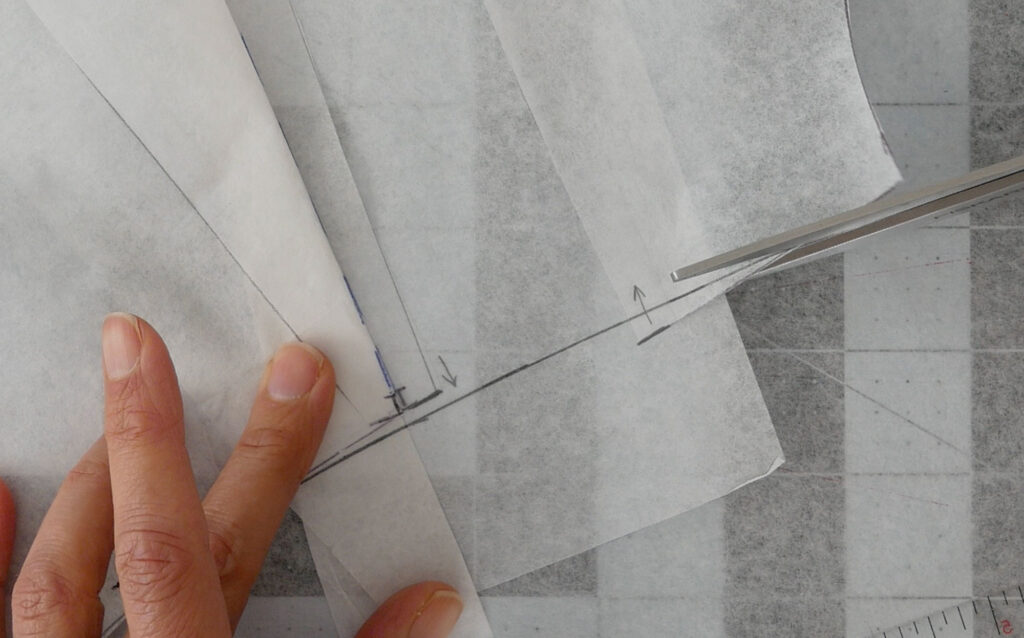
Draw a line starting in the center of the existing dart’s base, straight to your apex.
The new legs will start in the same place at the side seam, but will join together to form the tip on this new line, which points to your apex.
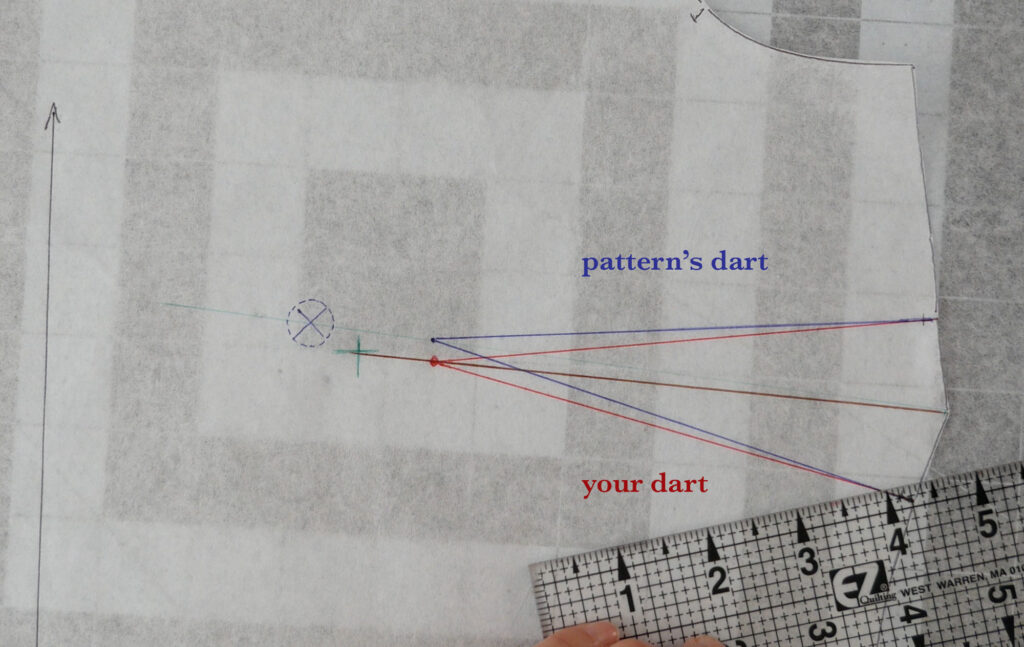
Measure the length of the original bottom dart leg and draw the new dart legs the same length. Is the new dart tip the same distance away from your apex as the original dart tip was from the pattern’s apex? If not, redraw the legs so the dart tip is farther or closer to the apex.
I like to keep the same distance as the original design if the pattern was drafted for my cup size, and the dart was just in the wrong place for me. I have two posts explaining pattern cup sizes: How to do a Full Bust Adjustment and How to Do a Small Bust Adjustment
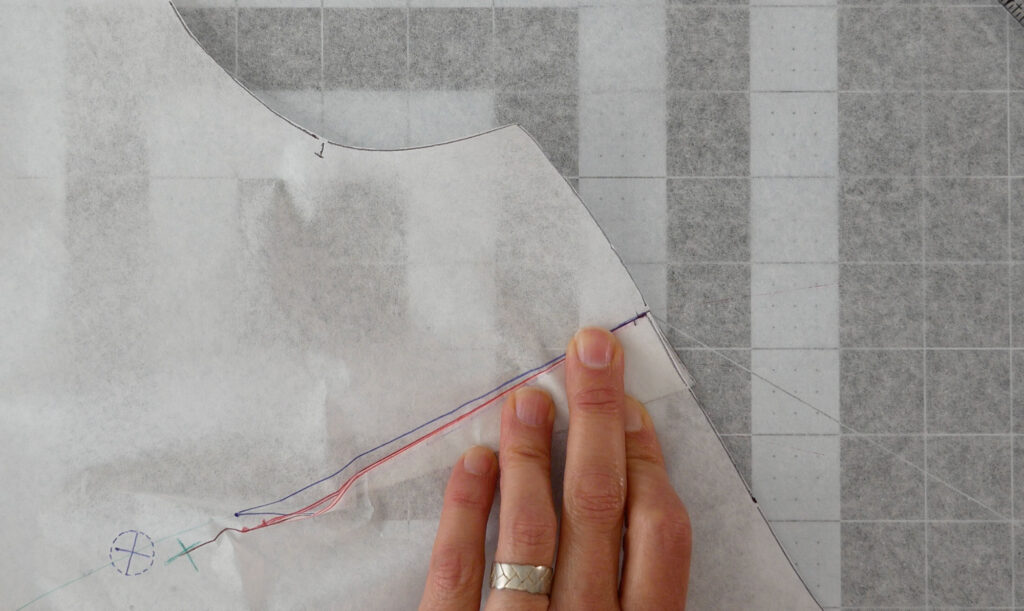
Fold the new dart as if it were sewn. While it’s still folded, check that the side seam above and below the dart match up. True the side seam if needed by splitting the difference the seam is off by, and adding that amount to the narrow seam and taking it off the wider seam. Redraw any new seamline to be smooth. No jerky lines. See my post How to True a Pattern.
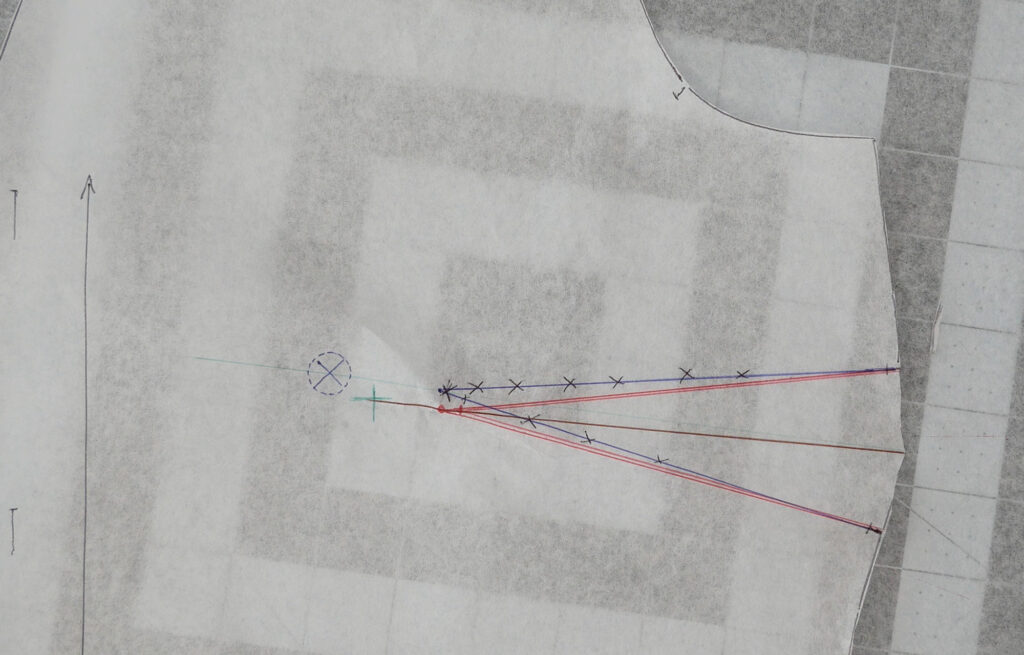
Either go over the side seamline of the folded dart base with a needle wheel or cut across the folded dart base to get the new shape of the side seam.
Redrawing the dart changes the look of the dart, and the angle at which it is sewn. You can keep the original angle by relocating the dart in it’s original shape.
The Tiny Bit More Involved Way: Move the Dart
Most if not all of the instructions I’ve come across have you draw a box around the dart and cut it out before raising or lowering it. That’s fine if you can leave your apex mark out of the box.
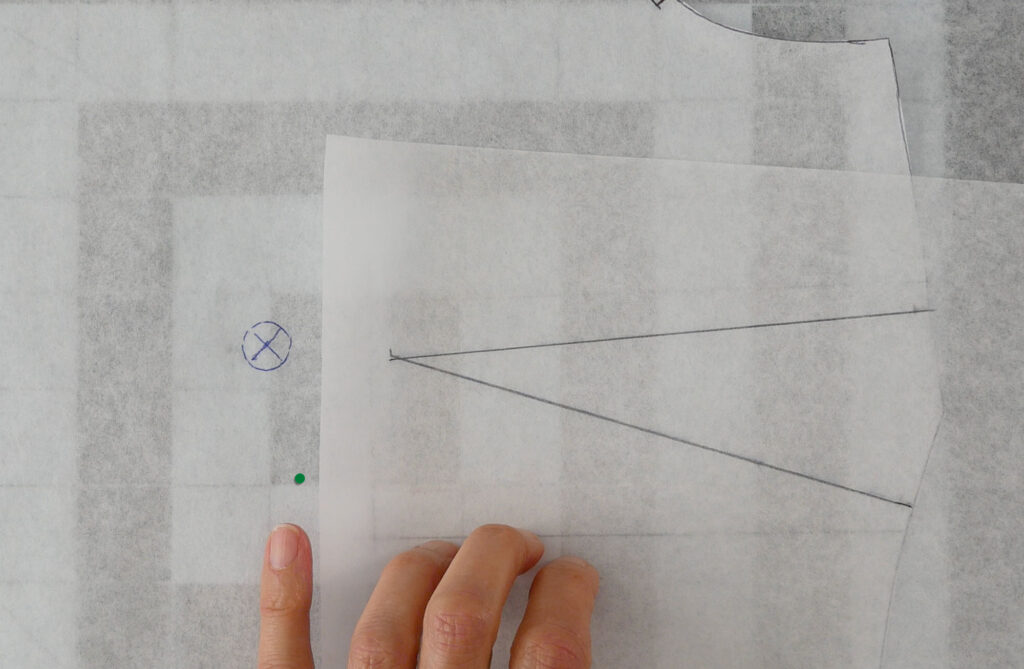
If you can’t or if you would rather, another option is to trace the dart on a separate piece of paper. Then you can always see where your apex is on the pattern.
Because you need that to tell you where the dart should be.
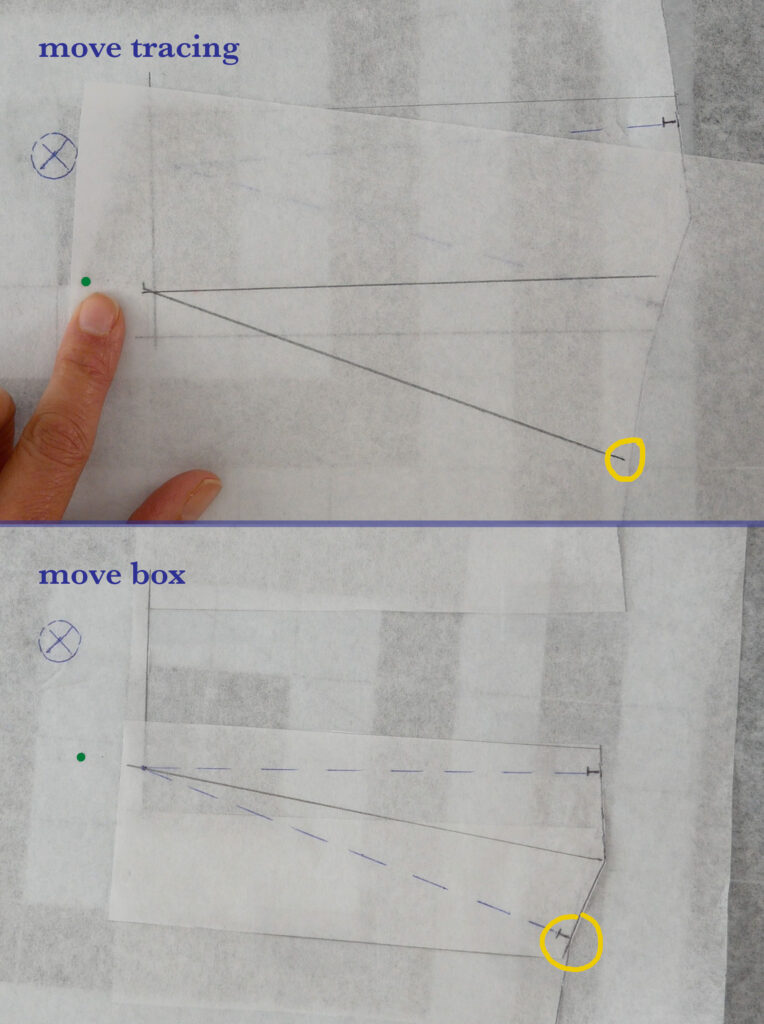
Either way, tracing or cutting, you’ll slide the dart up or down the side seam so the tip points to your apex. If it’s helpful, draw a line from the center of the dart’s base through the dart point to see where the tip is pointing.

After moving the dart so it points to your apex, tape it down. Add paper to the pattern where needed if you cut the dart out.
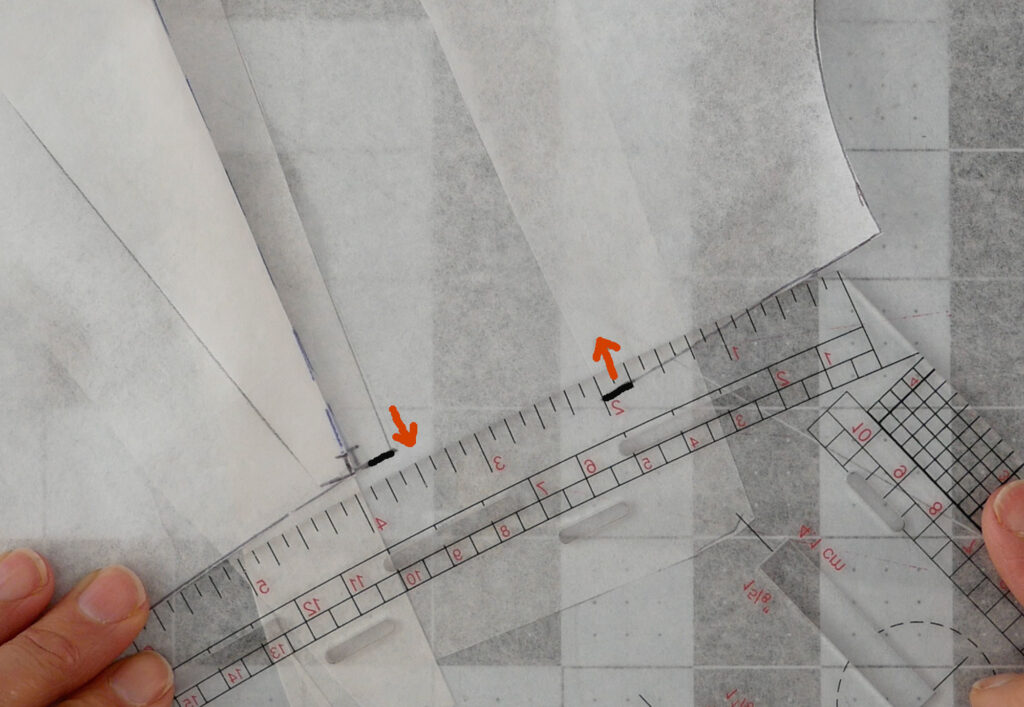
Fold the new dart as if it were sewn. While it’s still folded, check that the side seam above and below the dart match up and that it forms a smooth line. True the side seam if needed by splitting the difference the seam is off by, and adding that amount to the narrow seam and taking it off the wider seam.
Redraw any new seamline to be smooth. No jerky lines. See my post How to True a Pattern.
Cut across the folded dart on the edge (side seam line plus added seam allowance) to get the new shape of the side.
That’s it. It’s that easy.
You can also redraw or slide vertical bust darts left or right, whether they originate at the shoulder or the waist seam.
And if you need pointers on sewing darts, watch my video, “How to Sew a Dart”