
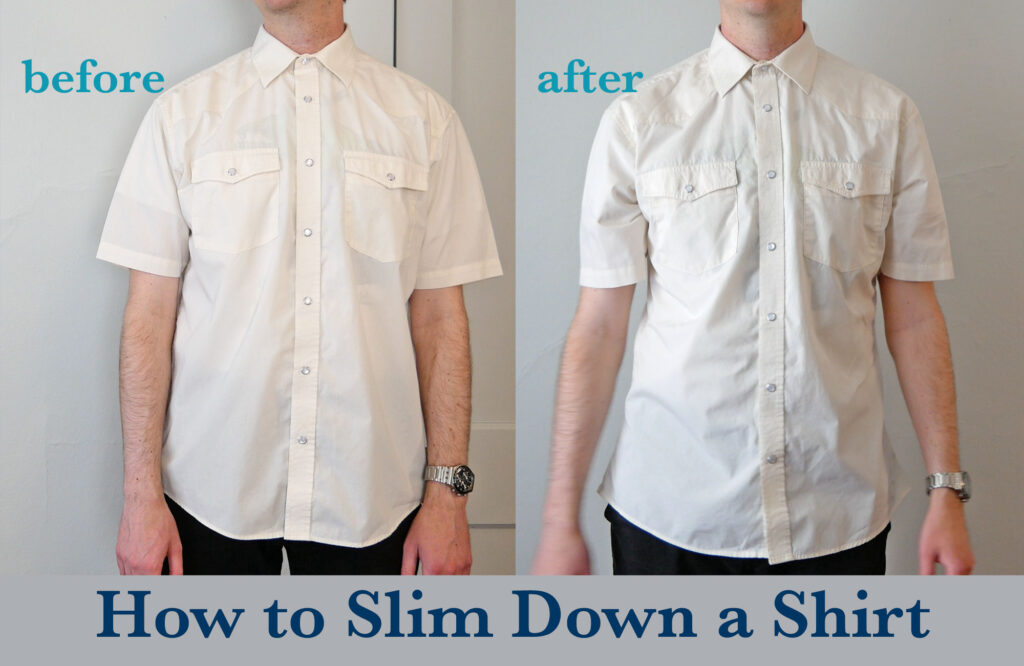
Knowing how to do some basic alterations can save you a lot of money. Not only are you not paying someone else to do them but you can keep wearing the item you altered to fit and avoid buying a replacement.
One of the basic alterations you’ll come across is Taking In.
And while this post focuses on a casual shirt that is too wide I promise you can apply this easy technique to quite a few garments, like a shirt, a dress shirt, a dress, a vest, and a jacket – and all the sleeve variations that come with them – plus some skirt and pant styles.
With just some pinning and sewing and an hour of your time you’ll be looking good.
If you want to watch the process you can here.
Step 1: Pin Out the Extra Width
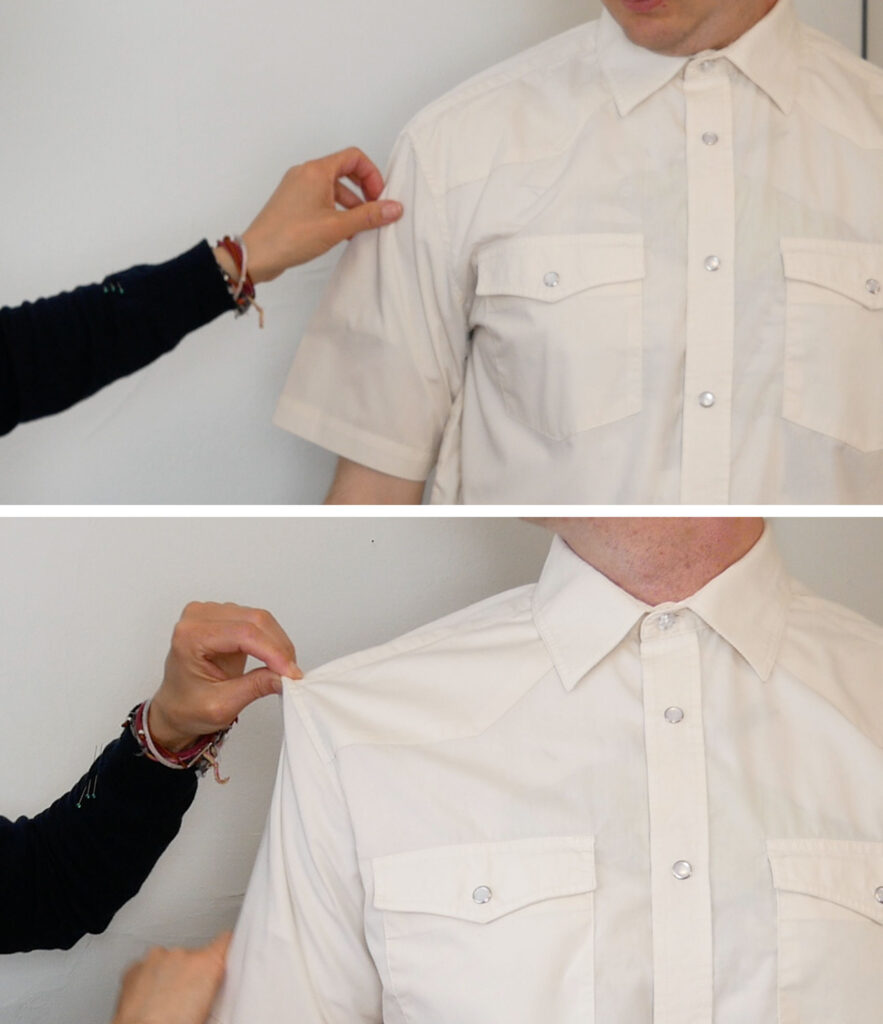
Have the person put the shirt on. Keep it untucked but otherwise as they plan to wear it – how they button it, if they wear it with an undershirt. Make sure they can see themselves in a mirror.
Ask the wearer how they want the shirt to fit, feel, or look. Take a good look at the garment and assess how big it is and where it’s too big. This shirt is too wide all over but I will only take it in at the side seams.
Stand behind the person and pinch out the excess fabric under the arms. Check that the center line of buttons, or snaps, stays centered and is not leaning to one side. This gives you a quick idea of how much you’ll be taking in, if should be taken out equally from the front and back (A broad back may mean taking more out of the front*) and if you can take in that much without the shirt becoming strange-looking.
*this post will explain a symmetrical taking-in technique. Look for the asterixis* for when to do something differently for an asymmetric alteration.
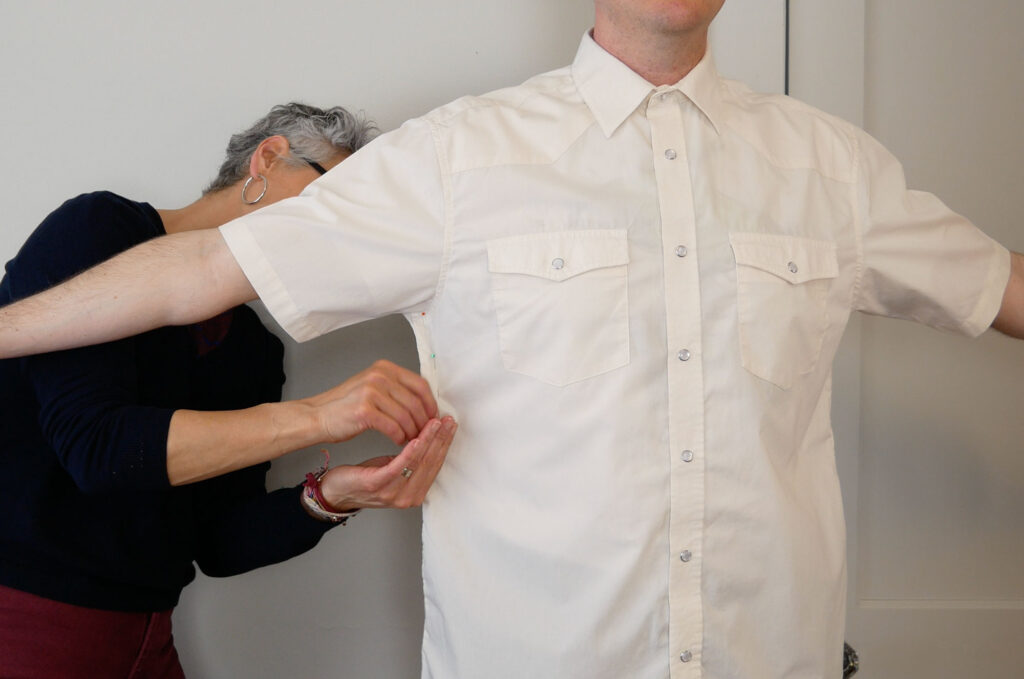
With straight pins at the ready, Start pinching the side seam evenly under the arm (so the front and back are equally pinched out). Place the pins pointing down to the floor. Where the pins go is where you will sew the new seam.
*You would take out the front and back unevenly if you needed to leave the back wider than the front or, with many women’s garments leave more fabric for the bust and take more out of the back. You’re main goal is to take out extra width while keeping the new side seam (your pins) bisecting the wearer evenly visually. The side seam is not too forward or too back. And if you pinch out too much from the tighter part you’ll see the fabric pulling across the wearer.
Place a couple of pins from the front and then a couple of pins from the back, always checking that the shirt is not being pulled too far over to the side you’re pinning and that the line looks smooth, not radically changing from taking in a ¼” to an 1” in a short distance. Re-pin and adjust where you need to.
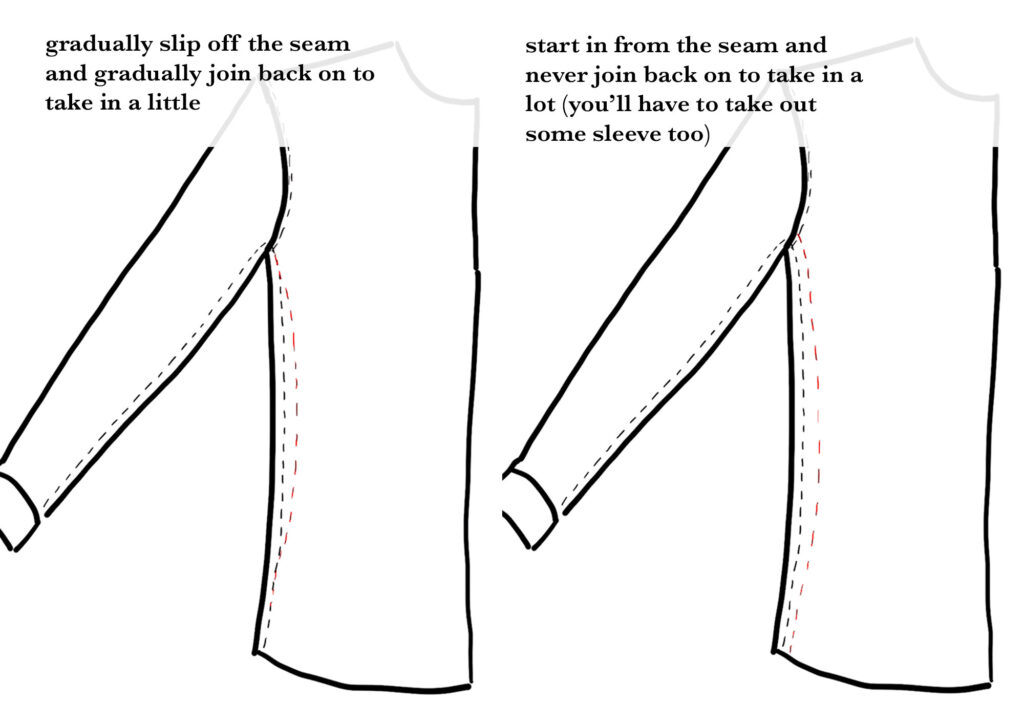
Typically the new seam line will gradually come off the old seam line at the start and gradually join back up on the seam line where you’re done. But if the shirt is very wide for the wearer you may have to pinch in from the seam line and never rejoin it.
On a shirt that is big in the chest you’ll have pinched out excess under the arm, so you’ll need to pinch out the sleeve too, under the arm and down the sleeve seam as much as you need to.
Keep in mind that if you pin out too much the shirt becomes overfitted and will restrict the wearer’s movements and comfort so after pinning ask the wearer what they think. How does it look? How does it feel?
Have the person put their arms forward – as if driving – and other positions to be certain the new fit allows for these movements.
Look for the fabric puddling or pulling in odd directions. This will tell you some adjustments are needed. Here I pinned too much out of the sleeve which raised the armhole too much. I can tell by the fabric making these lines above the chest to the armhole.
When a shirt fits – the shoulder seam will lay on the little divot of the shoulder joint. This shirt is too large all over and I only narrowed it below the arms leaving it still too wide in the shoulders and upper chest. The excess width of the shirt in the shoulders can be taken out of the shoulder seam and the sleeve seam.
For this casual shirt, the owner and I decided it wasn’t worth doing and if it was important to the wearer I would probably advise them to start over with a smaller shirt. Of course, you can’t always do that but let me leave that alteration for a future post.
I also decided not to pin the left side of the shirt. Transferring the amount taken in on one side to the other side is pretty easy and keeps the shirt symmetrical.
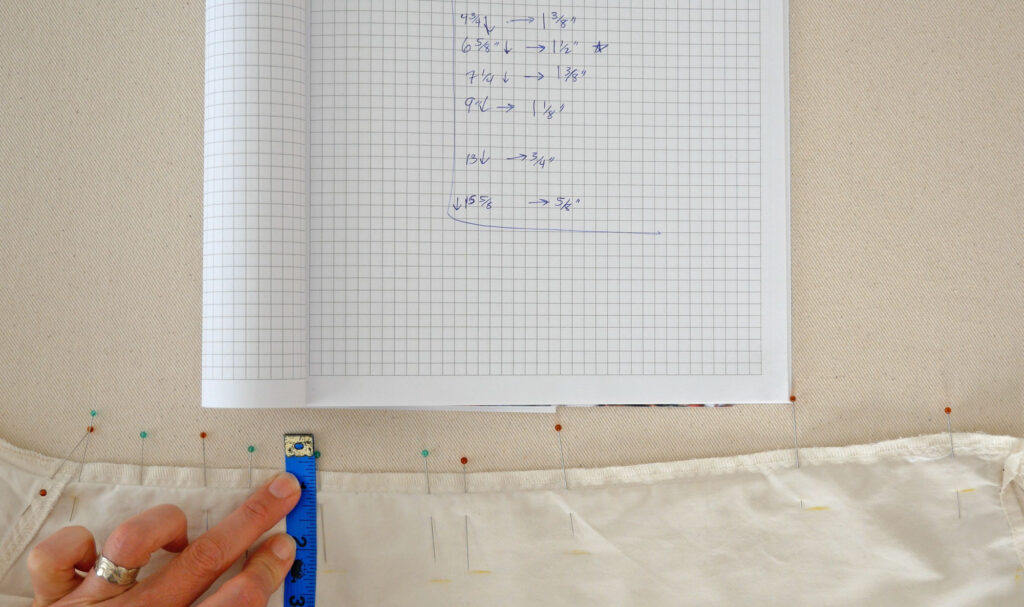
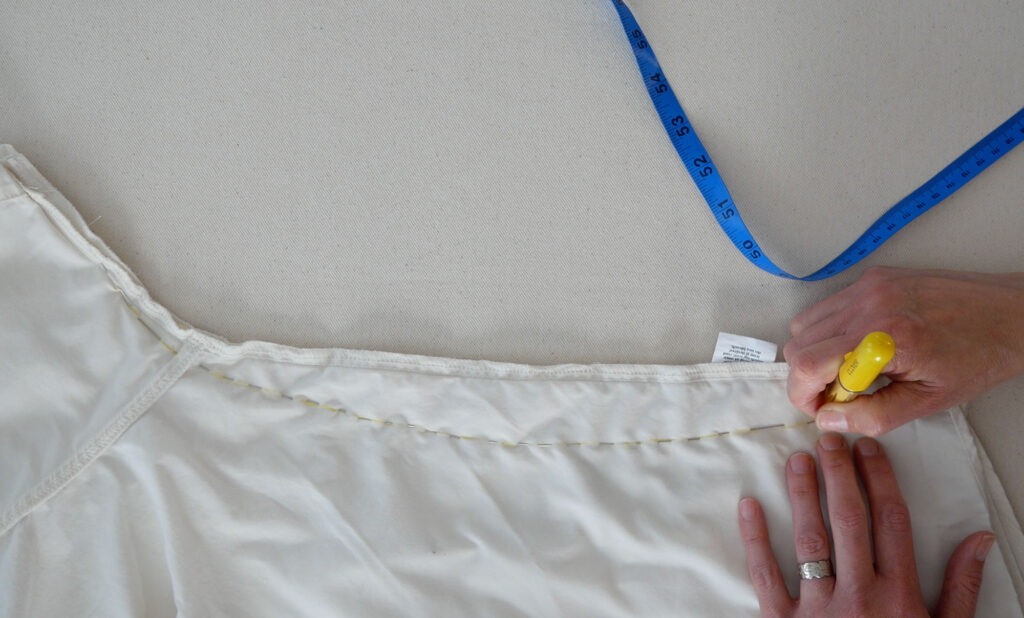
Step 2: Measure and Record where you Placed the Pins
Since where the pins are where you will sew the new side seam you need to know where you placed each pin in the shirt.
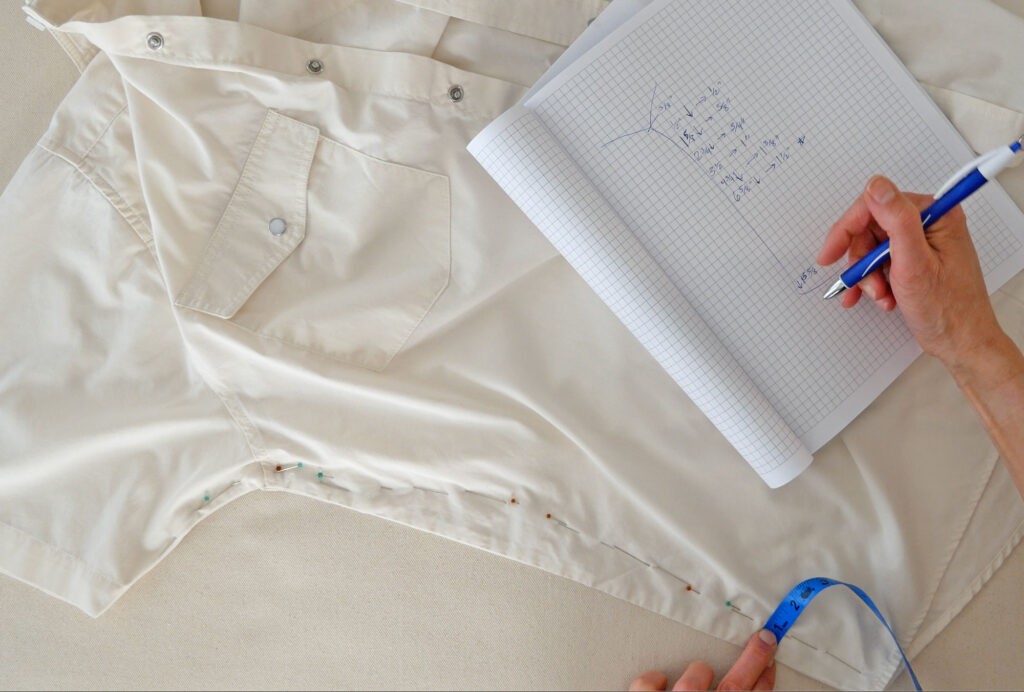
Lay the shirt down flat and starting at the underarm seam measure down along the shirt to a spot (not following the line the pins make but the side of the shirt). This could be at an inch down, at where the pin head is or it could be random. Write down how far down you measured
Then, at that far down, measure in where the pin is. Write this down next to the measurement for how far down you are. I find it helpful to jot a down arrow next to the number for how far down I measured and a sideways arrow for how far in I measured.
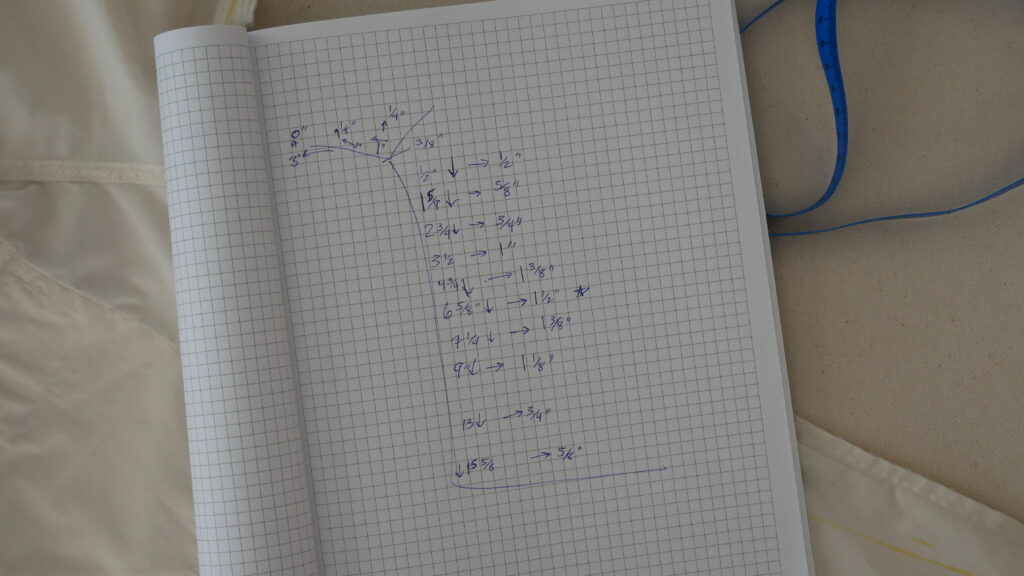
You’re recording how far down the shirt’s side seam the pin is and how far in the pin is from the side seam.
Measure at every inch, every two inches, or at random points down the side. Take a few extra measurements where the pins form a curve because how far in they are changes over a short distance.
I tend to measure down to a pinhead or where the pin pokes out from the back of the shirt for a place to stop and measure across.
Repeat this measuring and recording if you had to take in any part of the sleeve. Start at the underarm seam and measure toward the cuff.
When everything is written down, remove the pins.
*If you took out more from the front than the back (and vise versa) you are measuring from the outer edge of the shirt as you pinned it. After measuring, and before removing the pins, press the shirt side of the shirt as it is pinned to set a crease. The crease is going to stand in for the side seam when you measure next.
Step 3a: A Little Prep Before Marking Where to Sew
Flip the shirt inside out and lay it so the side seam is directly on the edge. You may need to iron the shirt to get this seam flat.
*Instead of the side seam being on the edge, the crease you pressed will be the edge.
BUT WAIT What if my shirt has a French seam, a flat-fell seam, or a self-bound seam? Basically any seam where the seam allowance is also sewn down. Believe it or not, it’s faster to unpick the seam, and if needed pin the sides back together as if they were still sewn (but sewn with a simple basic seam) and then proceed with the alteration. You do not have to recreate a French seam or flat-fell seam after taking in the sides. You can simply overlock/serge the seam allowances.
If you are taking width out all the way down the side to the hem, you will have to unpick and release the hem on both sides of the side seam. After taking in the side you’ll rehem that little part.
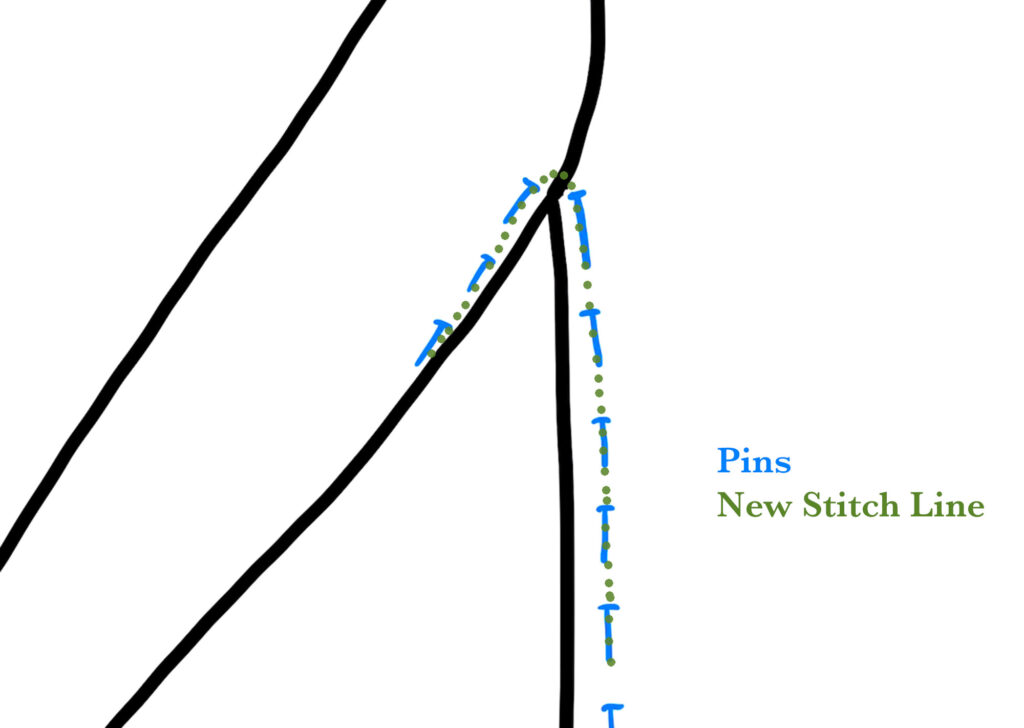
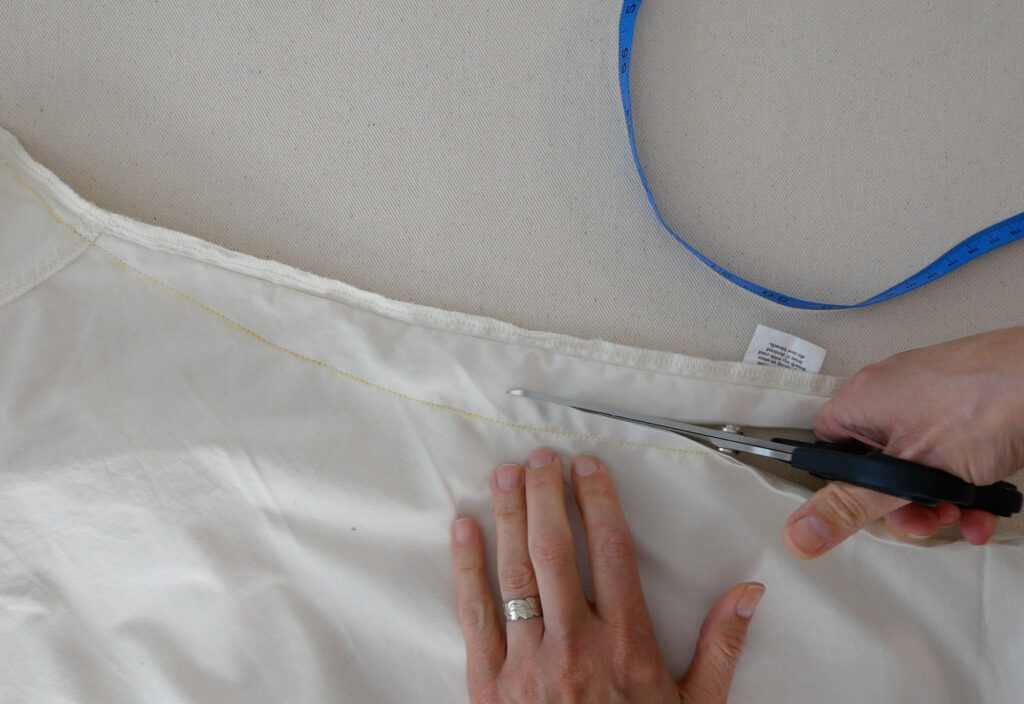
Step 3: Mark Where to Sew the New Side Seam
Now using the measurements you took from the pins you will measure both down and over making a mark to indicate where the pin was and where you will soon sew the new seam. Measure in from the seam line – the stitches – not from the edge of the fabric.
Usually, I measure down and over at the same time and place a pin but this time I had so many reference points I decided to mark all the measurements that went down the seam and then measure over and mark with fabric chalk.
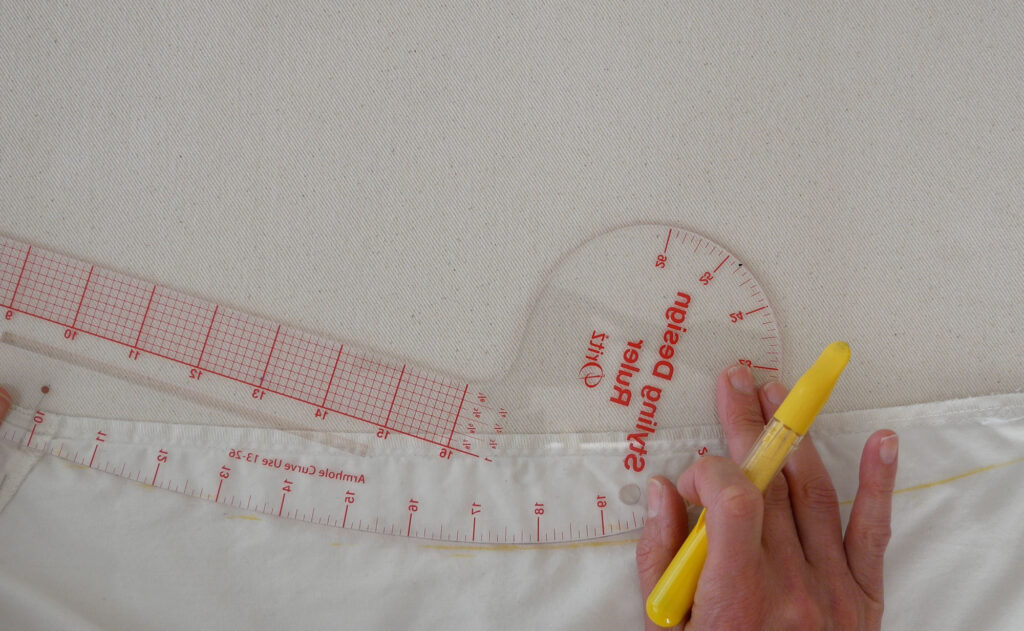
After all the measurements are transferred and marked on the shirt you’ll connect the marks into a nice smooth, natural-looking line. I find the use of a curved ruler or a French curve invaluable but of course, you could freehand it.
I move the ruler about until I find the best line that lines up with the most marks and then flip the curved ruler over to get the other half of the curve.
The line won’t lay on every mark but it should land on most of the marks and the marks it misses are very close to it.
Repeat for the sleeve seam if you pinned anything out of the sleeve
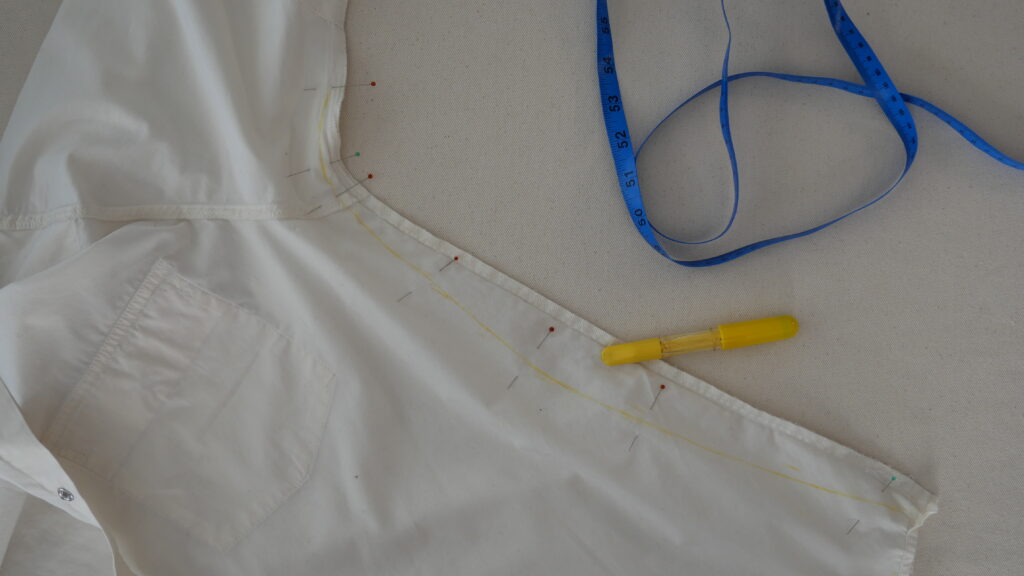
Step 4: Sew the New Seam
Once the new seam line is marked pin the two layers of the shirt so it doesn’t shift and sew down the marked line before the chalk wears off.
Don’t trim off any extra fabric yet.
Step 5: Transfer the New Seam to the Other Side
To transfer the new seam line to the unsewn side of the garment, line up the two sides over each other matching up the underarm seams and the edges of the garment sides. Place a couple of pins through all the garment layers to keep things from shifting. The side that has already been sewn should be facing up
Place pins through the layers directly on the new seamline. Use as many as you need to “trace” the new seamline or weave long pins in and out on the line.
Flip the shirt over.
You’ll see a line of pins that are also an exact copy of the first seam line. Now take your marking tool of choice and draw in the line.
Remove the pins along the seamline and sew the new seamline.
Step 6: Clean Up
Trim off excess fabric to make the new seam allowance. Iron the seam open but remove
any chalk or other marks before you do to avoid setting them into the shirt, especially on a light-colored shirt.
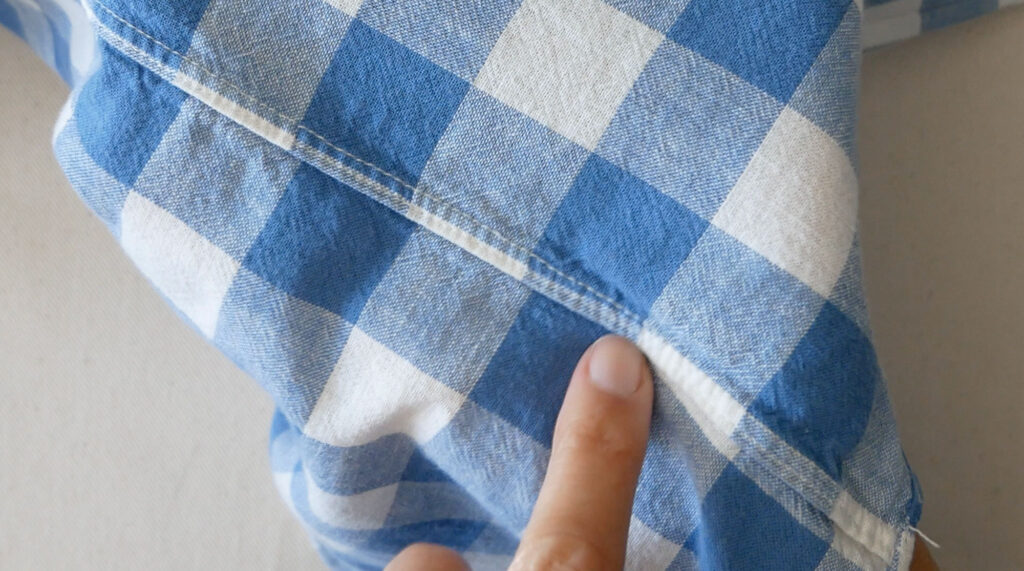
You can finish the seam allowance however you prefer. You could overcast/serge the two together. You could sew a zig-zag stitch over the edges together. You could self-bind them or bind them with binding.
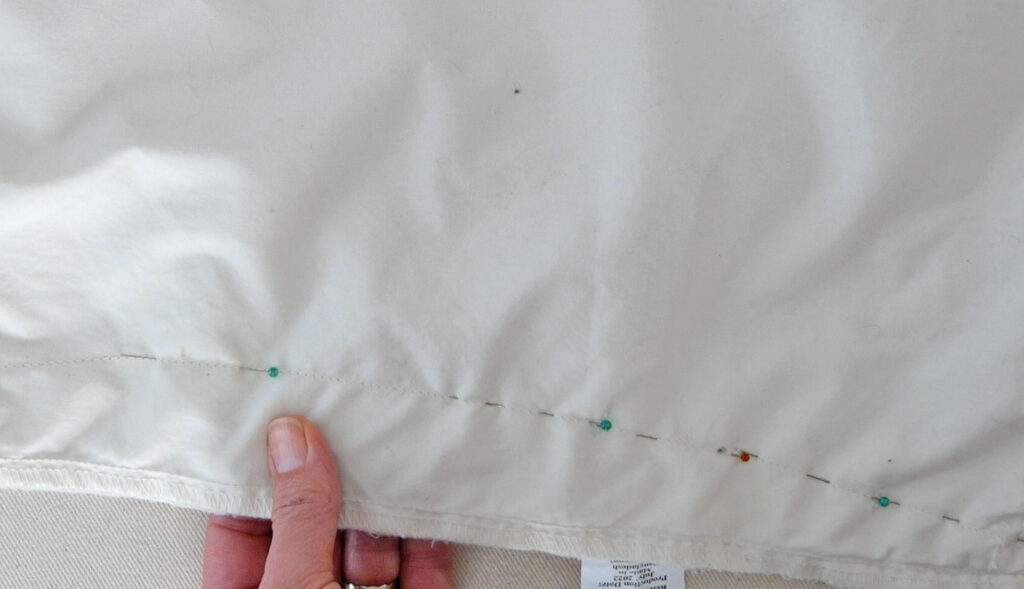
Rehem the hem if and where needed.

Done!
It’s great to have clothes that fit you like you want. Even better if you did it yourself 😉