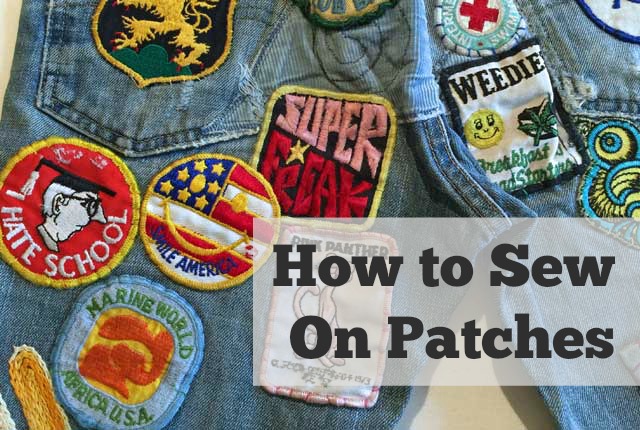
I use to cringe whenever one of my children earned another scout badge. Ug, sewing those tough little things onto a sash was bad enough, but sewing them onto the chest pocket was the worse. Other moms advised me to glue the badges on, or to buy Badge Magic at the scout store (how convenient). Well, I did, both and those patches never stayed on through the wash.
The best way to attach a patch or a badge is to break out a needle, hand or machine, and sew it on. Affixing a decorative patch on with stitches makes the patch stay in place AND allows the patch to be removed should one be stripped of their rank or shifts their preferences from heart patches to soccer ball patches.
Glue or iron-on fusing methods will keep a patch in place for awhile, especially if the item it’s attached to is not laundered but when the patch peels off a glue residue is left on the garment. Not pretty so just break out a needle and thread, or sit down at your machine, and you’ll have that patch on in no time and never need to think about it again.
There are different ways to sew patches on. Which way you use will depend on the type of patch it is, if you can reach the area it’s going with a sewing machine, the look you want and if you have to sew a patch onto a pocket.
(See my recent post; Eight Easy Ways to Make Your Own Patches)
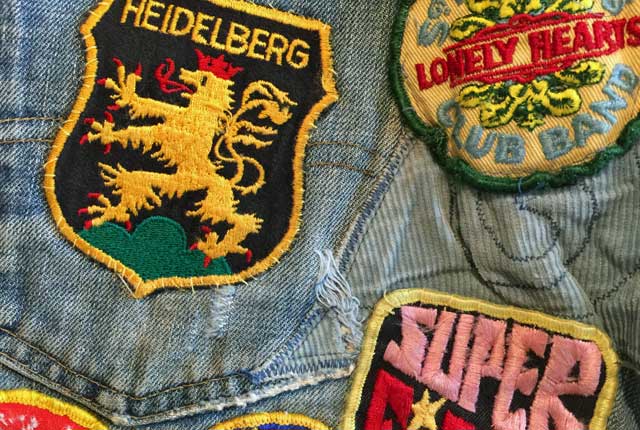
Patches With a Bound Edge
Many commercially produced patches’ edges are bound in tight stitches. These are a pain to sew through especially by hand. Which leaves sewing over the edges or right up next to the edges.
If you’re sewing by hand sew over the bound edge with a whip stitch.
If your sewing machine can reach the area of the garment you’re sewing the patch onto, use a zig-zag stitch and thread to match the bound edge. Set the zig-zag width so the needle lands just on the outside of both sides of the binding stitches on the patch. Set the stitch length to a medium length.
You could also use a straight stitch on your machine and stitch right up next to the inside edge of the binding stitches. The thread could match either the patch background or the thread used to bind the edges.
A Patch on a Pocket
If you ever want to use that pocket you’re going to have to hand stitch that patch onto it. The quickest whip stitch with matching thread or contrasting thread.
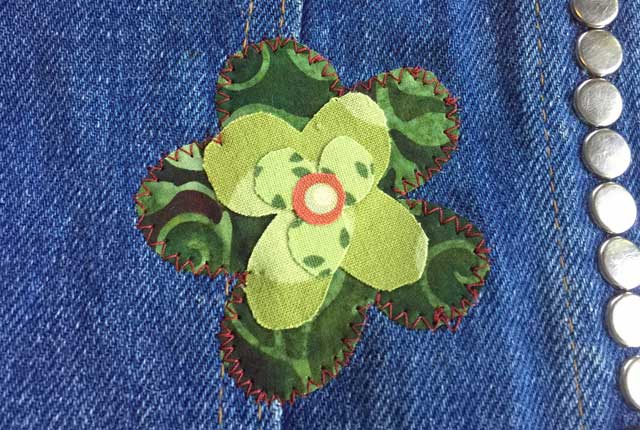
A Simple Applique
Simple decorative patches made from cutting quilting cottons should be fused down (assuming you applied the Heat-n-Bond to the patch fabric before you cut it out). The attaching process might end there but if you’re going to launder that apron, t-shirt, onesie work a running stitch (by hand) or a straight stitch or a narrow zig-zag stitch along the outline of the patch.
You could attach a simple cut out patch with out any fusing this way as well but the edges may fray up to your stitch line if using a running or straight stitch.
This method is great for knit fabrics. Think Alabama Chanin.
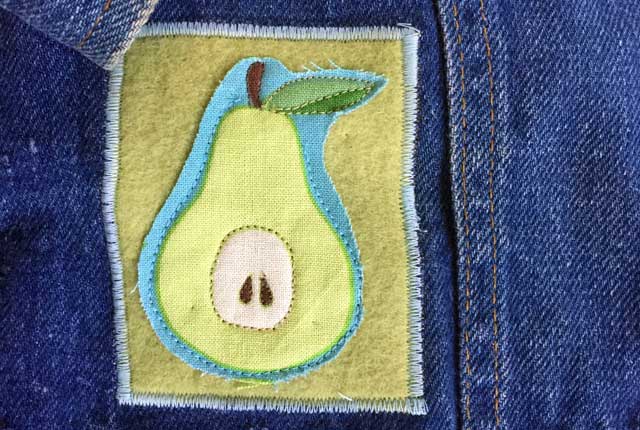
Mimic a Store Bought Patch
To make a home-made patch look like a commercially made patch attach the patch to the garment with a tight zig-zag stitch around the edge. Use a thread that contrasts the background color of your patch or matches it.
If the patch is going on a pocket or another area where you cannot use a machine to sew it on, sew a zig-zag stitch to the edges of the patch before hand stitching the patch to the garment. If your patch is not made of canvas, denim, felt or other heavy weight / thick fabric add another layer of fabric (2 fabric layers) or stabilizer (tear away or water-soluble) to the entire back of the patch before zig-zag stitching the edges.
Sew a Patch on Quickly and Securely
You scout has a meeting and they need that patch on now. Plug in your machine, get the thread that matches the bound edge or the fabric the patch is made on. Choose a zig-zag stitch and set the length to about 2 (a medium length). Sew over the bound edging all the way around the patch.
This is a great way to apply a decorative patch even when you do have plenty of time because let’s face it, if you have plenty of time to sew you can surely think of a dozen other things you would rather be working on.
Patches on garments that will be laundered frequently might need double staying power. In these cases, you want to fuse the patch down (Heat-n-Bond works if the patch did not come with a fusing agent already adhered to the back) or use a fabric or patch glue then stitch the patch down when all the glue has dried or cooled downed.
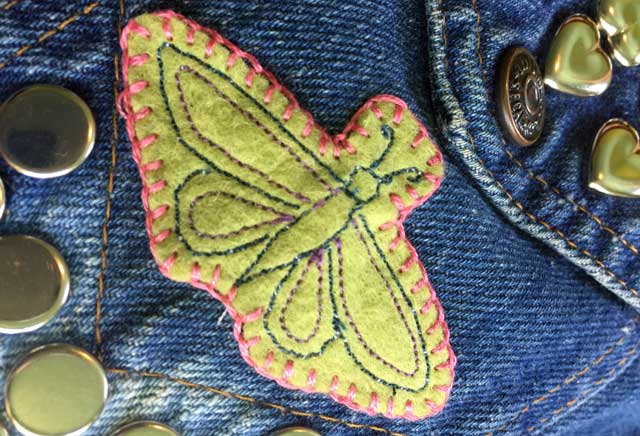
Add Some Flair
Use a blanket stitch and embroidery floss to sew on a patch on. Funny how the blanket stitch can add a little bohemian or Victorian or even western vibe depending on the patch, the color of embroidery floss, and how big your stitches are.
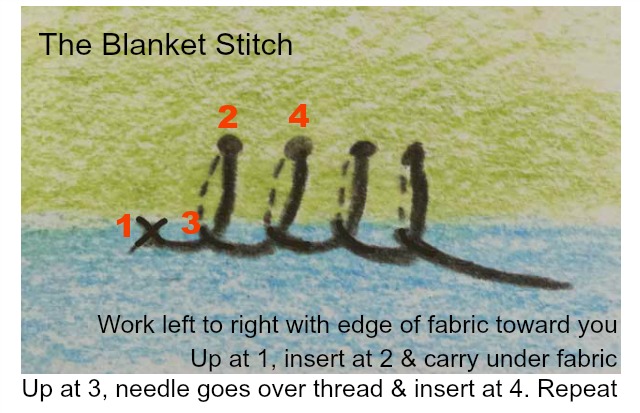
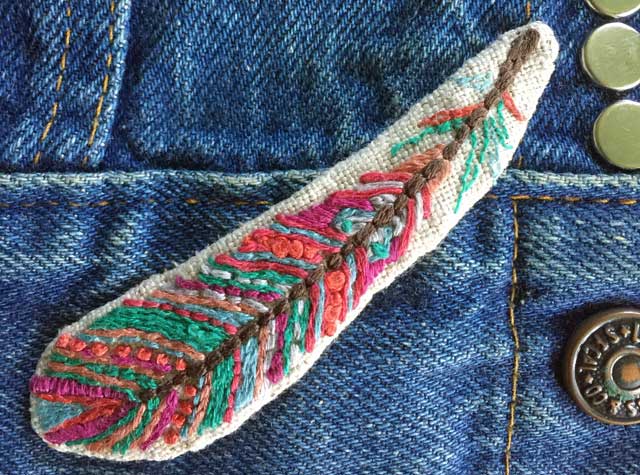
Embroidery as a Patch
Instead of embroidering directly onto a piece of clothing, because it’s too awkward to work on or transport or because the embroidery happened before you thought of putting it onto a garment, you can make a patch out of your embroidery.
After your needlework masterpiece is completed, cut out around the work leaving at least 1/4 inch around the stitches; enough fabric to turn under.
To keep the raw edges from unraveling you could run a machine stitch, straight or zig-zag, close to the raw edge or use Fray Check around the edge. Fold the raw edge under and press.
Or skip the stitches and Fray Check and simply fold the raw edge under, press, apply Heat-n-Bond to the back of the embroidery piece. This will hold the edges down and make the patch fusible.
Stitch the patch in place (fused or not) with a slip stitch, a whip stitch, a tiny running stitch around the edge, or decorative stitching with embroidery floss.
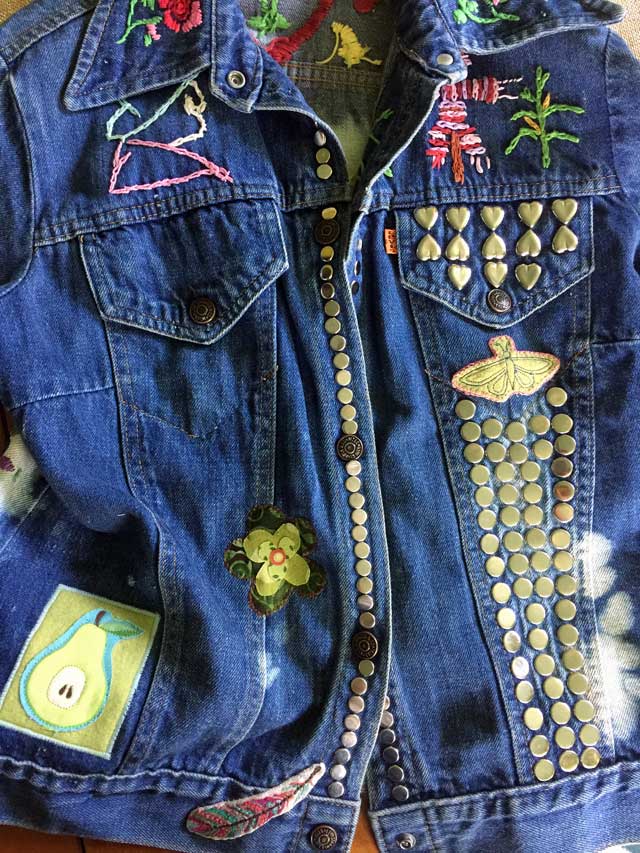
Got some ideas to decorate your jean jacket? See my recent post; Eight Easy Ways to Make Your Own Patches
Special thanks to my big Sis, for not only saving her high school era Levis but for passing them over to me. I will now be taking off the patches I applied on her jacket for this post.

Years ago, the day of my Girl Scout First Class Banquet, my Dad helped me staple several years worth of badges on my vest. My Dad was an engineer and a very function over form kind of guy. He knew there was not time to hand sew all the badges in question.
LOL. What a clever, and efficient, dad you have. Stapling is faster than glueing for sure; no drying time 😉
Didn’t know anything about sewing before today. Spent my night sewing all of my patches onto my riding vest.
Thank you so much!
There are 2 ways to sew on military patches. Method 1: sewing by a machine. Method 2: sewing by hand. If you want to wear a military patch, it is crucial to learn how to sew a patch on a military uniform.
Being an Army brat I remember my mom sewing patches on my Dad’s fatigues.
I love to use basting tape to hold the patches in place. Regular basting tape needs to be removed before you finish sewing the patch on, but water soluble basting tape can be left in the project.
That’s a great idea to use basting tape. Thank you
Great tutorial! The step-by-step instructions make it easy to follow, even for beginners. I especially appreciate the tips on choosing the right type of patch for different fabrics. Can’t wait to try out these techniques on my next sewing project! Thank you for sharing such helpful insights!
Thanks. I keep hoping to come up with a cool enough design to order some custom patches 😉 When I do I’ll be reaching out