There are times when you need to sew quite a ways in from the edge of the fabric. Further in than any seam guide marked on your machine. How do you know where to line your fabric edge at to sew 1.5 or 2 or more inches in? And if you measure over from the needle and find a spot to use as a guide how do you know it’s accurate?
If it’s a hem you might want to sew with the underside of the hem facing you. This way you would be able to see and use the edge of the hem as your guide for where to sew. However, on my machine at least, the top and the bottom stitches look different. The stitches on the top, the side going under the needle and using the thread off the spool always look better than the stitches on the bottom, those using thread from the bobbin. Because of this, I avoid to sewing “upside down” if the stitches will show on the garment.
I’ve seen different ways to mark a stitch guide; sharpie, elastic hair bands, a rubber band, tape, and all of those ways work. It’s placing that guide evenly and accurately that matters.
Here’s how to get an accurate guide:
(I use painter’s tape. It lays down and comes off easily. If you want to use a rubber band or other type of looped guide put the loop onto the machine’s arm before step 2.)

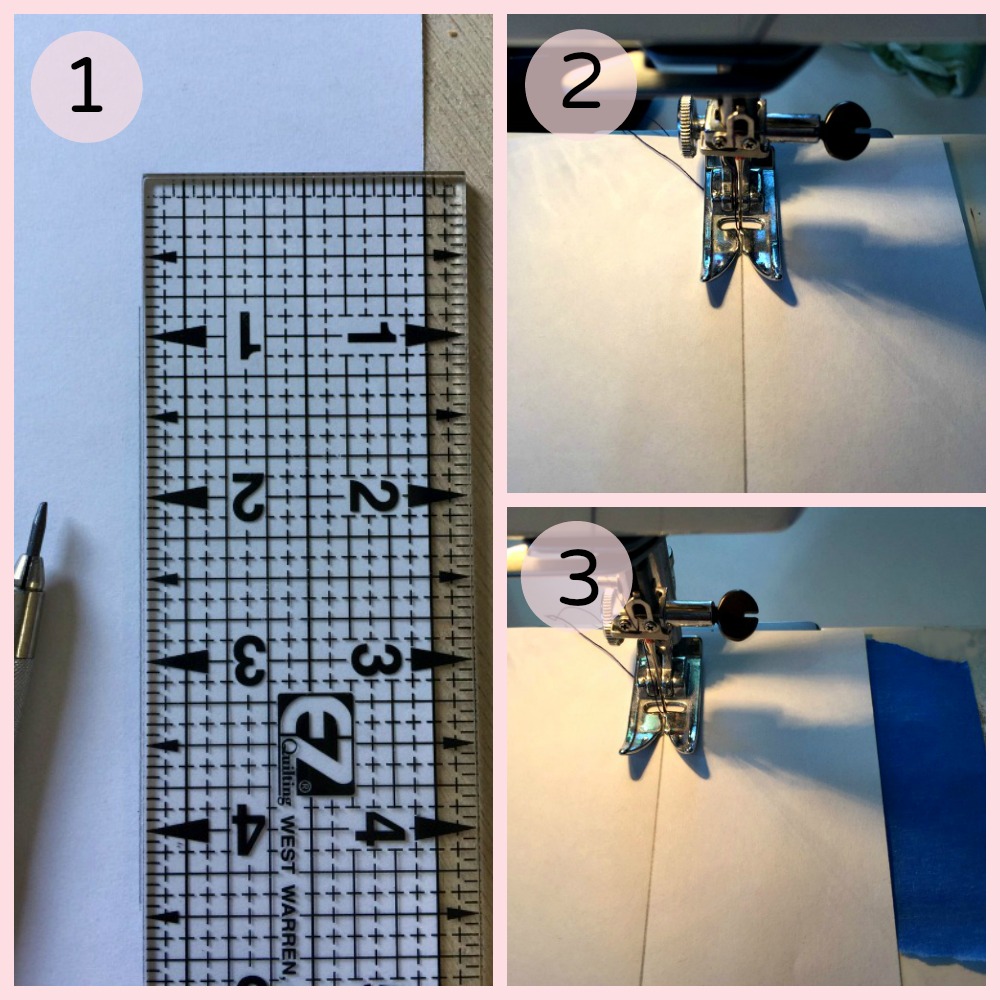
- Draw a line on a stiff piece of paper the width you need to sew from the edge of your fabric. The picture above shows 1 3/4″
- Place the machine needle into the paper on the line. Place the needle down a ways on the line, not right at the end.
Line up the drawn line with the center guide on the pressure foot. Visually check that the line is straight at the front and back of the needle. - Lay down painter’s tape right against the edge of your paper. The edge of the tape closest to the needle is your new wide guide. If using a looped guide, like a rubber band, move the band up against the paper. Try not to move the paper out of alignment when adjusting the band into place.
