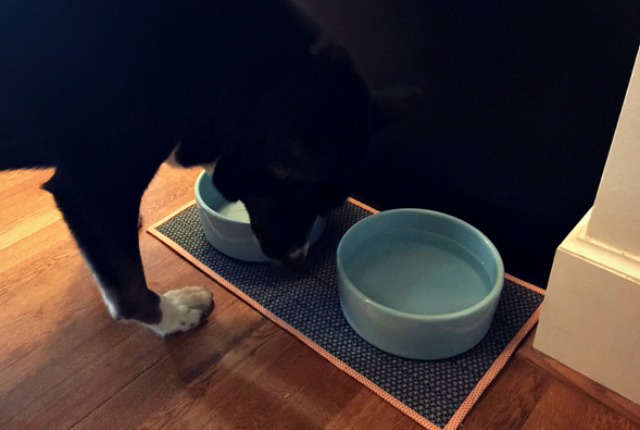
My dog is a messy eater and sloppy drinker. He will put his head up, open his mouth wide and let whatever food or water that was in his mouth just fall out. Did he forget he was eating? Did something distract him? “Quick,” he thinks, “dump this stuff, maybe she’ll think she hasn’t feed me yet and I’ll get something better.” Such a mess which other than sweeping up kibble all the time I didn’t think about too much when we had cheap vinyl flooring but now that we have wood floors (found under many layers of vinyl) I had to put something under his bowls to protect the wood.
I had been using a door mat, the kind that holds water under the dog’s bowls when the floor was still vinyl. I vacuumed the mat to keep it clean but after awhile it needed pressure washing. That was too much. When the kitchen was done I placed vinyl place mats between the wood floor and the dog’s bowls. The place mats looked much better than the door mat and fit the space better too. To clean I only had to wipe them I thought but actually I had to scrub which took the design off.
I wanted a mat which when dirty could be thrown into the washer. I mean, work smarter not harder, right? A place mat was too small for my dog’s bowls (large dog means large bowls) and a dish towel was too big for the space and looked a little like an after thought; “Oh, a mess. Throw a towel down – but just leave it there”
Making a machine washable, color coordinated, correct size mat was easy. It took about two hours, and I used up two large scraps and one good size scrap from my stash. (I’m on a use up my fabric stash challenge). The hardest part of the project was deciding on which fabric to use as the binding. Then I reminded myself it was a pet food bowl mat which would be on the floor and I was over thinking it. Sometimes you just have to stop procrastinating and get on with it.
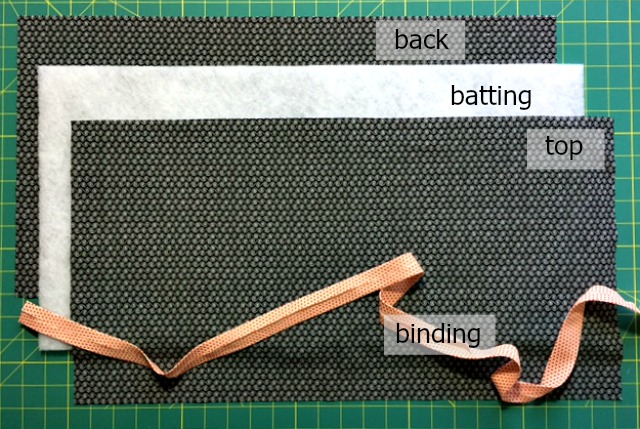
To make a mat you need:
- Two pieces of fabric cut to the size you desire you’re finished mat to be. The pieces can be the same fabric, different fabrics or even fabrics pieced together.
- Polyester or cotton batting cut to the same size as the fabric
- Bias binding or scrap fabric to make bias binding. You need enough binding to go around all the edges plus 2 inches (about 5 cm) to finish the ends.
- OR as I believe quilter’s do, make binding strips cut on the cross grain. This binding is four separate strips, each covering one edge. I don’t know this method of binding with out looking it up but if you know how you can certainly bind the mat with binding cut on the cross grain.
(I made 1″ (2.5 cm) binding, cutting the strips 2″ wide (5 cm). This gives you a half inch wide (1 cm) binding on both sides. See my post on how to make bias binding)
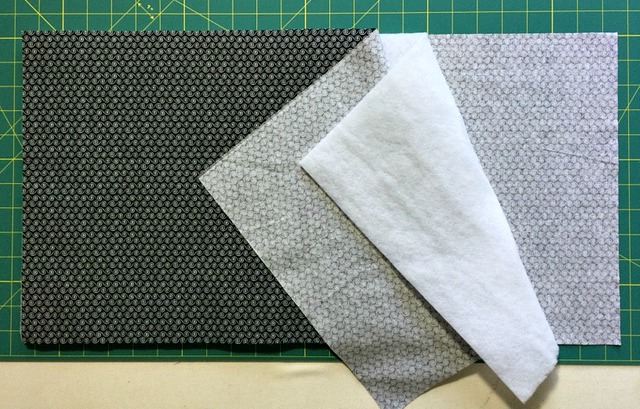
After cutting your fabric and batting stack them together as they will be when you are done: Fabric 1 is face down on your work surface, the batting lays on top of fabric 1, fabric 2 is placed on top of the batting wrong side on the batting and right side facing up.
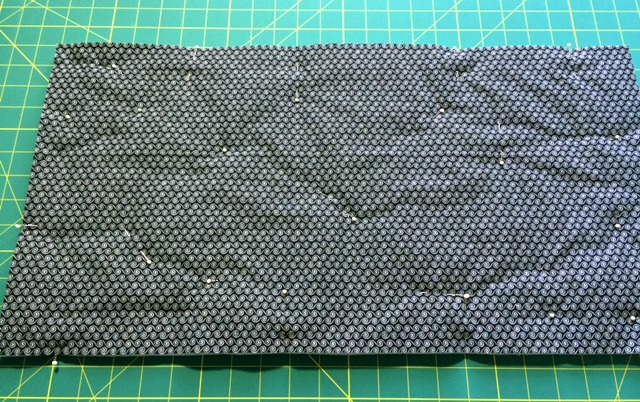
Pin together, through all three layers, all over the place.
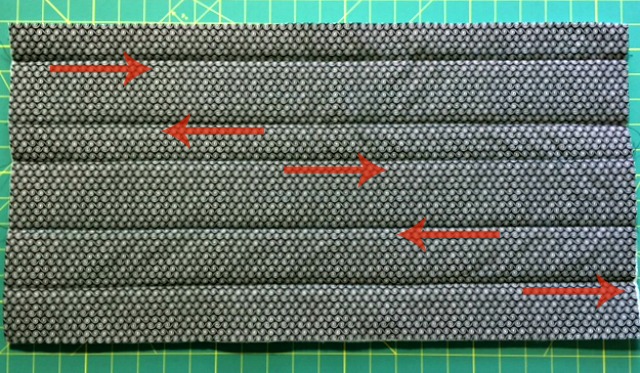
Sew the layers together however you want. The larger the mat the more places you should attach the layers together. You could sew the layers together with parallel lines, random lines or follow a design in your fabric if it’s a print. You’re the artist here do what strikes your creative desire.
The layers can shift when sewing them together. Changing to a walking foot on your machine would eliminate the shifting. However, the mat is not large so, being a little lazy, I kept the regular pressure foot on my machine and altered the direction I sewed the lines. If the first line sewn started on the left side of the mat then the next line I sewed started on the right and finished on the left. I also didn’t back tack at either end so I could run my finger against the stitches in the opposite direction in which it was sewn (with a little pressure) to help the fabric get back into place.
You can use purchased binding or make your own. Making binding is pretty easy but it will take a little time to make. Here’s my post on how to make binding. I made my bias binding by cutting 2″ (about 5 cm) wide bias strips from a good size scrap of fabric. If you know quilt style binding best then that will work too. I used bias binding as you would for garment sewing because I know that best.
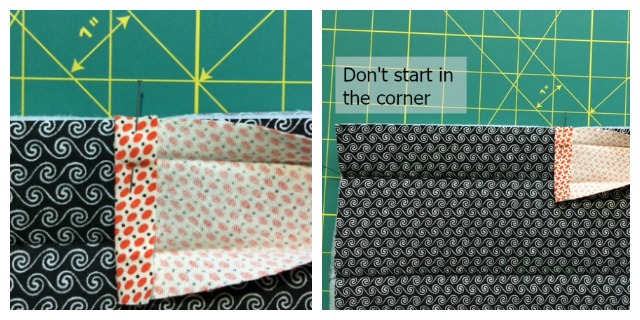
Cut the starting short end of your binding so it is perpendicular to the long edge of the binding. Fold this end in on itself about a 1/2 inch (1 cm). Line the long raw edge of the binding to the raw edge of the mat, right sides together, somewhere along one edge; not in a corner and not at the beginning of an edge (which is also a corner). Pin the binding to the mat along the edge but not around the corner. Do not cut the binding (other than the start). If you planned a definite front and back to your mat lay and pin the binding to the front side.
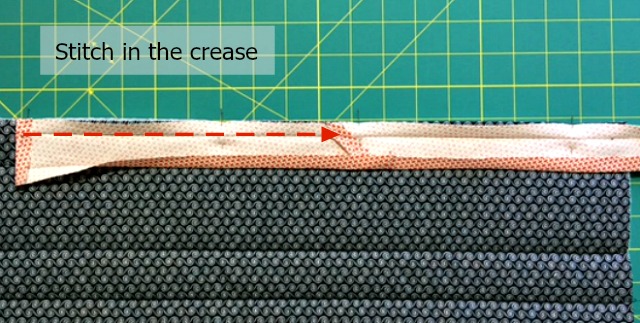
Start to sew the binding down, catching the fold at the start of the binding, through all layers. You will sew in the crease of the binding. I also watch my seam guide on the machine because the crease can be wavy and vary in distance from the edge especially if you used a bias binding maker to make your binding.
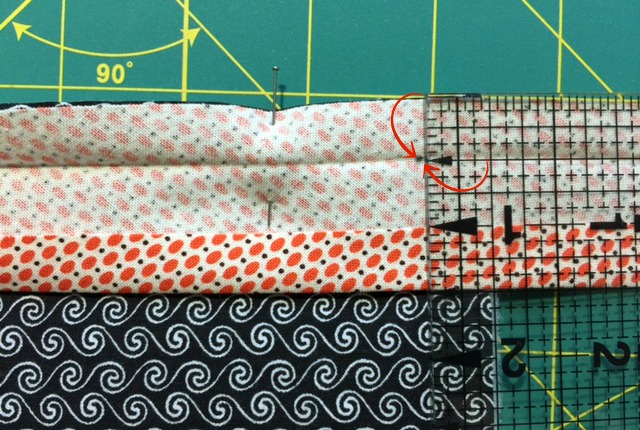
When you get to the corner stop right at the point the where the two edge’s seam allowances cross. If you are sewing in the crease which is 1/2″ (1 cm) wide you will stop 1/2″ (1 cm) before the edge you are approaching. If your seam allowance is 1/4″, stop 1/4″ away from edge. What ever your seam allowance is stop stitching the binding down that amount from the upcoming edge.
You can mark this stopping point before you sew to remind yourself when you are sewing or measure and mark where to stop at the machine as you get close to the corner.
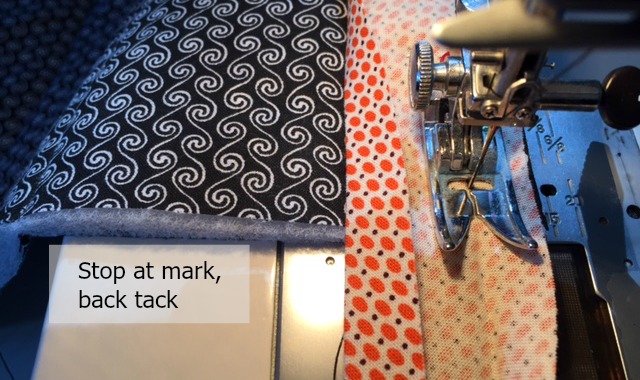
Stop and take a few stitches back to secure the threads (back tack). Clip the threads and put the mat on a flat surface to work the binding around the corner.
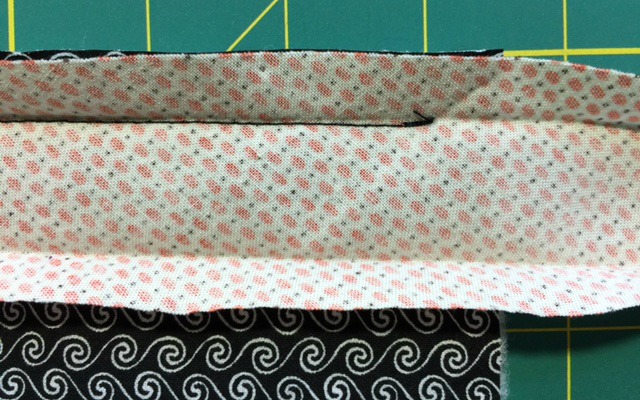
Here’s how you go around a 90° corner with binding:
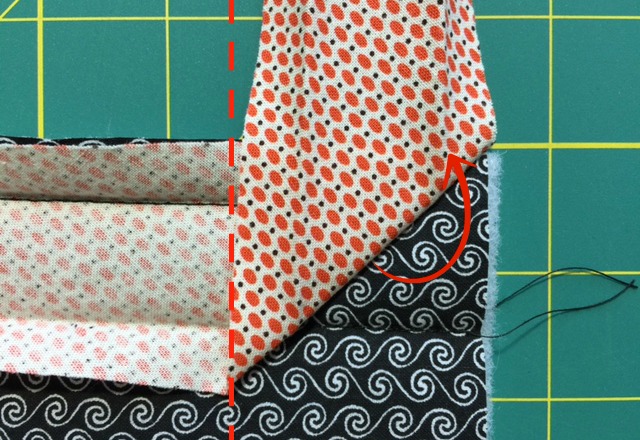
Fold the binding up. The fold will make a 45° angle. The loose edge of the binding will be perpendicular to the sewn down binding.
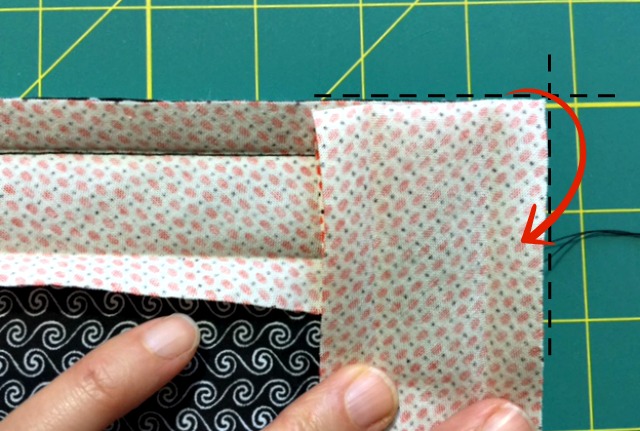
Lay the binding back down so the long edge is lined up with the next edge of the mat.
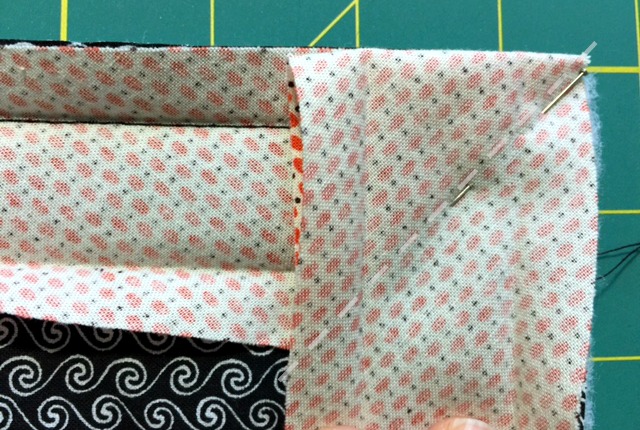
You now have two folds. The first diagonal fold and a fold along the top. The diagonal fold is underneath the unattached binding.
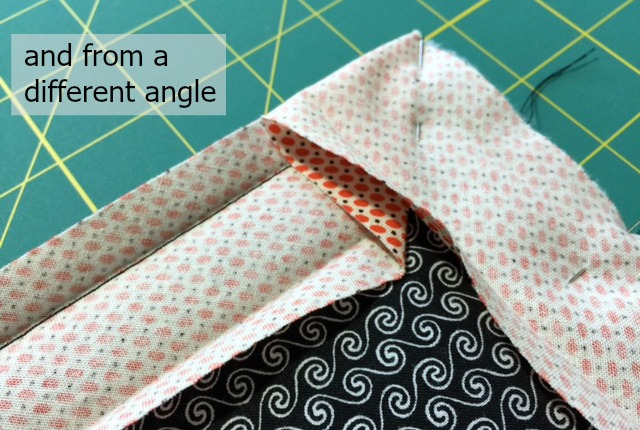
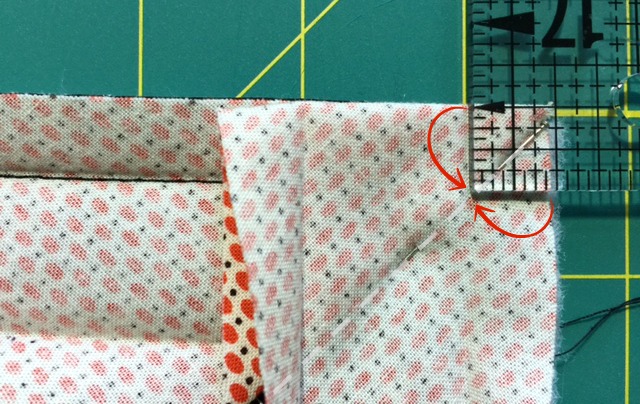
Back to the sewing machine. Lower the needle into the binding on the new edge where you ended the previous stitching. You can feel the fold through the top layer of the binding. You do not want to catch the fold under the needle. The needle will go in through the top layer of binding, the front of the mat, the batting and the back at the point where the seam allowances cross each other. Again, what ever your seam allowance is (mine is 1/2″ (1 cm) start at that distance down from the top and in from the edge. There is no stitching in the seam allowance. Stitches stay strictly on the stitch lines.
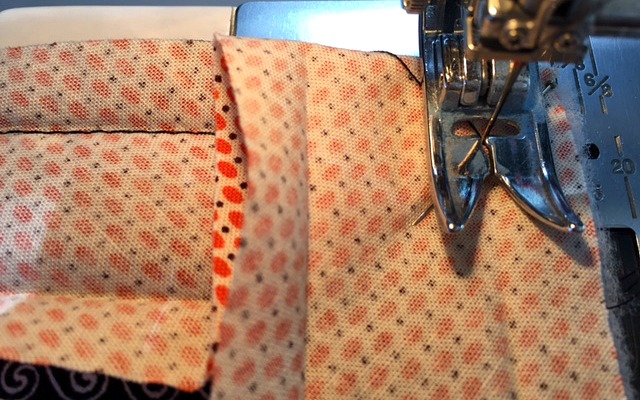
Stitch to the next corner stopping at your seam allowance as you did on the last edge. Repeat how to work the binding around the corner here and the remaining two corners.
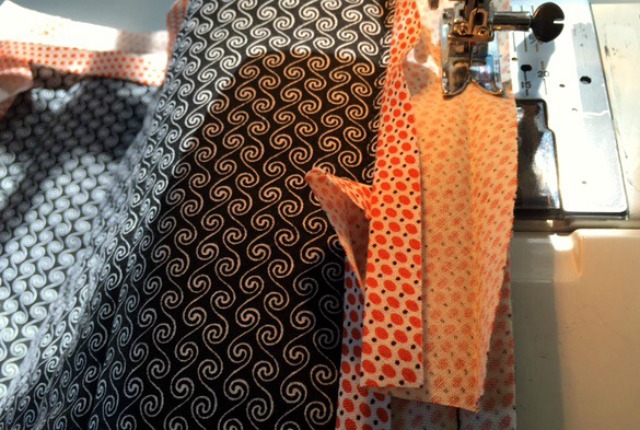
When you get to the end of the binding lay it over the start of the binding. Overlap the two ends a little less than an inch (2.5 cm).
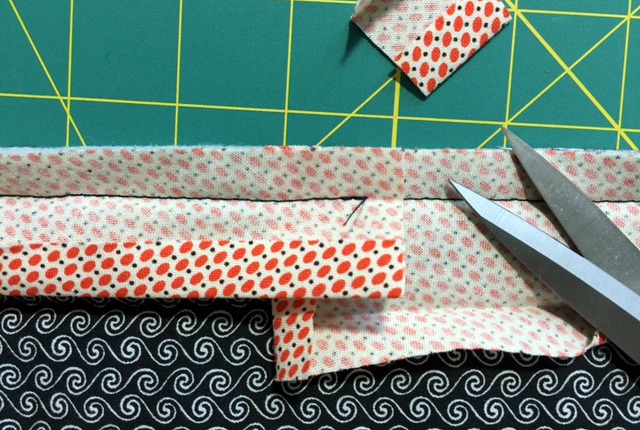
Clip off excess binding if you need to.
Now it’s just a matter of folding the binding over to the back and stitching it down. There are two ways to do this. Neither is better in this case. If you like the rhythm of and and want a hand work project to take to a meeting then simple fold over the binding, pin it here and there and stitch it down with a slip stitch by hand. (See below about folding the binding at the corners).
If handwork is not what you want today you can sew the binding down by machine. Here’s how:
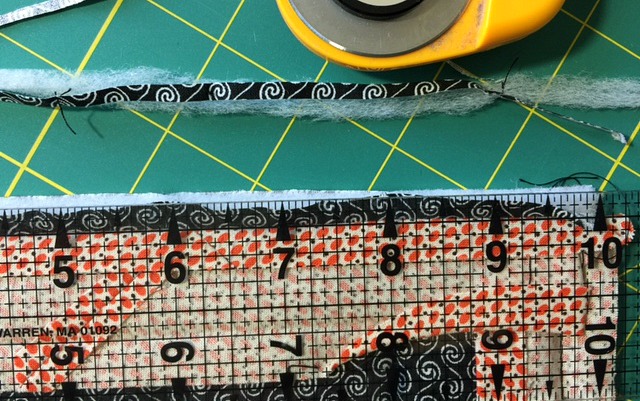
To be sure to catch the binding on the back while you sew on the top of the mat, the binding on the back side needs to be a little wider than on the front. Bias binding makers make both sides even but that can be worked around.
Trim the seam allowances by about half to give you a little more binding to play with. Do not trim the binding. Fold it out of the way of scissors, rotary cutters and any other sharp objects. (Trimming the binding in the corners will cut it into separate pieces – Ask me how I know)
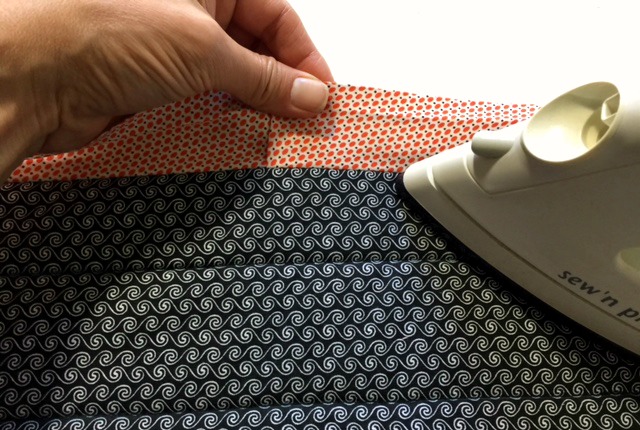
Press the binding away from the mat to open the seam. I held the binding taught while pressing.
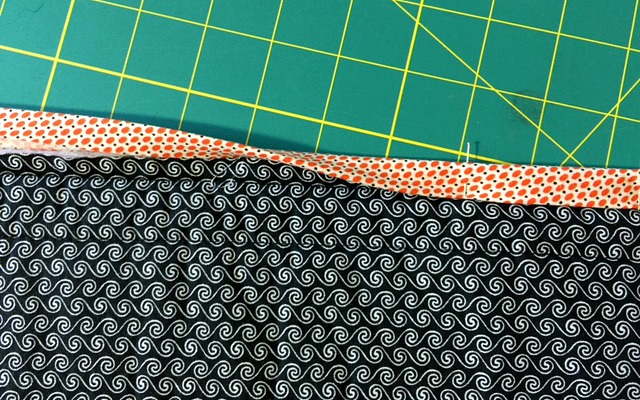
Fold the binding over the mat’s raw, straight edges to the back. With the seam allowance trimmed the binding should come down in the back past the line of stitches where it was attached to the front. This is important because this means you will catch the binding when you stitch in the ditch on the front.
Adjust the binding as you pin it down so it’s an even width all the way around on the back. It is the back so you can, if you want to, put your perfectionism to the side and just eyeball it.
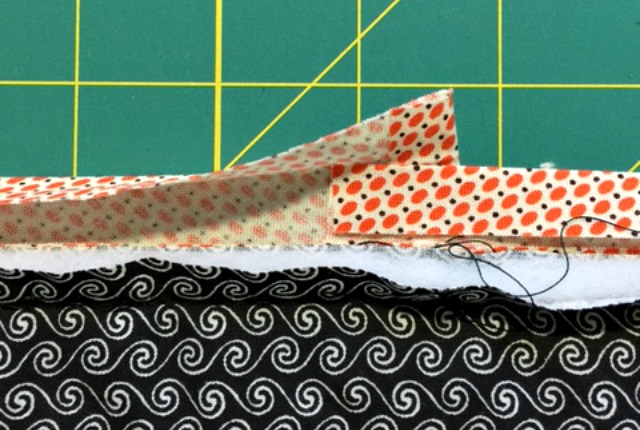
Simply fold the overlap over too. Keep the beginning of the binding folded in and on top.
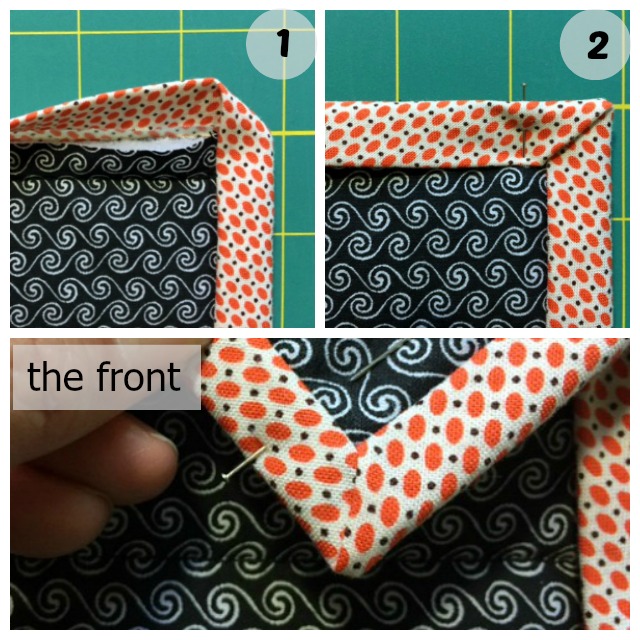
At each corner fold one edge over and continue the fold past the mat to the end of that side. It will end in an angle – almost 45°. Fold the second edge down, keeping that angle. Pin.
With the iron press the binding down all around. (Best not to press plastic head pins if you’re using them)
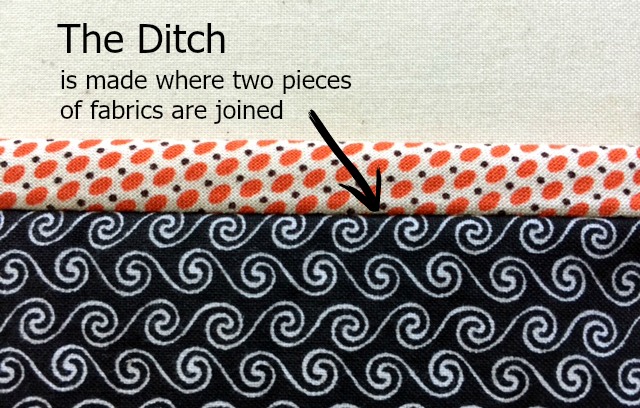
On the front side of the mat you will stitch in the ditch all the way around. Stitch in the ditch means to sew a straight stitch on the seam where two fabric are joined. In this project it will be where the binding is joined to the mat on the front side of the mat.
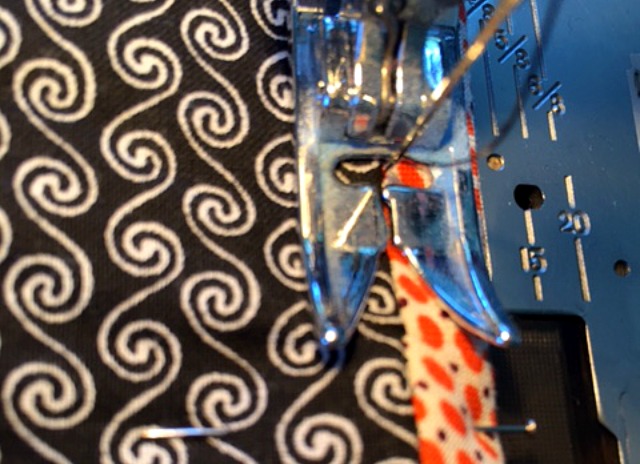
Stitching in the ditch on the top side hides the stitches in the crease, or in the “ditch”. You are also catching the binding on the backside stitching it down to the mat. You may want to to change out your bobbin thread to one that blends in with the binding fabric since it will be seen. Stitch in the ditch all the way around.
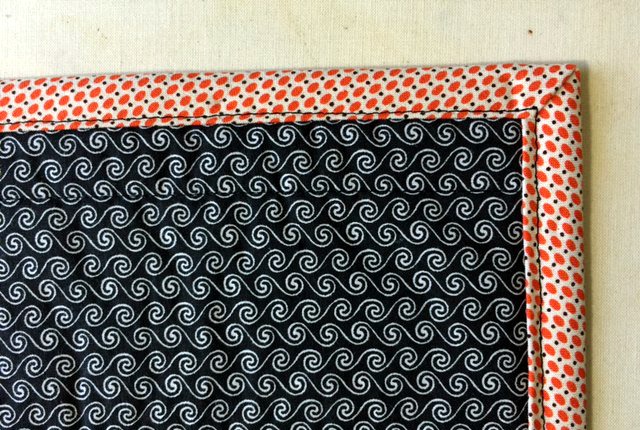
The back will look like this when stitching in the ditch.
If there are areas where the binding didn’t get sewn down you can simply tug on the binding there to get it in place, pin it down, and stitch in the ditch on the front to catch the loose binding. You do not have to take any stitches from the first round out.
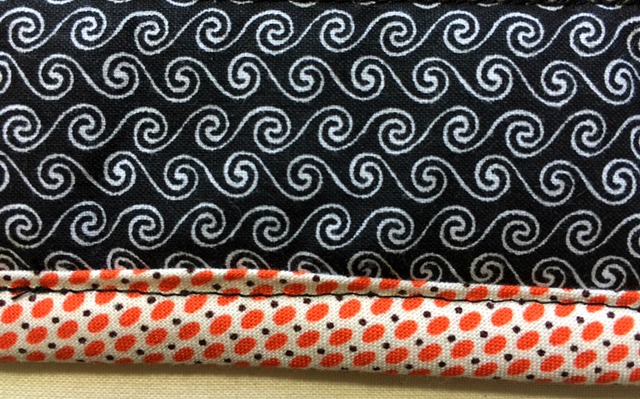
And this is why you may want to to use a bobbin thread that blends in with the binding and to get that binding an even width on the back. And this is why I tell myself to let that perfectionist take a vacation – things happen.
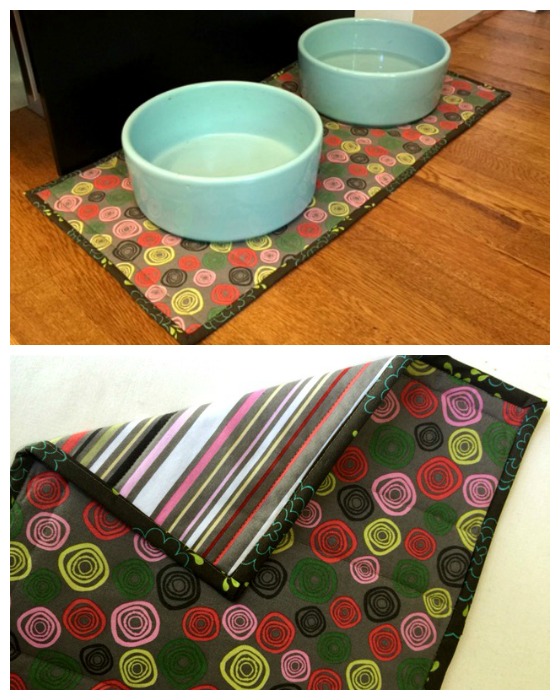
The first mat I made I used two different fabrics for the front and back. I figure I need two mats; one to use while the other is in the washing and drying cycle, I mean pile.
How could you make this differently?
- Make it smaller for a human place mat.
- Make it larger for a toddler play mat.
- Make it to go under the coffee maker or any appliance that people spill around.
- Add insulated batting for the teapot to sit on so it stays a little warmer.
- Forget the teapot, make it the size of a seat cushion with a little more padding for sitting on bleachers, benches and other comfortable sport venue seating.

Where did you get the dog bowls? I can’t find any like them!!!! Help!!
I think I found them at PetSmart or PetCo but it was years ago.