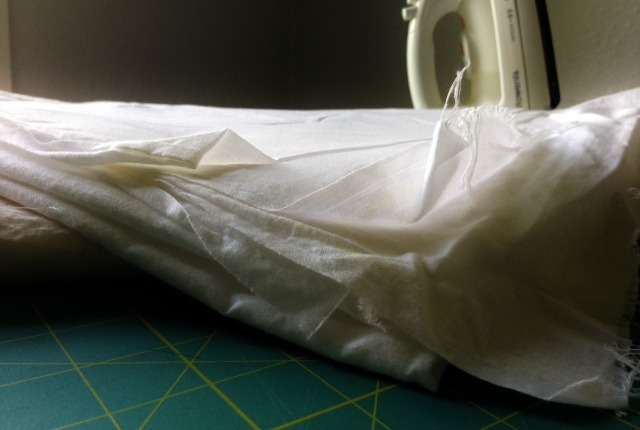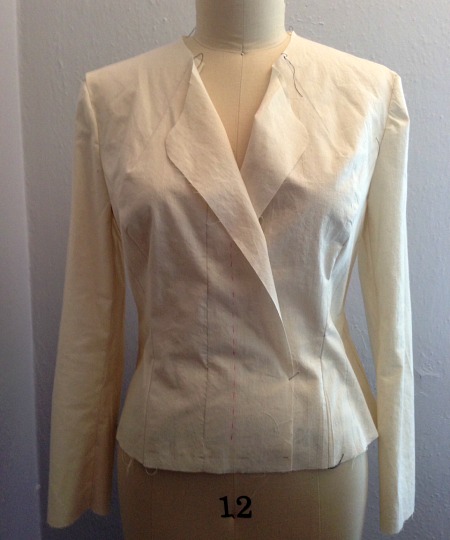
More than likely you have heard about making a muslin of a garment before making the garment. You may know why or you may be asking yourself, “What?” Basically a designer will make a muslin for every prototype to work out all the details in the design, the fit and the construction of the garment. A home sewer, starting with a commercial pattern usually assumes the pattern will fit if they have been honest with themselves and picked the right size to make. But you know what they say about assuming. So home sewers, even with a commercial pattern by a well known pattern company, will make a muslin to test the fit of the garment before cutting into their good fabric.
Constructing a muslin is not the only way to test for fit. You could cut your garment pieces out of your fashion fabric and baste or pin them together, try on, and check that everything is fitting well. This is the quickest way if you’re pretty sure only minor (or no) adjustments are going to be needed.
If you are totally uncertain of a pattern, maybe the pattern company is unfamiliar to you and therefore you do not know their sizing well, or if your garment fabric is very expensive, you probably want to sew up a muslin first. This simply means, sewing the garment up in muslin fabric to test how it fits. This way, if the fit is off you can make alterations on the muslin until it is corrected before cutting up your pricey, rare or special fabric.
Reality check: the impatient me says to trust the garment is going to fit and just go ahead and make it. Well, a new reality check has come up recently, I’ve had trouble with the fit in tops I’ve sewn. I’ve had to alter these tops after sewing them together. Cursing while I eeked out what I could in the seam allowance, or put in a tuck where one shouldn’t be (excess fabric that I could have removed from the pattern piece before cutting out my garment). So I’ve learned to double check using a muslin until I get to know my shape and my pattern manufactures better and am able to alter patterns right out of the envelope.

The good news is that sewing up a muslin is not sewing up the garment twice. Who has time for that? Well, if your garment is super simple you might sew it up completely in muslin. Hey, if that’s the case, make your muslin in a fabric (nothing expensive) that can also be worn if the fit is good or can be altered after you made it. I’ve done that with a detailed skirt I was making. I left off the extra details on the “muslin” of the skirt, made it in a simple cotton and I wear it far more than the fancy skirt I was making the “muslin” for.
When sewing up a muslin you only need the main pieces of your garment. For pants you need the leg pieces and just measure your waist against the paper waistband pattern (keep in mind overlaps on waist band patterns). And really you could make the muslin pants a short length since it’s the crotch and seat that need to be check for fit. To check for length measure your inseam and compare to the paper pattern. Lengthen or shorten the legs as needed.
For any bodice muslin (shirt, dress, jacket) you only need to sew up the front, the back and the sleeves. You do not need to sew facings, details like tabs, or interior pockets. You may or may not need the collar piece(s) and/or patch pockets depending on where you have fitting or placement concerns. Tip: pockets can be drawn on the muslin with pencil to check for placement.

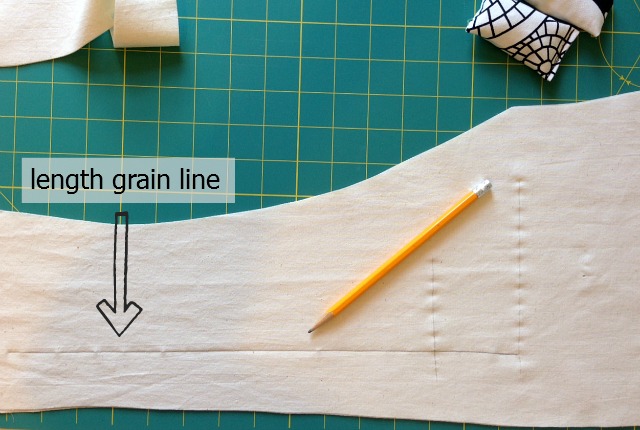
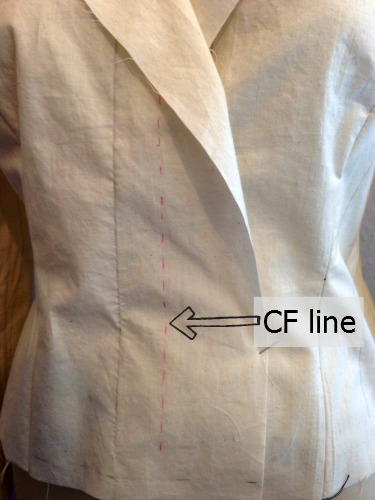
When cutting out your muslin trace the center front line onto the front pieces and if there is one, the center back line onto the back pieces with a pencil. Also draw in the grain line onto each piece of muslin(sleeves too). The grain lines help you see any distortion, usually due to posture, that you may want to fix. I also trace the cross grain on my back pieces since the back is where I’m having trouble fitting lately. The lines will help me see which direction any wrinkles or pulling are forming.
Sew up the muslin with your machine using a basting stitch (faster to rip open if you need to alter) in the order that the finished garment will be sewn but leave out any top stitching, edge stitching or other such details. The muslin is suppose to be a quick sew but please don’t forget to iron your seams. Unpressed seams will affect the fit of the muslin which might led to thinking you have a fit problem when you don’t. Do also run stitches on the seam line on the neck opening and arm openings if your garment is sleeveless. (Since these openings have parts cut on the bias, the stitching keeps them from stretching and possibly distorting the shape).

After stitching up your main parts, try the muslin garment on. If it has a front opening, align the center front lines (you only have one center front on your human body). The left front and the right front muslin pieces each have a center front line if they overlap at all. Lay these lines, one on top of the other, whether or not it’s a center front opening, and pin in place. If you have a back opening you need a another person to align the center back lines and pin them together (sorry, I haven’t yet come across a way to fit yourself with a center back opening on a bodice)

The best way to see any fitting problems is with a photo. I don’t know why but the pulls, wrinkles, etc are so much clearer in a picture than in the mirror. Photos, simple digital photos on the camera’s screen, seem to flatten things out for your eye. There are a couple of ways to get a picture of yourself in your muslin garment. You could have someone else take it (easiest option). You could set up your digital camera on a tripod or other flat surface (ironing board, book shelf) and use a delay to take the picture. You could even take a photo of yourself in a mirror (last photo above).
I read that taking a video is even better than a picture because you don’t need a delay on your camera (you turn on the video and walk in front of the lens) and you will see how the garment moves on you. I haven’t tried this video option yet but I will next time.
Analyze the fit of your muslin from the pictures (pinch and enlarge if you can) and with your favorite handy fitting reference (or references), see what you need to do to adjust the garment for a better fit. Keep tweaking and refitting until you get the muslin fitting how you like. And move in it; sit to be sure you have enough fabric across the seat (pants, dresses and skirts) and move your arms if sleeves are involved. Take in to account the thickness of the garment fabric when the muslin feels too tight or too loose.
After your muslin fits the best you can make it, transfer all your adjustments to the paper patterns. Make notes on the pattern pieces or a notebook for future corrections on other patterns. Remember to also adjust any lining and facing pieces if they correspond to a piece you had to adjust.
You are now ready to cut out your fashion fabric. It’s a good feeling knowing that this time, it’s going to fit.

Thank you so much for this. I found you through a Facebook link. I bought everything I needed to make myself a dress a couple of weeks ago but haven’t plucked up the courage to actually make it. I knew I needed to make a fit muslin but didn’t want to do everything twice, now you’ve simplified it for me I am ready to give it a go. I hadn’t made anything from a pattern for about 20 years until I recently made my 7year old daughter a dress which turned out great and I was really proud of. The items I made in my teens we’re rather less than a a perfect fit for myself so I’m hoping to bury some demons with this make.
I’m happy you found this helpful. There’s always mention about making a muslin but no one ever explains that it isn’t a complete duplicate; it’s just the pieces you need to check the fit. My frustration comes from seeing the garment doesn’t fit but having no clue why. Taking photos of the muslin on me was the biggest help in pinpointing the problem. Also, in the last few months I’ve been raiding the sewing section of the used bookstore here (libraries work too) and finding fitting books. I have four now and between them I can usually figure out how to fix my problem. My favorite is an old copy of The Vogue Sewing Book of Fitting, Adjustments & Alterations. My second favorite is Sandra Betzina’s Fast Fit.
I have made some big (expensive) sewing mistakes in the past (and probably in the future) and they are hard to see past. I always fear I will repeat the mistake. Reality is, I might. But then again, if I slowed down a little, researched a little, I might not. (Oh, but I try not to slow down to the point of just procrastinating). I remind myself frequently that the more I sew (mistakes and all) the more I’m learning and improving.
Keep up your sewing streak.
Awesome, awesome, awesome! Best explanation that I’ve read about “muslins.” Lots of good tips that I plan to put to use
Thank you. I constantly want to skip making the muslin and I’m sorry every time I do (do skip making it, that is ;-).
I found that buying sheets at thrift stores and garage sales is a way to get fabric to make your pattern for a trial fit and is cheap. Be sure to watch for the grain of the fabric.
That’s a good tip. Thanks