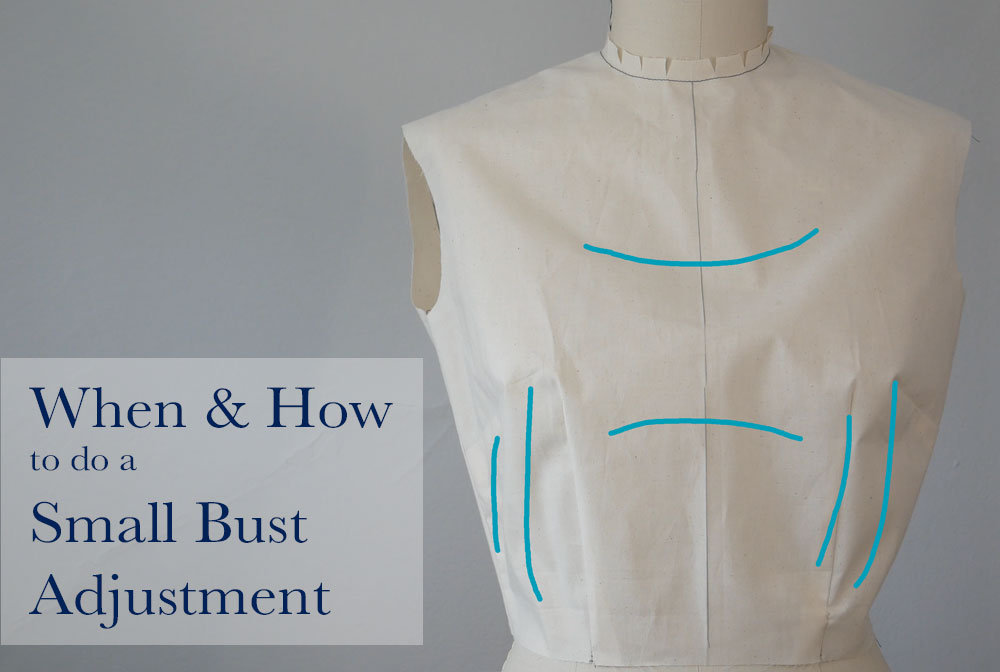
This post is one in a series about getting a better fit from your patterns through simple pattern adjustments.
The Small Bust Adjustment, aka SBA, is needed when the garment is too loose across the bust. There is just too much fabric in the front of the garment and not on purpose.
Luckily, like its opposite twin, the Full Bust Adjustment, you can tell if you need to do a SBA before cutting any fabric just by knowing your pattern cup size and what pattern cup size the pattern is drafted for. (Pattern cup sizes are NOT the same as bra cup sizes. They just use the same letters to confuse all of us.)
This video and post show how to do a SBA on a bodice with a dart and on a bodice without a dart. It also explains how a test garment or muslin will behave when you need a bust adjustment and go over pattern cup sizes.
Let’s go!
When Do You Need a Small Bust Adjustment?
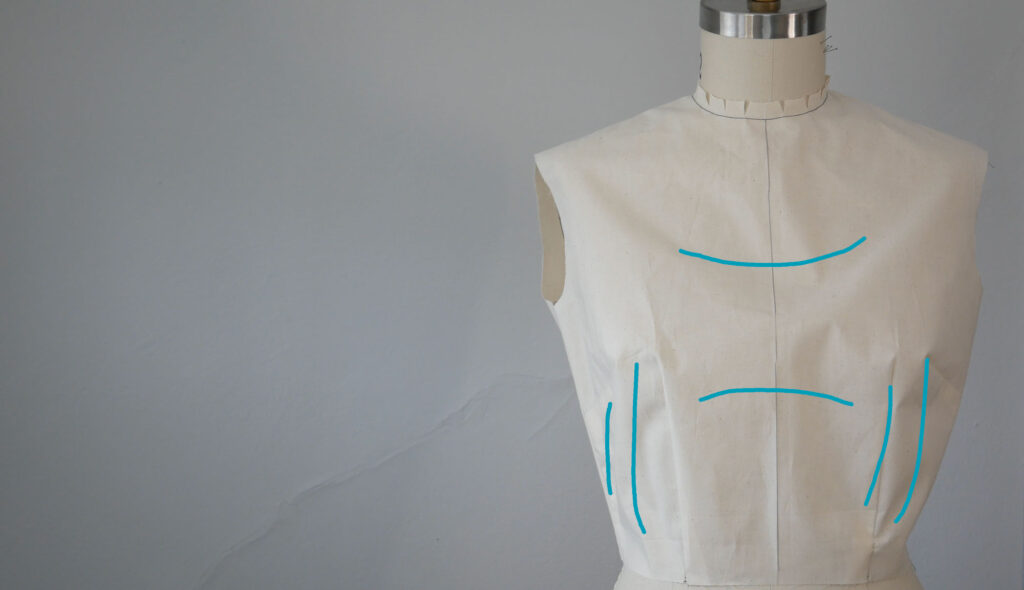
If you try on your test garment or finished garment and you notice the fabric appears to be bubbling or puddling over or under the bust, vertically and/or horizontally you have more fabric than your body needs in the bust. Everywhere else, the garment will fit well or fairly well – the garment is not too big all over.
Maybe you haven’t sewn the garment yet, but this is a common problem you have with sewing patterns or you know the difference between your high bust and full bust is less than the pattern was drafted for.
If you’ve seen my video about choosing the best size pattern, you’ve chosen your pattern size based on your high bust measurement, not your full bust. We do this to fit the upper chest and shoulders, which are harder to adjust, but it leaves you with a pattern that is too big across the bustline.
Sometimes the bust area doesn’t fit, but it’s not necessarily because there is too much fabric. This is because the bust dart is in the wrong spot for you, or it’s too big, too long, or too short. A simple repositioning or redrawing of the bust dart is what you need. For a small bust, the dart could be pinching out too much fabric. Redraw the dart legs so they are closer together. A dart reduction lets the garment lie flatter against the body. And make sure the dart is not too low or too high for your apex.
Determine the Amount You Need to Reduce
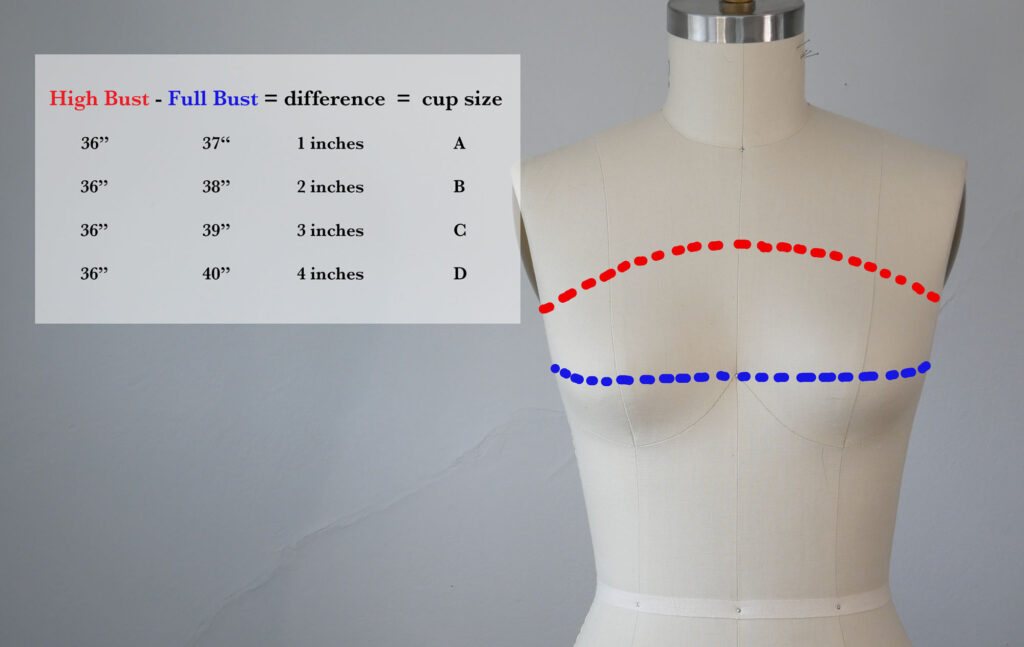
Start by taking your high bust measurement and your full bust measurement.
Read my post “Get the Right Fit” for how to take these measurements accurately.
The difference between your high bust and full bust tells you what pattern cup size you are. Forget about bra cup size. This is not the same. In pattern drafting, the cup size refers to the difference, in inches, between the high bust measurement and the full bust measurement.
If you have a 1” difference, you are a pattern A-cup, 2” difference = a pattern B-cup, 3” difference = a pattern C-cup, and so on.
What cup size is the pattern drafted for?
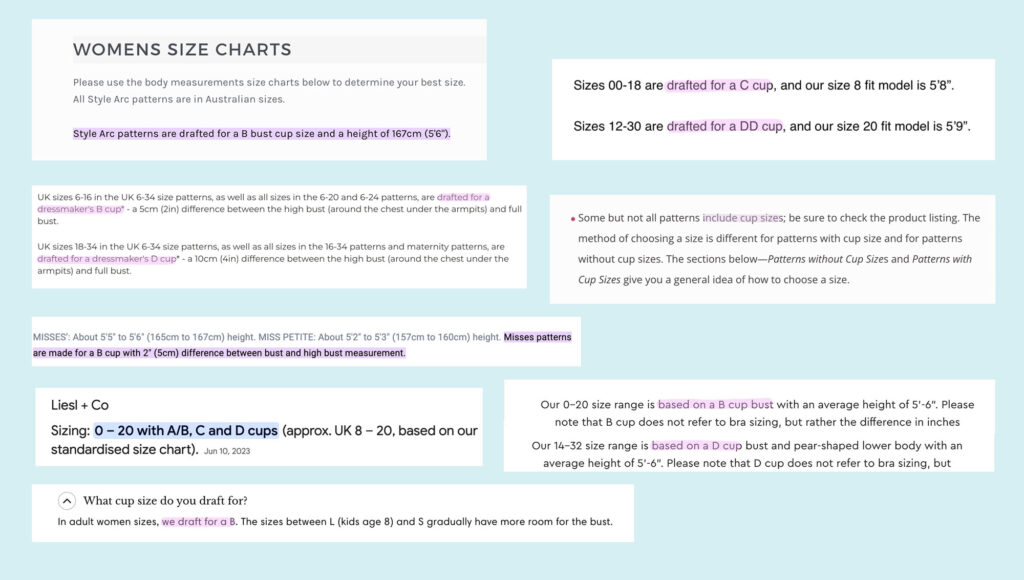
Most companies will tell you on their website, if not on the pattern, what cup size it is drafted for. Vogue, Butterick, McCalls, and Simplicity all draft for a 2” difference (or B-cup) between the high bust and full bust.
If you have a 1” difference and your pattern was drafted for a 2” difference, you already know, especially if the style is fitted, that you need 1” less in the bust.
With styles that are loose or boxy, the extra room in the bust area may not be detectable, and you will not have to make an adjustment. I do a small bust adjustment when the style has a fitted waist, especially a raised or empire waist, that’s closer to the bust. Those styles go from too loose (for me) to fitted in a short distance and that’s when it’s very obvious I have extra fabric across the chest. (And yet, I wear a C-cup bra size – go figure)
Another way to find out how much to adjust the pattern is to compare your measurement plus your desired ease* to the flat pattern measurement or the finished garment measurements, if the pattern provides them.
It’s important to measure the flat pattern at your bust level. The bust is not located at the same level for everybody. You need to determine where your apex is compared to where it is on the pattern.
*A Note About Ease
The minimum ease, aka wearing ease, is the amount of fabric beyond the body measurements. Wearing Ease is added to garments for movement. If the garment was made the exact same measurements as the body, one couldn’t sit down or raise their arms (unless it was made from high stretch fabric). Therefore, ease is added, more so to woven garments than stretch garments.
The amount of ease will also vary depending on the thickness and stiffness of the fabric and if the garment is meant to be cut on the bias.
Additional ease beyond what one needs for movement, is called Design Ease. It is added for style, like a swing top, an oversized T-shirt, or a full skirt. Most people have a preference for how loose or fitted they like to wear their clothes, no matter what the current style.
So, measure yourself and add the desired amount of ease you need or like (consider what type of fabric, the garment’s style, and your personal preference). Then measure the flat pattern at the bust level, and compare.
The guideline for minimum bust ease is:
- Blouse, dress, jumpsuit 2.5 to 3” or 6.5 -7.5 cm
- Unlined jacket 3-4” or 7.5 to 10 cm
- Lined jacket 3.5-4.5” or 9-11.5cm
- Coats 4-5” or 10-12.5 cm
Determine the Location of Your Bust Apex on the Pattern
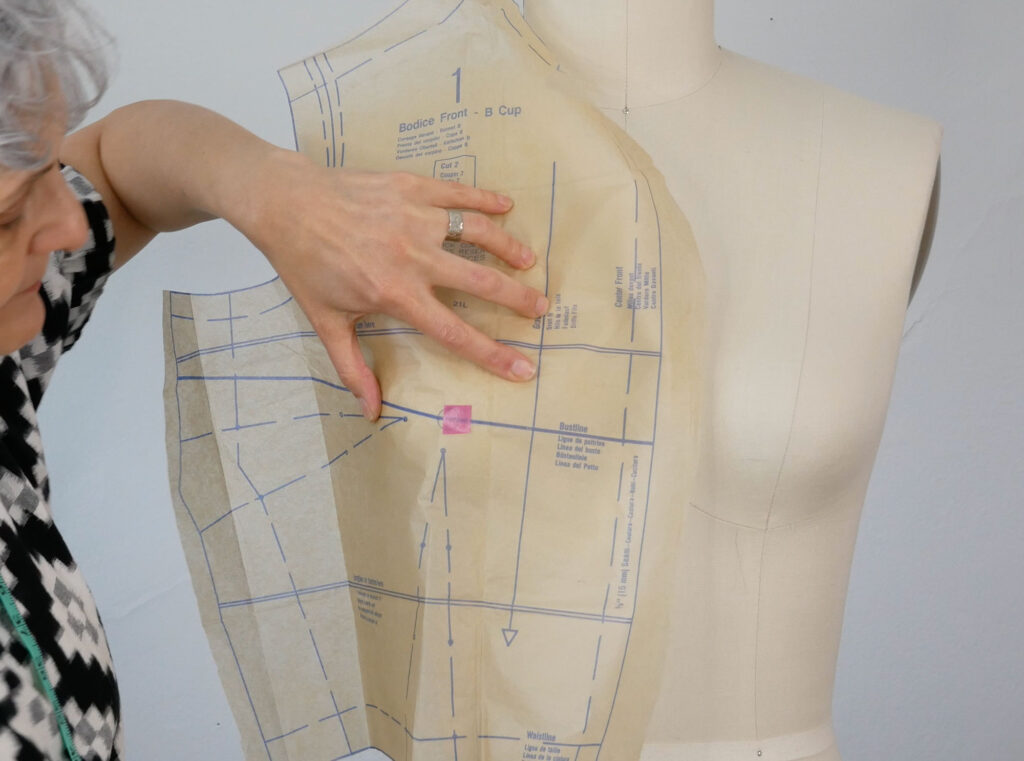
The bust apex is where the bust is at its fullest. The pattern has a bust apex just like the body. On a well-made pattern, it’s marked with a cross inside a circle. You want the pattern’s apex and your apex to be in the same location for the best fit.
If you have a tissue pattern, simply hold it up against your body, ensure the seam lines and center front are in the correct position, and mark on the pattern where the fullest part of your breast is. This is your bust apex.
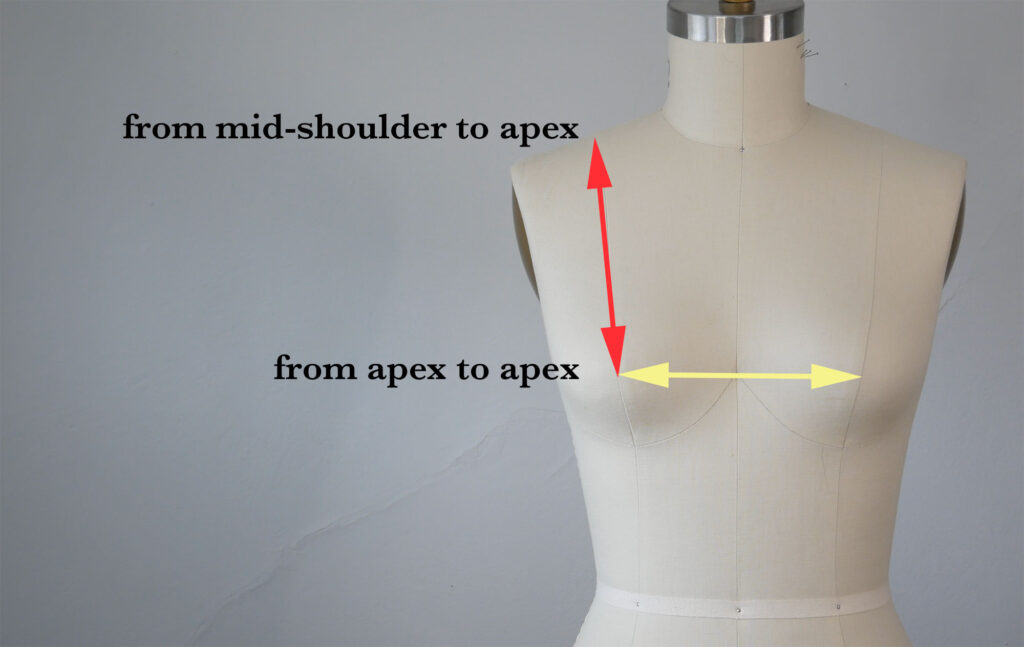
Or measure down from the middle of your shoulder to your apex. Then across your front from apex to apex. Then transfer these measurements to the flat pattern.
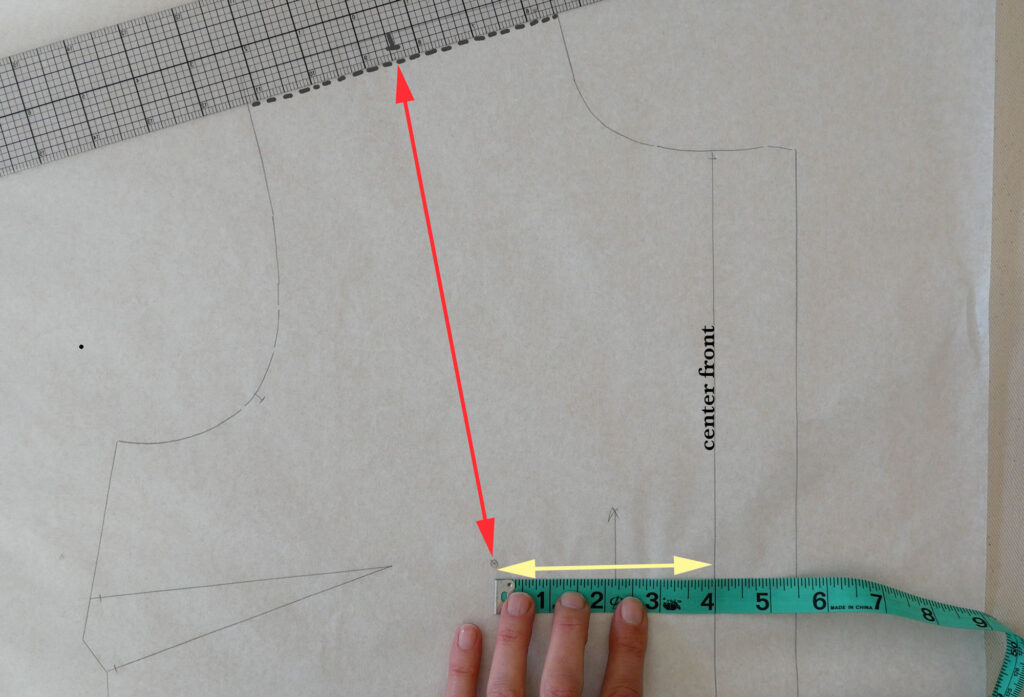
Measure down from mid-shoulder to the bust apex on the pattern. If the apex is not marked on the pattern, the bust dart will be pointing to it, but be at least 1” away from the apex. Remember to measure from the seamline, not the edge of the pattern piece. Mark the distance down where your apex is.
Measure horizontally from the center front, half of your apex to apex distance. Remember to measure from center front, which is not always the edge of the pattern piece. Make a mark.
Where the two marks meet is the location of your apex.
If your apex location is 1/2″ or less away from the pattern’s bust apex you do not need to change the pattern’s apex.
The tip of the bust dart should be pointing toward your apex. There’s a high chance it isn’t. Right now you can either redraw the dart or move it.
(To redraw the dart. Start at the base of the dart, keep the dart legs the same length as they are now, and draw in new legs so that where they meet, the new tip, points to your apex.)
How do You Know How Much to Reduce?
- The formula: Difference of High Bust and Full Bust compared to what the pattern was drafted for
- Measure across the front bodice piece at your bust apex level. Exclude the seam allowance and anything extending beyond the center front. Double this for the total width of the front. Add the width of the back pattern pieces to this. Compare the pattern measurements to your body measurements + desired ease. How much do you want to take away from the pattern front?
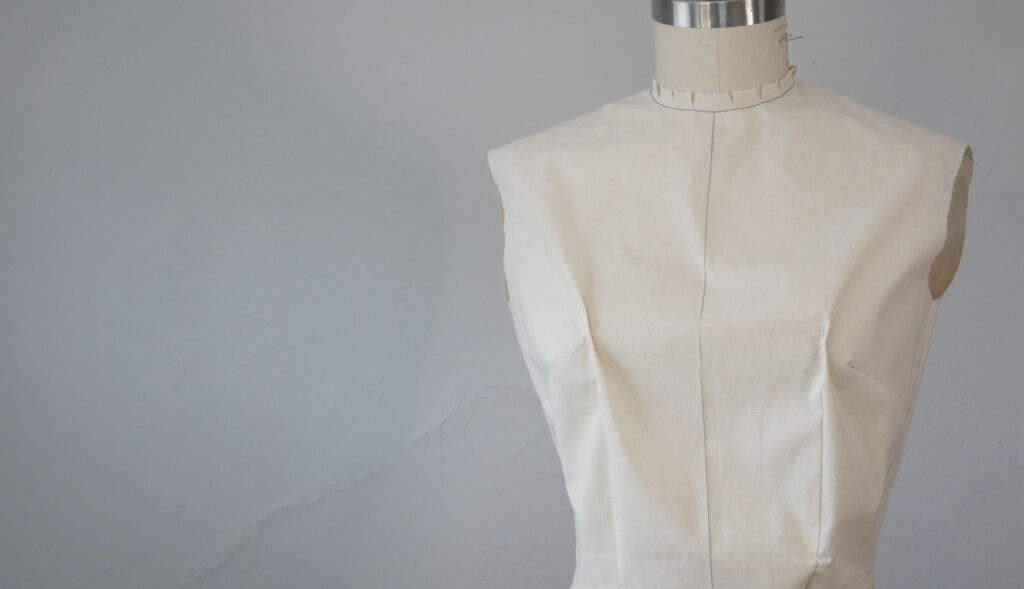
- If you sewed a test garment, put it on and get some pins. Pin out the excess fabric over the bust EVENLY. Check the side seams under the arms. Watch that they stay on the side and you are not pulling the back to the front. You may have a narrow back, too, but that’s a different adjustment.
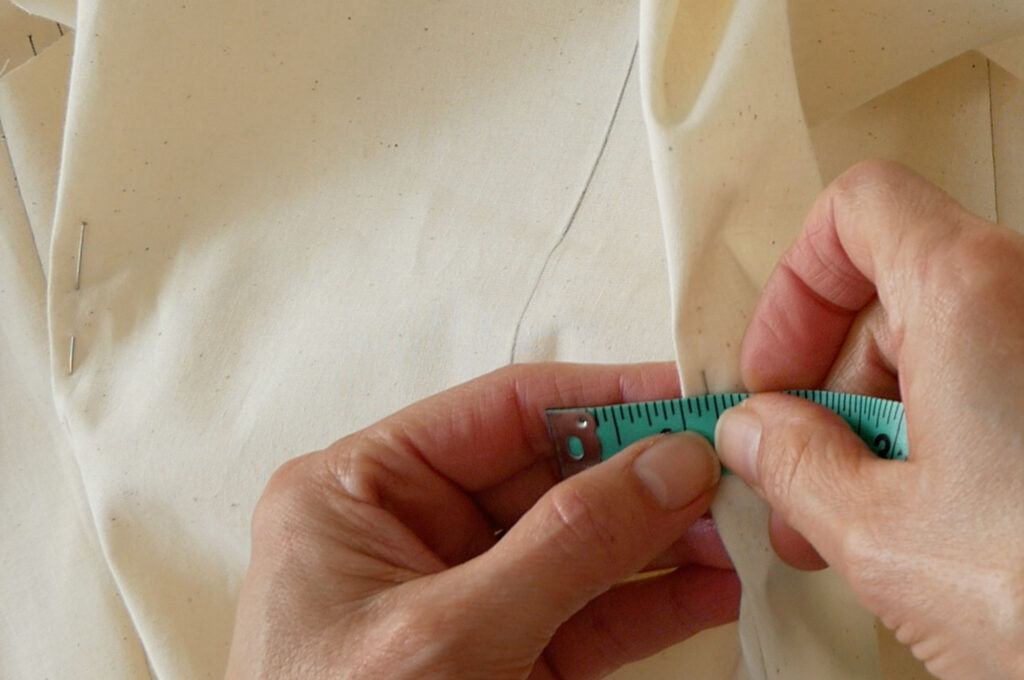
Measure the amount pinched out on both sides. Remember, whatever depth of the pinch you measure, you’ll double it to get the total amount pinched out. And both sides of the garment give you the total taken out across the front.
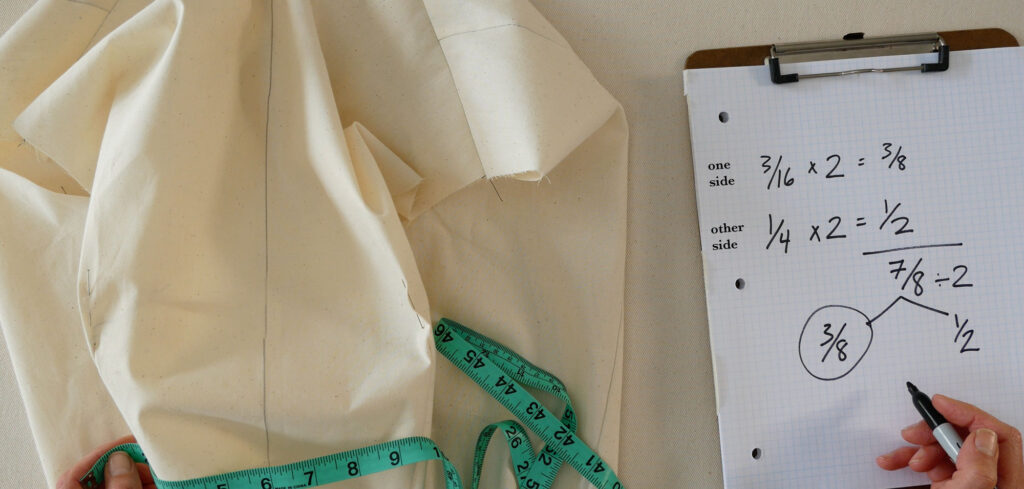
Add the amount taken out and then divide to get the average. This is in case you pinned out more from one side than the other. If you get an amount not evenly divided by two like I did. You can decide if you want it tighter or looser.
Once you know how much you want to reduce the bust it’s time to do the adjustment.
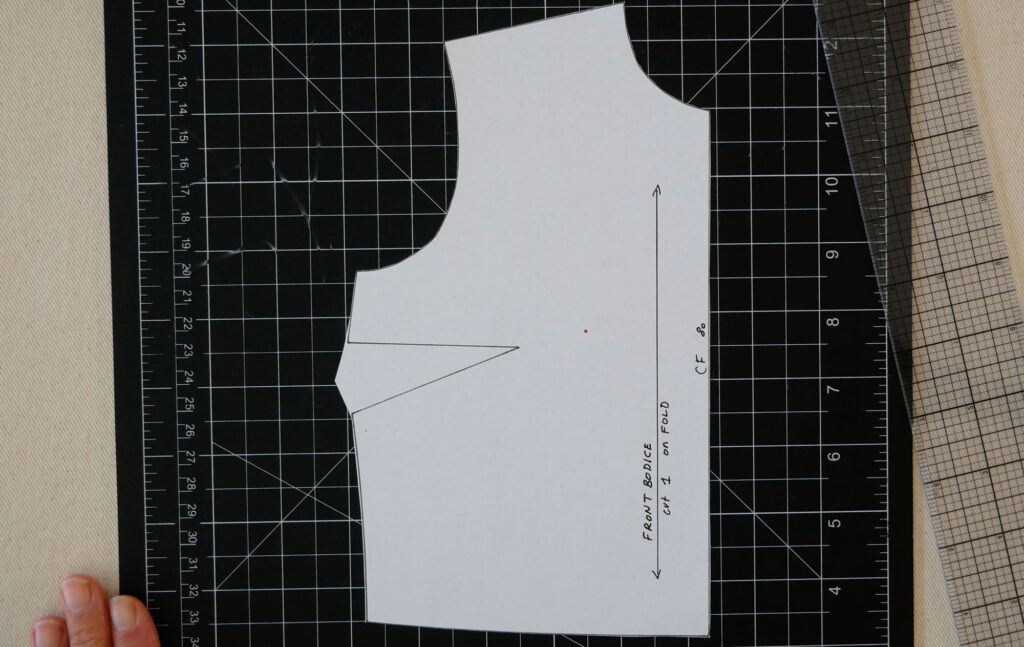
How to Do the Small Bust Adjustment on a Bodice With a Bust Dart
Have your apex marked on your pattern (or a copy of your pattern).
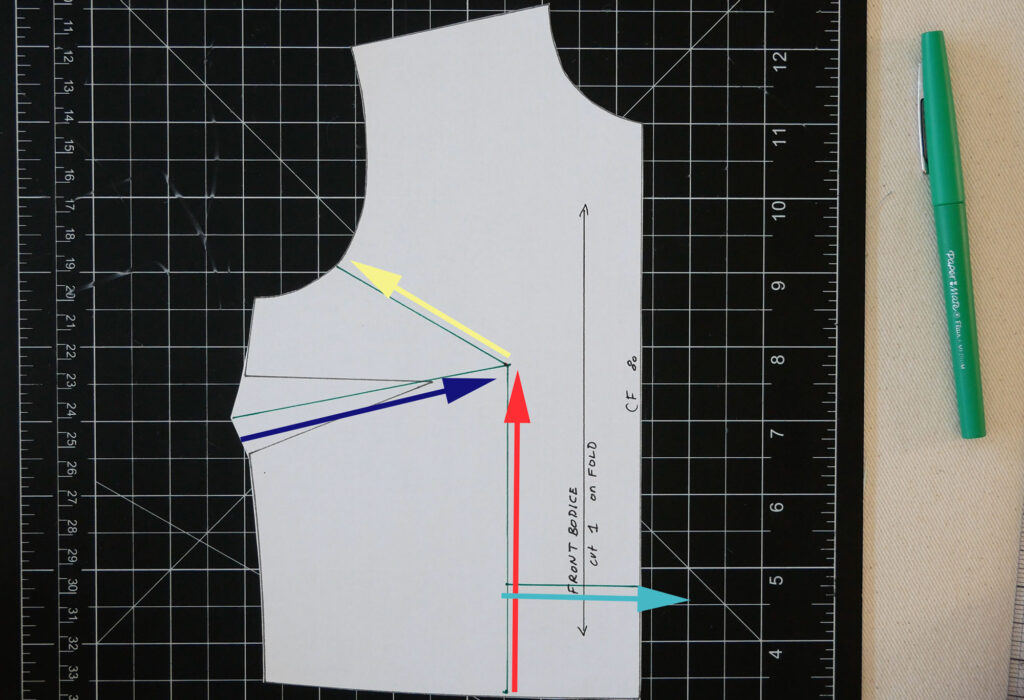
Take a ruler and draw a line parallel to the grainline from the apex to the waist seam or hem (red arrow, above).
Draw a line from the apex to approximately the middle of the lower third of the armhole (yellow arrow, above). It doesn’t need to be precisely 2/3 down from the start of the armhole, just eyeball it.
Draw a line through the middle of the dart, starting at the dart’s base, to the apex (dark blue arrow, above). Because you marked your apex this line may or may not go through the tip of the dart. That’s ok because we’ll redraw the dart when we’re done.
Now, draw a line perpendicular to the grainline from the edge closest to the center front to the first line you drew (light blue arrow, above). Exact height is flexible, but somewhere near the waist seam or hem.
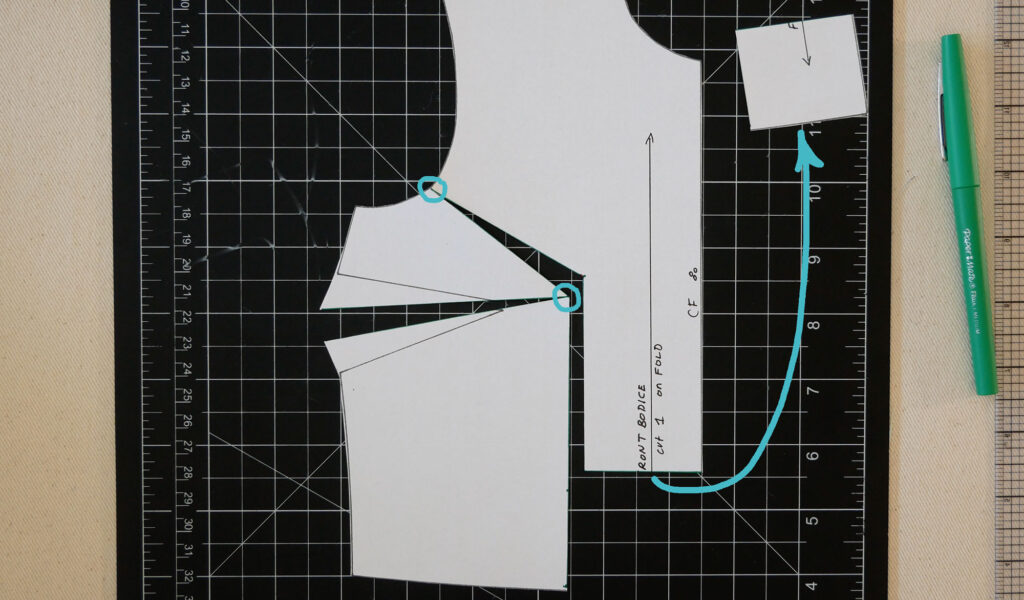
Cut on your first line from the waist/hem to the apex.
Turn toward the armhole and cut. Stop just shy of cutting the pattern all the way through. You’ll leave a little hinge of paper.
Cut on the third line starting at the side seam to the apex, but not through the apex. Again, you’ll leave another hinge.
Then cut across the center on your horizontal line. This time, cut it off completely, but don’t lose that piece.
Now, by how much do you need to reduce the bust area?
You will reduce this pattern piece by only half of what you need to take away from the front because your pattern represents only half of the front. You’ll cut two front pieces or one on the fold, which, together, will eliminate the total amount you need to reduce the pattern by.
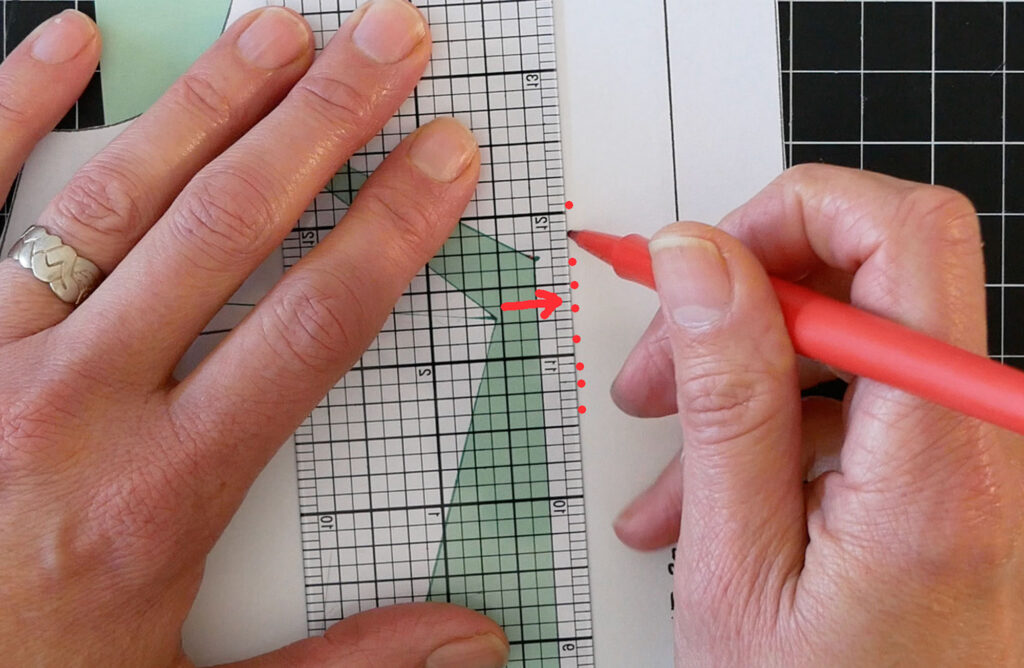
Start at the apex and measure over half of your total reduction and mark it. (Again, if I need to take 1” out of the bust area, I’ll measure over ½” and mark it). At the marked amount, draw a line down parallel to the grain line.
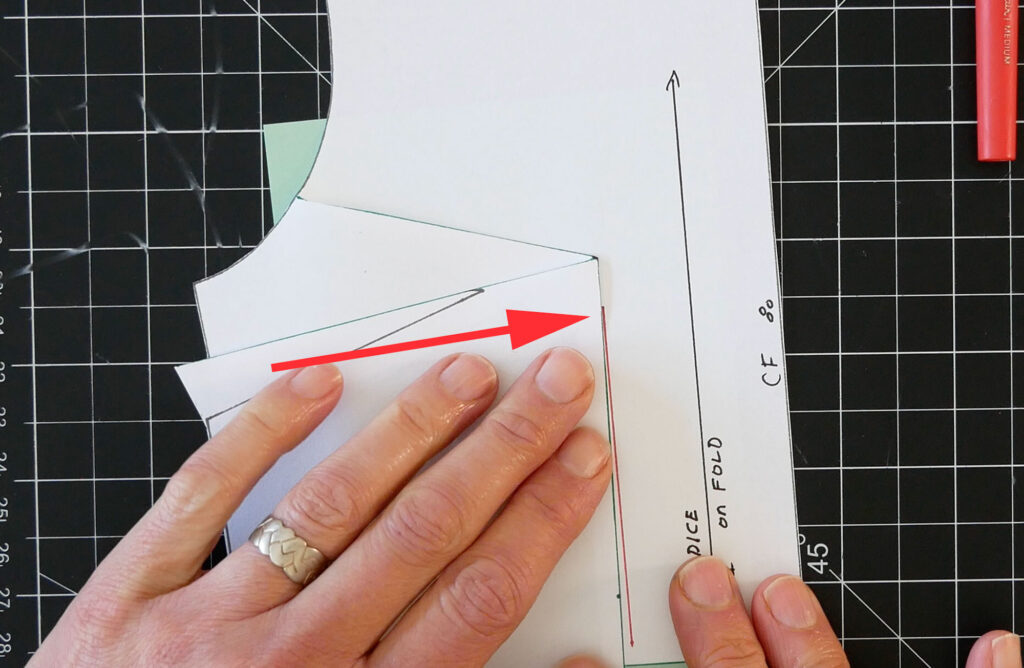
Place the side part of the pattern over the center part so it lines up to the mark. The line you just drew ensures that the overlapped edges are parallel and equal distance apart the entire way down.
Tape the pattern down.
The dart will close in on itself automatically to become the size it needs to be.
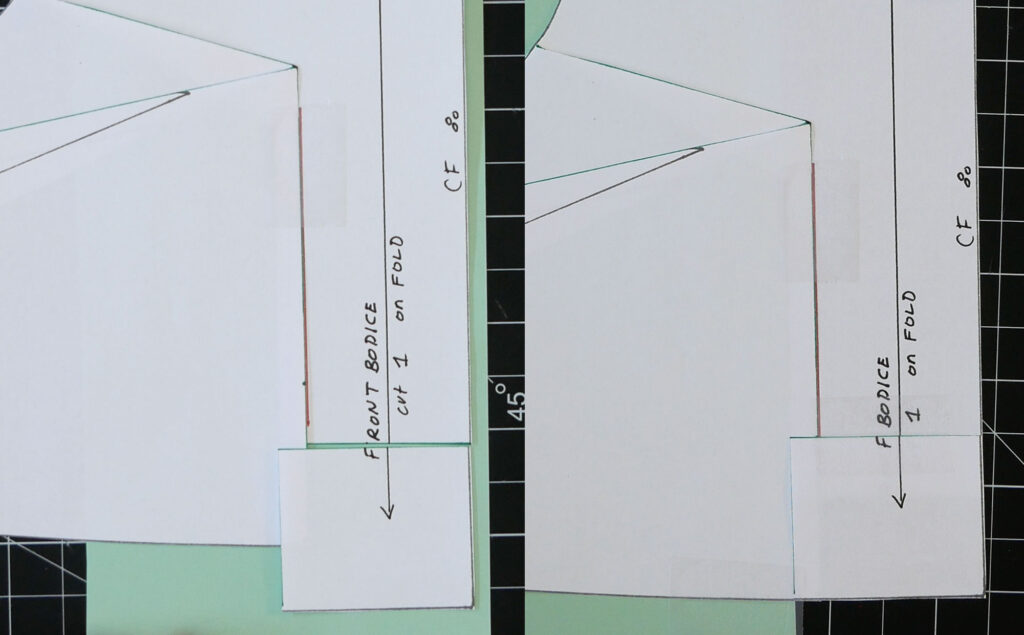
If the center front was still attached, the pattern would be way off because in overlapping we’ve raised the waistline. You don’t need all that extra fabric to go over the bust, so now it’s gone, but we have to make the center of the pattern match, so simply overlap that loose piece so it lines up at the waist or hem. And tape it down.
The width at the waist has also become smaller with this reduction. If you need that room in the waist add it back to the lower side seam. You can add the amount you overlapped the pattern here, to the front or add half to the front and half to the back pattern’s lower side seam. When adding back width be sure it’s added only below the side seam notch. Any width added above the side seam notch only adds it back to the bust area.
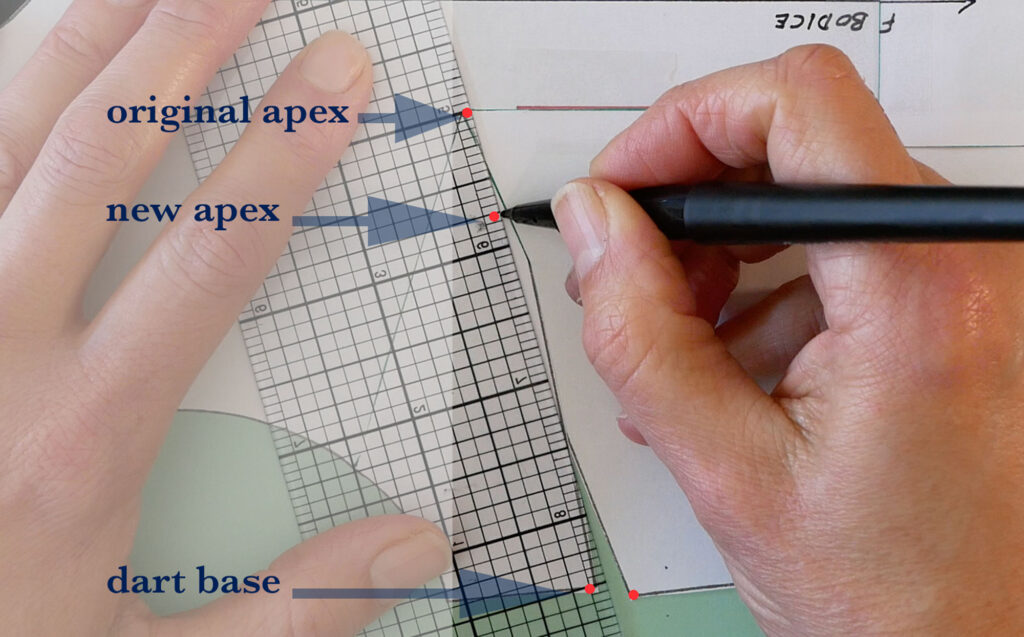
The dart needs adjusting and to see it more clearly, you could cut on the dart legs to remove the overlapped center piece.
All bust darts, regardless of size, should point to the apex which has not changed position in this adjustment. A smaller bust will have a dart tip about ¾” to 1” away from the apex. (the larger the bust the further away the dart tip is from the apex.
We redraw the dart so it is both closer to and pointing toward the apex.
Place a ruler in the center of the dart’s base and have it go to the apex. Measure ¾” to 1” back away from the apex toward the dart. This is the new tip of the dart.
Draw in your new dart legs from the base to the new dart tip.
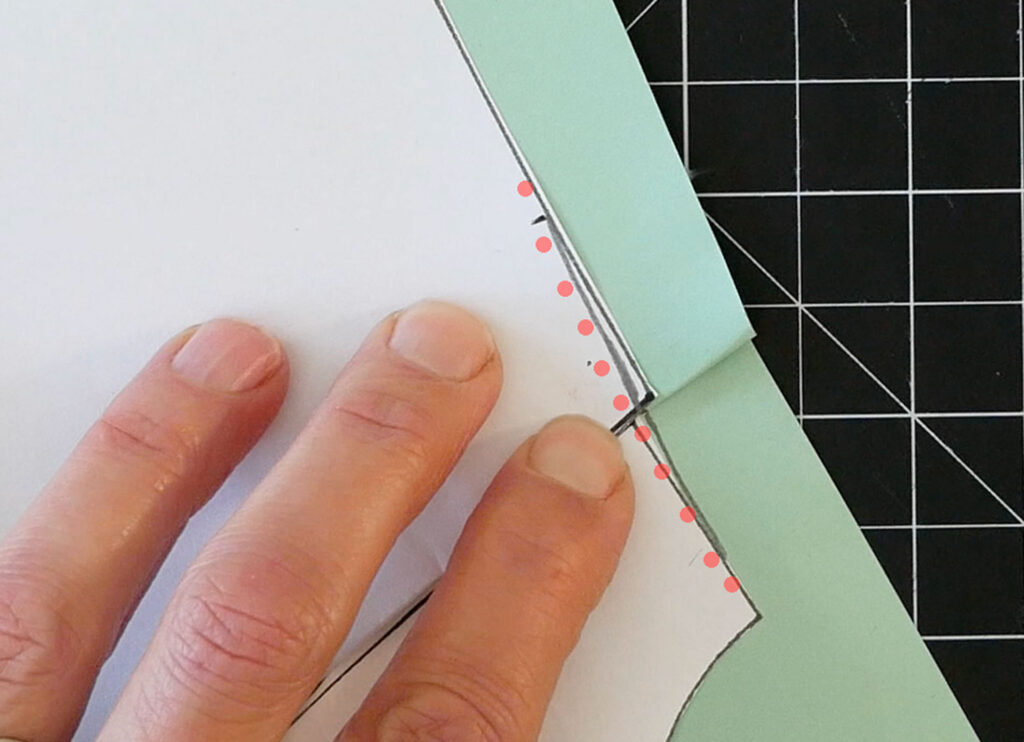
Fold the dart by bringing the lower leg up to the upper leg and true the side seam at the base of the dart by taking half of the extra width off the excess side and adding half to the lesser side. Keep the line smooth. This is called trueing and I have a post all about it.
Cut the side seam with the dart still folded to get the shape of the new dart.
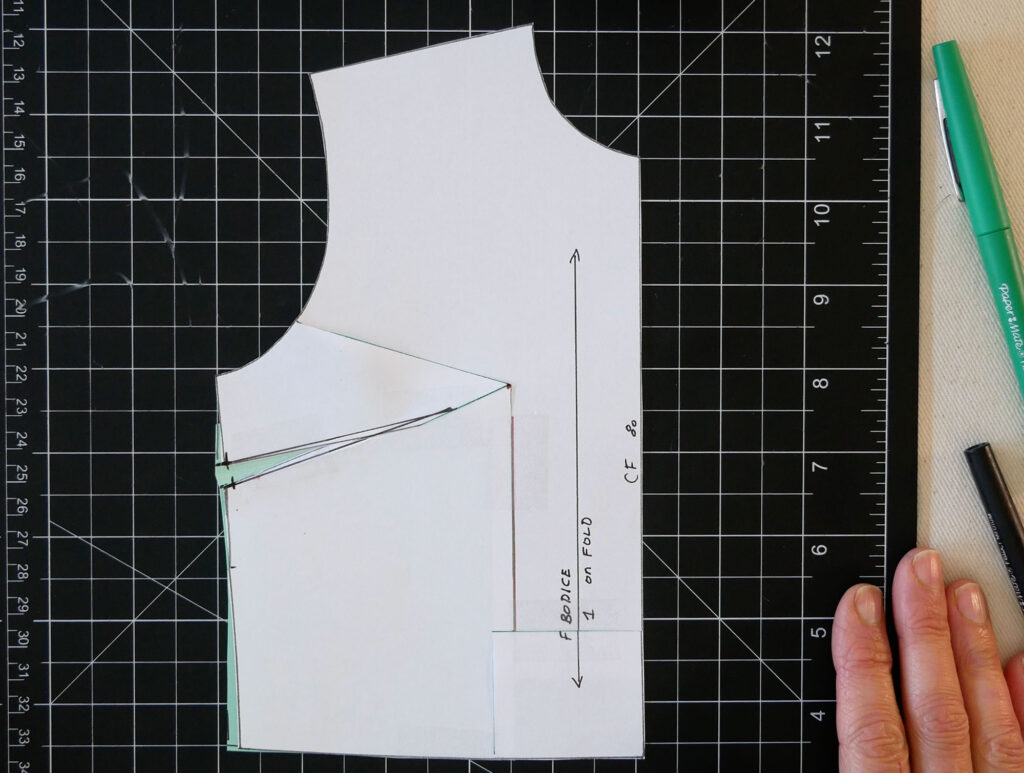
Check that the back pattern piece is the same length as the front along the side seam. Line up the side seam notch on the seam line, not the outer cut line, and walk the pattern pieces together Jump over the dart.
Make sure the pattern has smooth lines on the bottom, side seam and armhole. Adjust if needed. Remember new lines blend smoothly on and off of the original line.
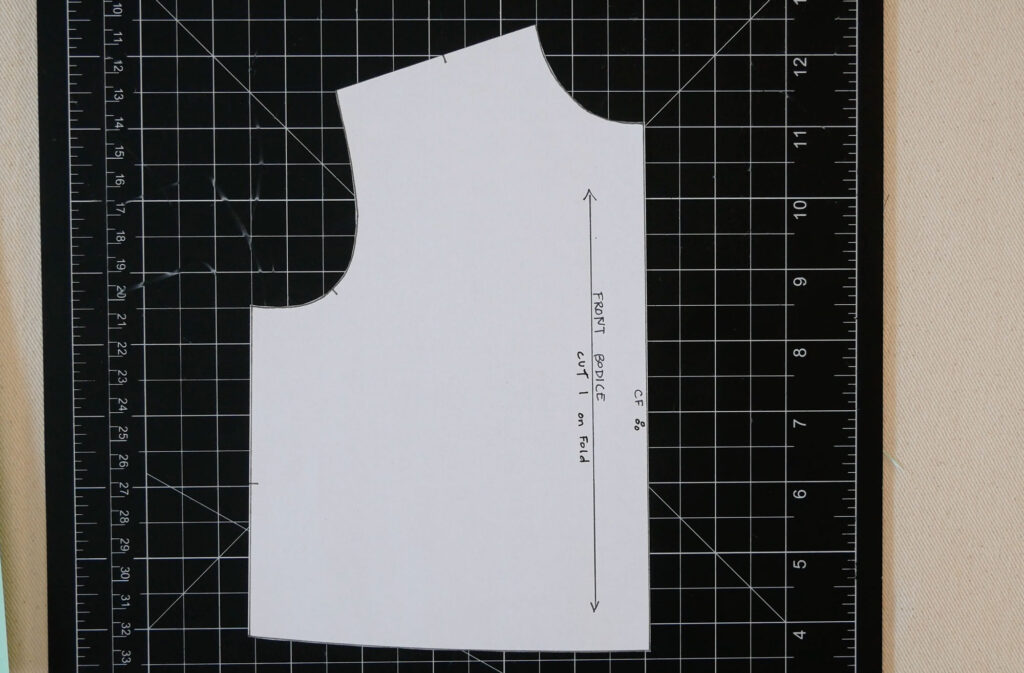
How to Do the Small Bust Adjustment on a Bodice Without a Dart
A bodice without a dart can use the simpler pivot method.
Trace your pattern onto another piece of paper.
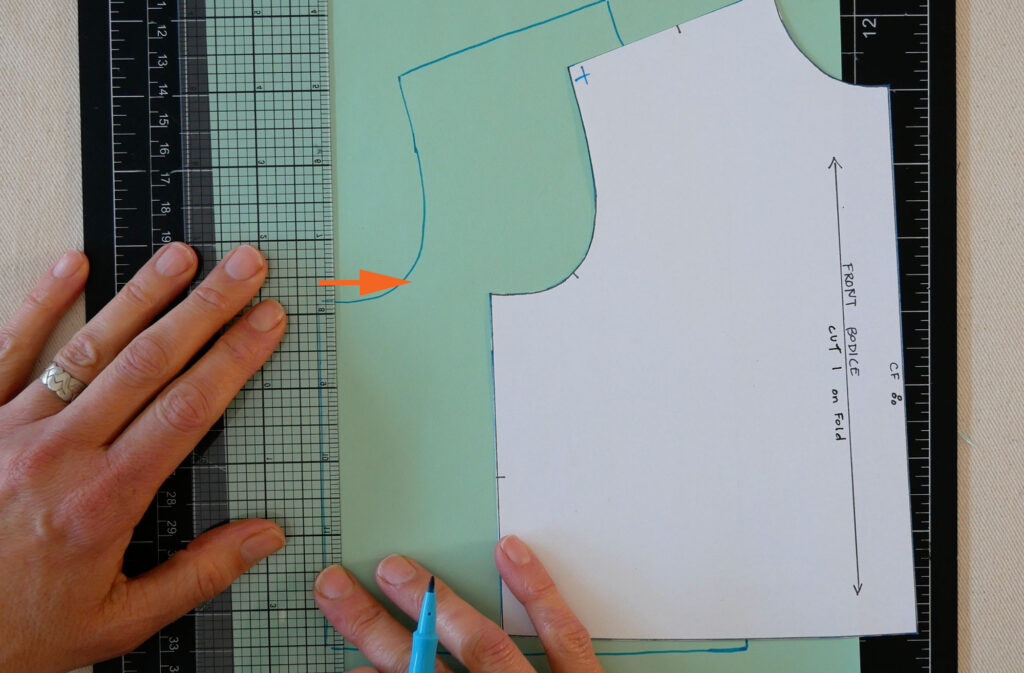
Measure inward from the bottom of the armhole and top of the side seam, half the amount you need to take out of the bust in total and mark this on the paper.
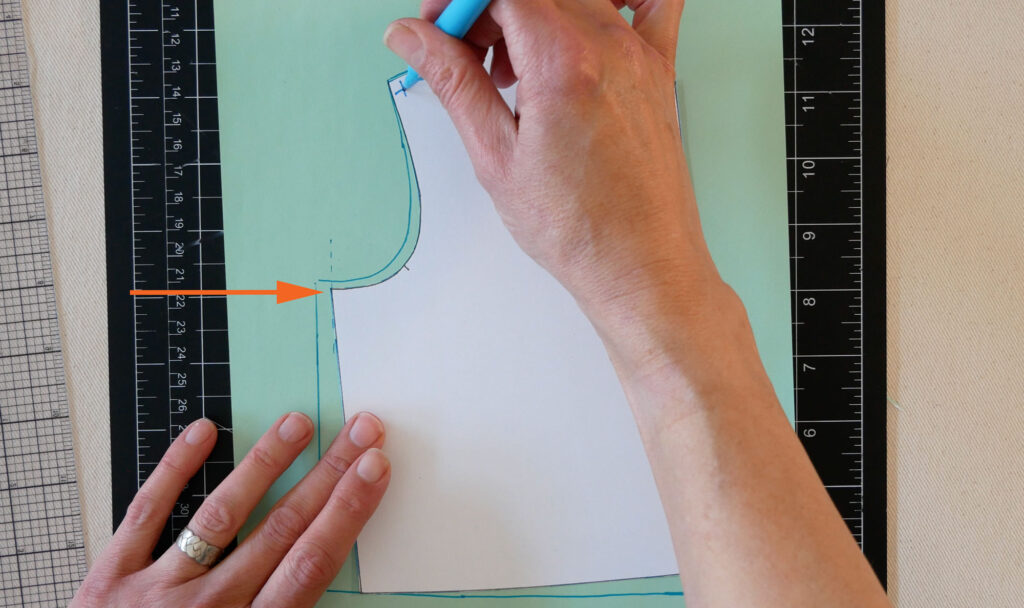
Line the pattern piece back on top of the tracing. Place the tip of a pencil, or an awl, on the seamline at the shoulder/armhole to hold the pattern down at that point and swing the rest of the pattern in until the underarm hits the mark you made.
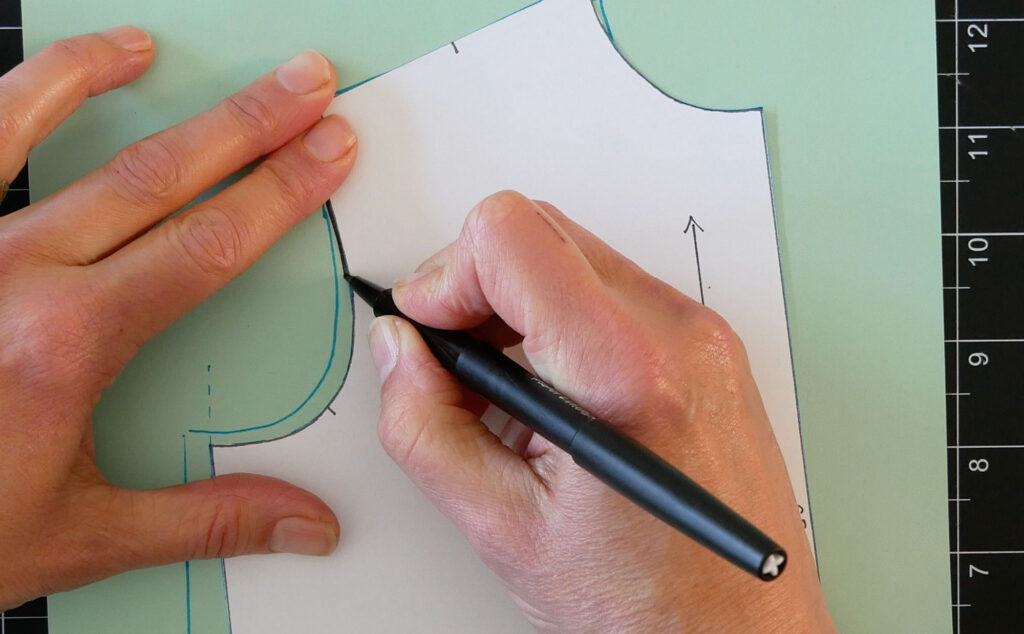
Hold the pattern in the new position and trace the outline of the armhole. This is the pattern’s armhole.
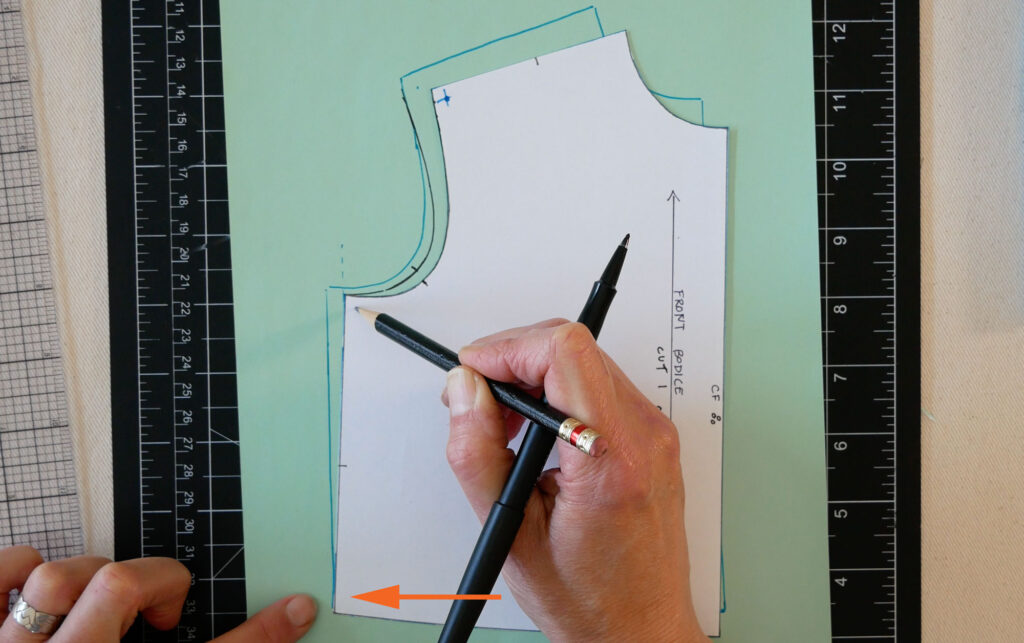
Move the pencil or awl down to the intersection of the armhole and side seam seamlines to hold the pattern down at that point as before. Swing the pattern outward so the side seam meets the original side seam at the waist or hem.
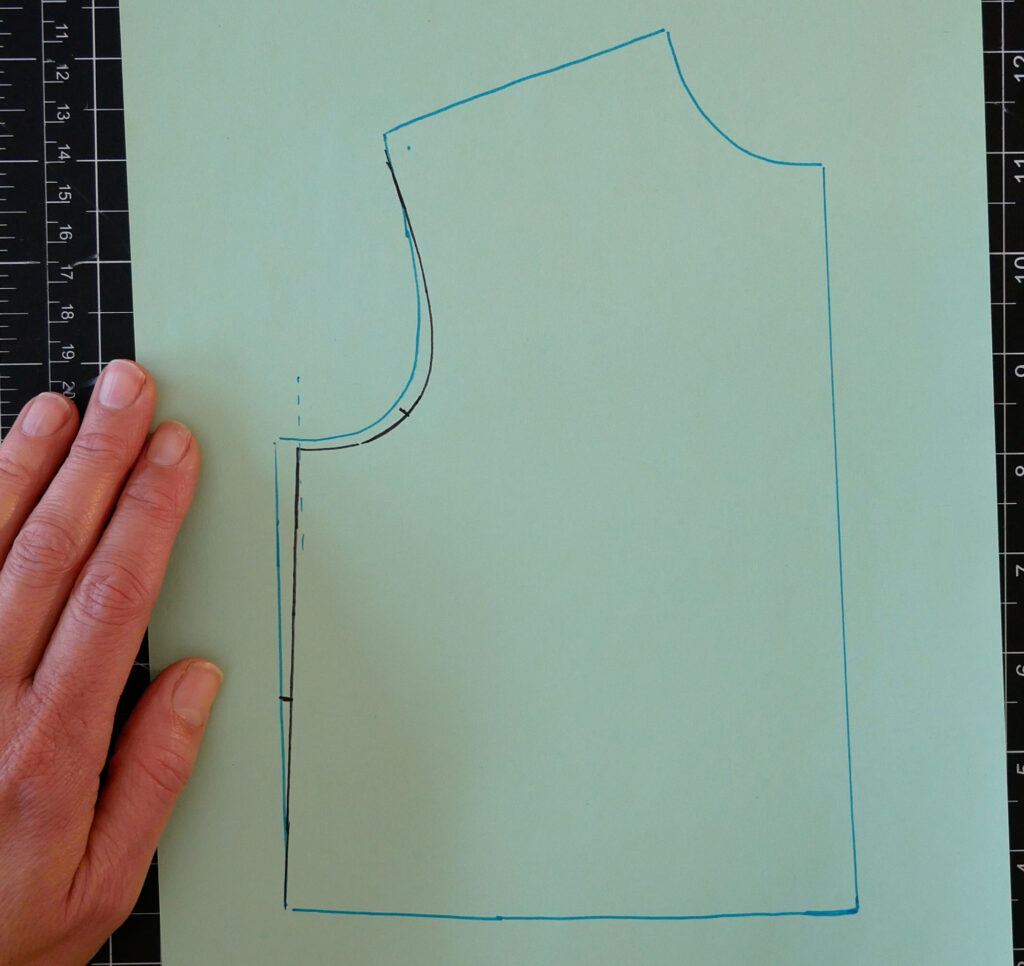
Trace the pattern’s side seam to get the new side seam.
Check that the new front pattern piece lines up with the back pattern piece at the side seam. Often, the new front side seam is longer than the back and needs to be raised at the waist to keep it at its original length. Start with the side seam notches lined up then walk the pattern pieces together toward the waist seam/hem, and if the front is too long, take the extra length off from the bottom of the front piece just at the side. Blend any adjustments smoothly back into the waist/hem seam.
This is your new pattern, reduced only at the bust level, where the reduction was needed. How clever.
