
This post is one in a series about getting a better fit from your patterns through simple pattern adjustments.
The Full Bust Adjustment, aka FBA, is one of the most common adjustments women need to make to their sewing pattern. (Did you know the average bra size in America is a 34DD?)
Luckily, it’s also one of those adjustments, like height, that you can find out if you need to make it by knowing two simple things; your pattern cup size and your pattern’s cup size. (Pattern cup sizes are NOT the same as bra cup sizes but they use the same letters to confuse all of us)
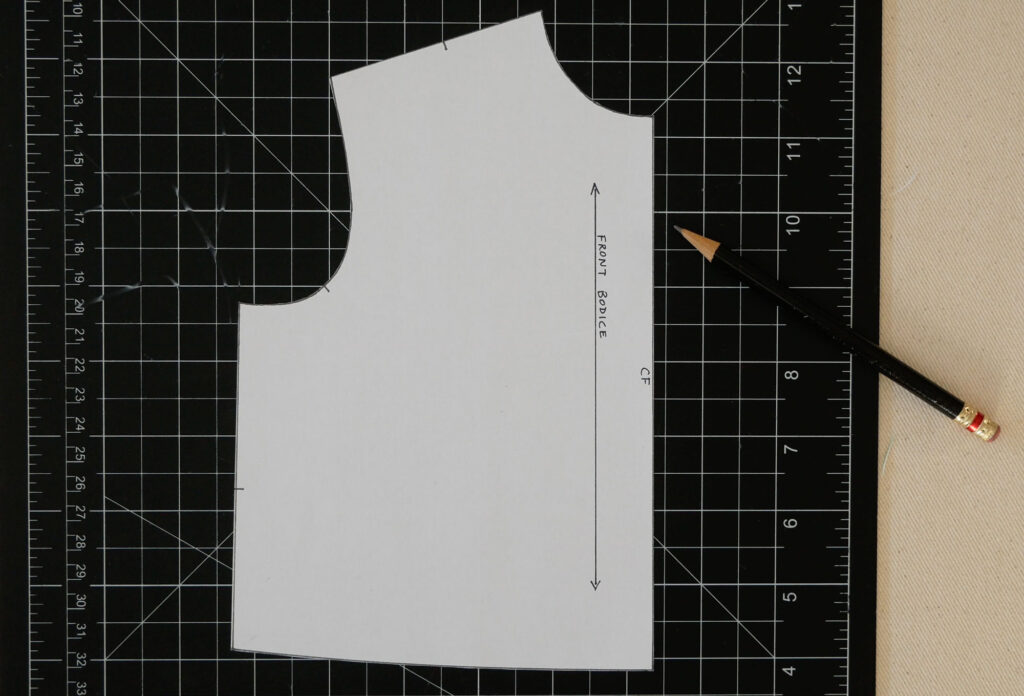
This video and post show how to do a FBA on a bodice with a dart and a bodice without a dart. It also explains how to know when you need a bust adjustment by looking at the muslin and/or knowing about pattern cup sizes.
Let’s go!
When Do You Need a Full Bust Adjustment?
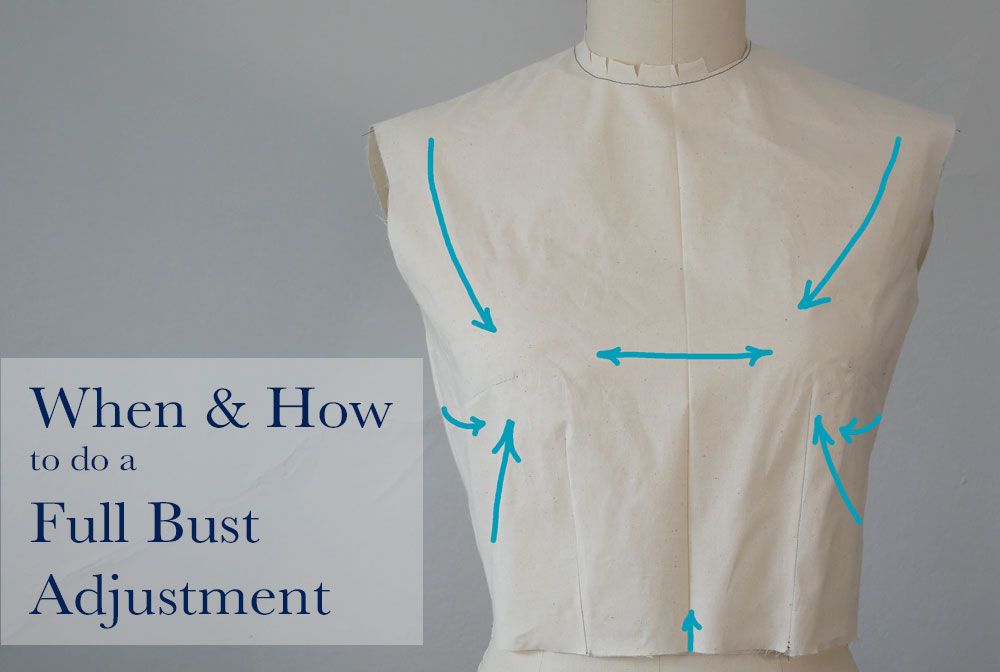
You try on your test garment or finished garment and you notice one or more of the following:
- The front of the garment is straining across the bust.
- Diagonal lines in the fabric go from the shoulders to the bust or from under the bust to the side seam.
- The front hem or waist seam is rising up/shorter under the bust.
- The side seams are pulling forward.
- The garment fits the waist, shoulders, and neck well, just the area across the bust is tight.
All of these signs mean you need more fabric in the bust area of the garment.
If the garment fit is off somehow, but you’re having none of the above-listed signs, a simple repositioning of the bust dart, or an empire seam line, may be all that’s needed for a better fit. You have room for the bust, it’s just that the extra room is not aligned with where you need it. It may be too high or too low for your bust.
If you haven’t sewn the garment yet, but you know that tightness across the bust is a common problem you have with sewing patterns or you know the difference between your high bust and full bust is more than the pattern was drafted for you will benefit from doing a Full Bust Adjustment or at least look into it before cutting your fabric.
If you’ve seen my video or read the post about choosing the best size pattern, you’ve chosen your pattern size based on your high bust measurement, not your full bust. We do this to get the best fit in the upper chest and shoulders, which are harder to adjust, but it might leave you with a pattern that is too small across the full bust.
Determine the Amount You Need to Add
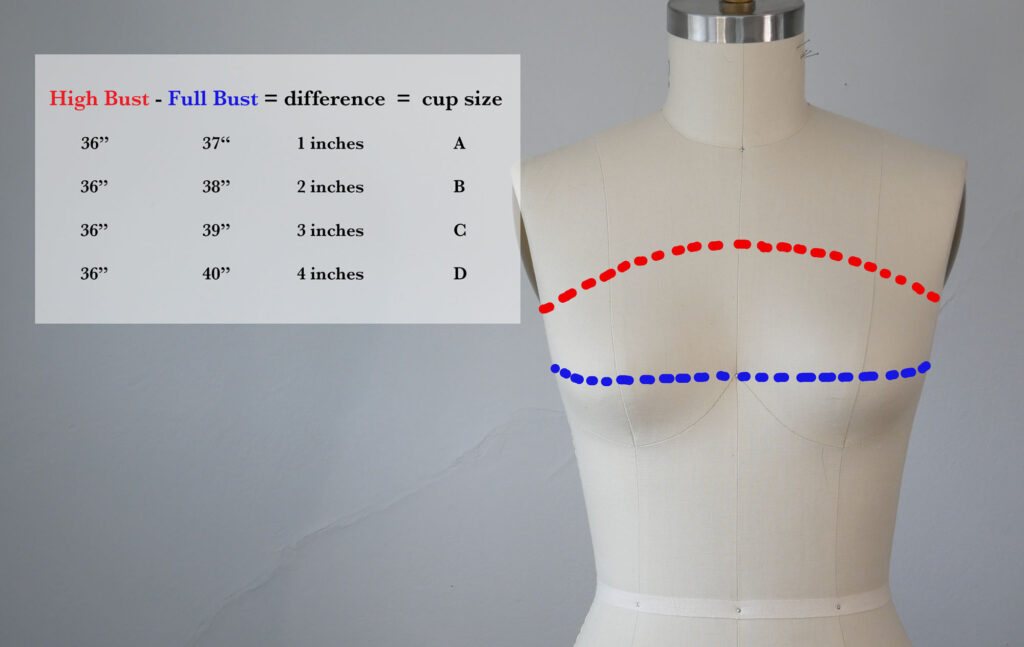
Start with taking your high bust measurement and your full bust measurement.
Read my post “Get the Right Fit” for how to take these measurements accurately.
The difference between your high bust and full bust tells you what pattern cup size you are. Forget about bra cup size. This is not the same. In pattern drafting, the cup size refers to the difference, in inches, between the high bust measurement and the full bust measurement.
If you have a 1” difference you are pattern A-cup, 2” difference = a pattern B-cup, 3” difference = a pattern C-cup, and so on.

What cup size is the pattern is drafted for? Most companies will tell you on their website if not on the pattern. Vogue, Butterick, McCalls and Simplicity all draft for a 2” difference (or B-cup) between the high bust and full bust.
If you have a 3” difference and your pattern was drafted for a 2” difference, you already know, especially if the style is fitted, that you need 1” more in the bust.
Measure the Flat Pattern
Another way to find out how much to adjust the pattern is to compare your measurement plus your desired ease* to the flat pattern measurement or the finished garment measurements if the pattern provides them.
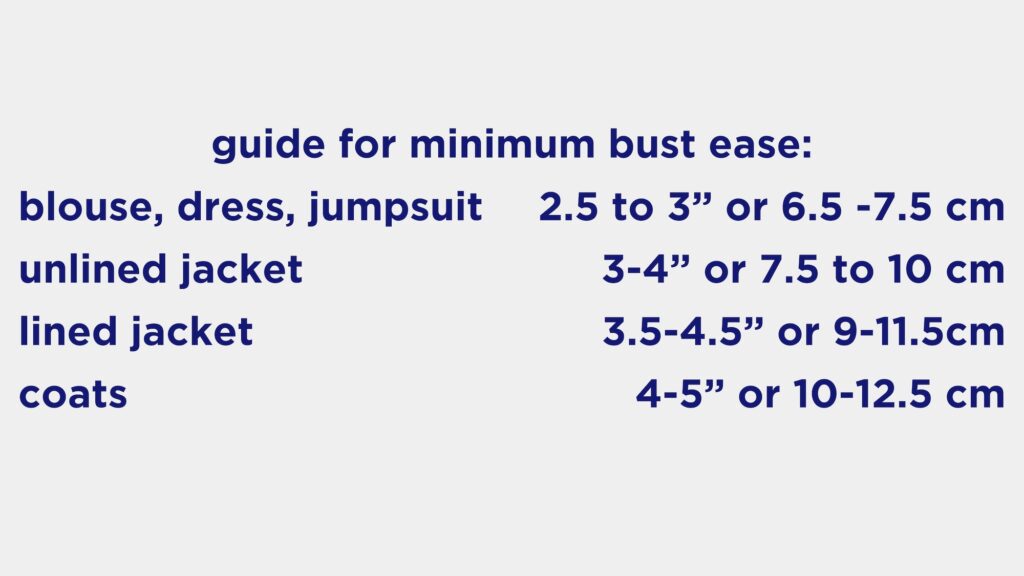
*A Note About Ease
The minimum ease, aka wearing ease, is the amount of fabric beyond the body measurements. Wearing ease is added to garments for movement. If the garment was made the exact same measurements as the body, it would need to be made from stretch fabric so one could sit down or raise their arms. Therefore, wearing ease is added, more so to woven garments than stretch garments.
The amount of wearing ease will also vary depending on the thickness and stiffness of the fabric and if the garment is meant to be cut on the bias.
Additional ease beyond wearing ease, is called design ease. It is added for style, like a swing top, an oversized T-shirt, or a full skirt.
Many people have a preference for how loose or fitted they like their clothes, no matter what the current style may be.
It’s important to measure the pattern where you need the fullness. The bust is not located at the same level on everybody or on every pattern. You need to determine where your apex is compared to where it is on the pattern
How to Determine the Location of Your Bust Apex on the Pattern
The bust apex is where the bust is the fullest. The pattern has a bust apex just like the body. On a well-made pattern, the apex is marked with a cross inside a circle. You want the pattern’s apex and your apex to be in the same location for the best fit. And you need to move mark your apex on the pattern before doing a Full Bust Adjustment
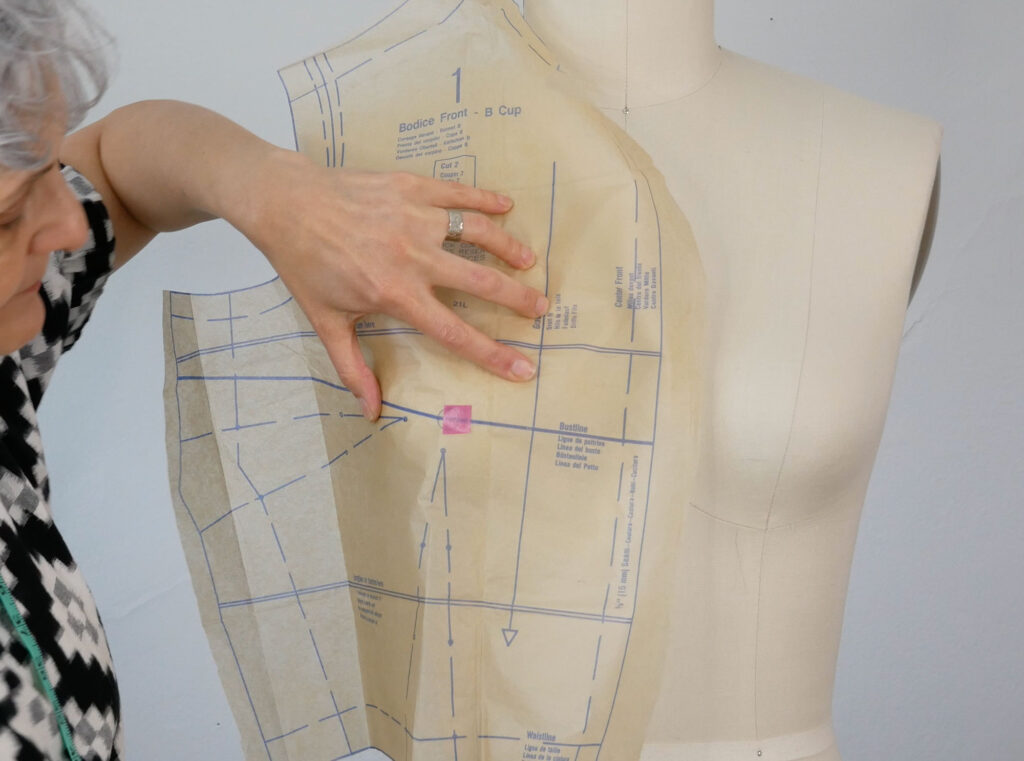
To find where your apex is on a tissue pattern, simply hold it up against your body, mind that the seam lines and center front are in the correct position, and mark on the pattern where the fullest part of your breast is. This is your bust apex.
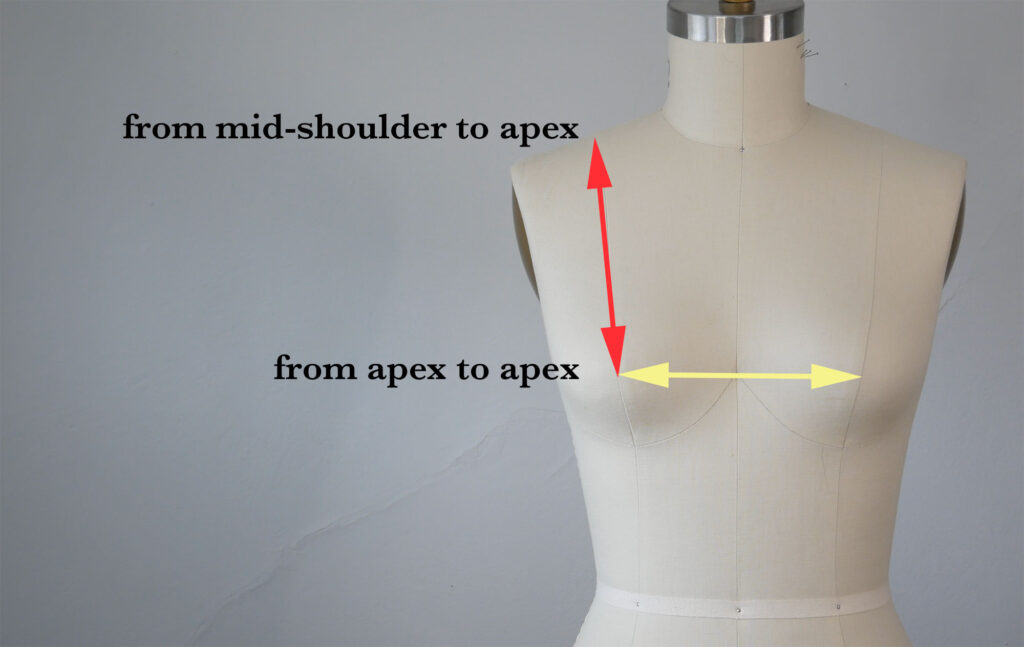
Or measure yourself down from the middle of your shoulder to your apex. Then across your breast from apex to apex.
Then transfer these measurements to the flat pattern.
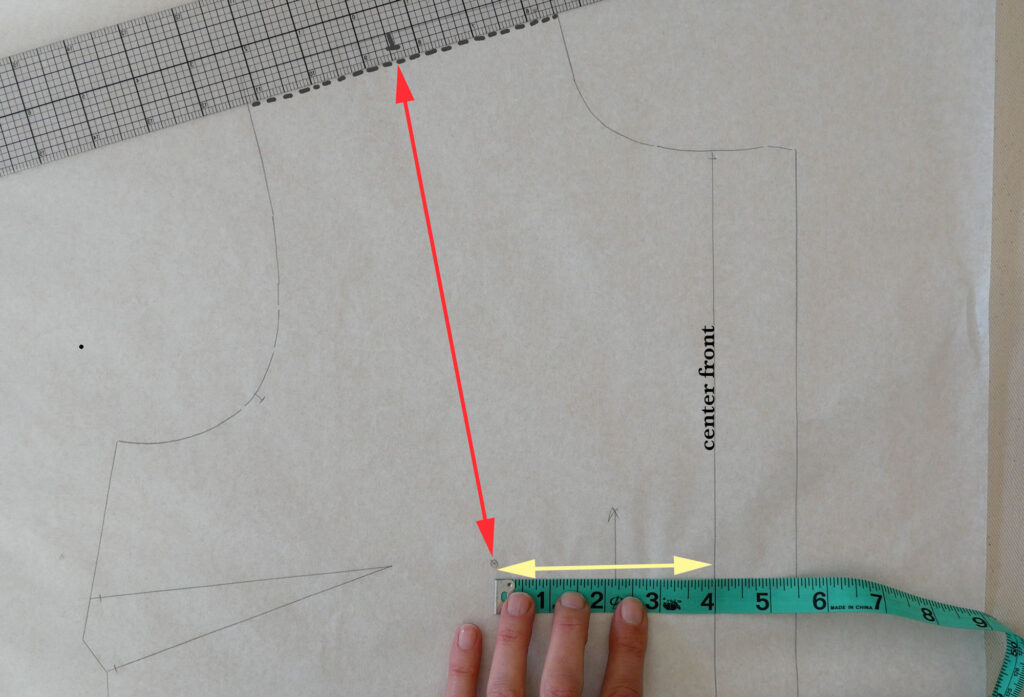
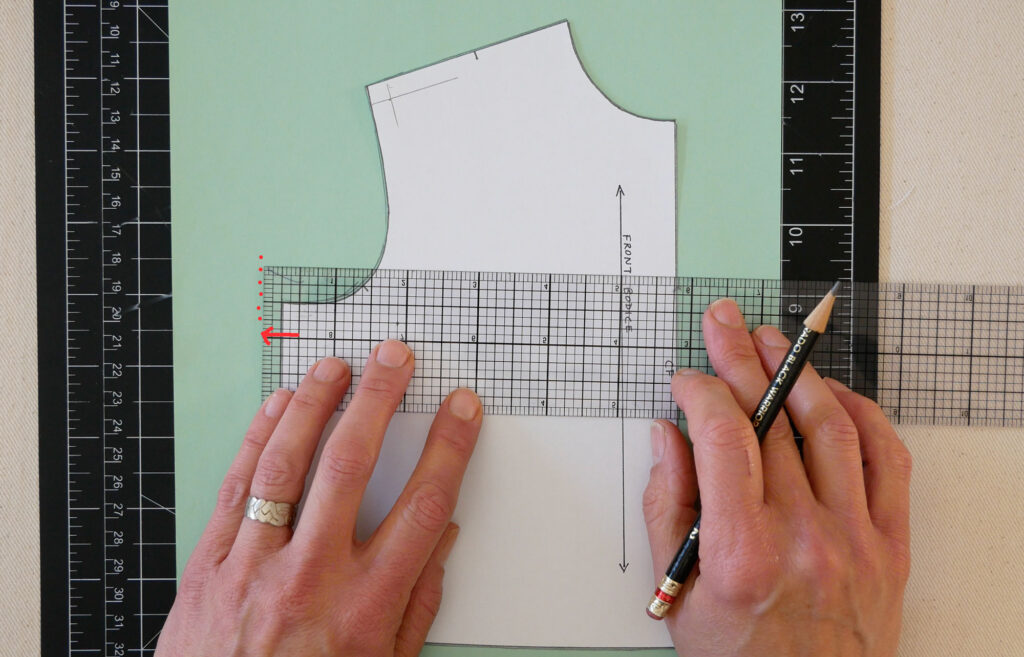
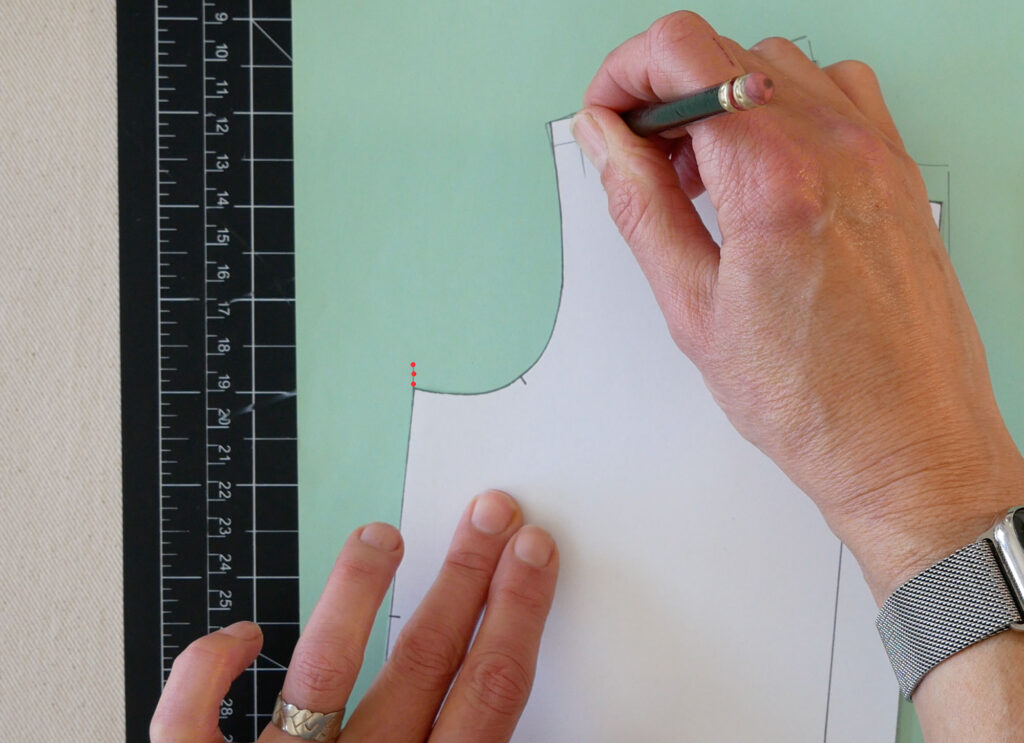
- Start by measuring down from mid-shoulder to the bust apex on the pattern. If the apex is not marked on the pattern, the bust dart will be pointing to it but be at least 1” away from the apex. Remember to measure from the shoulder seamline, not the edge of the pattern piece. Mark how far down your apex is.
- Measure over horizontally from the center front, half of your apex to apex distance. Remember to measure from center front, which is not always the edge of the pattern piece. Make a mark.
- Where the two marks meet is the location of your apex.
- If your pattern didn’t have the apex marked, now it does 😉
- If your apex is within 1/2″ of the pattern’s apex you do not have to move the pattern’s apex.
- If your apex was more than 1/2″ away form the pattern’s apex the bust dart will no longer be pointing toward the apex (yours). Move the dart now higher or lower so it points toward the new apex position. Or you can redraw the dart. (To redraw the dart: start at the base of the dart and keeping the dart legs the same length as they are now, draw in new legs so the tip points to your apex. The legs stay where they started but the tip moves higher or lower on the bodice)
Now you can measure across the pattern at the bust apex that is level to your bust apex. Exclude the seam allowance and anything extending beyond the center front. Double this to get the total front width. Add the width of the back pattern pieces to this.
Compare the pattern measurements to your body measurements + desired ease. How much do you need to add?
FYI: You can not add an infinite amount to the pattern with a FBA alone. It will distort the pattern. So if you need more than 4” total added to the pattern you will need a FBA and another type of alteration.
How to Do the Full Bust Adjustment on a Bodice With a Bust Dart
Have your apex marked on your pattern.
Take a ruler and draw a line parallel to the grainline from the apex to the waist seam or hem.
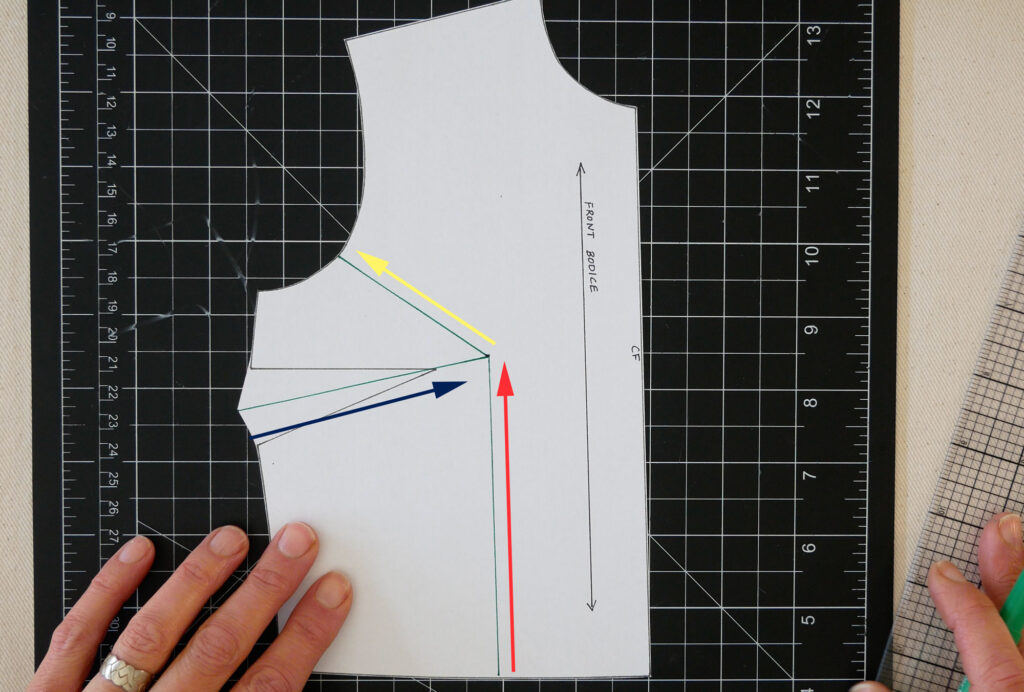
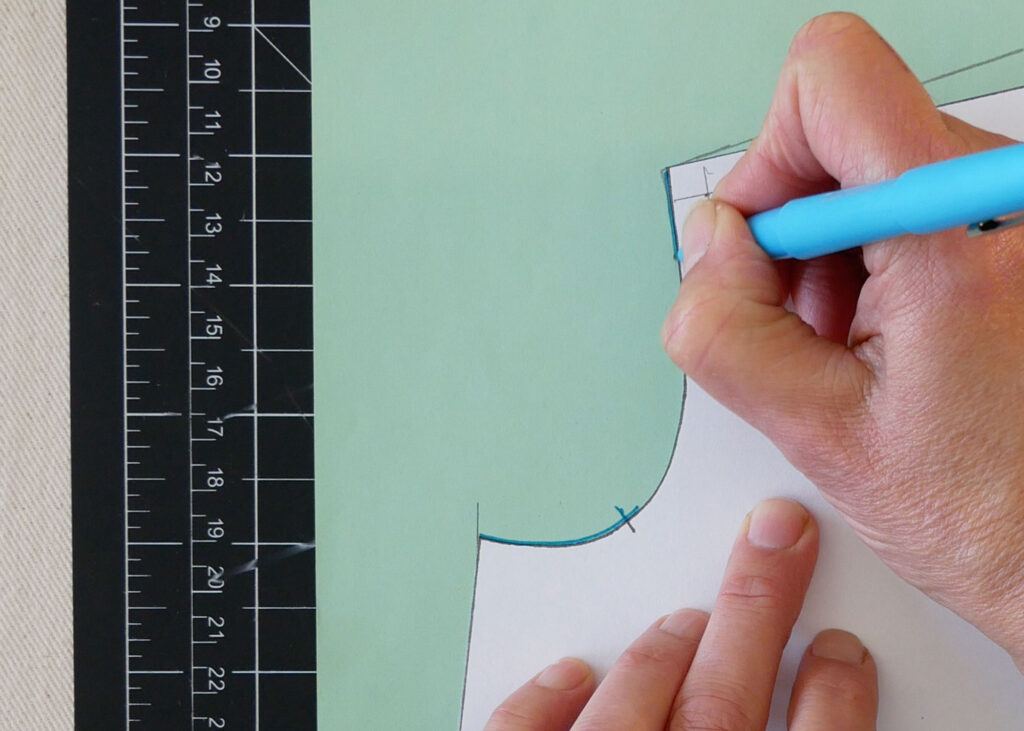
Draw a line from the apex to approximately the middle of the lower third of the armhole. It doesn’t need to be precise, just eyeball it.
Draw a line through the middle of the dart, starting at the dart’s base, to the apex. Because you marked your apex this line may or may not go through the tip of the dart. That’s ok because we’ll redraw the dart when we’re done.
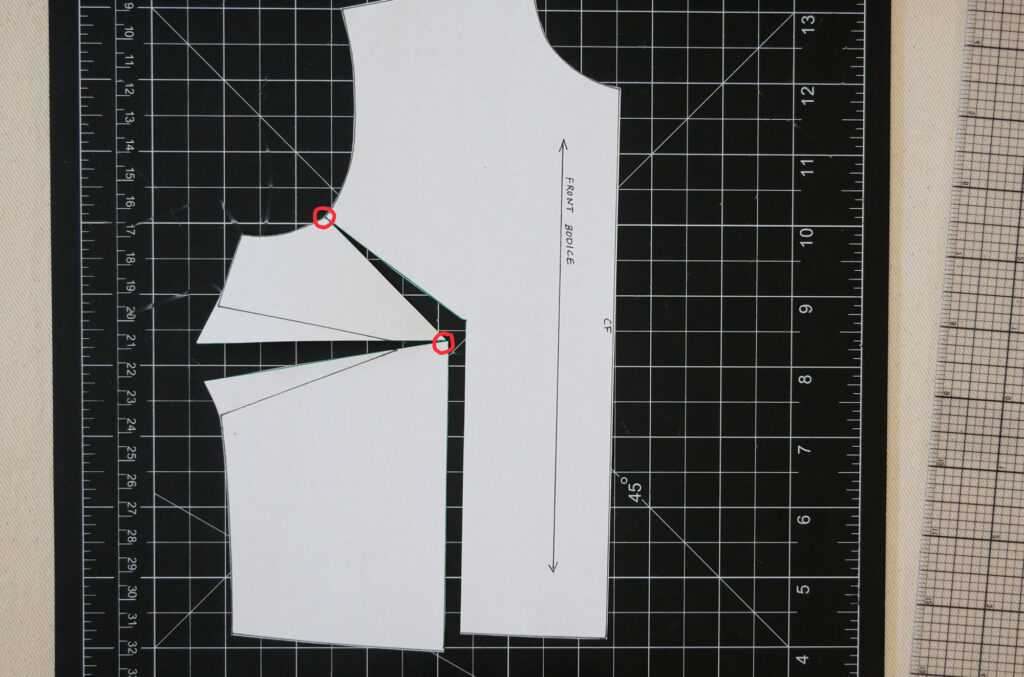
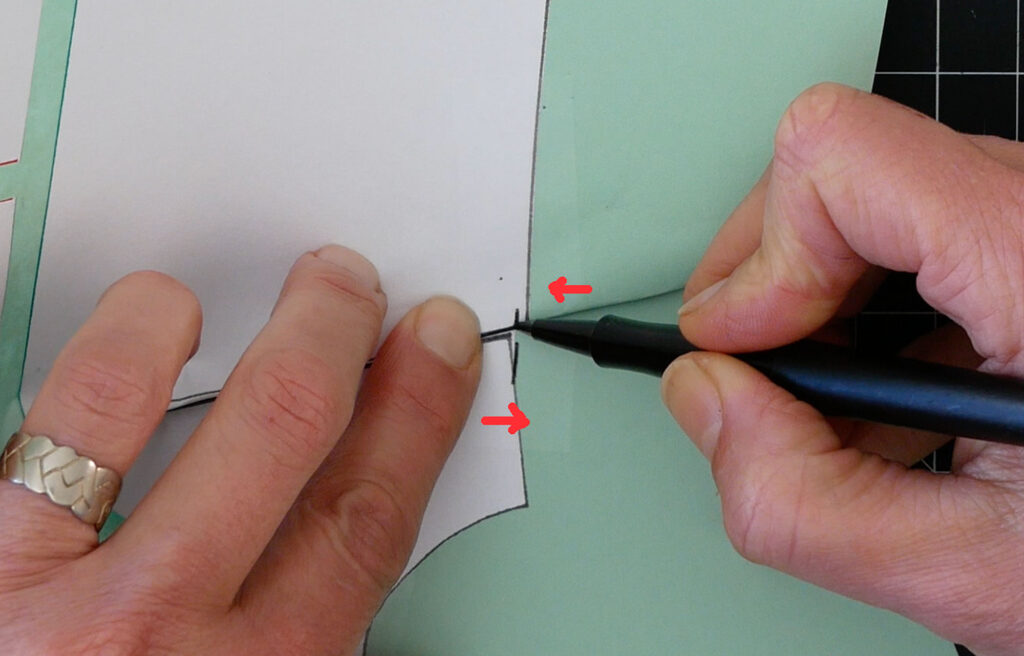
Cut on your first line from the waist/hem to the apex.
Turn toward the armhole and cut. Stop just shy of cutting the pattern all the way through. You’ll leave a little hinge of paper.
Cut on the third line starting at the side seam to the apex but not through the apex. Again you’ll leave another hinge.
Slip a piece of paper under your pattern. Tape down part of the center edge to keep it in place.
Now comes the magic.
You will add half of what you need to add to the front because your pattern represents only half of the front. You’ll cut two front pieces or one on the fold, which together, will provide the total amount you need.
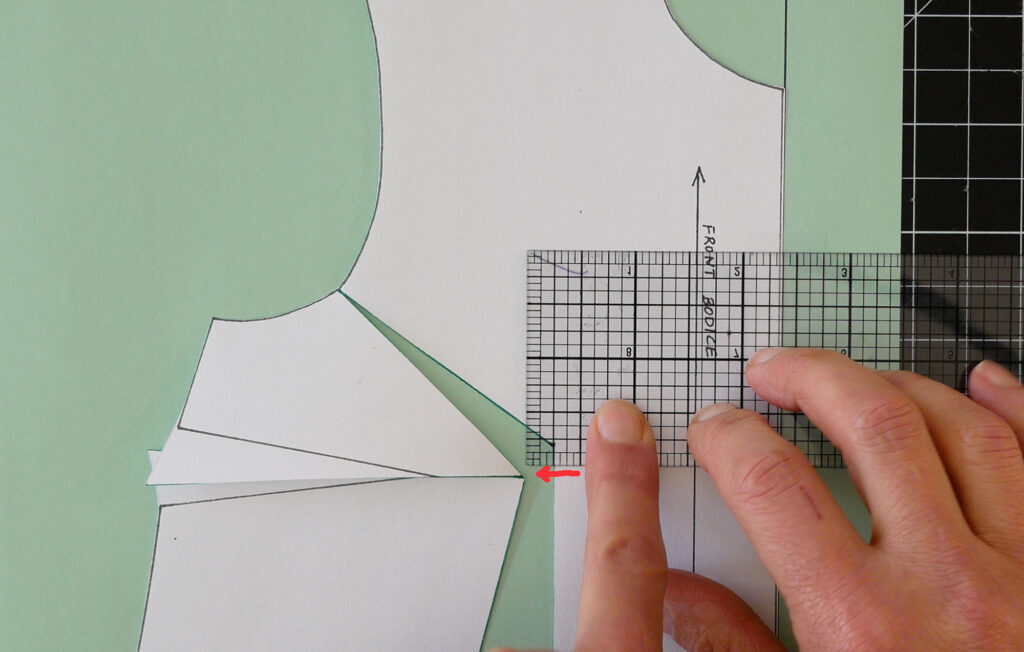
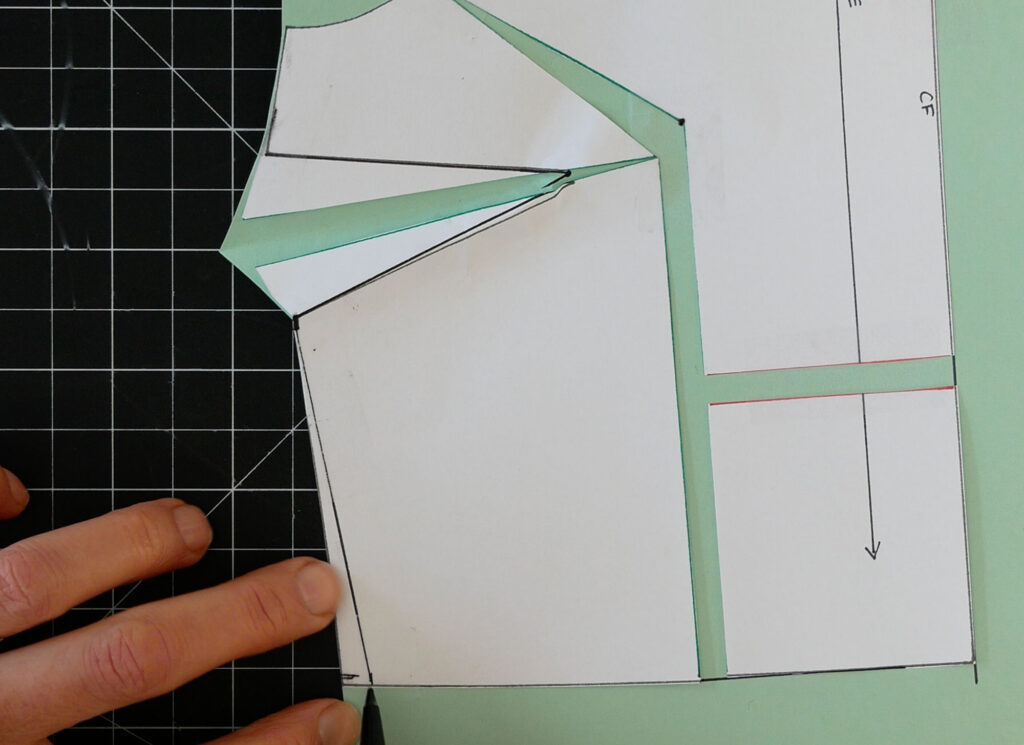
Spread the pattern horizontally, at the apex, half the amount you need to add. If you need 1” add to the bust you will spread the pattern apart ½”.
Be sure the cut edges of line #1 stay parallel and equal distance apart the entire way down the pattern. Secure the cut edges down near the apex.

The dart spreads apart automatically to become the size it needs to be.
The front hem is now off because the bust needs extra fabric added both horizontally and vertically. This is why the front hem, under the bust was rising up. Extra length is needed here and to get it you simply bring down the center to match the side of the pattern.
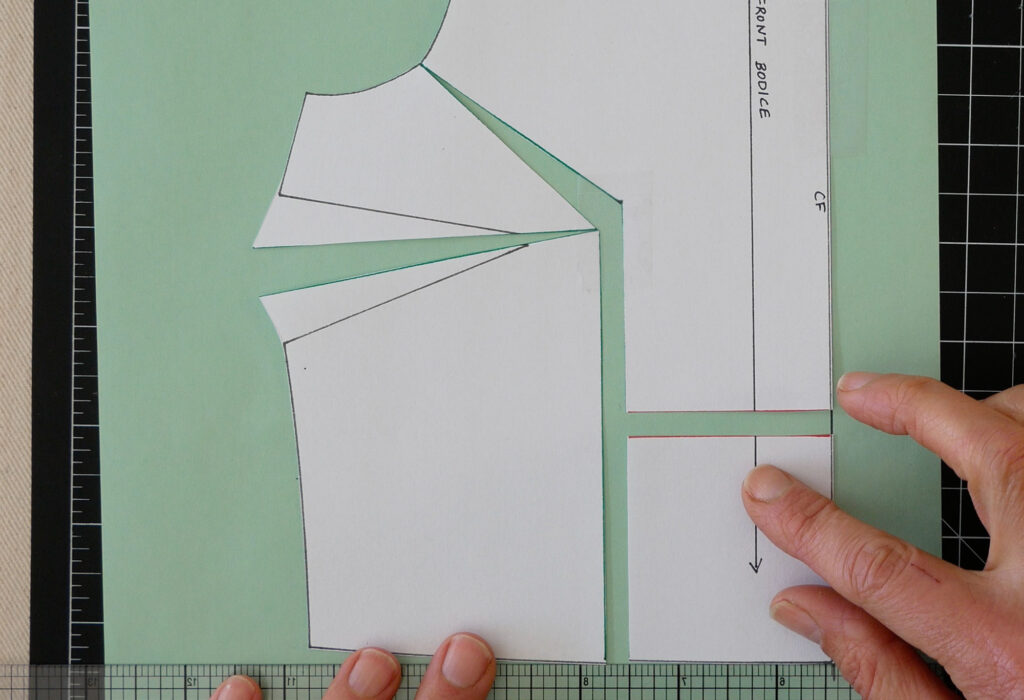
Cut the center straight across, perpendicular to the grainline. Lower it, staying lined up with the grainline or center front, until it lines up with the side of the pattern and tape it down.
Check that the waist seam/hem and armhole seams are smooth.
Redraw the dart legs. Measure the top dart leg so the new leg is the same length as the original. Have the tip of the new dart point to your apex. Draw in the new bottom dart leg to be equal in length to the top leg.
Fold the bottom leg of the dart to meet the top leg and true the side seam at the base of the dart. Redraw a smooth line taking half of the extra width off the excess side and adding half to the lesser side. This is called trueing and I have a post all about it.
Cut the side seam with the dart still folded to get the shape of the new dart.
The width at the waist has grown because the pattern was expanded all the way down to the waist seam or hem. If you don’t want this extra room you can take it off at the side seam.
Take off the extra width only below the side seam notch. You need the width higher up for the bust. Any new seam lines should blend smoothly coming off of and rejoining the original line.
Check that the back pattern piece is true to the new front pattern piece at the side seam.
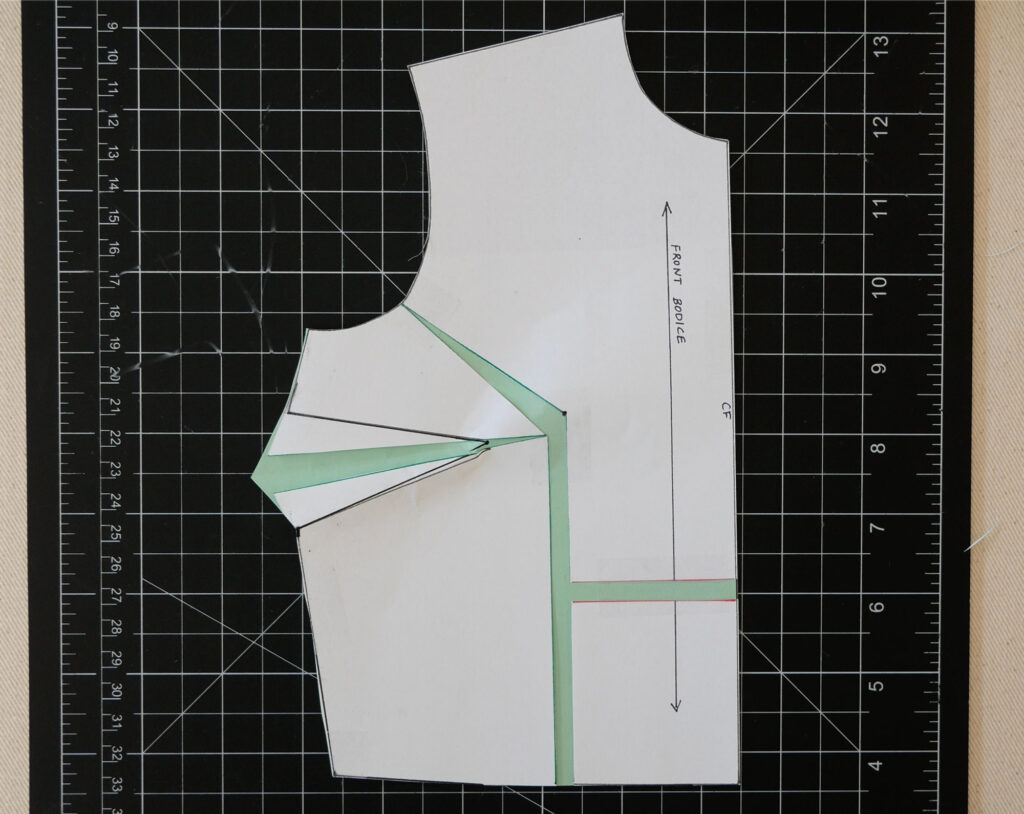
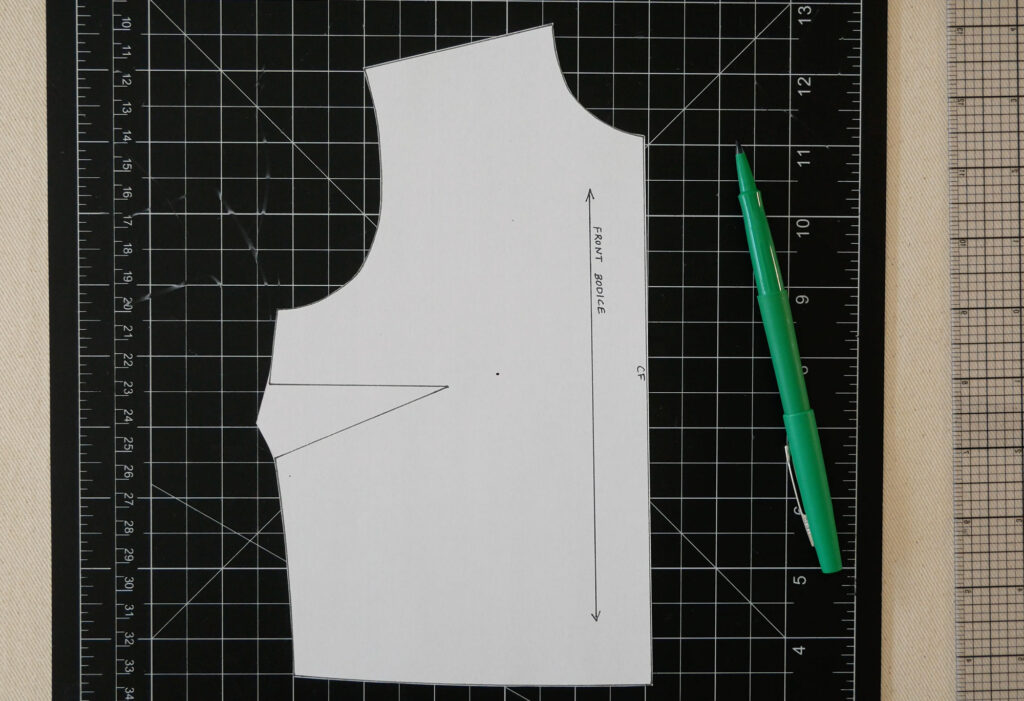
Your new front bodice pattern with more room added both horizontally and vertically in the center to accommodate a full bust.
How to Do the Full Bust Adjustment on a Bodice Without a Dart
A bodice without a dart can use the simpler pivot method.
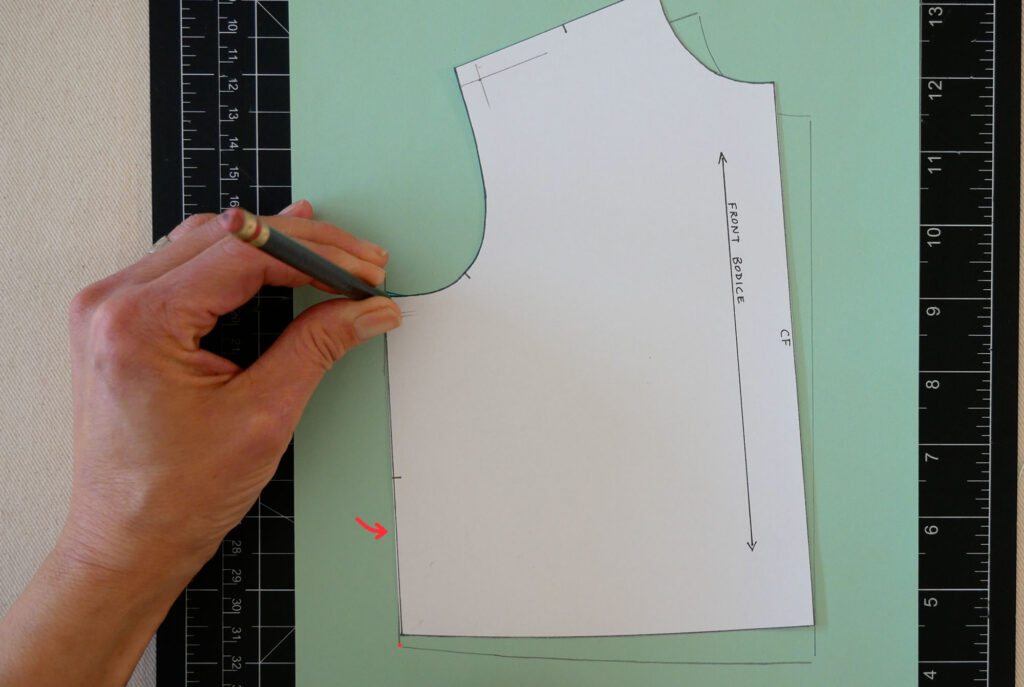
Trace your pattern onto another piece of paper.
Measure over from the armhole/side seam, half the amount you need to add to the bust in total and make a mark on the paper.
Using a pencil tip, or awl, hold the pattern down at the intersection of the armhole/shoulder seam. Swing the pattern out so the underarm hits the mark.
Trace the pattern at the armhole to get the new armhole.
Move your pencil or awl down to the armhole/sideseam intersection and hold the pattern down. Pivot the pattern so the side seam meets the original side seam at the waist.
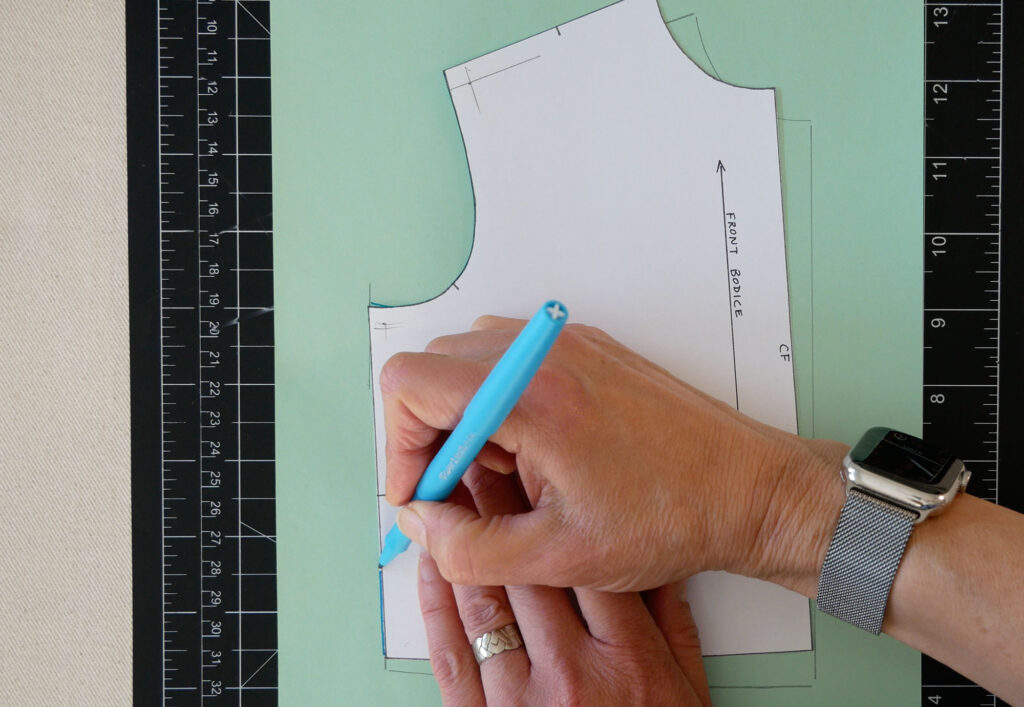
Trace the pattern’s side seam.
Check against the back pattern piece’s side seam to be sure it stills lines up. The front side seam may need to be raised at the waist to keep it at its original length.
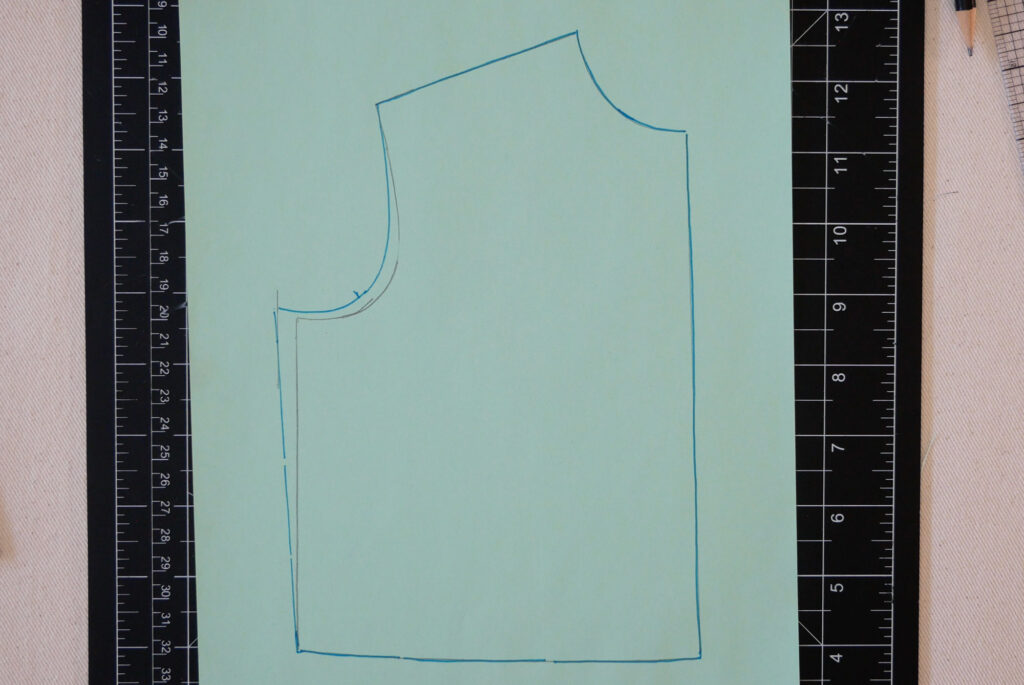
This is your new pattern. Extra room was added only to the bust area. The waist and shoulders stayed the same.
That’s how to do a Full Bust Adjustment on a bodice with and without a bust dart.