
It is said that 25% of your sewing time (or more) should be spent on fitting. Well, let’s keep it to 25% and no more by starting with the size that will give you fewer problems, checking the fit and making some common pattern adjustments before any fabric is even brought out.
If you want to watch the video instead here it is, otherwise, Read On
A Good Fit Starts With Accurate Measurements
You can not just guess what size you need and you certainly can’t base a sewing pattern size on your size in ready-to-wear clothing. There’s no getting around it, you have to measure yourself.
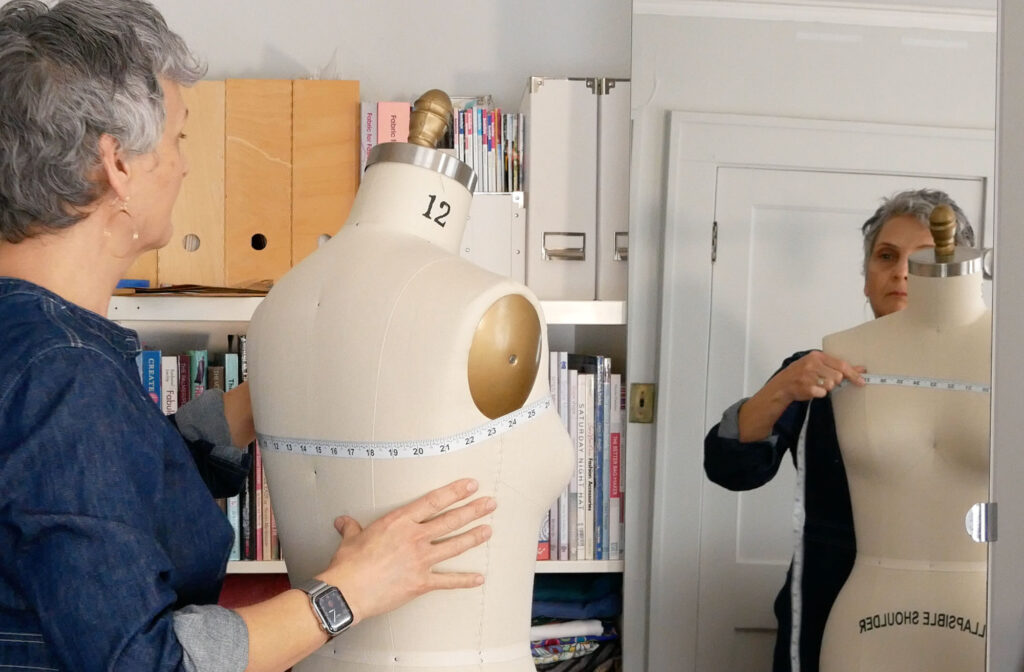
In front of a full-length mirror, standing in your everyday undergarments, NOT over your clothes, NOT over leggings or a leotard (both compress the body giving you inaccurate measurements) stand tall and relax.
It’s important to keep your stance consistent when measuring yourself. Stand straight with your arms and elbows down. Stand still when taking your measurements. Take a deep breath in, breathe out, then take your measurements. This helps bring the shoulders down to their natural position.
High bust measurement
When measuring keep your fingers over the tape measurer, not sandwiched between your body and the tape measurer but also don’t pull tight. You want accurate measurements
With your flexible tape measurer measure the:
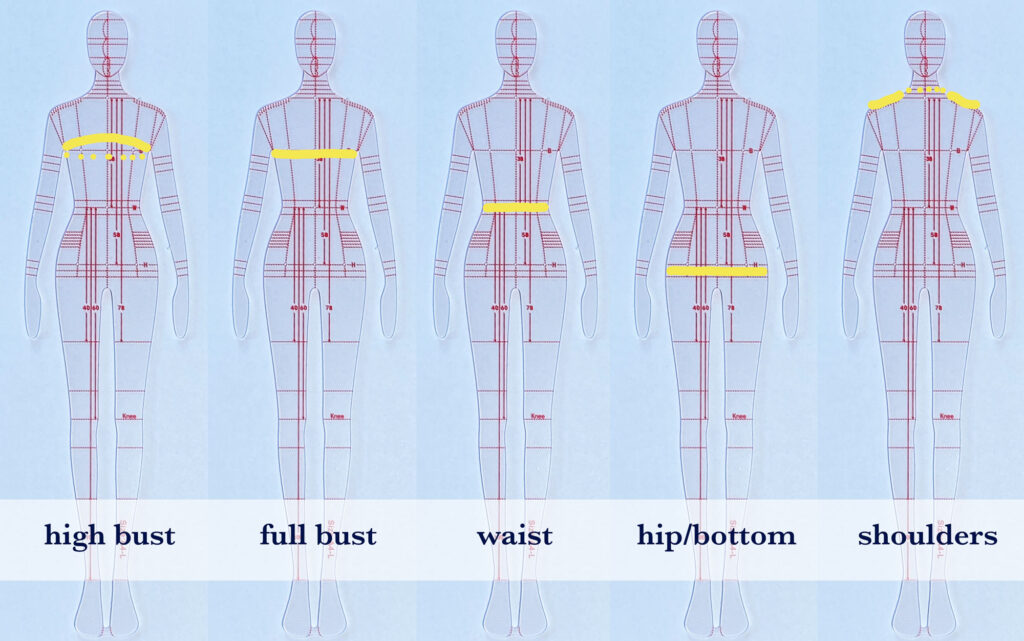
- High Bust – This is around the back, under the arms, and over the bust apex* (Apex means the fullest point.) The High Bust measurement helps you determine your pattern cup size for patterns that give you different cup sizes and gives you a more accurate indication of what size you need to fit your shoulders and upper chest.
Should a woman who is generously endowed use her full bust measurement to pick a pattern size she will likely find the garment too loose in the shoulders, neck, and upper chest. It’s best to pick a size that fits in this upper chest area and do a full bust adjustment to the pattern to fit the full bust. - Full bust – Measure the fullest circumference of your body at the bust/chest level. Turn sideways and check that the measuring tape is parallel to the floor.
- Waist – Measure your natural waist. The natural waist is where you are smallest in your torso. You can find it by leaning to the side like a teapot and where your torso bends is your natural waist. It’s usually slightly higher than the belly button. Check in the mirror that the tape measurer is parallel to the floor.
- Hips – Measure at the largest circumference of your body at the bottom/hip area. Again, the tape should be parallel to the floor.
- Mid-Shoulder to Bust – Measure starting at the midpoint between your neck and where the divet in your shoulder is/your arm is attached (This low point can be felt easier than seen.) to your bust apex. This measurement will tell you if you need to raise or lower a bust dart or redraw the princess seam to go over your apex.
- Bustline to Waistline – Measure down the center front from your bust line (across the left and right apexes) to your natural waistline. This tells you if you need to shorten or add to the pattern between the apex and the pattern’s waistline.
- Waistline to Hipline – Measure down center front the distance between the natural waistline to the hipline (where your hips and bottom are widest. This tells you if you need to shorten or add to the pattern between the pattern’s waistline and your hips.
- Shoulder Width – Measure across the shoulders from the low point on one arm/shoulder, across the back of the neck, to the low point on the other arm. Especially if you suspect or know if your shoulders are narrow or broad.
It can be helpful to physically mark the low point on one of your shoulders with a pen and tape the tape measure to the opposite shoulder’s low point. Then carry the tape measure across the back of your neck to the marked low point on the opposite arm. Hold the “tail” of the tape measure down by your side. Relax the shoulders and see in the mirror what distance the mark is next to. - Measure ANY area you have problems fitting. Maybe you have muscular biceps and frequently find sleeves too tight. Measure the circumference of the fullest area in any area you have trouble fitting and what distance up or down from a marker this full area is. Again, using the biceps as an example, How full and approximately how far down from my shoulder is the fullness. Measure the length of any area that is frequently too long or too short on you. Anything you usually have trouble fitting, be sure to measure it.
Wait? What Size Does the Pattern Say I Need? Surely Not.
It’s well known that pattern sizes and clothing sizes are not even close. And yet maybe you can relate to my experience:
When buying something on the JCrew site the size chart indicates I take a 10. Ok. When I go to sew a Vogue pattern, my exact same body measurements say I need a 14 and grade out to a 16, not a 10. And, here’s the kicker, I pick the 12, the one in between my RTW size and the pattern size because “There’s no way I take a 14/16. I’m a 10. Well, girlie, you’re wrong.
It’s vanity sizing, and at this point, it’s just regular ol’ sizing, and the number, aka; the name of your size, is just that, a name. Your measurements have not changed. We have to, or at least I have to, be honest and be logical, and pick the size I need or else the garment will not fit.
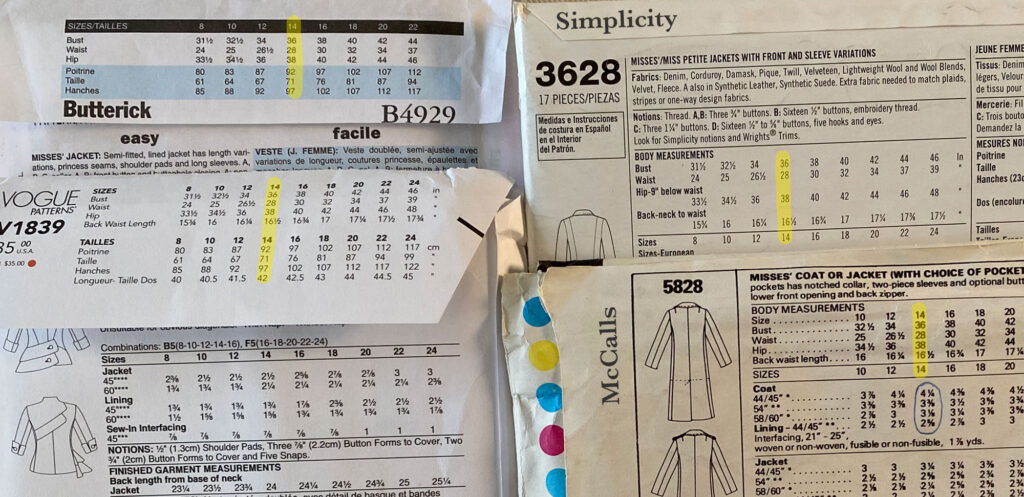
And just to confuse you more, pattern sizes will vary from pattern company to pattern company just as clothing brands differ from each other except the Big 4 (Butterick, Vogue, McCall’s and Simplicity) which use and share a standardized size chart.
This standardized size chart is based on an average of people’s measurements from the companies’ geographical region; North America in the case of Simplicity Group. This explains why a medium-sized pattern from a North American company will be a very different size than a medium-sized pattern from an Asian company, or a European company.
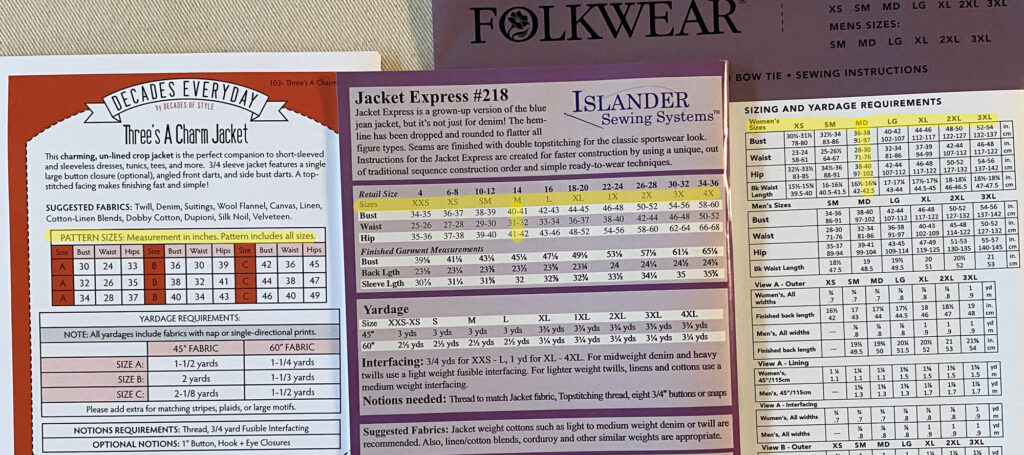
Independent pattern companies, aka; Indie Patterns, do not use or share a standardized size chart. They may use an average size of their target audience but typically use the pattern designer’s own measurements to base their sizing on and grade up or down from that in whatever method they choose for grading. (There are different ways to size a pattern up or down and it affects the fit).
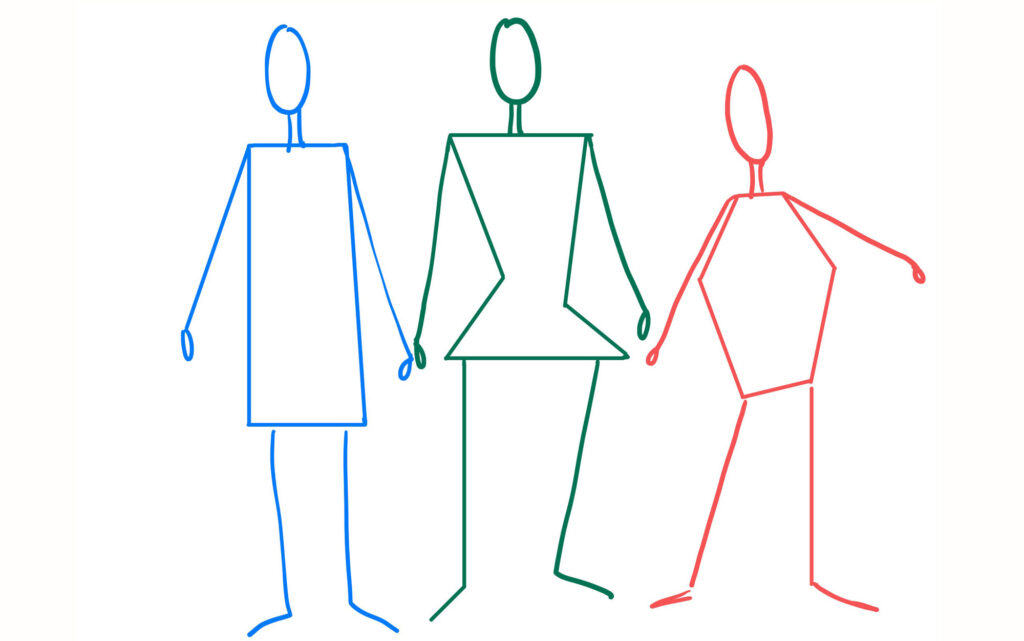
Even if your measurements are exactly average to the sample used by the Big 4 or identical to an indie pattern designer, your shape is different. You may be the same height but have longer legs, or the same bust measurement but have a wider rib cage. Factors like height, cup size, shoulder slopes, shoulder widths, posture, skeletal size, musculature, and age affect the fit in major ways.
Take your measurements and accept them for what they are, just numbers, and a good place to start when choosing our pattern size.
Picking Your Best Pattern Size
Generally, if you’re sewing a pattern for skirts and pants choose your waist measurement. If your hips are two sizes or more larger than your waist, use your hip measurement to choose the starting size. If you’re between two sizes, choose the smaller size for a closer fit or if you are small-boned. Choose the larger size for a looser fit or if you are large-boned.
If you’re buying a pattern for a jacket, top or dress, you need a size that fits you in the shoulders and bust as these items hang from these body areas. So you’ll select your sized based on your high bust or full bust measurements depending on which cup size the pattern is drafted for.
Good to Know: Each size in Small, Medium, and Large type sizing represents two numerical sizes and it has to fit the larger of the two sizes.
Many pattern fitting experts recommend measuring your high bust and choosing your pattern size based on that measurement. You will substitute it for the “bust” measurement on the pattern’s size chart. If your measurement falls in between sizes choose the smaller pattern. If the garment is a very tight design you could choose either size to start.
This high bust measurement size will fit the shoulders, neckline, armscye, and upper chest more accurately than choosing the size based on your full bust. After choosing this size you may have to do a Bust Adjustment alteration to the pattern however, these adjustments are much easier to do than adjustments for the upper chest, shoulders and armscye areas.
Simplicity.com (that’s the parent company for Butterick, McCalls and Vogue as well as Simplicity) recommends when sewing their Misses patterns if you have more than a 2 ½” or 6.3 cm difference between bust and high bust, select your pattern size by high bust measurement. For their Women’s patterns which are drafted for a C cup if you have more than a 1” or 2.5 cm difference choose based on the high bust measurement.
Some patterns are drafted for different cup sizes. They will include a bodice piece in each cup size. Those patterns will tell you how to select your size.
After you choose what size your bust or high bust requires you’ll need to check what size your waist and hips require (Unless you’re making bottoms then forget the bust measurement)
Most folks find that according to the size chart they need a different size in the bust, waist, and hips.
Write down what size you need for each area. If your pattern is multisized it is easy to go from one size to another and I’ll show you how but for now, choose what size or sizes you need based on the pattern’s size chart (and remember unless it’s a Big 4 every pattern company uses a different size chart)
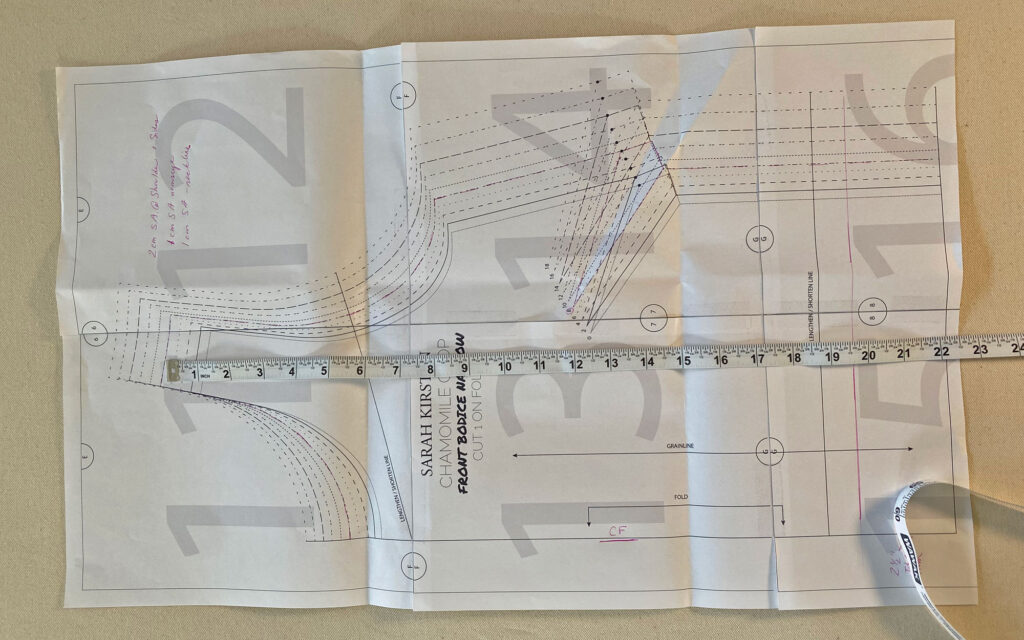
Measure the Flat Pattern
Check the finished measurements of the garment if the pattern provides them but also measure the flat pattern in key areas and compare your measurements against it. Because everyone carries their fullness and length in different places on the body, flat pattern measuring can help you make sure the pattern is big enough or long or short enough in those areas.
When measuring the flat pattern:
- The pattern needs to be flat.
- Do not include the seam allowance. Either measure from the cutting line to cutting line for your size and subtract the seam allowance. Or draw the seam allowance on your pattern and measure from seam line to seam line.
- Do not include any extensions beyond the opening. This would be a built-on placket or facing that will be folded back on itself.
- Do not measure the space between dart legs or pleat notches. Again, these are folded out in the finished garment. Either fold them out of the pattern and measure or measure up to the dart or pleat, skip over it, and carry on measuring the other side.
- If the the pattern piece is to be cut on the fold it is only half a pattern so double your measurement
- Measure all the pieces that make up that area and add the results together. Example, a front leg piece and a back leg piece to get the circumference of the thigh. ( line up the side seam notches to be sure you’re measuring at the same height across the pattern pieces)
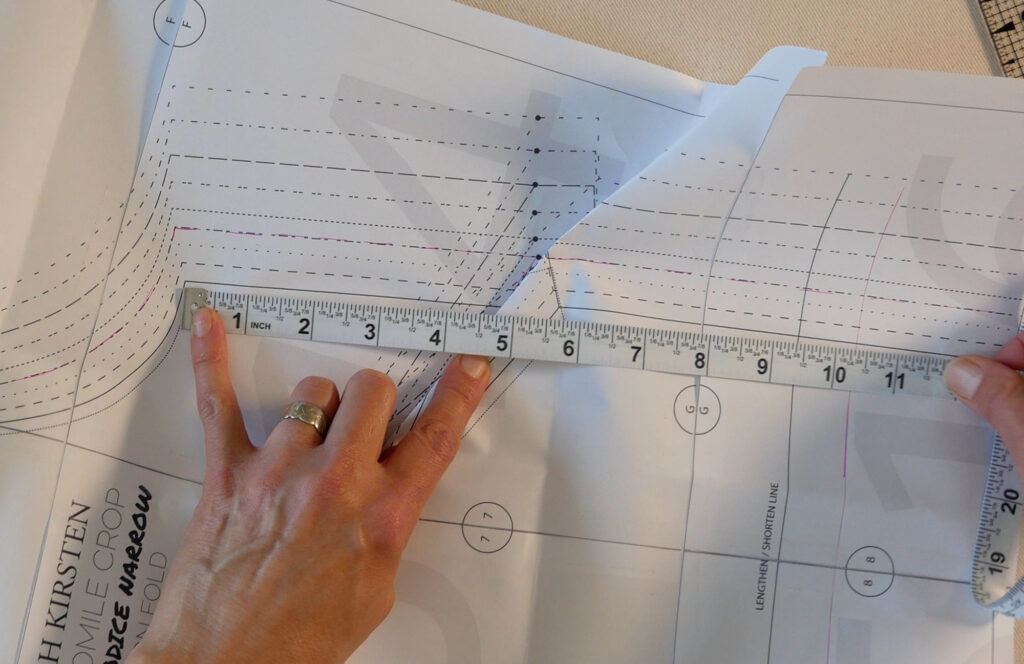
I advise measuring the distance between mid-shoulder to bust, from bust to waist and waist to hips or hem. Many of us are longer or shorter than the pattern in a different area than the pattern’s “lengthen or shorten line”. This will also inform you if you need to raise or lower the bust dart to a better height.
Once you have the flat pattern measurements you can compare them to your body measurements.
However, you don’t want your body measurements and the pattern measurements to be equal. It’s very important, that your pattern is slightly bigger than your body (unless you are making a tight-fitting, stretch garment). You need to have room to move in your clothes. You need to have ease.
Ease is the Key to Comfort and Design
You can’t make a garment that is exactly your body measurements and expect to be able to move fully in it. (again, high-stretch fabrics can be the same or less than your measurements and you will be able to move because the fabric, not the style, allows movement)
You need some extra room, more than the body’s measurements, added to the pattern piece to be able to move and you will possibly need even more fabric to achieve the style’s silhouette. This extra fabric, both for movement and style is called Ease.
The minimum amount needed to be able to move, sit and raise your arms is called Wearing Ease.
Design Ease is any additional room added for stylistic purposes. This ease influences the garment’s drape, shape, fit, and attitude.
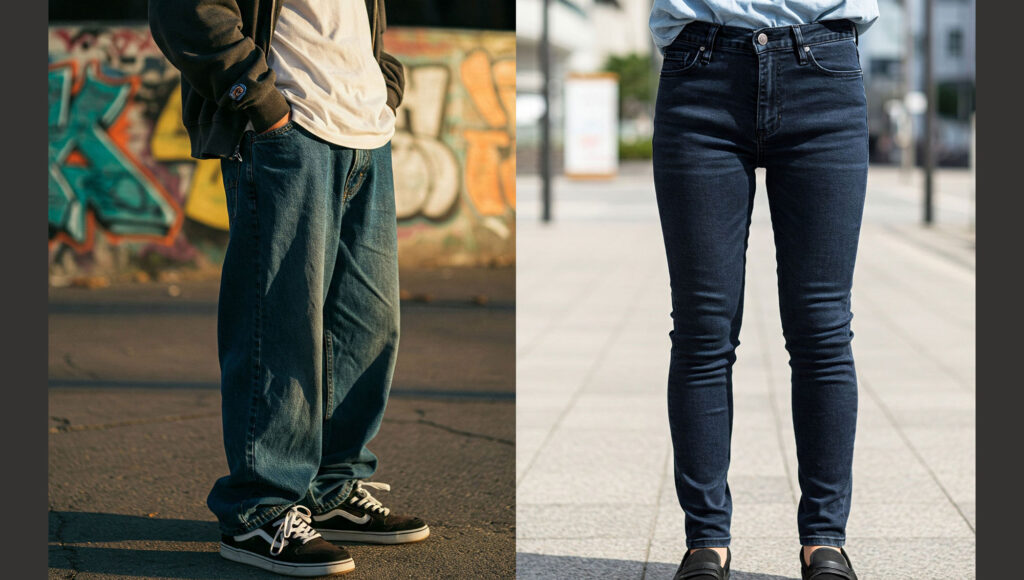
For example, in the 1990’s extra large jeans were in style. This very loose leg and seat (the fit) gave a relaxed appearance (the attitude). The denim puddled at the feet (the drape). The amount of extra fabric was beyond what was needed for the body to move and sit. Skinny jeans are the opposite. They have minimum ease added for a tight, sleek appearance. They have to use a high-stretch denim to compensate for the lack of ease. It’s the stretch in the fabric that allows the wearer to sit and for the feet to go in and out of the tiny leg opening.
Because fashion is an art and not a science there is no rule, or limit on how much design ease can be used. The designer has creative freedom and when you sew your clothes, you are the designer.
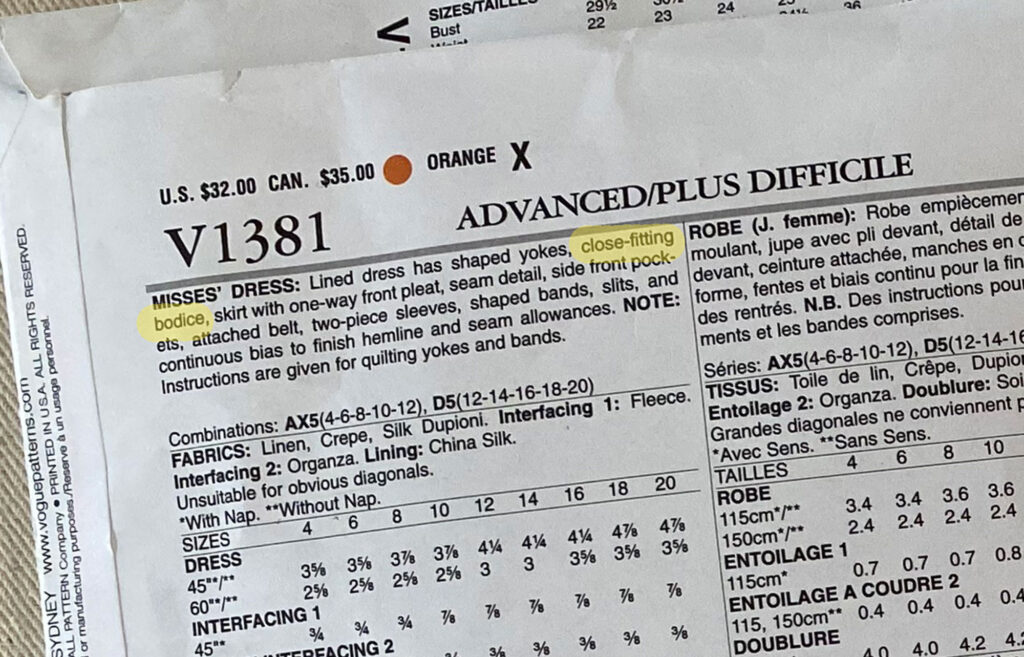
To know how much ease the pattern has included your best clue is the photo. But this is not always accurate depending on the shape of the model and if clips were used where you can’t see them.
Sometimes a pattern will include in the description the amount of design ease added. Terms like semi-fitted or loose are talking about design ease. A semi-fitted shirt may have 4 to 5 inches more than the body measurement for each size. A loose shirt could have 5 to 8 inches of more than the body measurements.
Note: According to Sandra Betzina, If the pattern is described as very loose fitting and you are shorter than the height drafted for (typically 5’6”) you may want to use a size smaller pattern than your measurements indicate. This way both the proportions and the size of the shoulder will suit you better.
You have to decide how much ease you like in your clothes AND how closely you want to follow the design’s style. If you choose to sew a smaller size because there is a lot of design ease, your final garment could look like a different garment then you thought you were making. You changed the design by changing the amount of design ease.
I have done this exact thing. I took out too much ease from a chino pants pattern and ended up with pants that looked nothing like the intended, relaxed style the pattern designer drafted. Lesson learned.
Measuring Garments You Already Wear
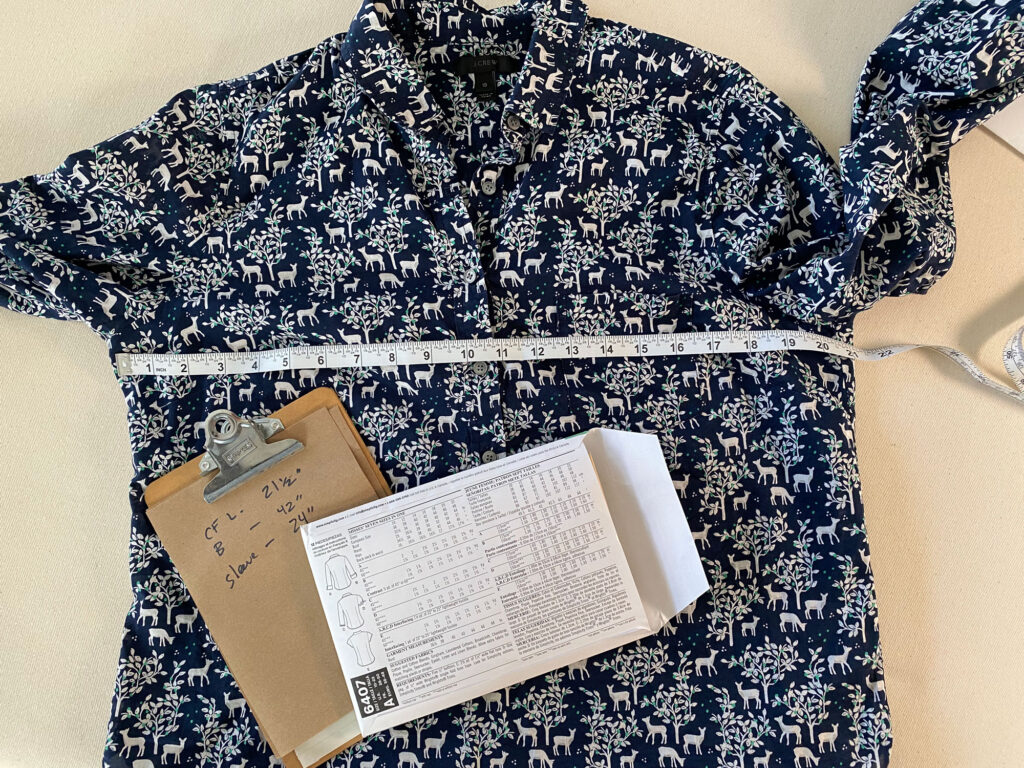
And because design ease may throw you off when measuring the flat pattern as it did me with those pants, you can start by measuring the clothing you own that you like to wear. Your favorites will tell you what fit you prefer and, like comparing our measurements to the flat pattern, you can compare your clothes’ measurements to the flat pattern.
I can measure the waist or sleeves or bust of a garment I like that is similar to the pattern I’m making then compare it to the flat pattern measurements in that same area. The garment has ease in it, and so does the pattern. It’s a little more like comparing apples to apples.
Remember, since you are measuring the garment flat you’ll need to double the measurement for the entire circumference.
Make Alterations to the Pattern Before You Cut Any Fabric
Ok, You’ve measured and realized that this pattern is not going to fit you as it is right now. Something is off somewhere. Not a problem in fact it’s absolutely normal.
It is super rare for anyone to cut out a pattern right out of the envelope and have it fit as a garment should. You are not the only one who has to make adjustments to the pattern to get it to fit. This it’s just how it is and I cannot stress that enough
Let’s go over a few common adjustments you can make to the pattern before you sew a teat garment.
Note: Measure the pattern and remember that you need a minimum of two inches (5 cm) of ease if you want the garment to hang freely over the body.
Using Multiple Sizes
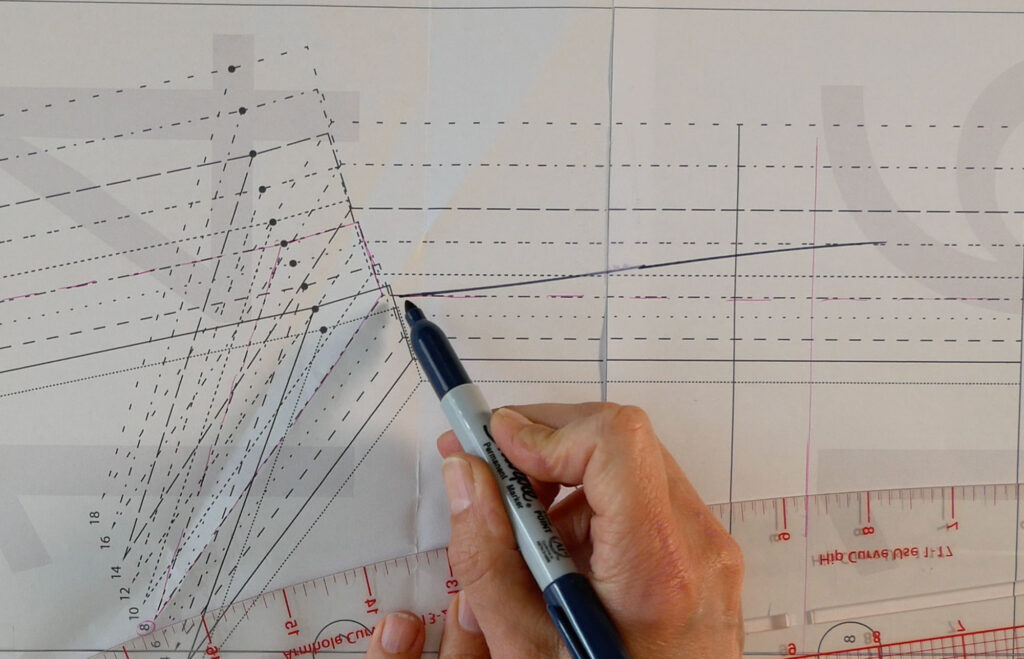
If you need a different size in your bust, waist, and/or hips and you have a multi-sized pattern it’s as easy as drawing a new cutting line that joins one size to the other. The key is to make the lines smoothly transition. Start at nothing from one size’s cutting line and blend to nothing when you reach the other size’s cutting line. Connecting lines will gently curve between the sizes.
Add Length to a Pattern
Adding length to the hem doesn’t always work. Sometimes you need to length elsewhere. This is why patterns typically have a lengthen/shorten line on pattern pieces. And if they don’t have one, or there isn’t one where you need it you can make one. It’s easy.
However, I caution you not to add length in the armscye area unless you know how to add that extra amount to the sleeve cap as well. If it’s sleeveless you could do this easier but you still need to either bring up the armhole so it’s not revealing your bra.
If you are long between your shoulder and bust apex, lowering the bust dart is a far easier adjustment than messing with that armscye.
If you need to lengthen the pattern:
- Determine where you need to add the length. (Above the knee, below the knee, at the waist) If the pattern’s lengthen/shorten line is in this area skip the next step.
- If there is no lengthen/shorten line in the area you need length, draw one. Draw a line perpendicular to the grainline across the pattern piece where you need the extra length.
- Draw two short straight lines, a few inches apart, across the lengthen/shorten line (The pattern’s or yours).
- Cut the pattern in 2 along the lengthen/shorten line.
- Tape the cut edge of one pattern piece to a sheet of paper that is as wide as your pattern piece and a couple of inches longer than the length you’re adding.
- Measure over from the taped edge onto the added paper how much you need to add to the pattern.
- Draw a line parallel to the lengthen/shorten line on the added paper where you measured. (This second line is the same distance from the lengthen/shorten line as you need to add to the pattern.
- Lengthen the grainline (if it’s there) and your two short lines, across the paper to meet the new line
- Line up the other part of the pattern piece to the second line. Match the cross lines and grainline if applicable.
- Tape the second part of the pattern down to the added paper on the second line.
- Draw a line to extend the Center Front or Back, inside seams, and side seams.
- Many times you “true” the sideseam; the old sideseam lines no longer line up. When you draw in the new cut line, connecting the two original lines, split the difference of the two as you connect them. If they are a ¼” off, subtract ⅛” off the line that is now too wide and add ⅛” to the line that is now too narrow.
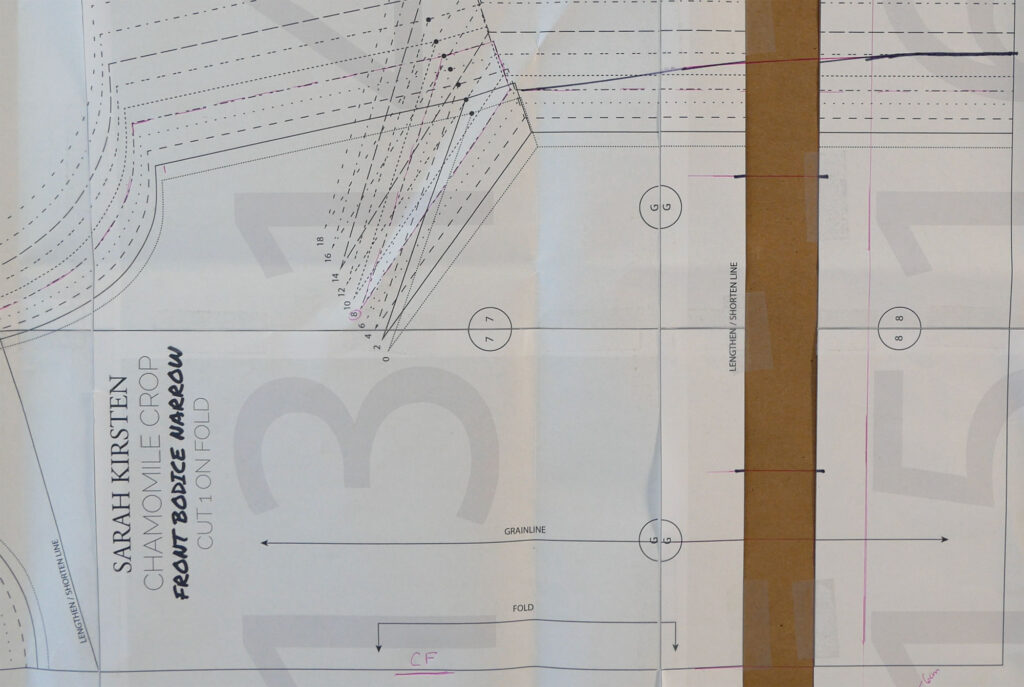
Shorten a Pattern
Cutting off any extra length at the hem doesn’t always work. Sometimes you need to shorten the pattern elsewhere. This is why patterns typically have a lengthen/shorten line on pattern pieces. And if they don’t have one, or there isn’t one where you need it you can make one. It’s easy.
However, I caution you not to shorten a pattern in the armscye area unless you know how to remove that extra amount from the sleeve cap as well. If it’s sleeveless you could do this easier but you still need to lower the armhole so your arm will fit through it.
If you are short between your shoulder and bust apex, raising the bust dart is a far easier adjustment than messing with that armscye.
If you need to shorten a pattern:
- Determine where you need to shorten the pattern. (Above the knee, below the knee, at the waist) If the pattern’s lengthen/shorten line is in this area skip the next step.
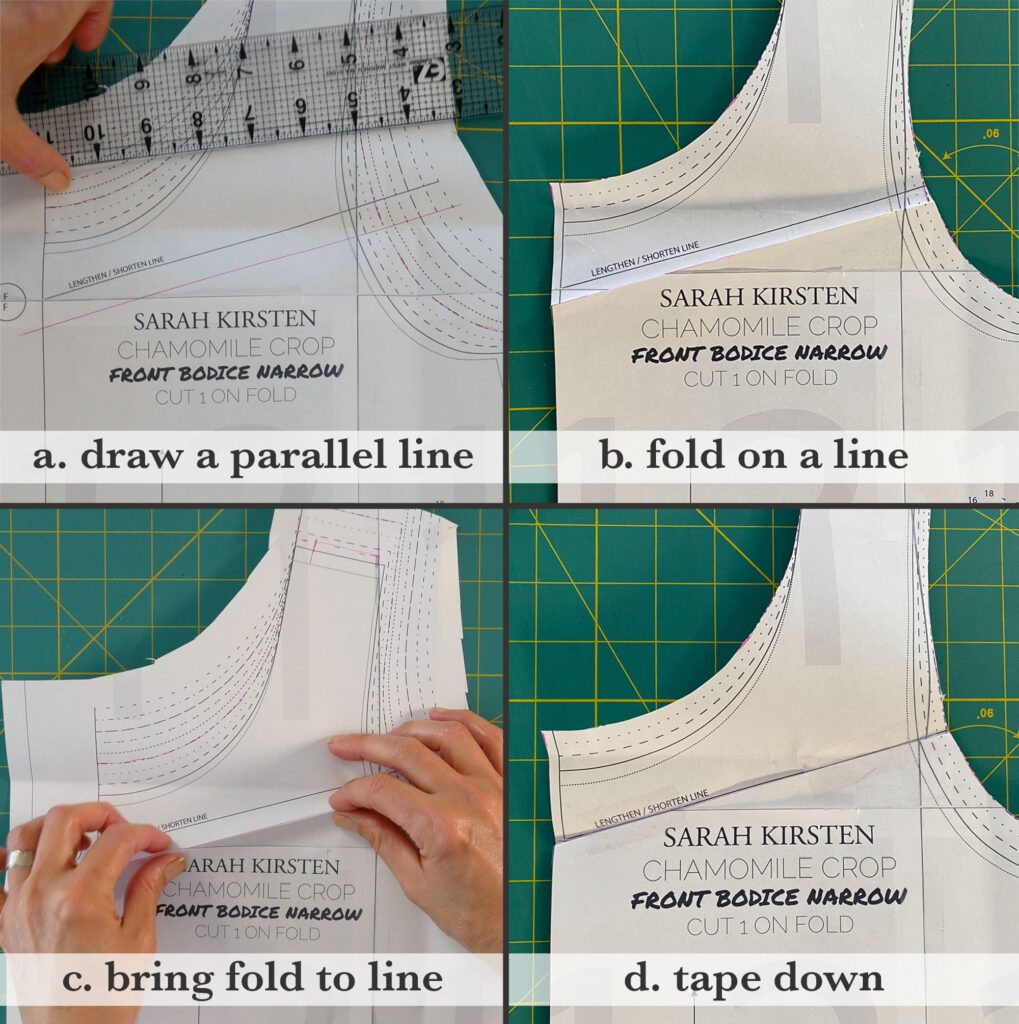
- If there is no lengthen/shorten line in the area you need length, draw one. Draw a line perpendicular to the grainline across the pattern piece where you need to shorten it.
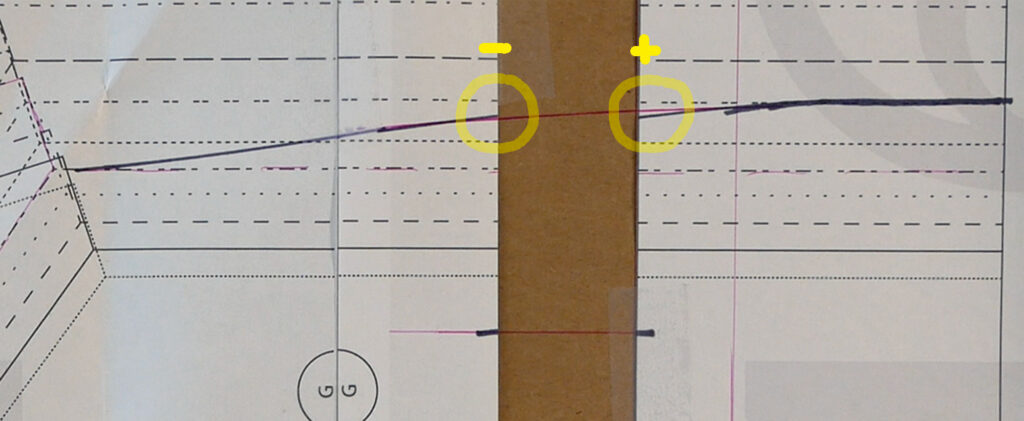
- Draw a second line parallel to this lengthen/shorten line the same distance apart as you need to shorten the pattern piece by.
- Fold the pattern on one of your lines.
- Bring the fold up or down to meet the other line.
- Tape this fold closed.
- True up any seams on the sides of these lines. When the sideseam (or other seam) no longer lines up, draw in a new cut line, connecting the two original lines. Split the difference of the two as you connect them. If they are a ¼” off, subtract ⅛” off the line that is now too wide and add ⅛” to the line that is now too narrow.
Other common adjustments you can make on a flat pattern before you cut are:
- Full Bust Adjustment aka FBA
- Small Bust Adjustment aka SBA
- Dart Placement Adjustment
- Forward Shoulder Adjustment.
Seriously, Sew a Test Garment (aka: a Muslin or a Toile)
Nobody wants to sew a muslin. Even the people who end up making three test garments before they start in the final fabric don’t want to. But what’s worse spending hours and days sewing on fabric you’ve spent good money on only to have the finished garment not fit well enough that you’ll wear it regularly.
You are not being punished or held back when you sew a test garment. Instead, you’re putting in the hours and the work, to learn how fit and the result is beautiful, tailored-made clothes.
Please, learn from me and so many others. Invest the time upfront for less frustration and waste, and make a test garment.
Besides, sewing a test garment isn’t as involved as the final garment. You take a lot of shortcuts, on purpose. Your goal is to test the pattern, not be able to wear the test garment.
- First, choose a fabric with a similar drape as the final fabric because fabric can affect fit. This isn’t always easy, especially with knit fabrics and thick coat fabric but a test garment in anything is better than no test garment.
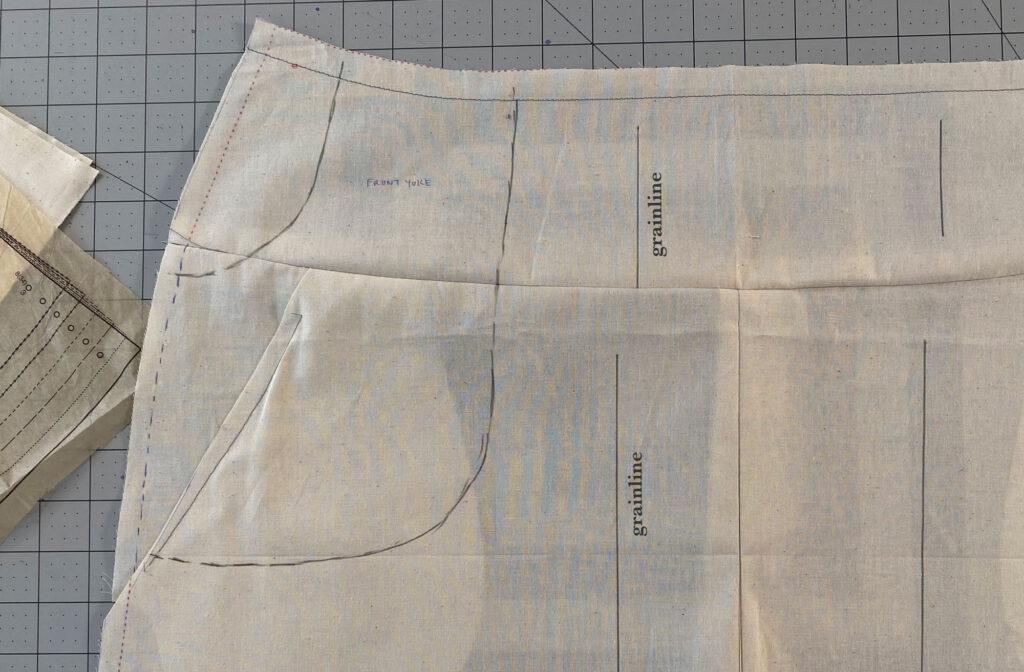
- Draw in the grainline with a pencil on each piece that makes the garment. When trying on you will be able to see if a piece is being pulled off grain. This can indicate you need more fabric added somewhere.
- Add additional seam allowance to the side seams. If the test garment is too tight in an area, you can let out that seam and use the extra wide seam allowance to adjust the seamline without having to cut out a wider piece.
- Leave off the hem allowance cutting on the hem fold line or if you think you might need the extra length leave the hem allowance on and pin up the hem instead of sewing it down.
- Stay stitch any curves and bias-cut edges so they don’t stretch out of shape while you make the test garment. You wouldn’t think a neckline would stretch so badly so fast but it will.
- Use a basting stitch to sew a test garment. The longer stitches require less time sewing and are easier to rip out if you need to change the seam.
- Leave off the details. You don’t need to sew the pockets unless they’re part of the front of the garment. (but don’t sew the actual pockets – just use the piece that makes the front of the garment). Patch pockets or welt pocket openings can be drawn onto the fabric to check the pocket placement.
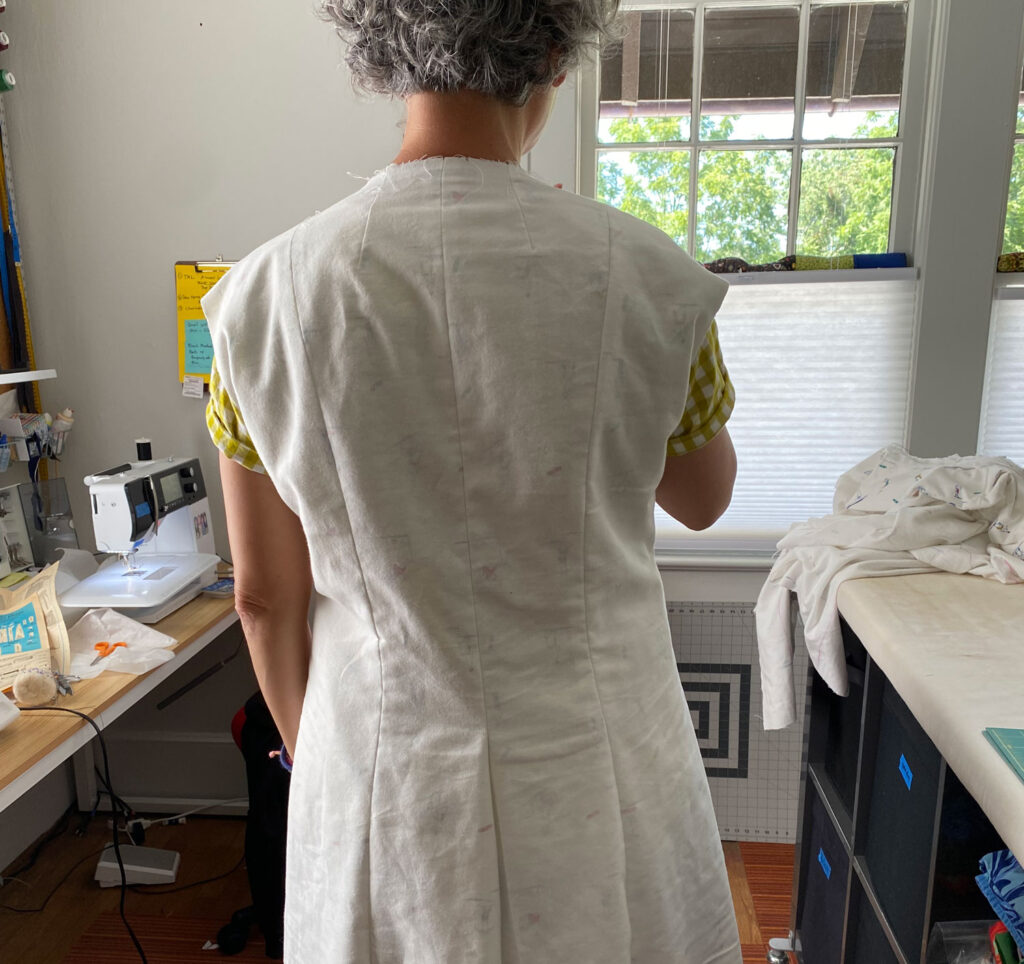
Try on your muslin. Make sure you can raise your arms, and sit comfortably.
Be aware that sometimes we rush sewing a muslin and this sloppy stitching might look like a fit problem when you try the garment on. Examine your sewing first if you’re unsure why something is off in a particular area.
And don’t obsess over every line or wrinkle. Overfitting a garment isn’t good.
Whatever changes you make to the muslin be sure to transfer them to the flat pattern and make notes on the pattern piece or on the instruction sheet.
A popular “try-on” method in home sewing is tissue fitting. Instead of sewing a muslin you pin the pattern pieces together and try on the tissue pattern. It’s a little more detailed than that and you can read all about it in The Palmer/Pletsch Complete Guide to Fitting.
Sewing a test garment will elevate your final garment, enhance your fitting knowledge, and give you practice with any construction technique the pattern calls for. Sewing a test garment is going to save you more frustration than it causes, it will save your expensive fabric and in the long run, your time.
Last Word
Learning to fit is a process. The more you do it the better you get. Patience and practice are the key. The best fabric and the finest workmanship cannot compensate for poor fit. I wish it could.
There are many books out there on fitting and I think all have a different approach to fitting. Try your library first to see if the author’s method is one that makes sense to you
Here are three fitting books I relied on for much of my research for this post and video.
- Gina Renee Dunham “The Fitting Book“
- Sandra Betzina “Fast Fit“
- Palmer and Pletsch “Complete Guide to Fitting“
Hi! Just wanted to say that I just found your you tube channel (having to hem pants for my son’s prom tonight… cough cough) and you have the most thorough and comprehensible teaching style I’ve ever seen. I’m thrilled that you are still writing a blog, and that you’re still making videos! I’m an instant and forever fan!
wow and thank you!