
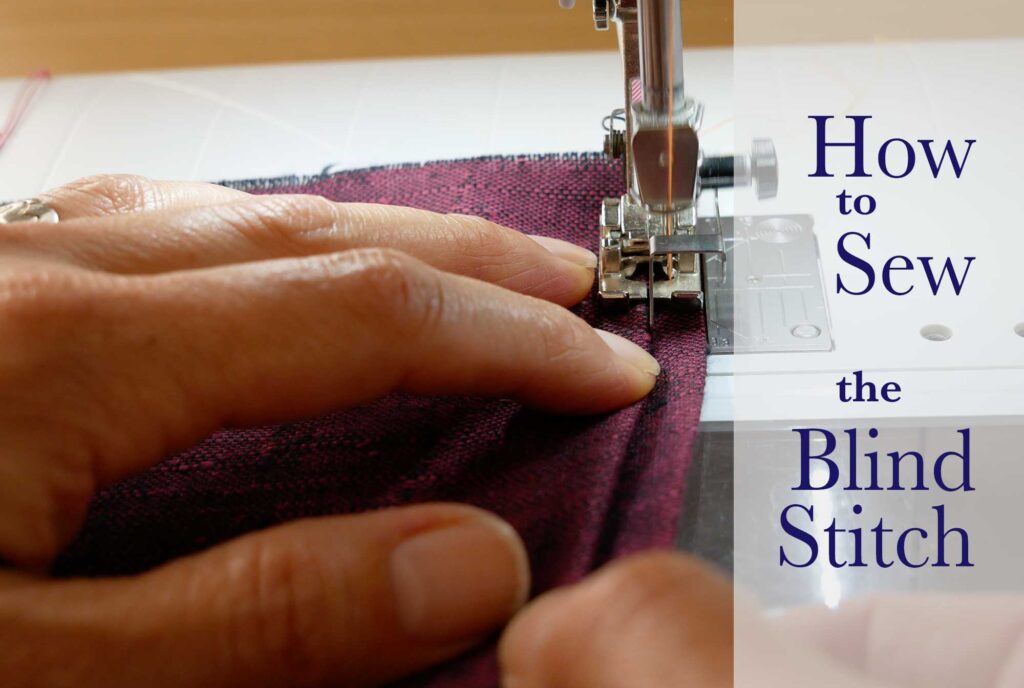
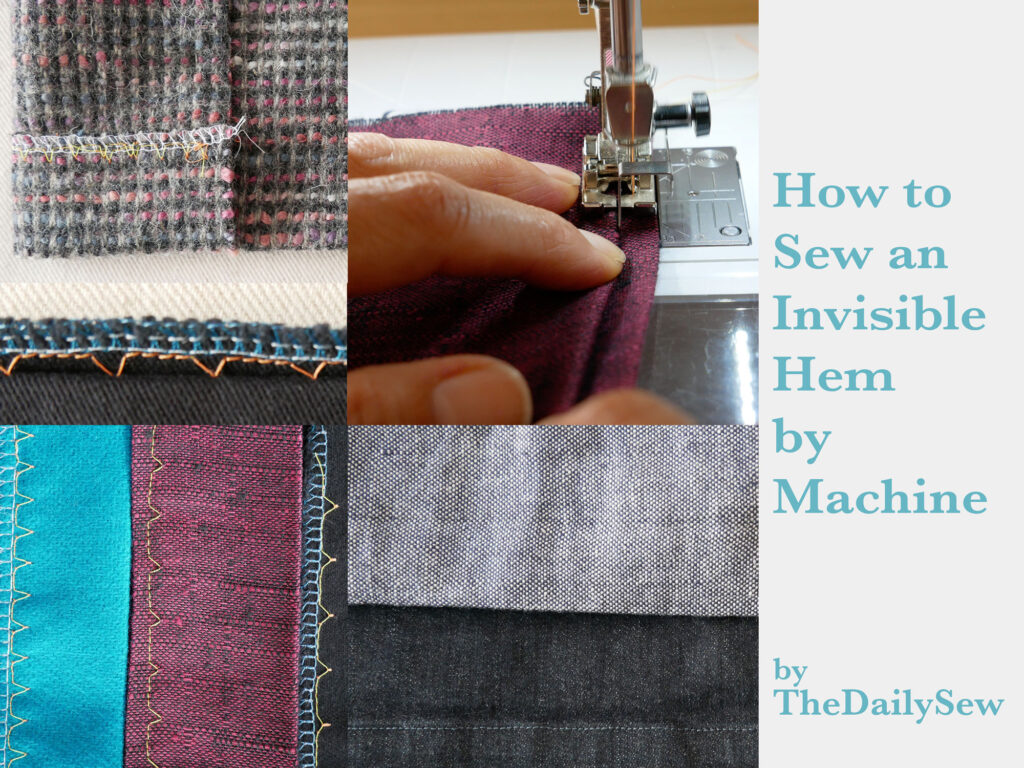
A few months ago I made a video How to Hem Dress Pants in which I sewed the hem, as I always do, by hand, because that’s how I learned to sew an invisible hem.
But then a lot of people asked, “Ok, but can I do that with my sewing machine?”
Ahhh, yes, but I haven’t tried it.
So, I tried the machine blind stitch, and then I tried it some more.
This stitch is both easy and hard, but once you know the basics of it, it will have you asking, “Why didn’t you show us this sooner?”
The machine blind stitched hem is so much faster and, when done, looks just like a hand-sewn hem… Game changer!
You can use this stitch on dress pants, dresses, skirts, blazers, and coats of course but it would also be great for drapes and slipcovers.
Do yourself a favor and take a few minutes to learn this stitch. It will save you so much time in the long run.
You can watch the process here or read on!
What Is the Blind Stitch?
A topstitched hem is very common in today’s clothing. The top stitch hem is folded and sewn with a straight stitch leaving stitches on the outside of the garment which is sometimes in a matching thread and sometimes in a contrasting thread, think jeans. It is considered sportier, and casual.
Hems that are ”invisible” on the outside were sewn by hand, and in ready-to-wear sewn with a blindstitch machine. Luckily most current, domestic sewing machines now offer a blind stitch.
The machine blind stitch sews a few stitches on the hem only and then jumps to the left for one stitch, catching a tiny bit of the garment, which secures the hem to the garment. Just like a tiny hand stitch going along the hem and then, every ½” or so catching a tiny bit of the garment.
For the machine to do this though the hem and garment is folded in a specific way.
There are three parts of this stitch to learn for success:
- The stitch itself and how to adjust it for the fabric
- How to fold the fabric
- How to guide and control the fold as it is being fed under the needle.
Does Your Machine Sew the Blind Stitch?
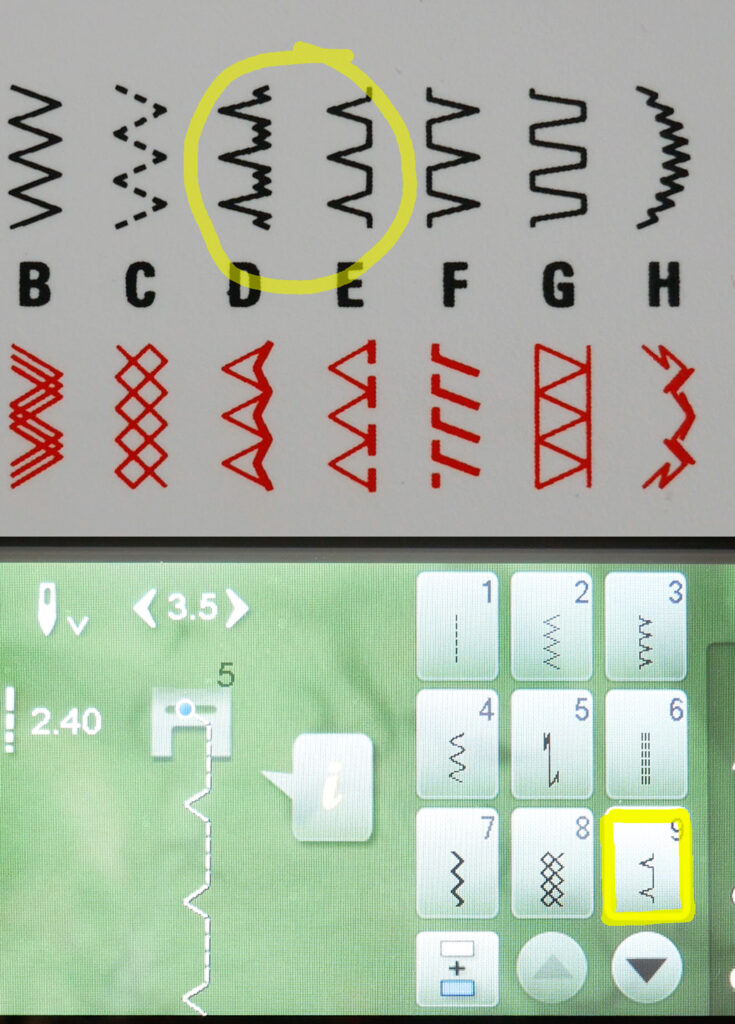
This is what the blind stitch looks like; a few straight stitches down the right side and then a jump over to the left for one stitch. This lone stitch will shape the threads into a triangle.
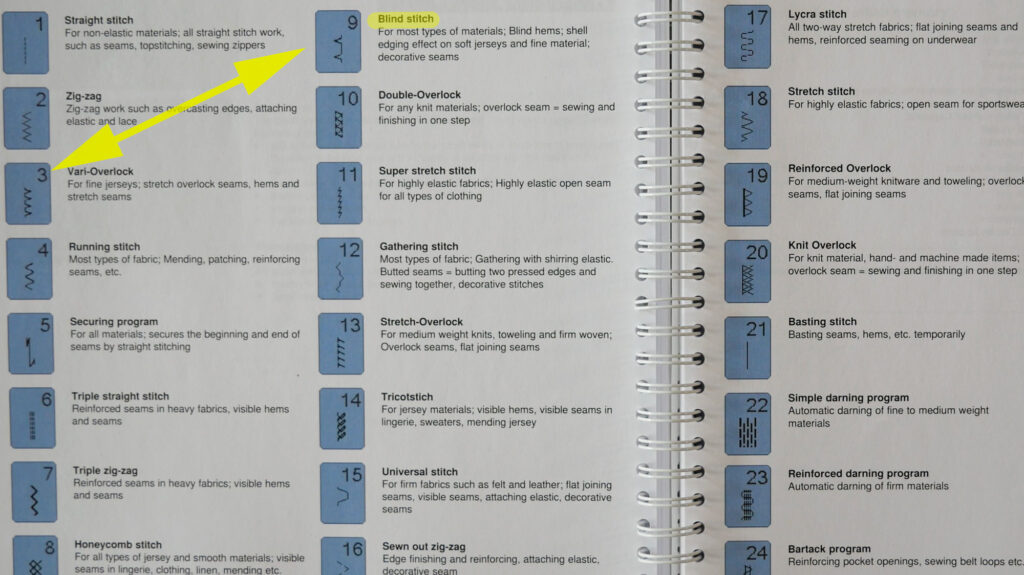
Check either the machine’s manual or the machine itself for the blind stitch diagram and then double-check as some overcast stitches look similar.
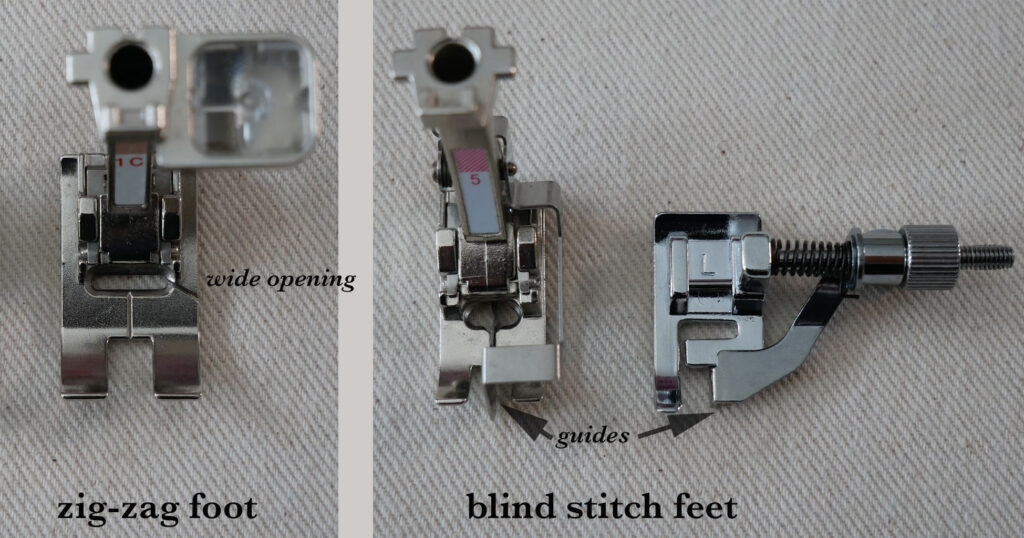
The Blind Stitch Presser Foot (not necessarily a necessity)
The blind stitch requires a presser foot with a wide opening so the needle can jump to the left and form the stitch. Usually, the main presser foot that comes with your sewing machine has this wide opening for the needle (also called a zig-zag foot).
Many machine models have a special blind stitch presser foot with a built-in guide. The guide keeps the fabric lined up correctly when forming the stitch. (Alignment is crucial with this stitch)
Unfortunately, I cannot show the feet for all the different machines because they vary and I don’t own them all, but if your machine offers this stitch it will tell you which presser foot to use with it.
Many machines will have a code (usually a letter of the alphabet), next to the stitch diagram. That code refers to the presser foot that is required for that stitch. If your machine doesn’t tell you, then the manual will.
Some models may not come with a special blind stitch foot but will sell one separately. If you want to try the stitch before you buy the foot use a zig-zag foot for the blindstitch.
Prep the Project to Stitch
Measure, fold and press up the hem. This stitch is typically used with a wider hem of an inch or more.
The machine blind stitch will work with either type of hem:
- A hem finished by folding the raw edge under
- A hem finished with an overcast stitch, zig-zag stitch or binding.
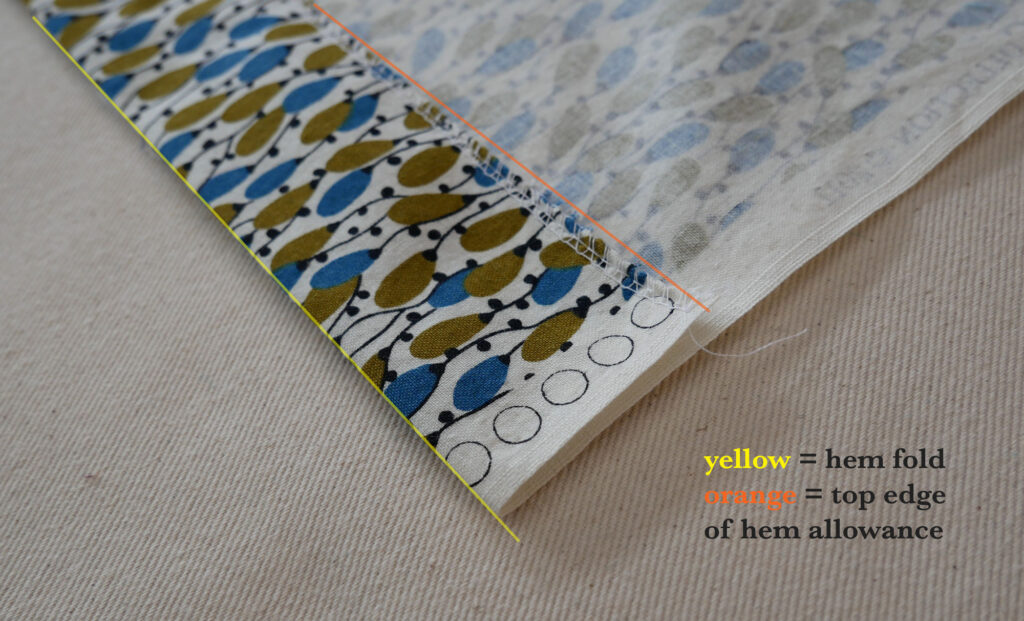
After your hem is folded up and pressed (above) you will fold the hem allowance and the part of the garment it is touching, to the outer side or right side of the garment. (below)
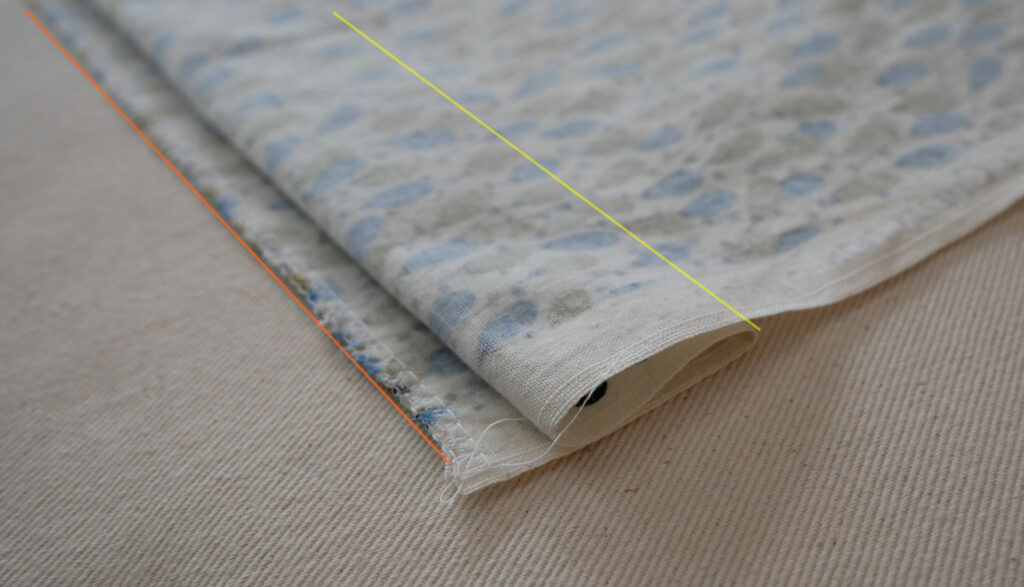
But, and this is important, leave a little bit, from ¼” to ⅜” or 1 cm of the top edge of the hem sticking out beyond the garment.
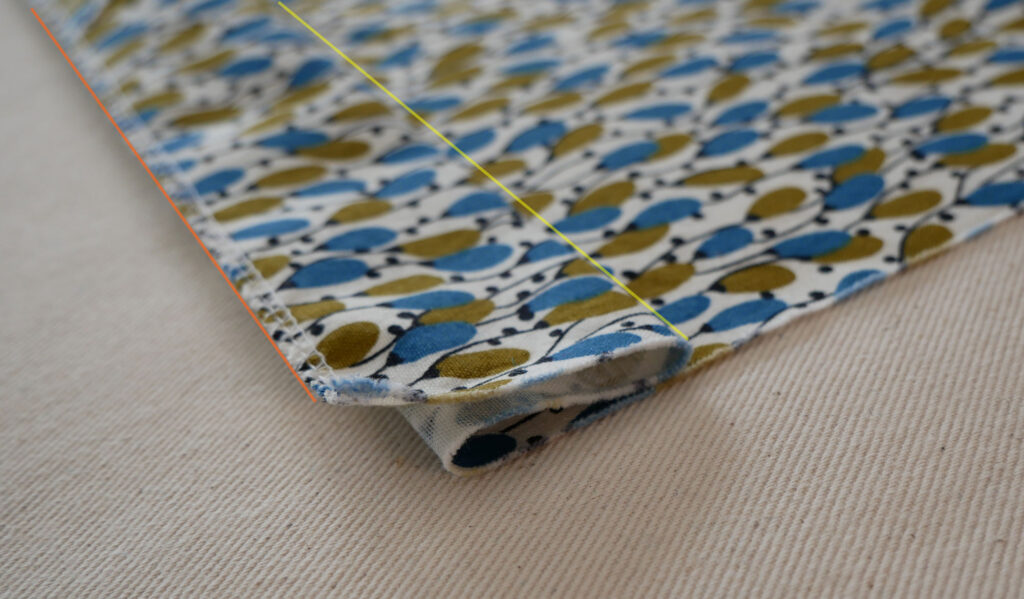
Watching the video might be more helpful to see how the garment/fabric is folded. You can find the folding at minute mark 2:40 in the video.
The fold is key to hemming with the blind stitch.
Once folded, you could pin the fold in place, but don’t put the pins too close to the fold or they will be in the way when you sew it.
I read to hand-baste the hem down, but I didn’t find that necessary. Maybe if your fabric is slippery it would help. It was also suggested to iron the new fold. I did not try this, so again, it may be a step you do not need.
Test the Stitch
This is a stitch that you must test Every Time you use it. Every time because the thickness of the fabric will influence the stitch settings, how wide it has to be in order to catch the garment, but not catch too much.
Test on either a swatch of the same fabric or on the project itself. (When you want to remove the test stitches, simply pull on the bobbin thread. When it comes out the top thread will release too.)
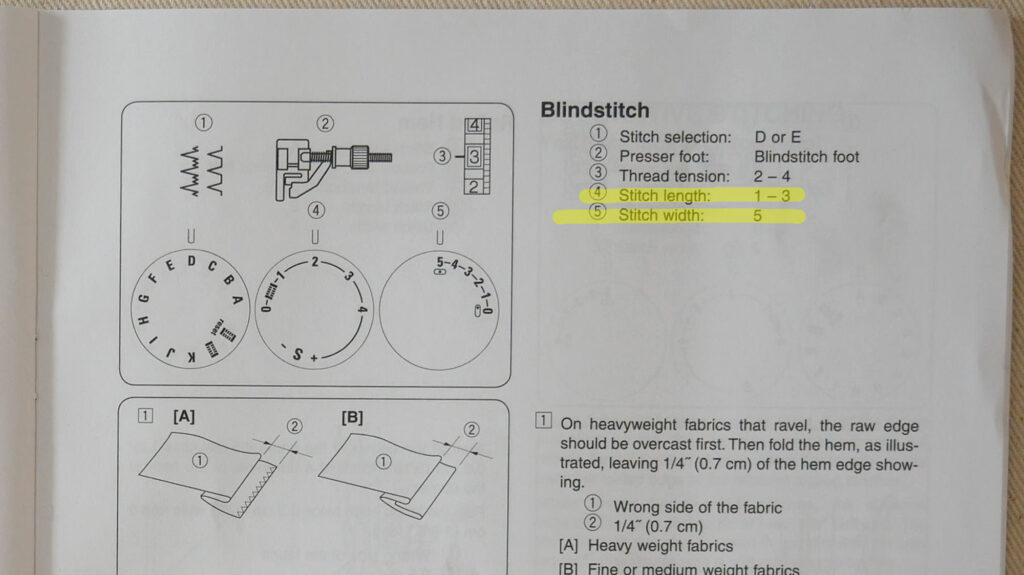
Every machine or manual will tell you what stitch settings to select when using the blindstitch. These are suggestions only – a place to start.
Start with the suggested stitch settings, sew a couple of inches, and then check your stitches. Are they catching the garment? Look on the right side of the garment. Are the stitches catching too much of the garment? Are the stitches on the outside too big?
Increase the stitch width if the hem is not becoming secured to the garment at all, or rarely.
Decrease the stitch width if the stitch is catching too much of the garment layer and the stitches on the outside are large.
The stitch length can also be adjusted.
Lengthen the stitch length to spread the catching stitches further apart. Shorten the stitch length to increase the stitches per inch. This makes a sturdier hem.

Hem the Garment
Place the garment so the bulk of it is to the left of the needle. The wrong side is up. The hem is underneath and the little extension is to the right.
If your foot has a guide, the guide will line up with the fold and the extension will be the only fabric under the right side of the presser foot.
It’s nice if the hem extension is the same width as the side of the presser foot, then the foot could be used as a guide too.
Use your left hand to guide the fabric and your right hand to hold the fold. Learning how to handle the fabric is important to the success of the stitch.
The fold of the fabric should skim along the guide on the presser foot. It should not be scrunched up against it.
If you notice a section where the stitch didn’t catch, simply go back and sew over that area again. No need to take out the missed stitches since they’re not visible on the outside anyway.
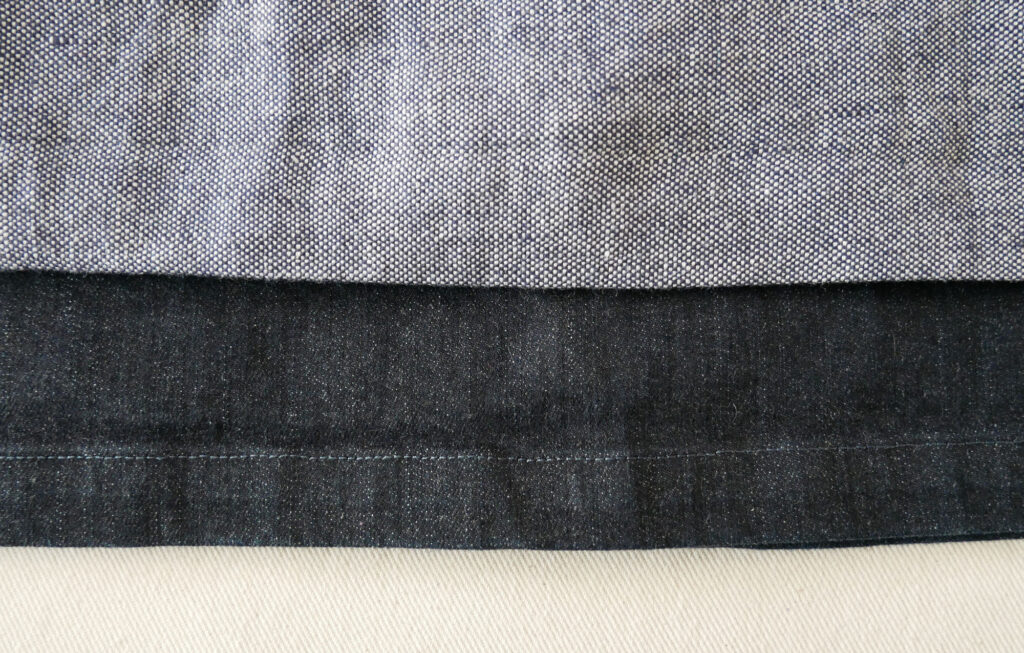
The Finished Stitch
After sewing the hem, iron it to get rid of the crease that it made.
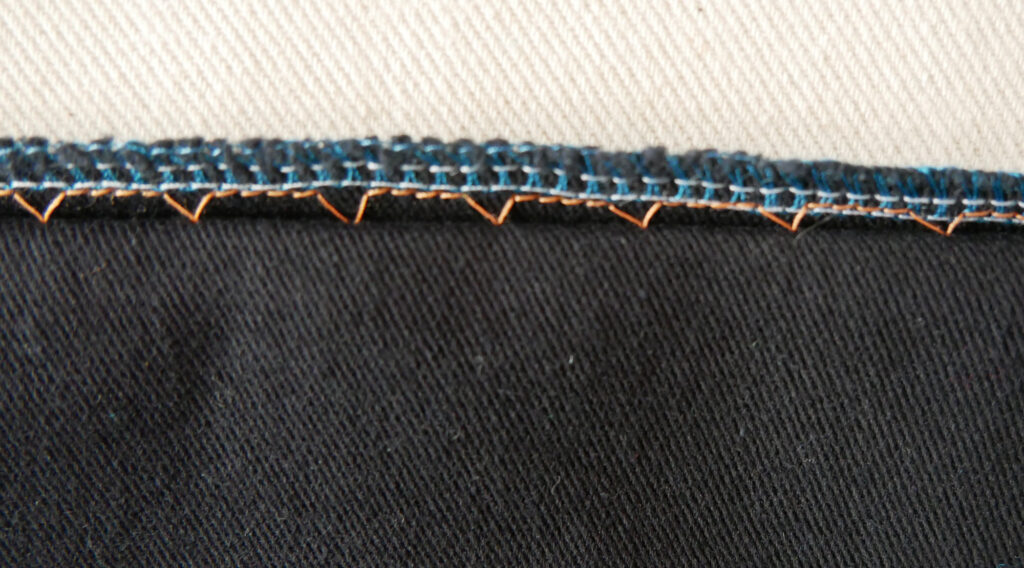
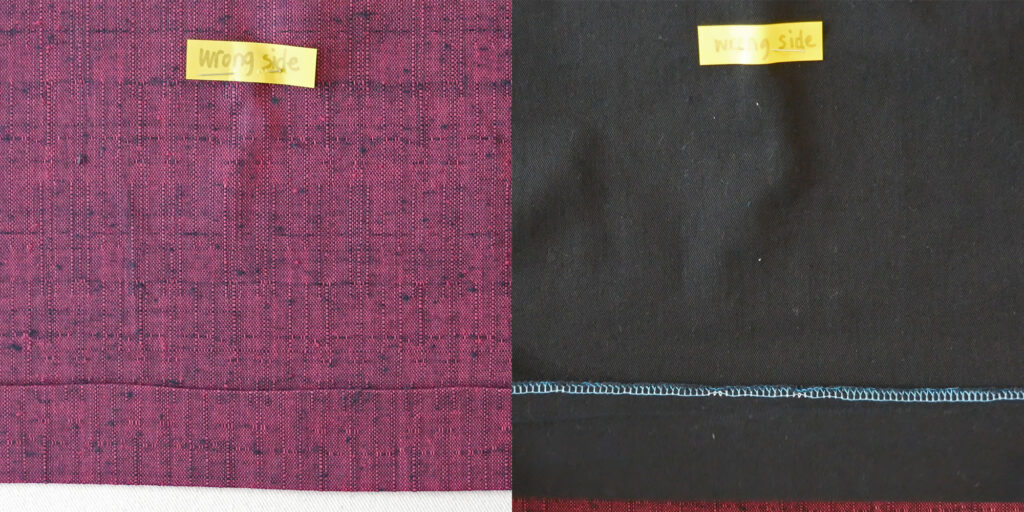
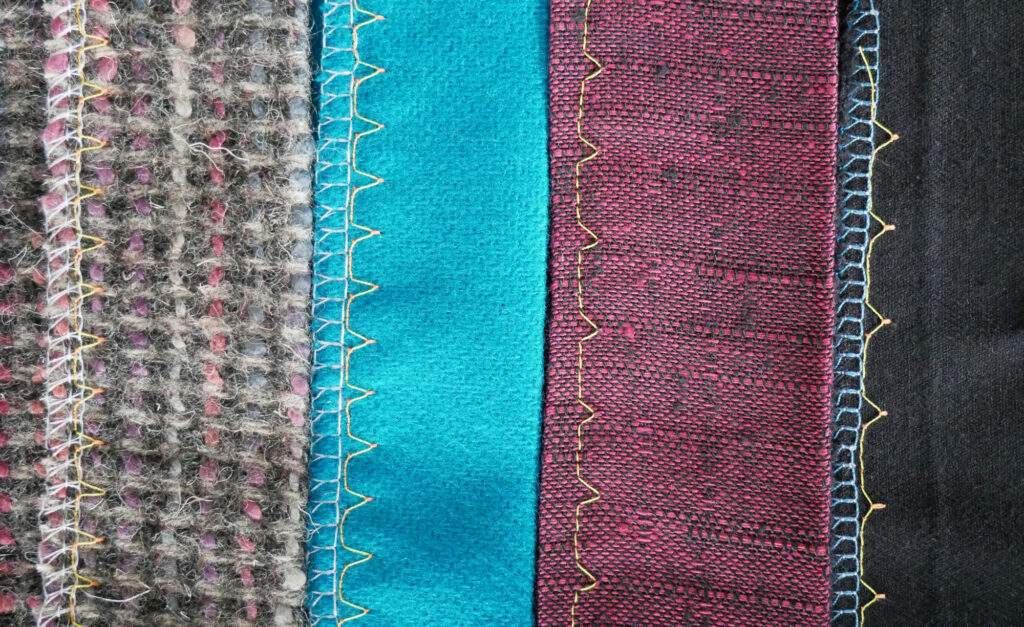
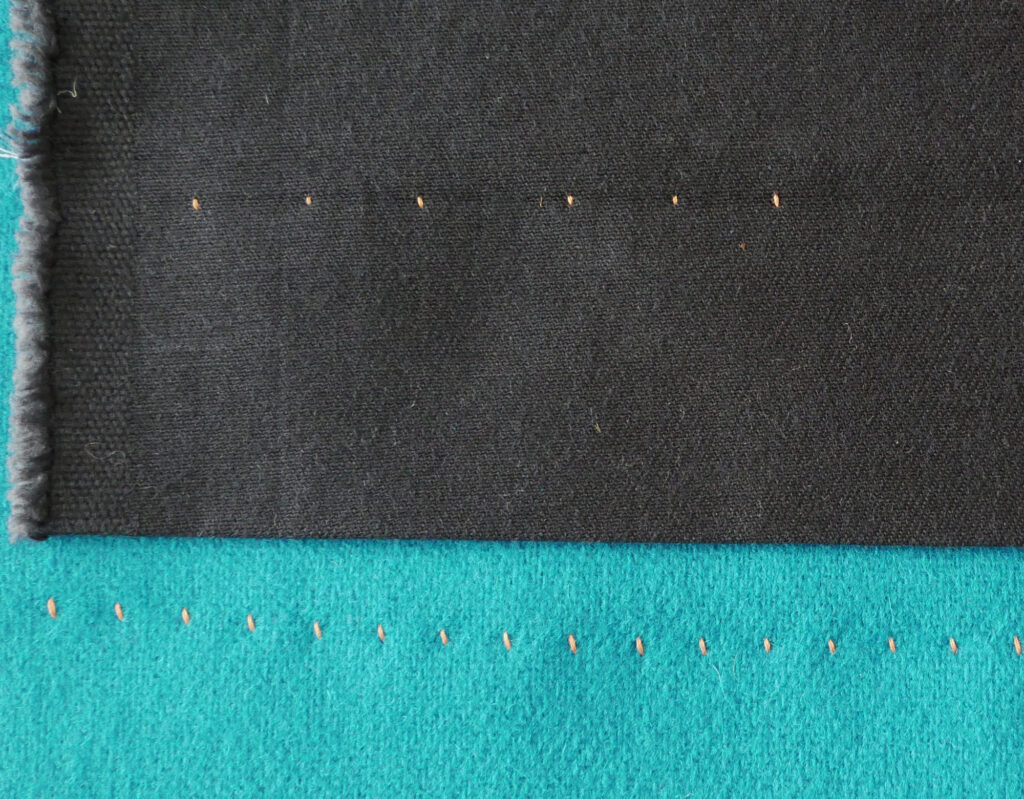
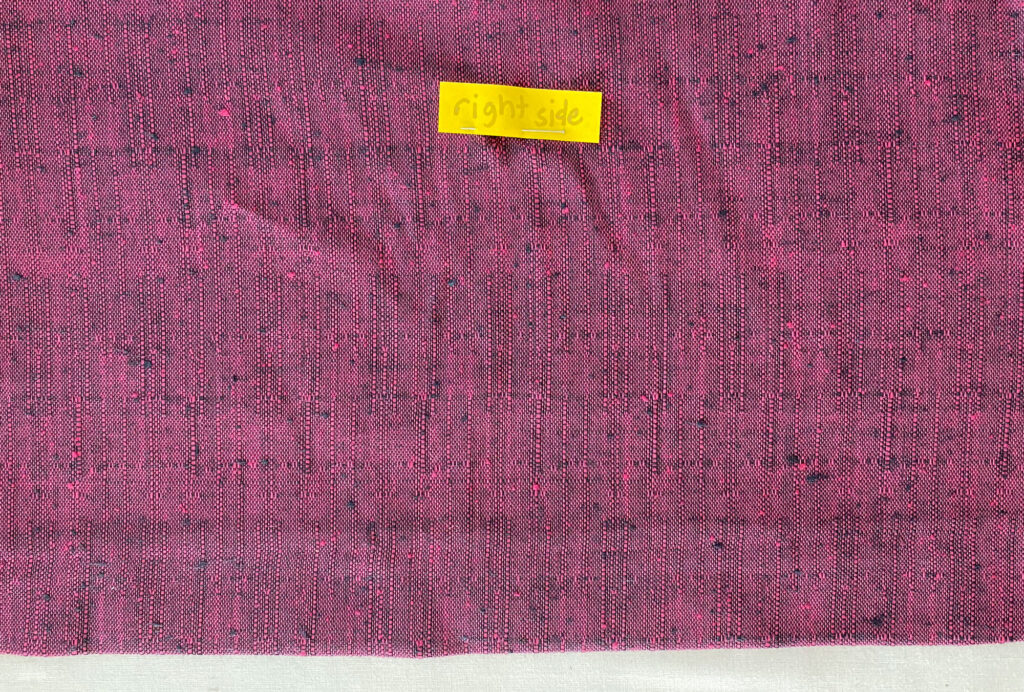
On the fushia color sample, I used contrasting thread on the left, matching thread on the right

Inside the circle, you can barely see one orange stitch (the contrasting thread). Matching thread was used to the right of the needle above and the stitches disappear.

When sewing on a textured fabric, like the tweed above, even with contrasting thread, the stitches disappear.
A blind stitch that is set too wide will result in ladder-like stitches. I have seen this on store-bought T-shirts.
The photo here shows the stitch lengths – further apart on the black twill and close together on the blue wool.
Take-A-Way
Always test the blind stitch on the exact fabric and expect to make adjustments, because every fabric will need a different adjustment.
Folding the fabric correctly, and controlling it as it goes under the needle is just as important as the stitch settings.
The machine blind stitch is an easy-to-learn, and a little-more-effort-to-master type of thing, but totally worth the effort of learning. And if you use matching thread, you’ll have a little more room for error. I like the sound of that
Thank you for your suggestions and inspiration. I hope I can pass some along. If you have any questions about the machine blindstitch, please put them in the comments below and I will reply