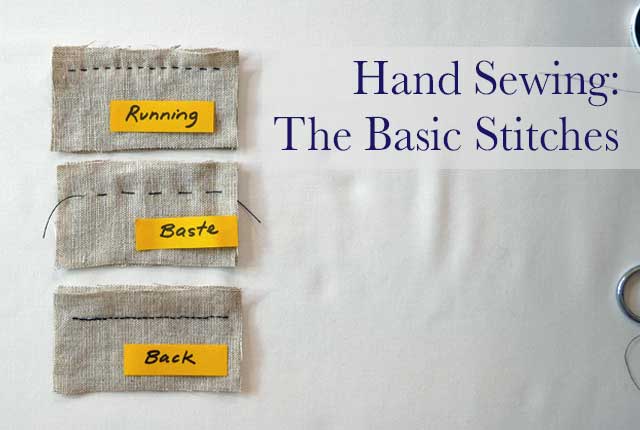
As much as my sewing machine (it’s more like a computer with a needle) can do, there are situations and techniques that require a hand stitch.
This video will show you how to stitch three basic hand stitches, two knots and the best way to thread a needle.
The Close-Ups and Details
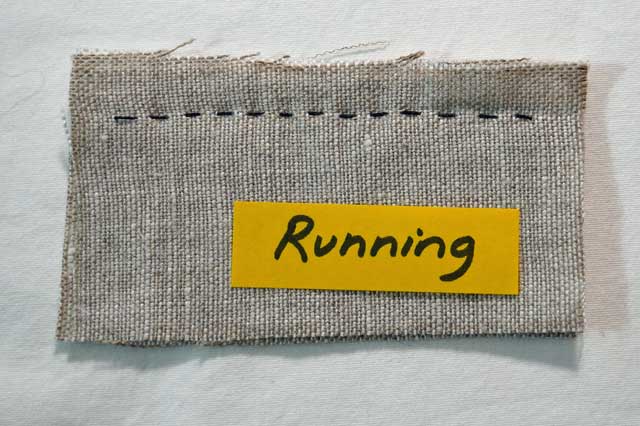
The Running Stitch; the all-purpose stitch
The running stitch is formed with even, 1/8 inch stitches.
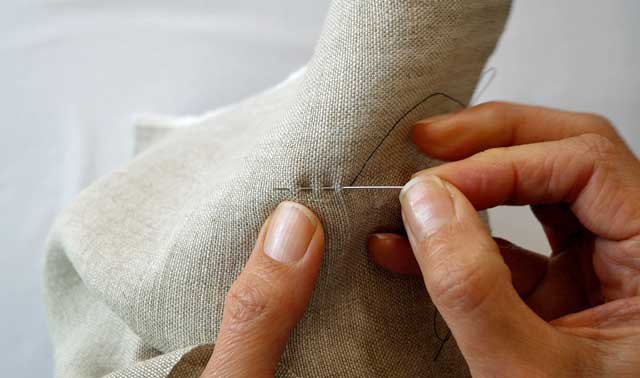
The needle is woven in and out of the fabric, picking up as many stitches as the needle allows before it is pulled through.
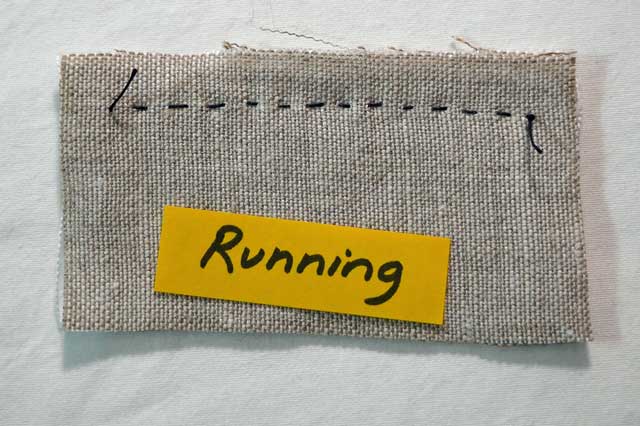
The back of the running stitch looks like the front due to the even length of the stitches.

The Basting Stitch; the temporary stitch
The even basting stitch is one of a few basting stitches. Basting stitches are the only hand stitches not meant to be permanent. They are used in the construction process much like scaffolding is in building. It’s needed to get the job done but will be removed when all is completed
Like the running stitch, the stitches are even, but they’re longer. Basting stitches are about 1/4 of an inch long on the front and back.

You may choose to leave your thread unknotted depending on how long they will be needed to hold your fabric pieces together.
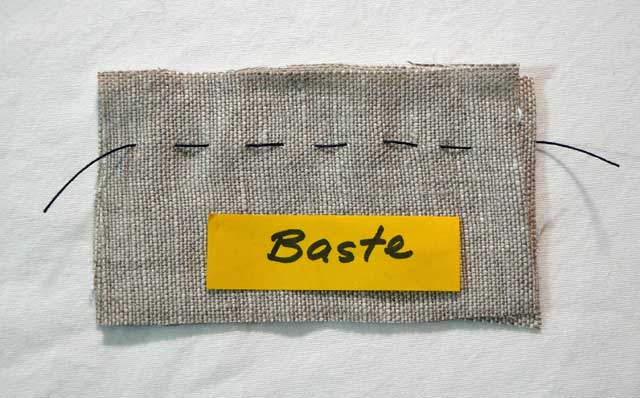
Again, the back of the even basting stitch looks like the front.
The Back Stitch; the strong stitch
The back stitch is one of the strongest hand stitches there is. It’s perfect for sewing seams which will be under strain and for repairing ripped seams that a sewing machine can’t reach.
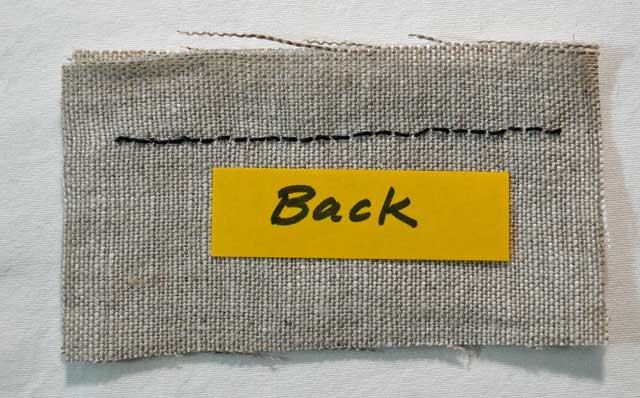
The front of the back stitch resembles machine stitching. There are no spaces between stitches.
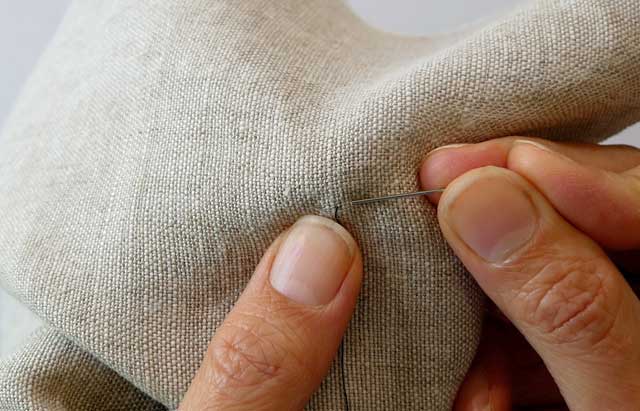
The needle comes up and then to the right (backward if you’re righthanded) one stitch length, 1/8″.
The needle is then carried across the back two stitch lengths, or 1/4″, and comes back to the front.
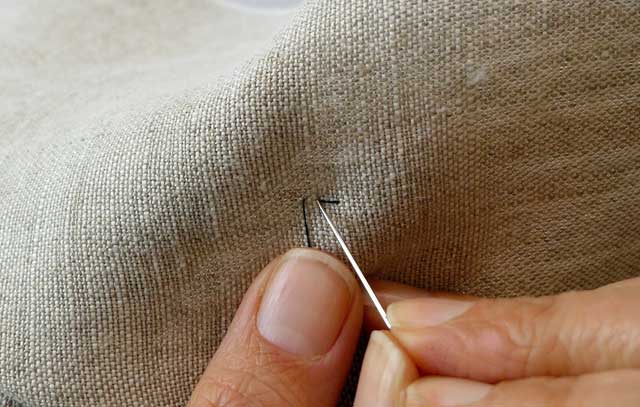
This is repeated. Back one stitch across the top, going into the fabric where the last stitch ended, and forward two stitches across the back.
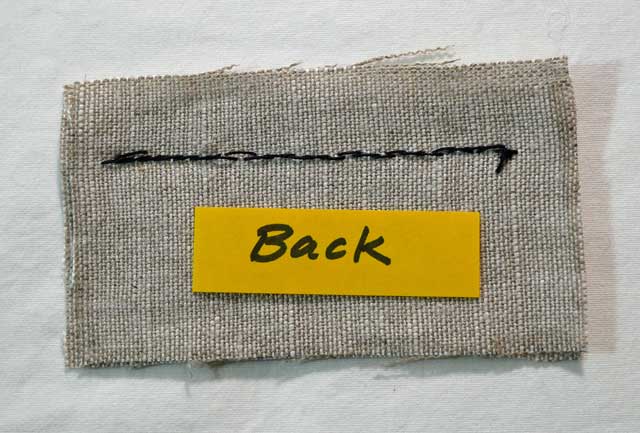
The back of the back stitch shows the overlapping, longer stitches.
Knots, Needles, and Thread
Be sure to watch the video for more details on the stitches, two easy and strong knots for starting and ending, and how to thread your needle for fewer tangles.
More videos are in the works for hemming stitches, back stitch variations, catch stitches and more.
And visit this post for how to sew on a button (for good)

Hello. I’m glad I’m finally taking the time to really review your website. I’ll need to come back more often–which i will.
This article on hands stitching is amazing. I took a live Pattern making class (designed for all levels) from November 2017-early March 2018 (several holidays delayed class).
The instructor asked us to draft a skirt (my first time ever based off of what we learned) as homework. She told us to use muslin and if possible, do a running stitch.
I asked her what was/is the difference between a running stitch and a basting stitch. She said they’re the same. This is someone who is a couture sewer, does a lot of drafting, and has their own business-plus teaches classes.
Had it not been for this article, I would not have ever known. Now I need to practice some of these stitches! Thanks so much!
Thanks, I do hope you come back and find more useful information. I think some people forget what it’s like to be a beginner in a subject they know so much about. The two stitches are very much alike but not the same – as you now know.
Thank you for the encouraging words. I will come back more often. 😊. Social media can & sometimes adds to the lack of beginner skills & is best at only showing the finished product. Rarely do you see anyone on IG, FB, Twitter showing different hand stitched. You Tube is better for something like that.
I’ll really know once I practice! Thanks so much!
😉
I’m basting an Aida cloth onto a scroll frame for a cross stitching. It will probably take me a few weeks, would I knot the thread in this case? I mean I assume I can just take tiny thread scissors and clip the strands to remove it when I am done?
I think I would knot it because you want it to stay in place for a couple of weeks, as you said. And yes, just cut the knots when you’re done.